Papabird
-
Posts
14 -
Joined
-
Last visited
-
 I am not sure exactly but check out the file called "R1_Swap.pdf version 2" in the FB group "Yamaha Royal Star Venture and Tour Deluxe Fans, and Owners". Also check in with Earl above (skydoc_17) to see if he can source exactly what parts you will need.
 -
Papabird changed their profile photo
-
I was finally able to get my new (to me) brake calipers installed onto my 2005 RSTD. Same works on 99-13 RSV. @skydoc_17 (Earl) sourced the calipers, stainless steel brake line and appropriate banjo bolts for the conversion. Earl was excellent to deal with as well. The install was straight forward and worked great. I picked up new EBC sintered brake pads for the new parts. My donor bike was a Yamaha R6 that was hit in the rear end. Fresh DOT4 fluid was installed at the same time. The improved stopping power is noticeably immediately. My Blue Ridge Parkway trip last month was the real test and I was hugely impressed and very confident with my new stopping power. This is a highly recommended upgrade for your RSTD or RSV.

-
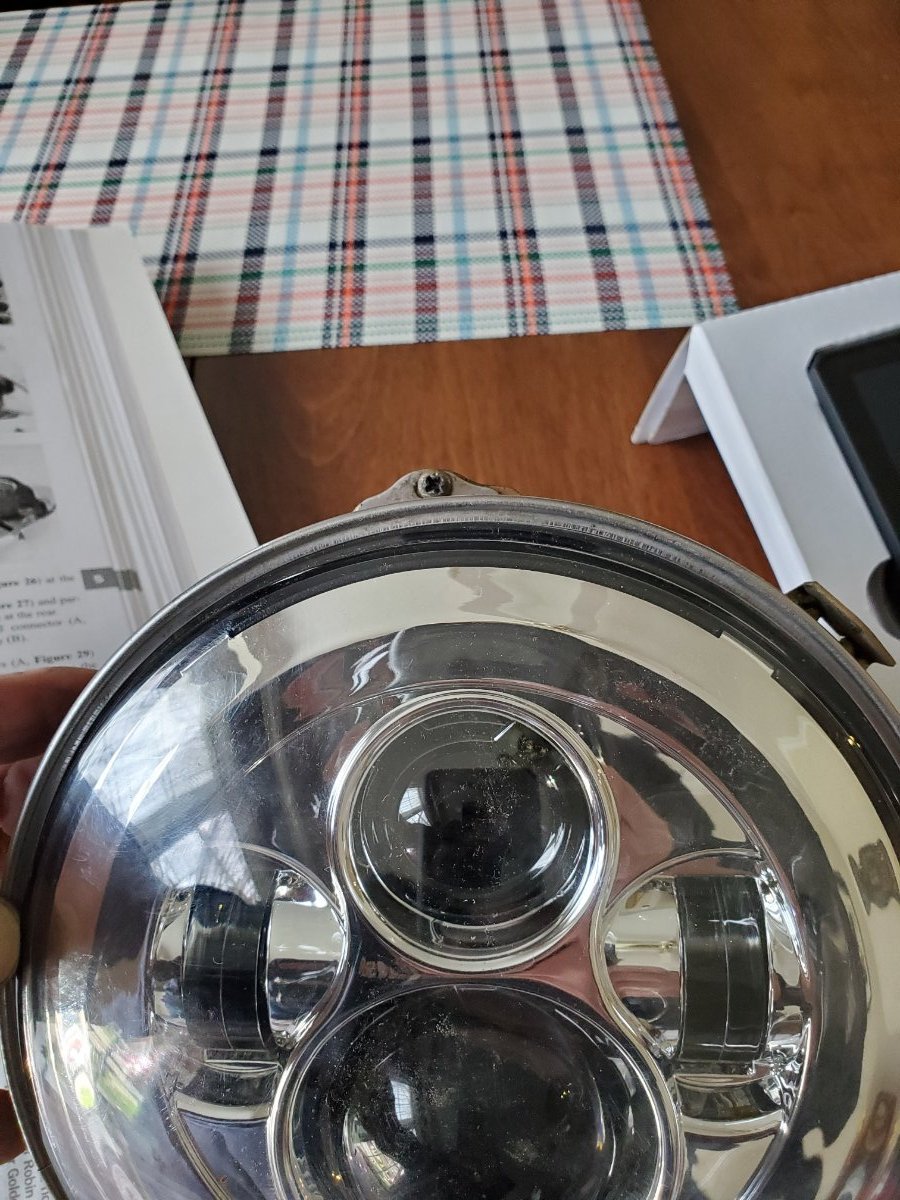
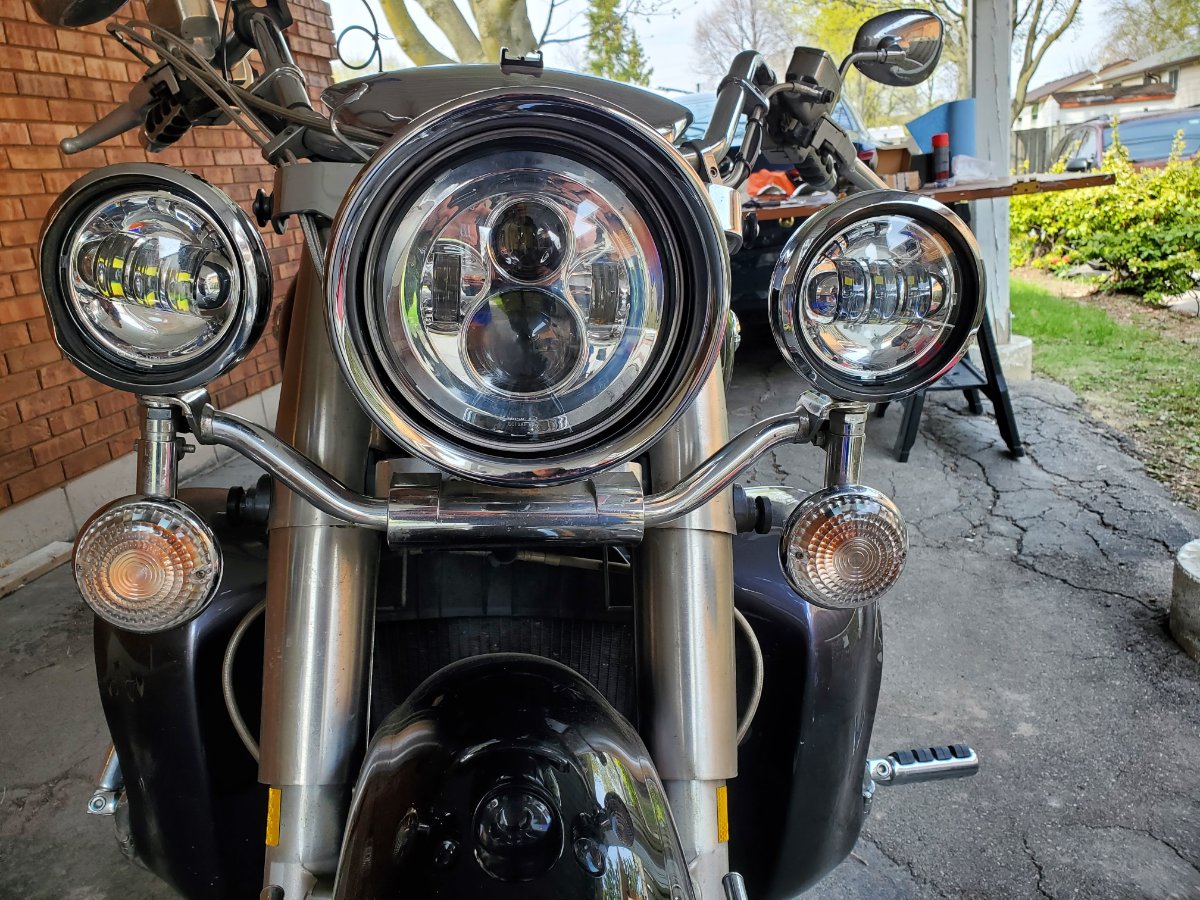
I ordered these... https://www.ledfactorymart.com/collections/led-lights-for-harley-davidson/products/harley-davidson-led-daymaker-headlight-fog-lamps As mentioned in the above pics I had to remove the connectors on the 4.5" lights to make them fit in the bucket.
-
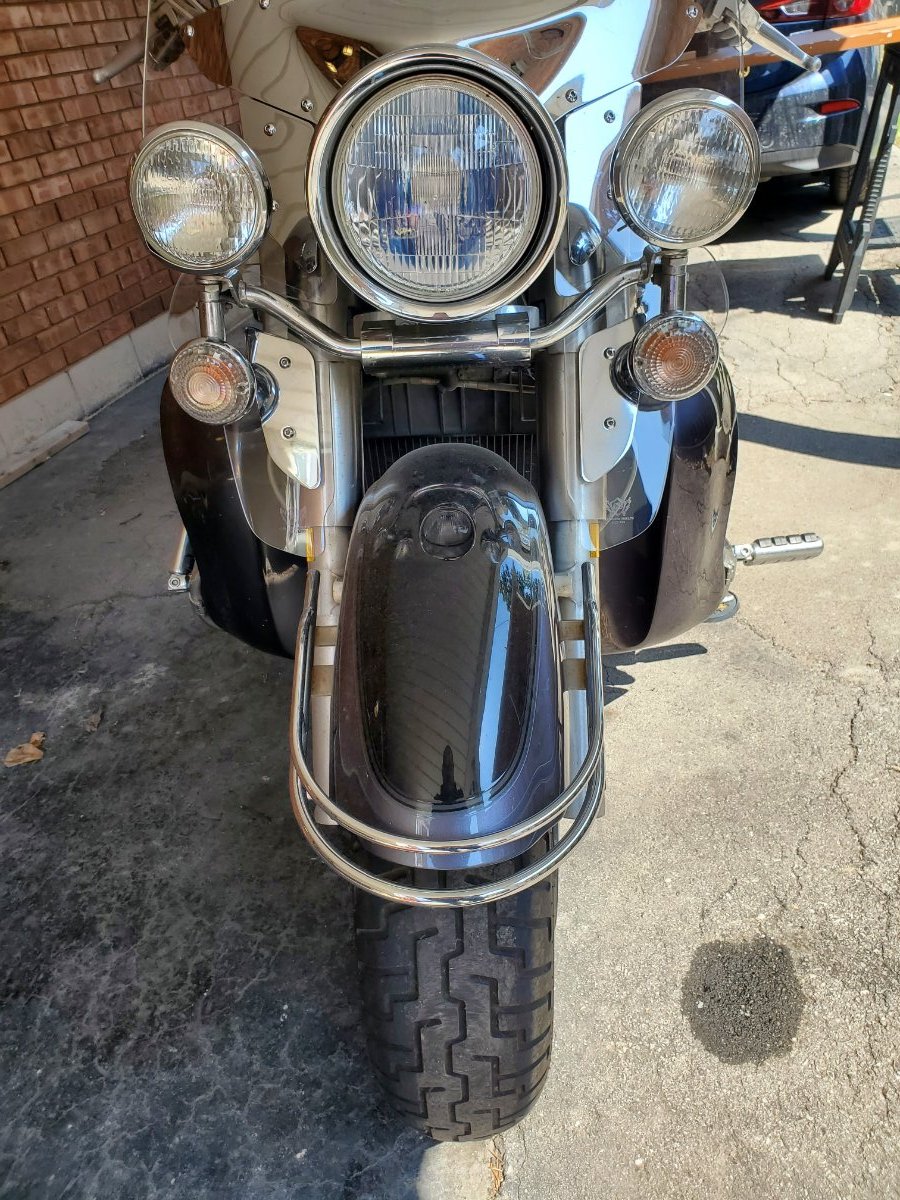
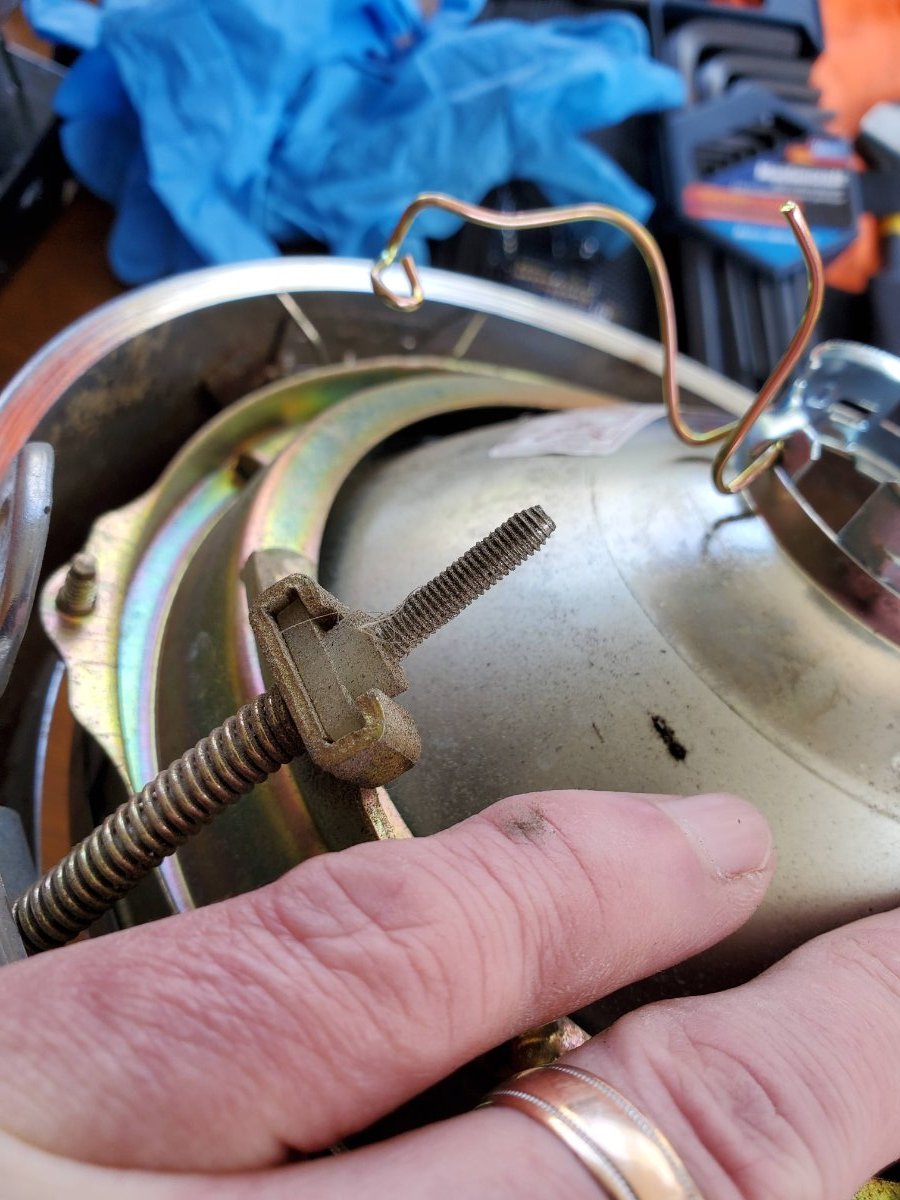
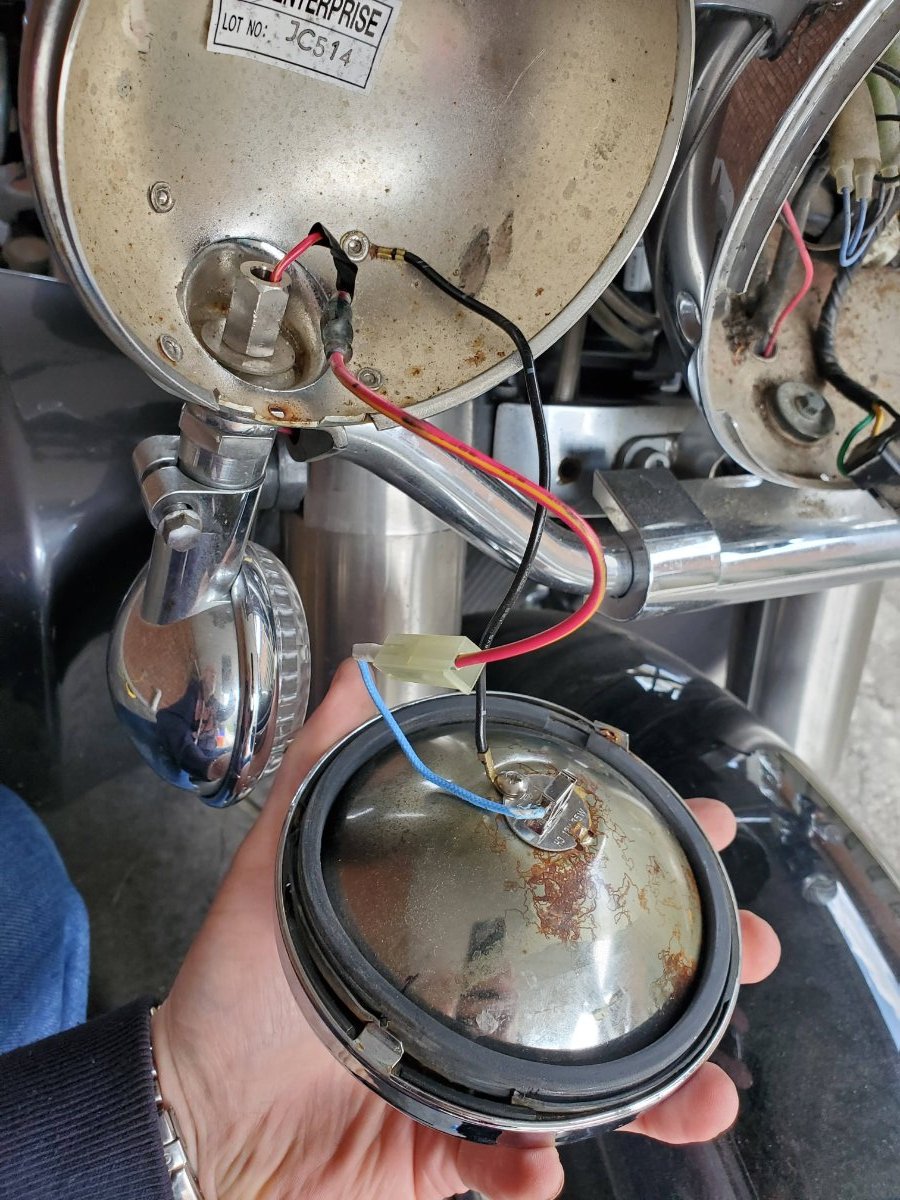
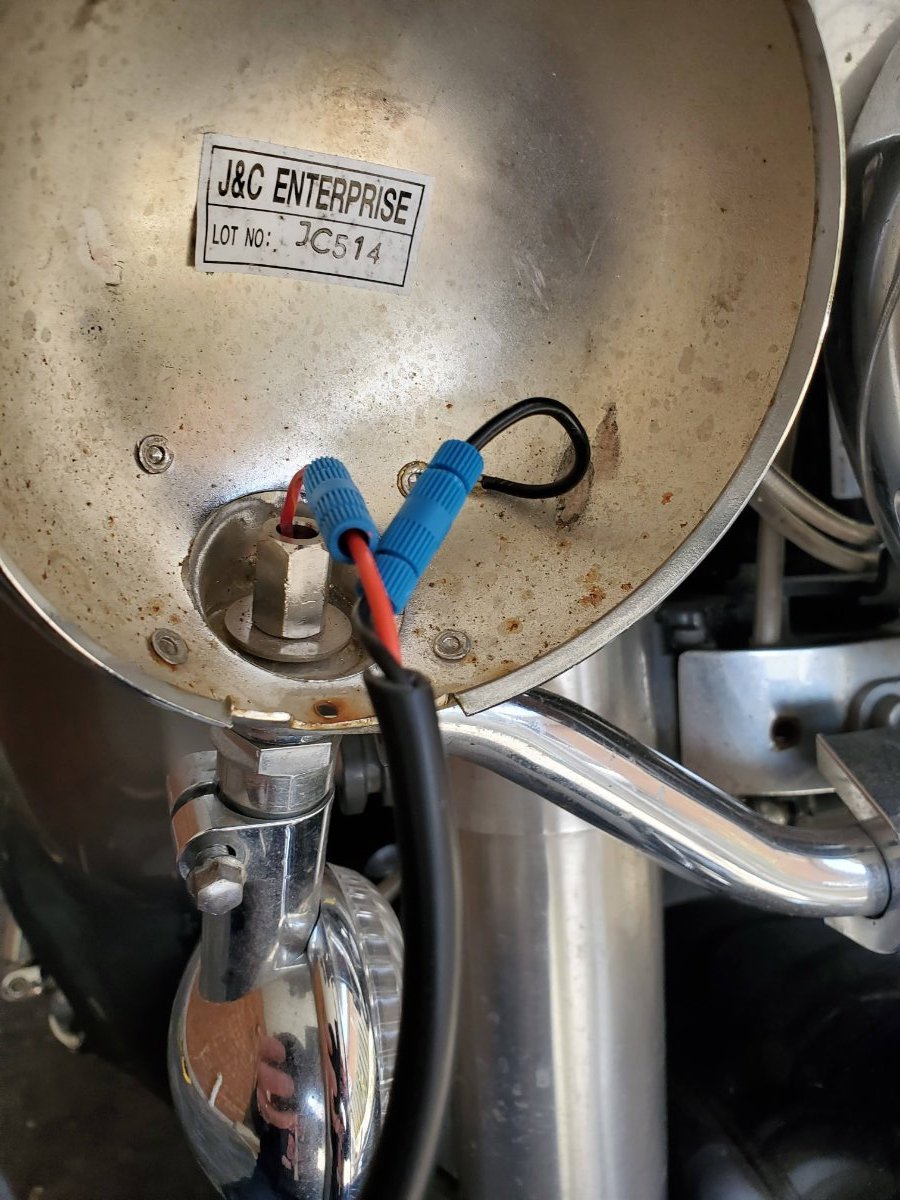
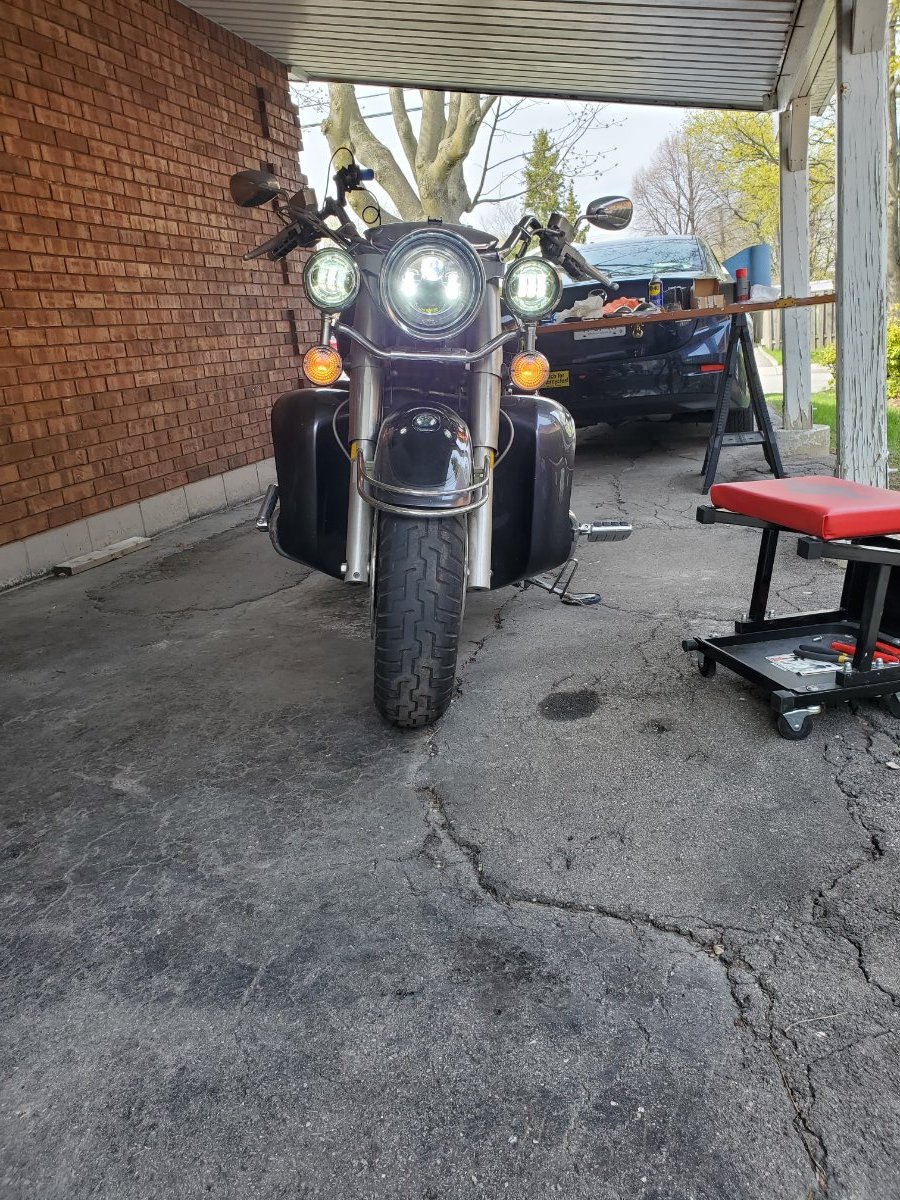
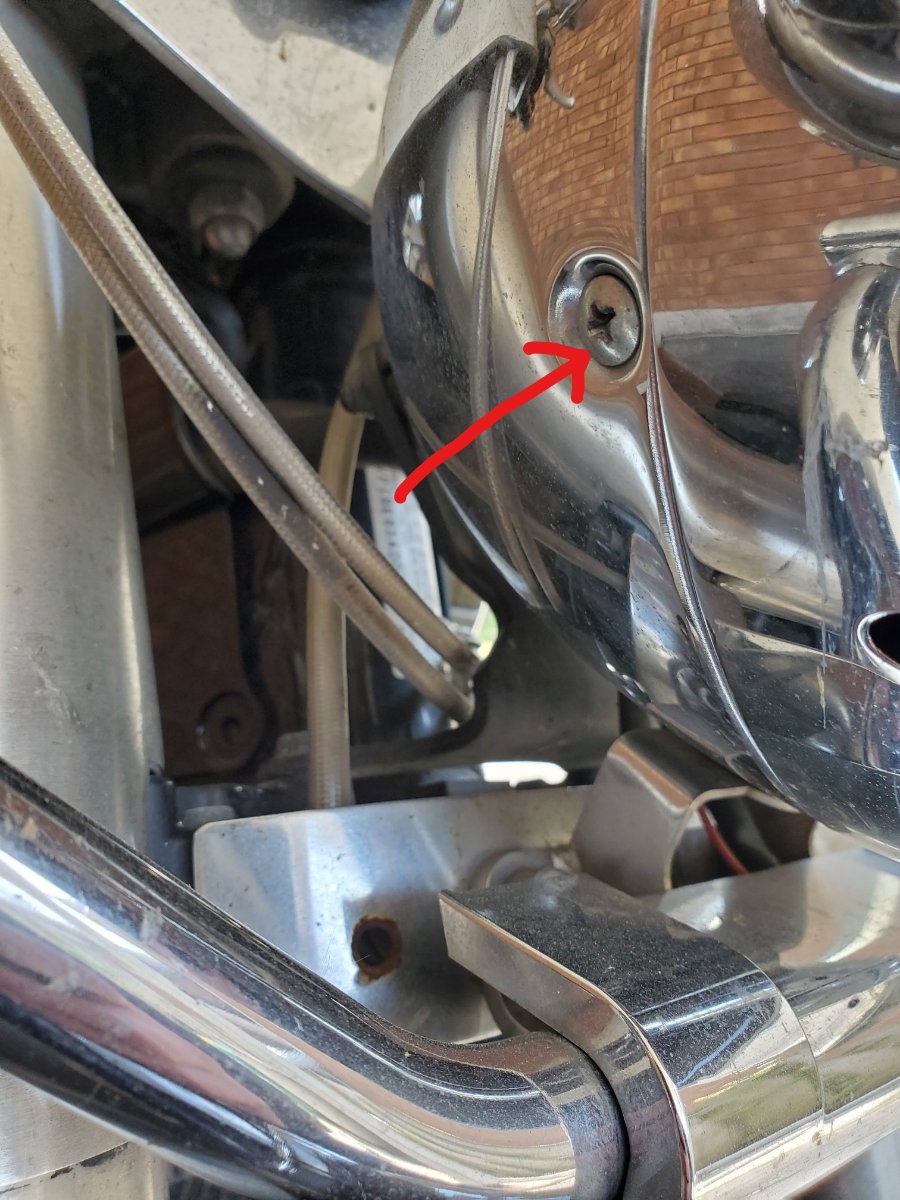
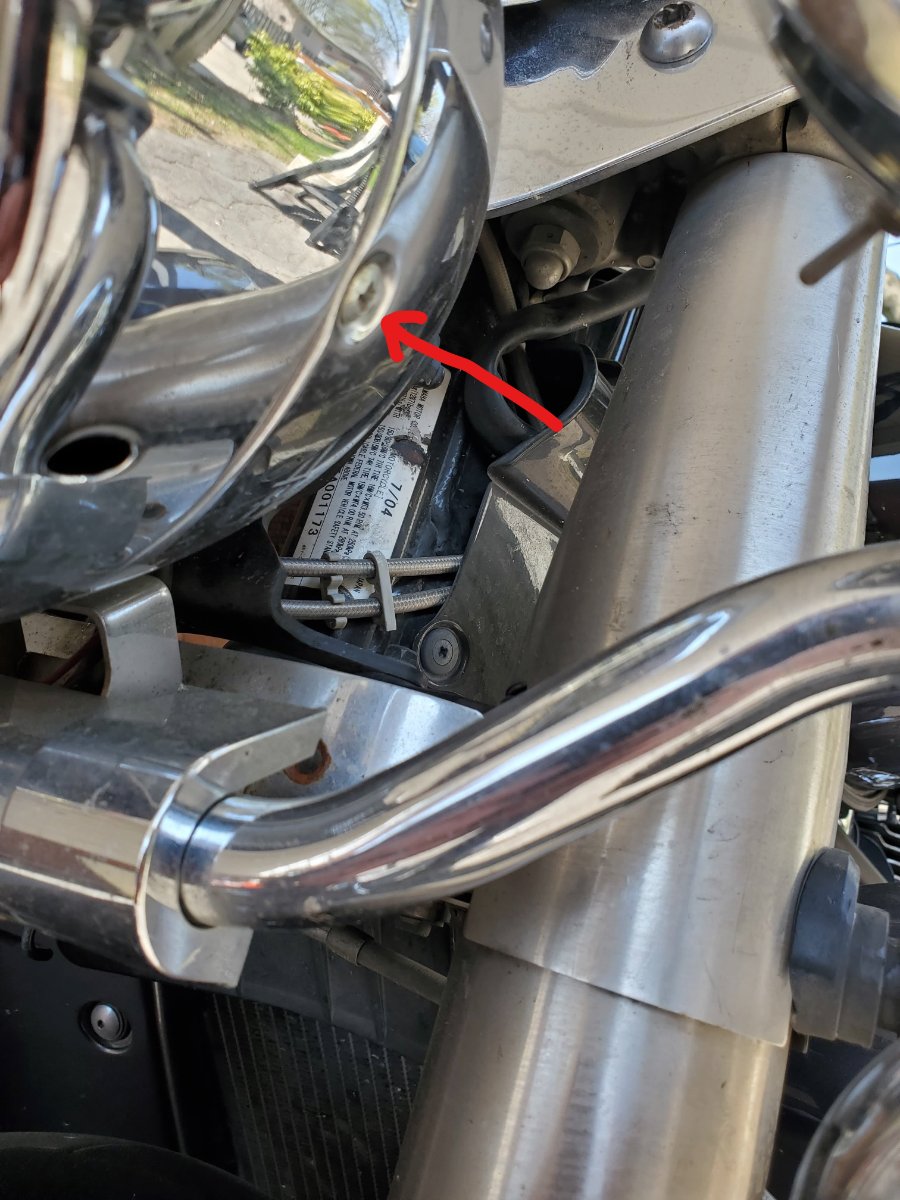
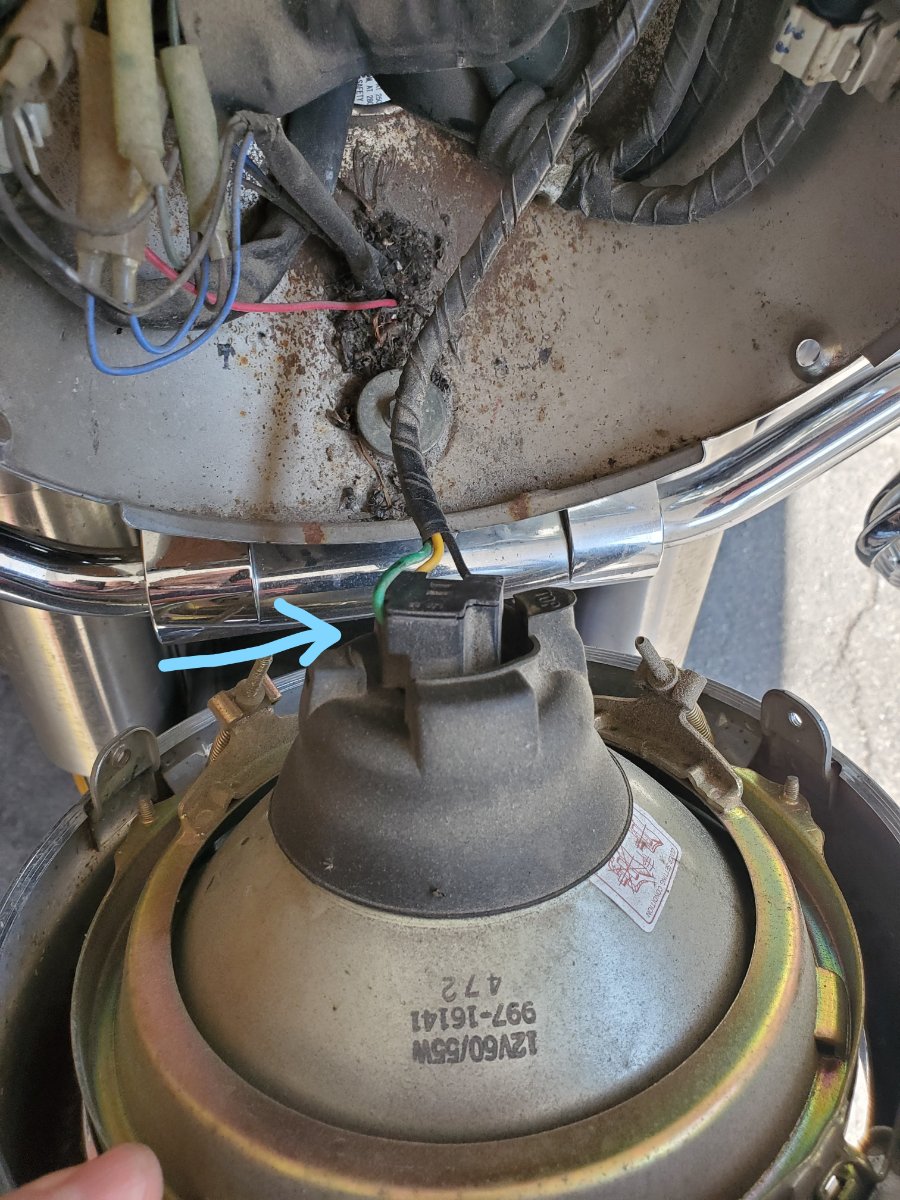
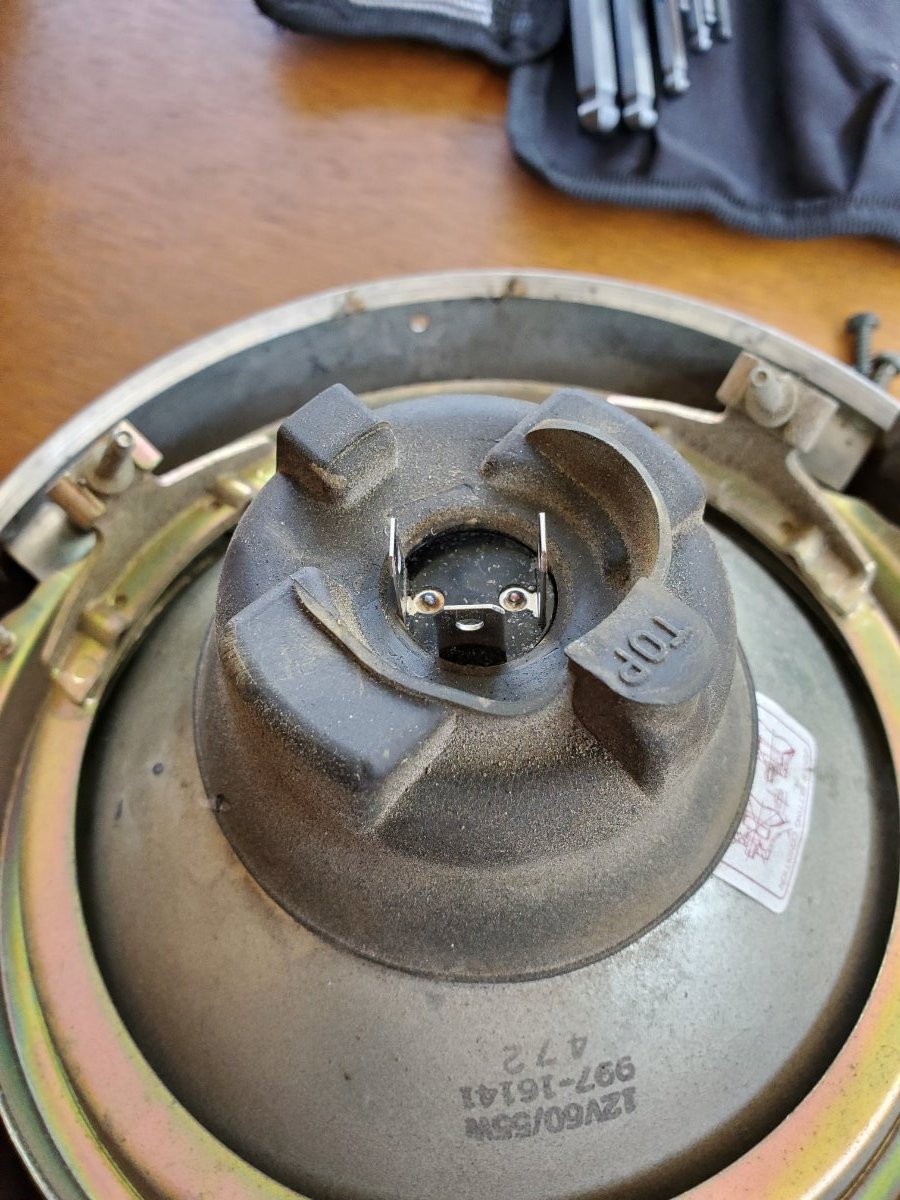
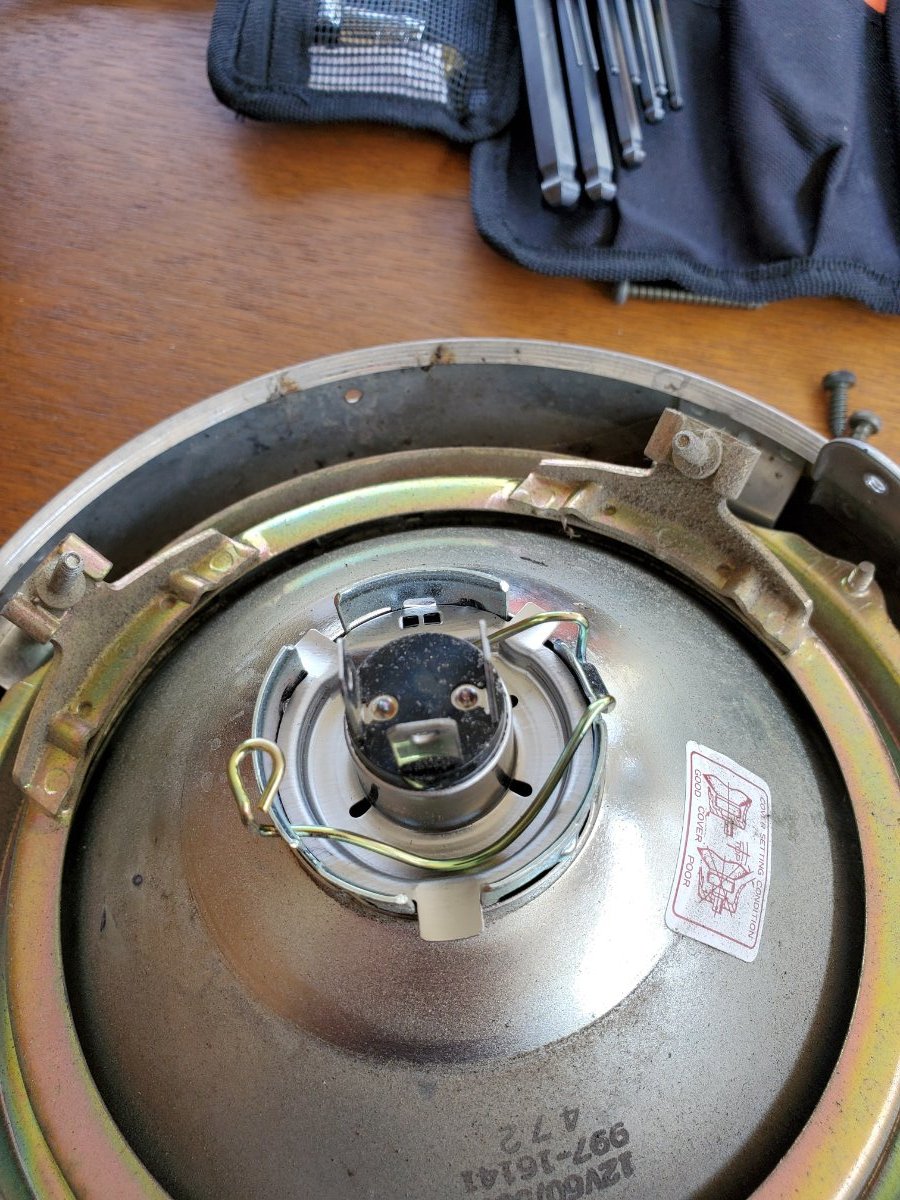
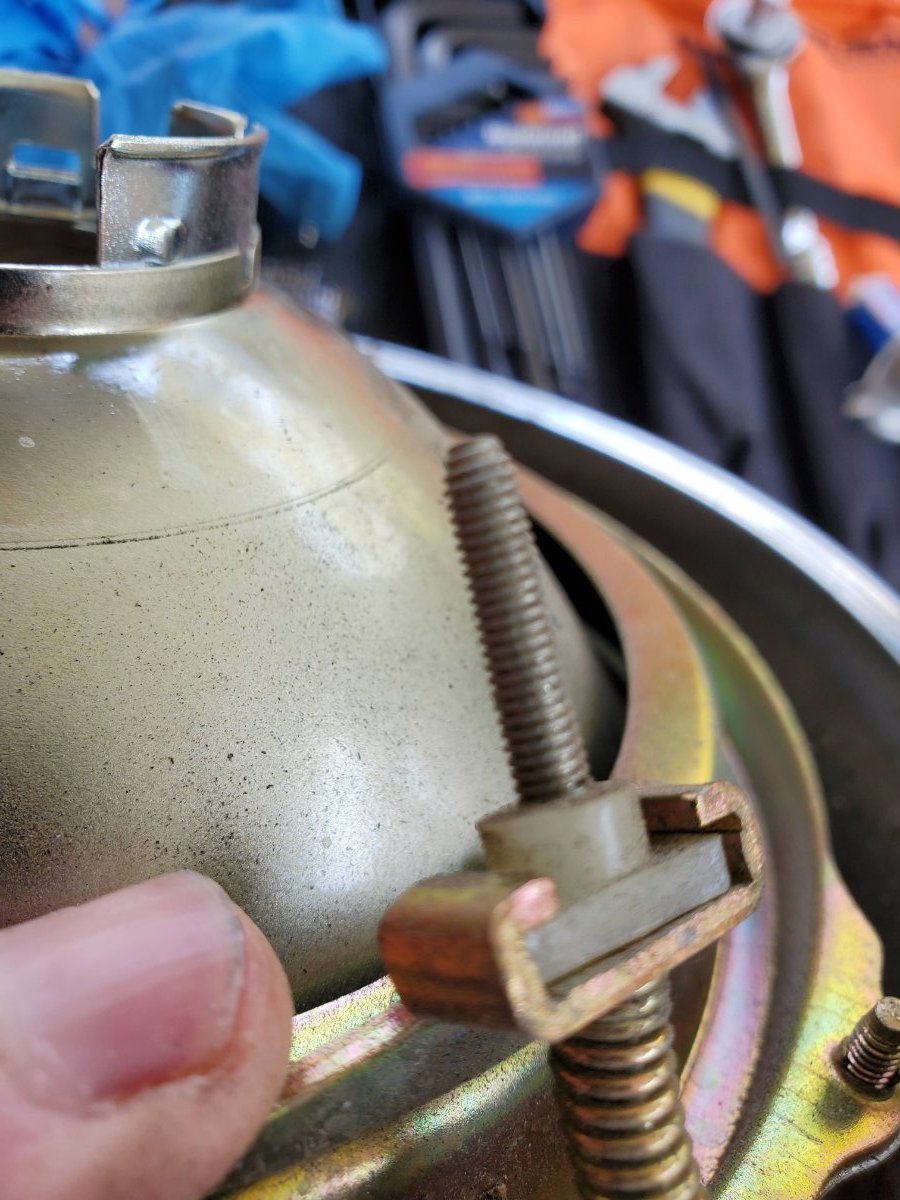
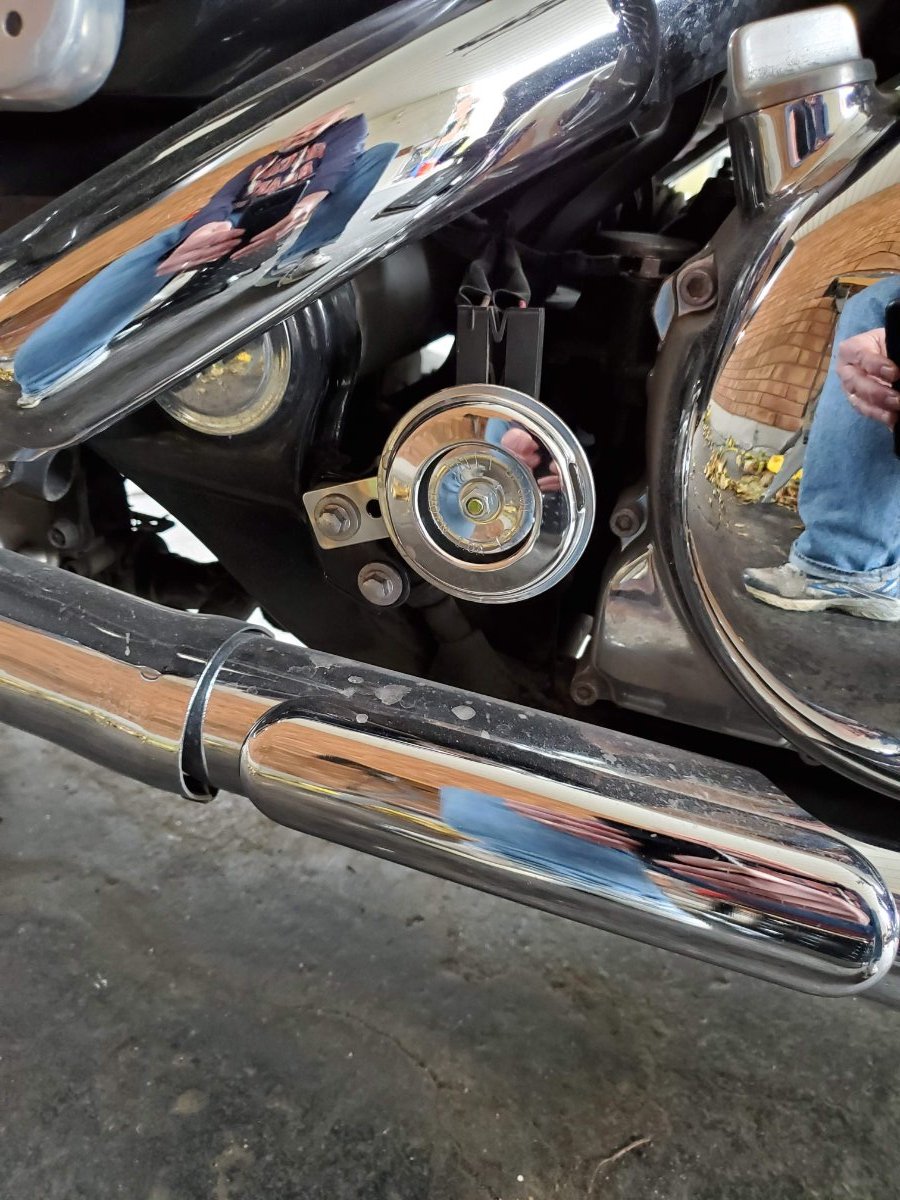
If anybody is interested, here are my notes on converting from incandescent headlights to LED. I ordered a set from LED Factory Mart. Info: 2005 Royal Star Tour Deluxe. So here is obviously your staring point. There is a screw on either side of the main headlight assembly. Remove the main headlight plug. Remove the rubber housing. Undo the spring bar. This will take a bit of effort. Before you remove the two long screws found a 8 o'clock and 4 o'clock you may want to take note of approximately how much of each one is screwed in. These also act as the aiming adjustments. You will still need to re-aim your light after you are complete anyways. Here is the inside of my driving lights before making any modifications. The LED 4" lights I ordered came with a very nice plug assembly but there wasn't enough room in the bucket to keep it. I had to cut it off and wire in directly. It will be a tight fit to get the 4" lights back in the bucket. When lining up the main headlight to go back in the housing note that if you line it up with this screw at the top it will not be centered. That screw is a bit off of 12 o'clock. Finished project.
-
Hello Motoboy51. Welcome to these awesome bikes. I picked up my 2005 RSTD last fall. Where are you planning to put the power distribution/fuse block? And what one? Despite the largeness of these bikes, space is limited in the side covers and under the seat. I would like to do the same as I had installed on my previous bike (VTX1300). I haven't found a block that will fit well. Thanks Roger
-
Front Lights Replacement Advice
Papabird replied to Coyote251's topic in Royal Star and Royal Star Tour Deluxe Tech Talk
I picked up a set of the LED lights from LED Factory Mart. Not exactly sure how it will install yet but I will document as I install and figure it out. I also have a 2005 RSTD. It will be sometime over the next few weeks that I get to it. Roger -
Power fuse block
Papabird replied to Papabird's topic in Royal Star and Royal Star Tour Deluxe Tech Talk
I will have to check to see if the one I have will just sit on the battery and still have clearance. Thanks -
I would like to add a power fuse block as a central place to connect addons (USB power, heated gear plug, eventually a gps). Similar to this https://www.amazon.ca/dp/B0838TZ2Z2/ref=cm_sw_em_r_mt_dp_QRCNFbRVHE2R3?_encoding=UTF8&psc=1 I would wire in a relay to it. My problem is that I can’t find anyplace to put it on my RSTD. Anybody else do this? thanks
-
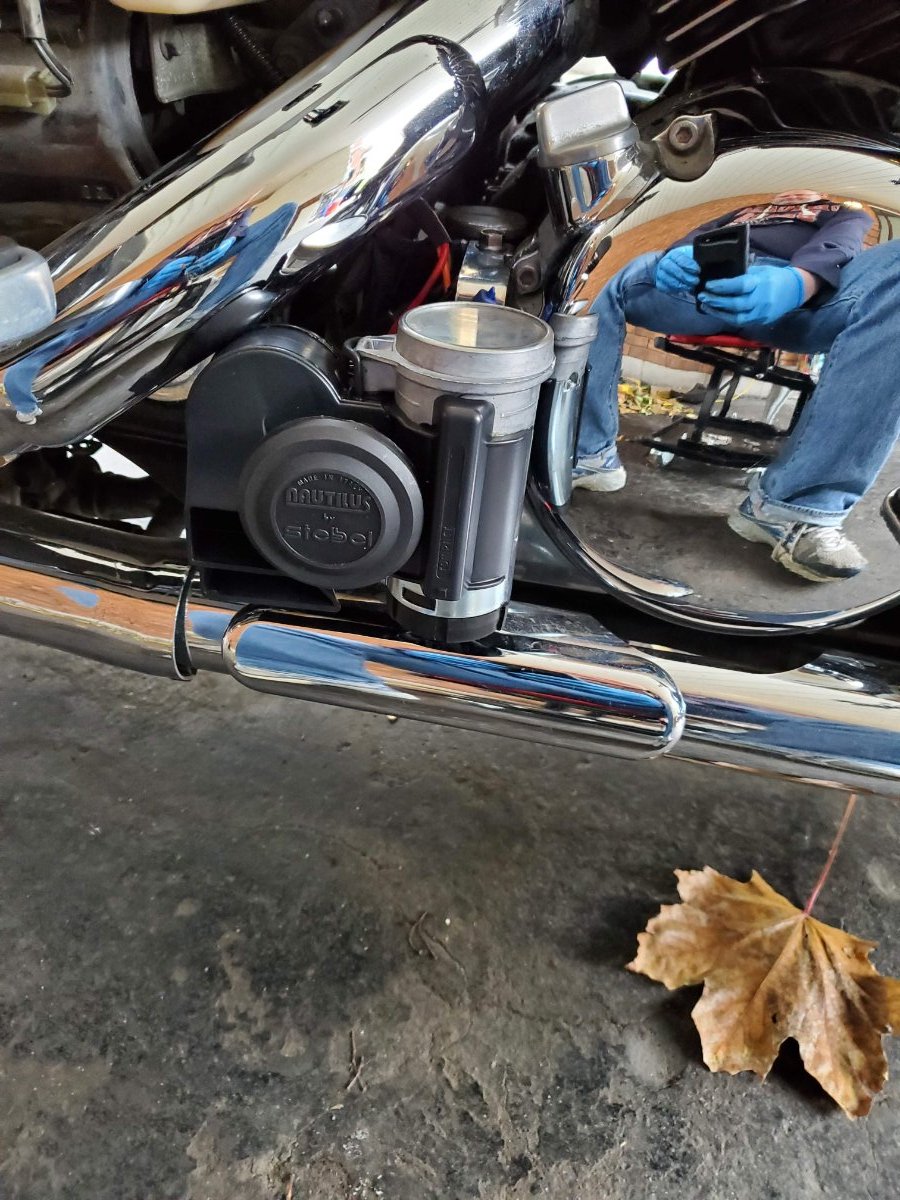
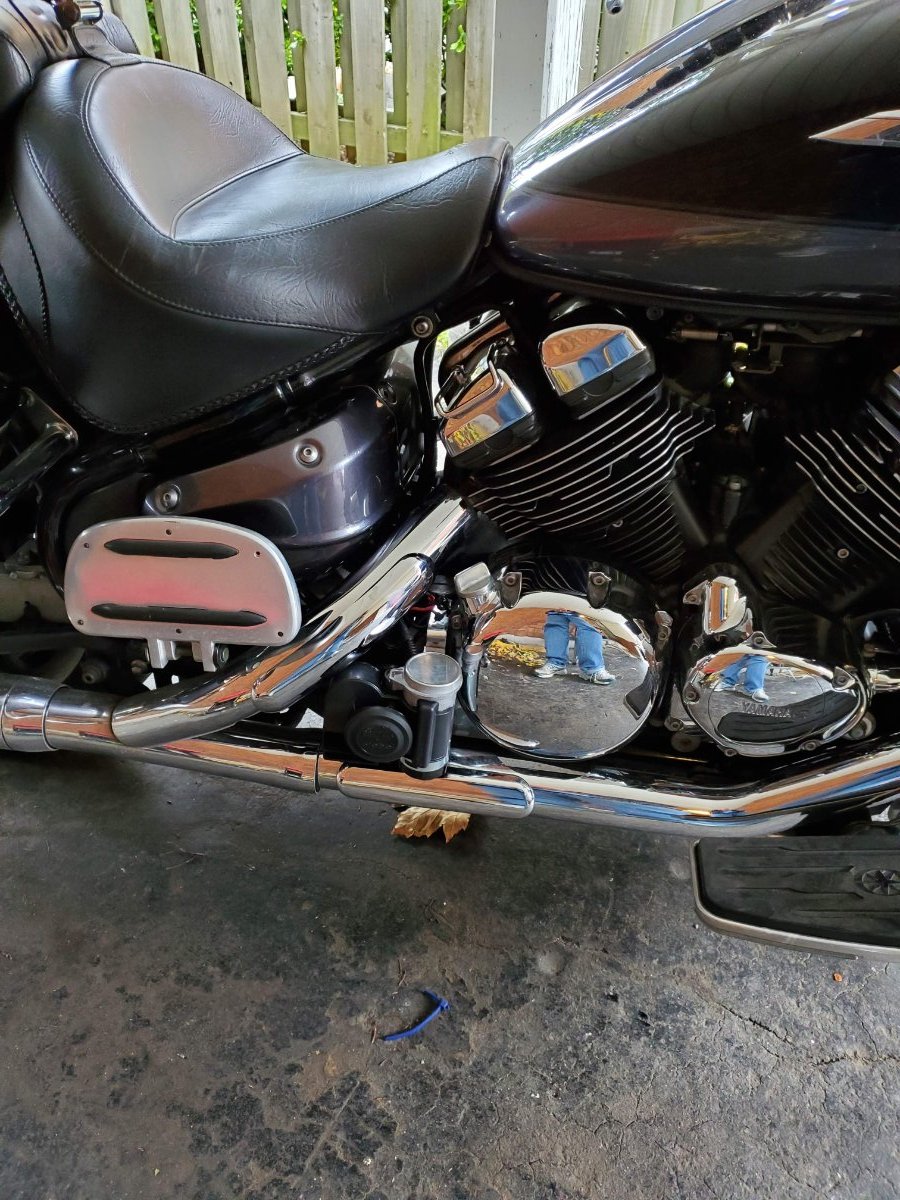
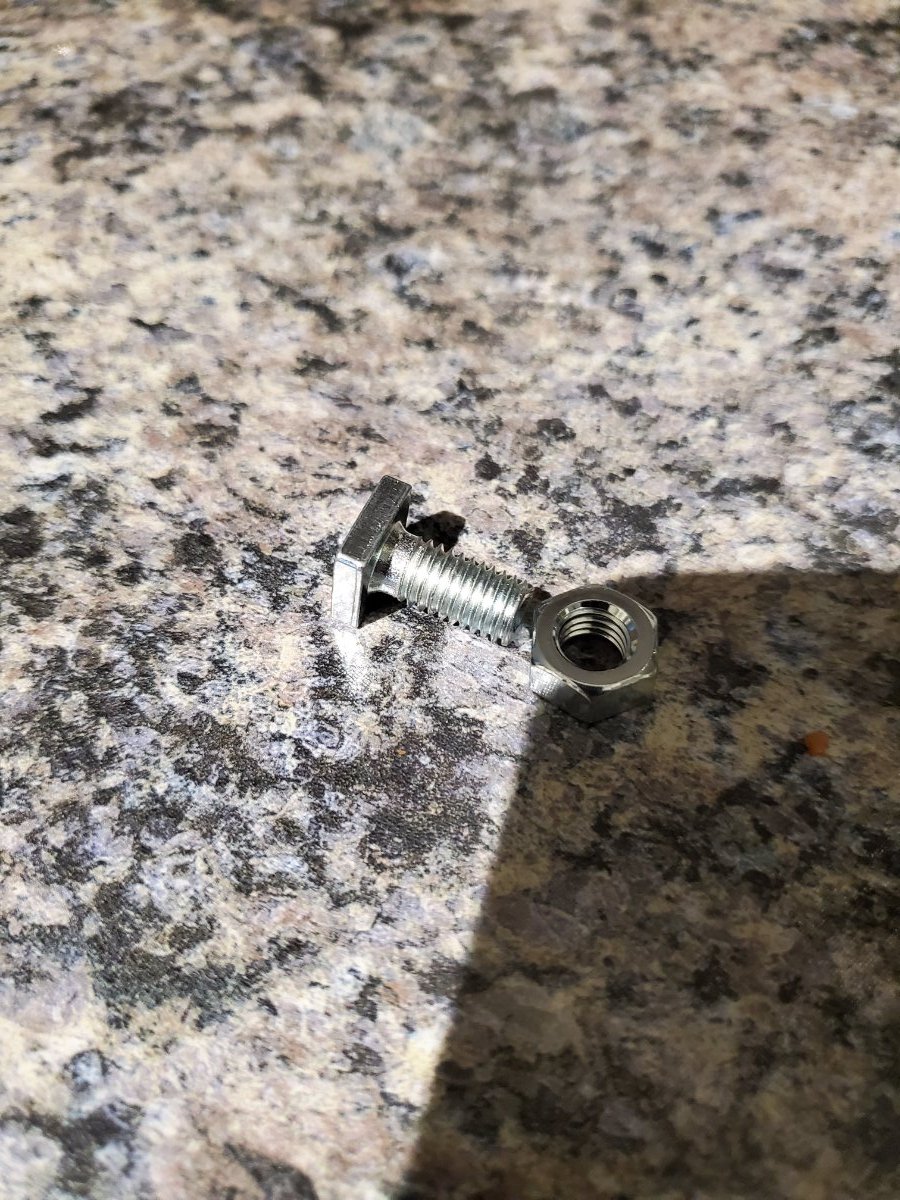
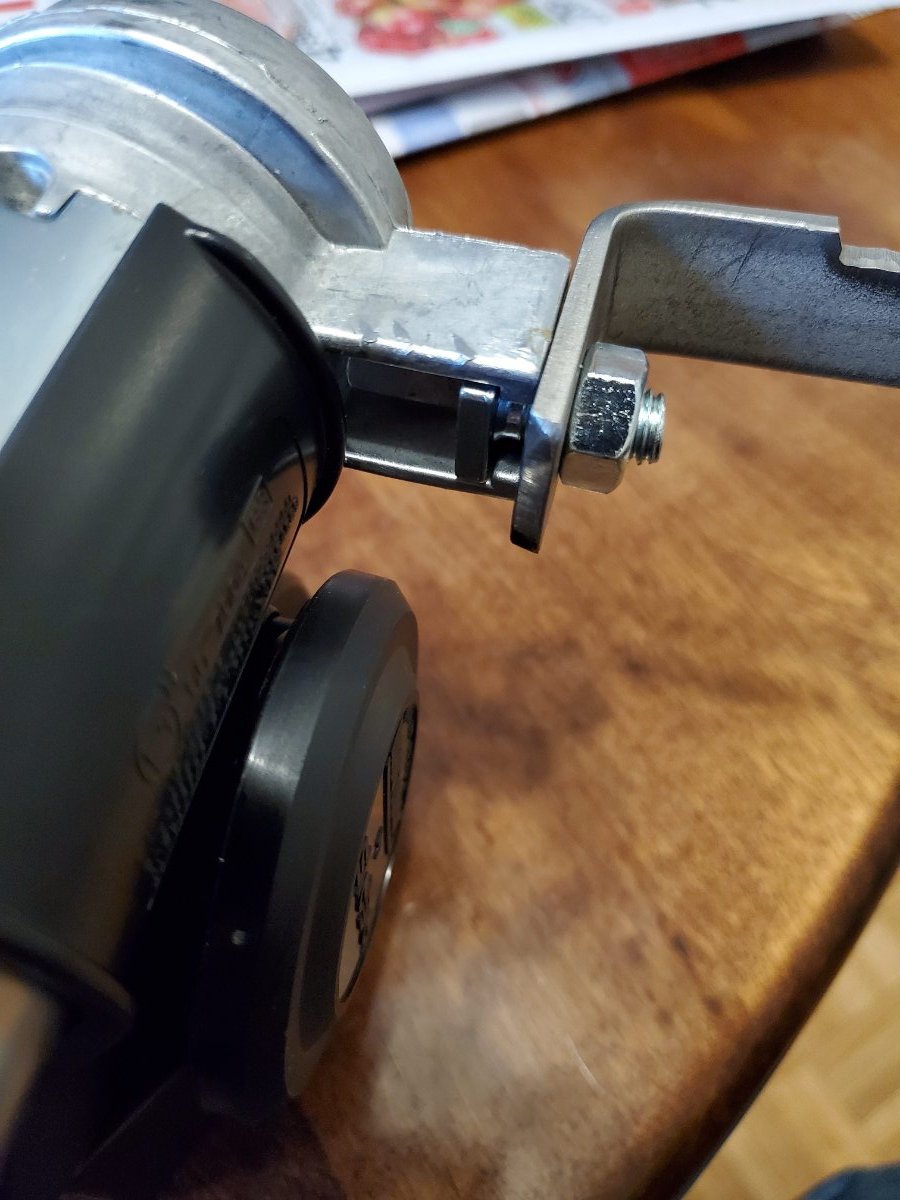
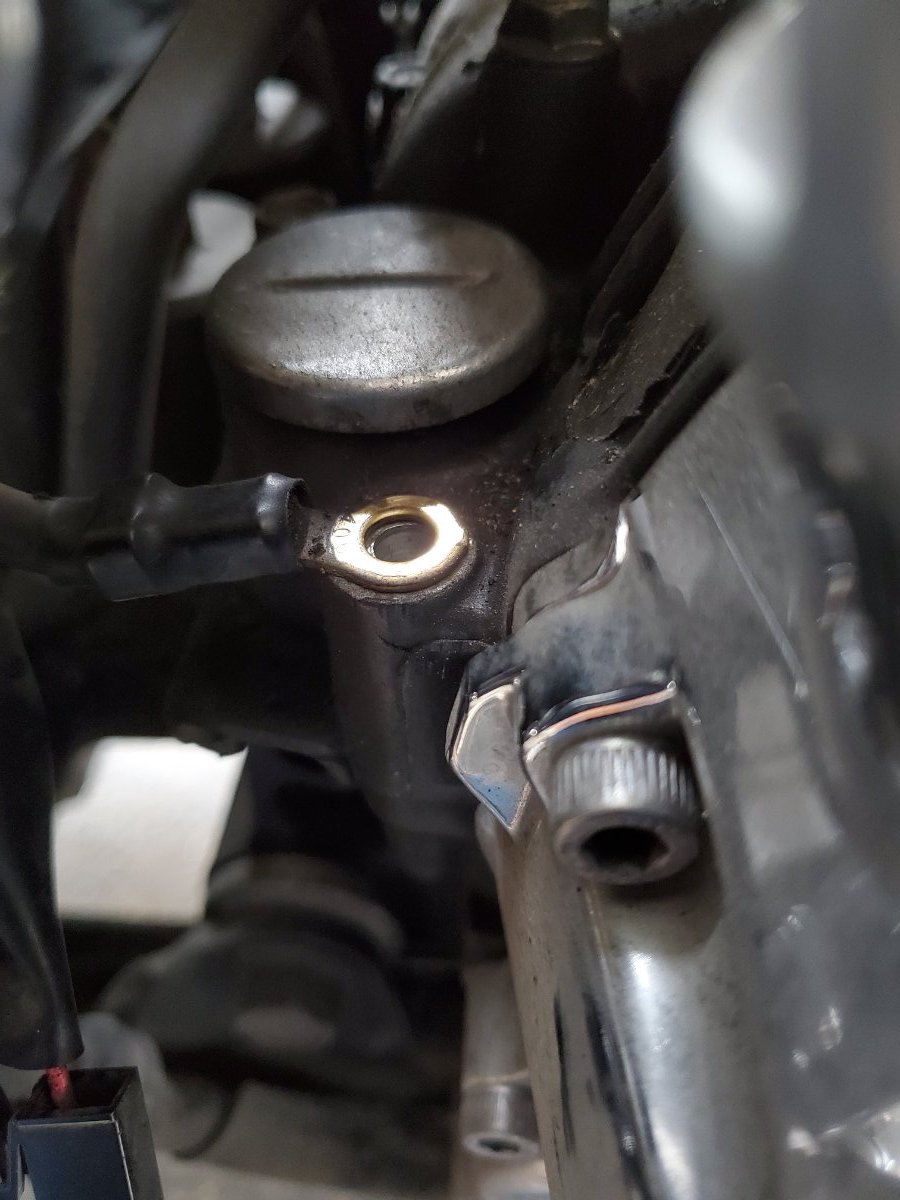
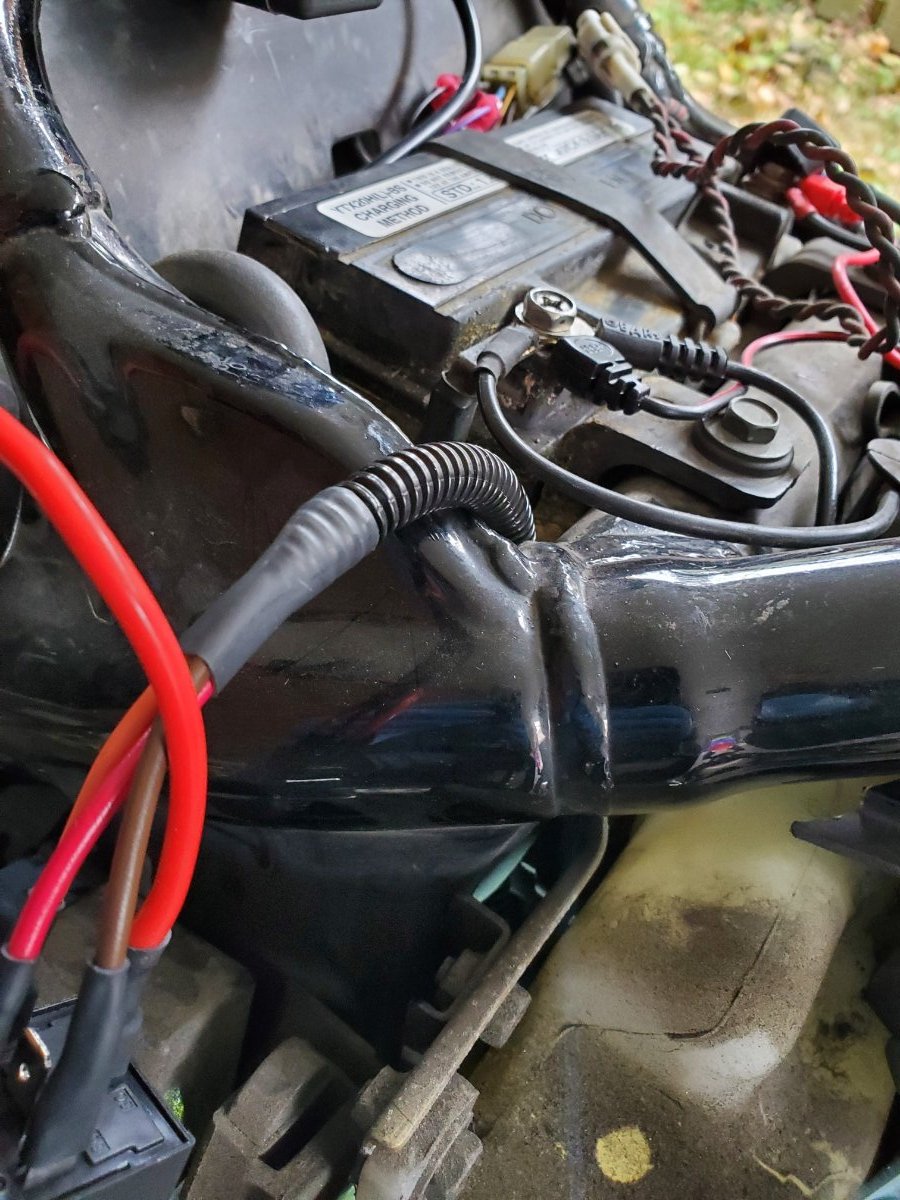
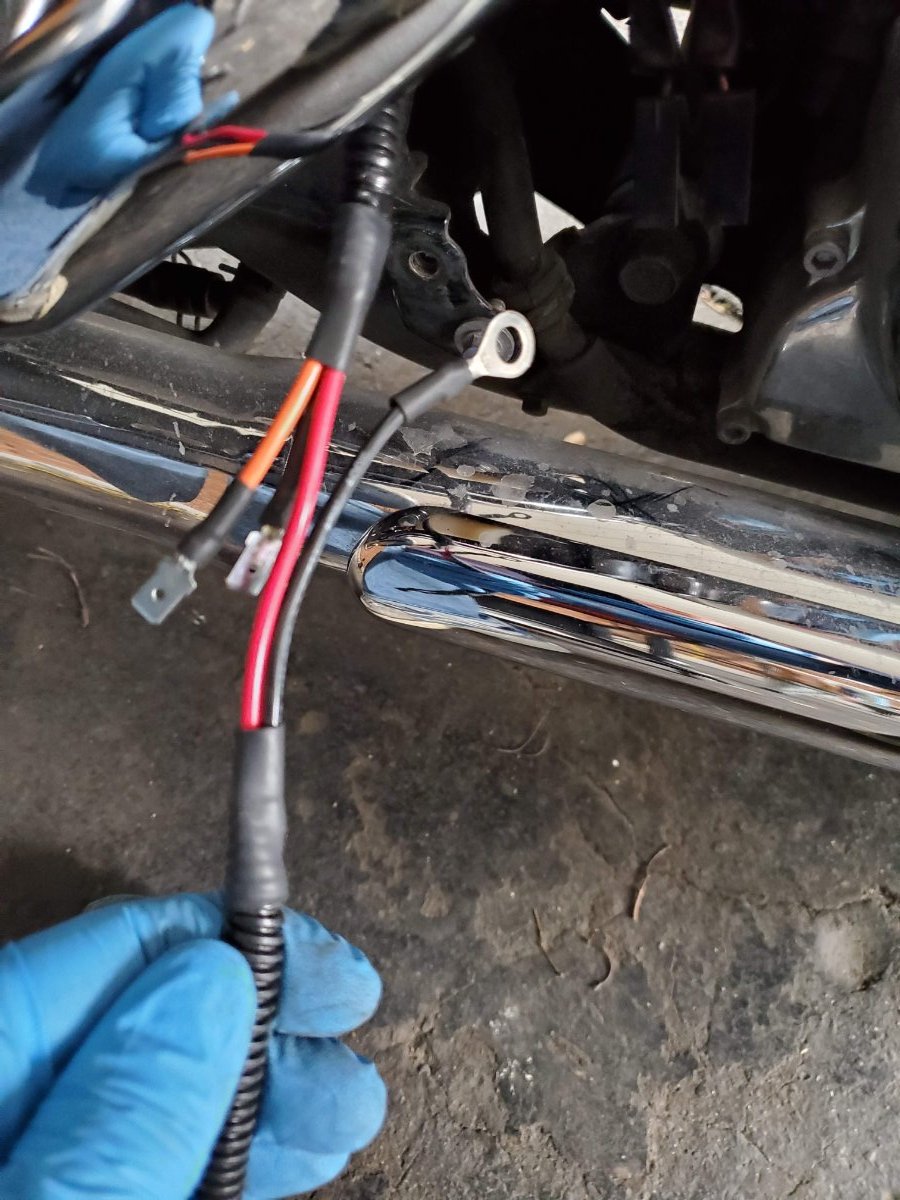
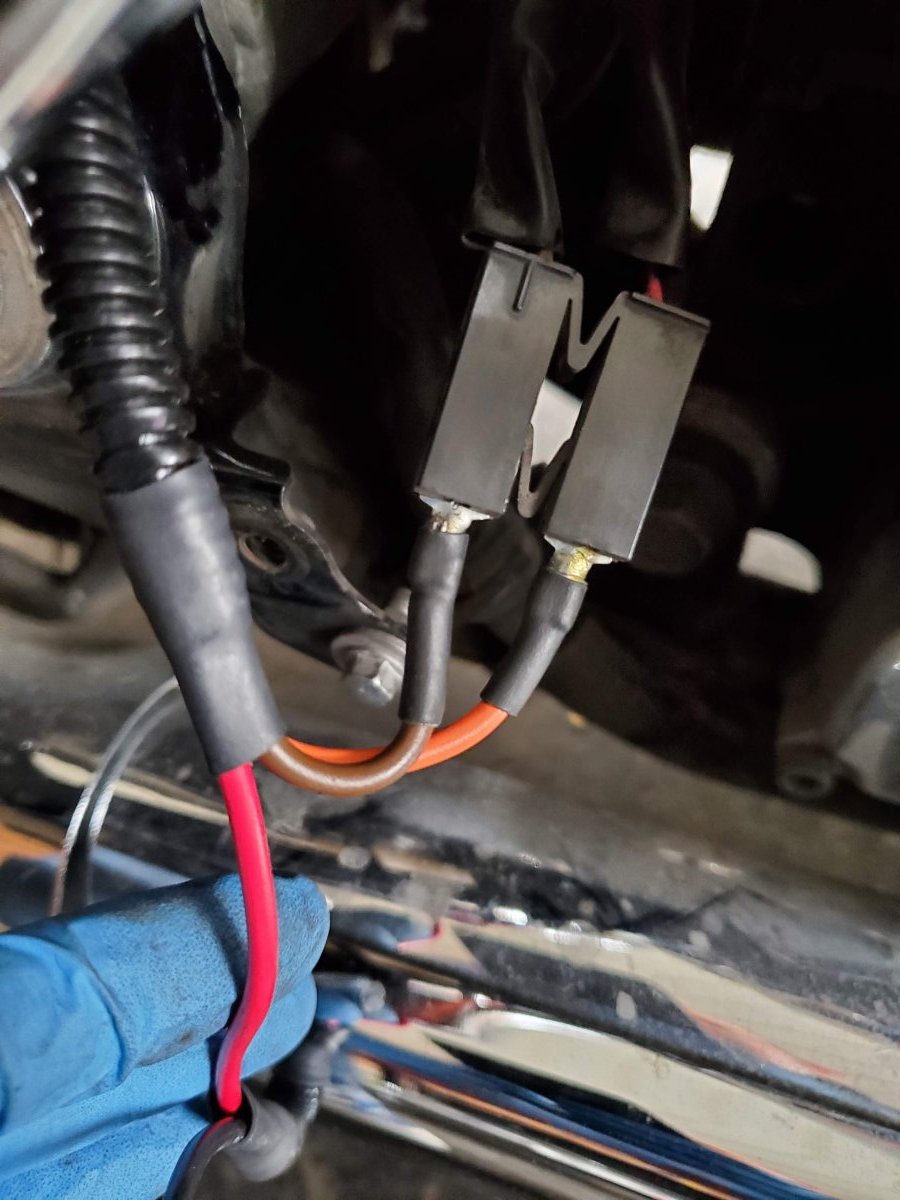
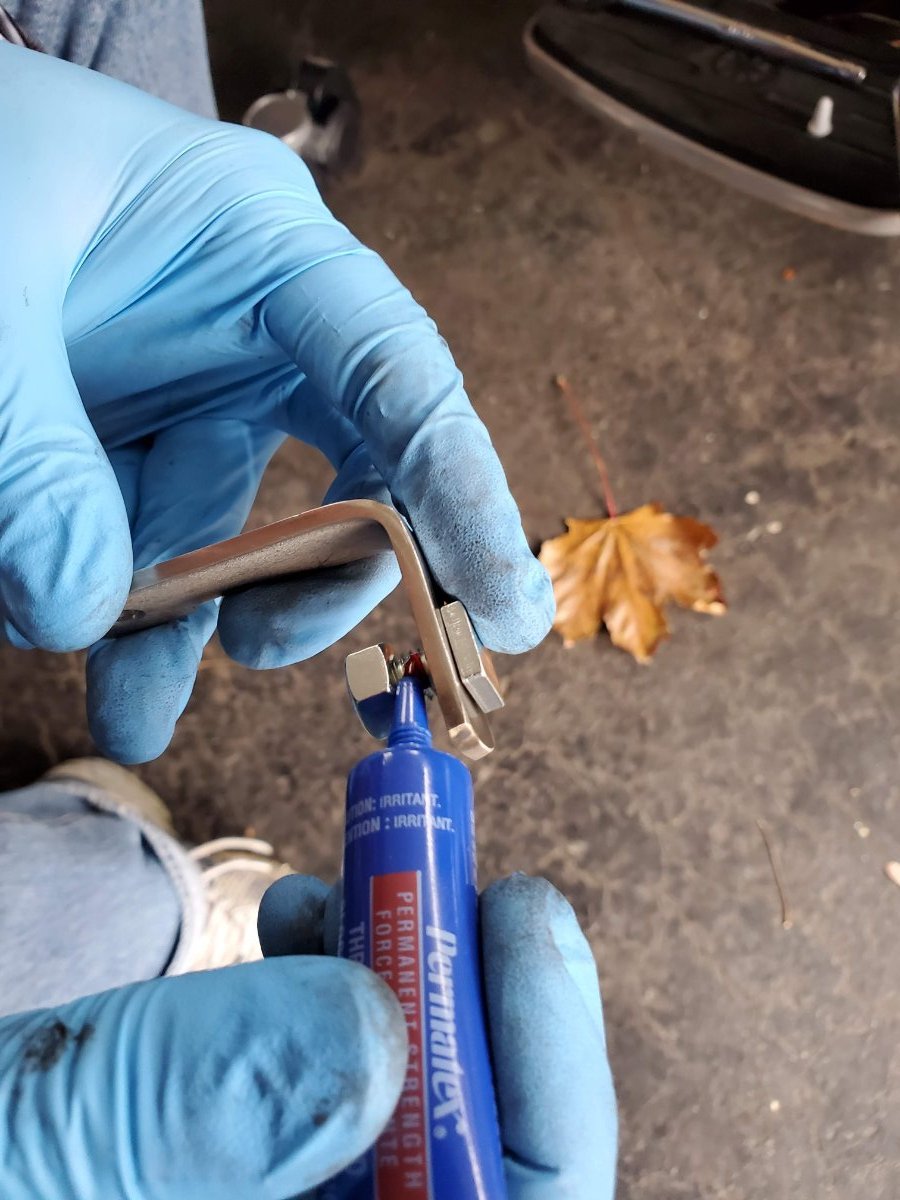
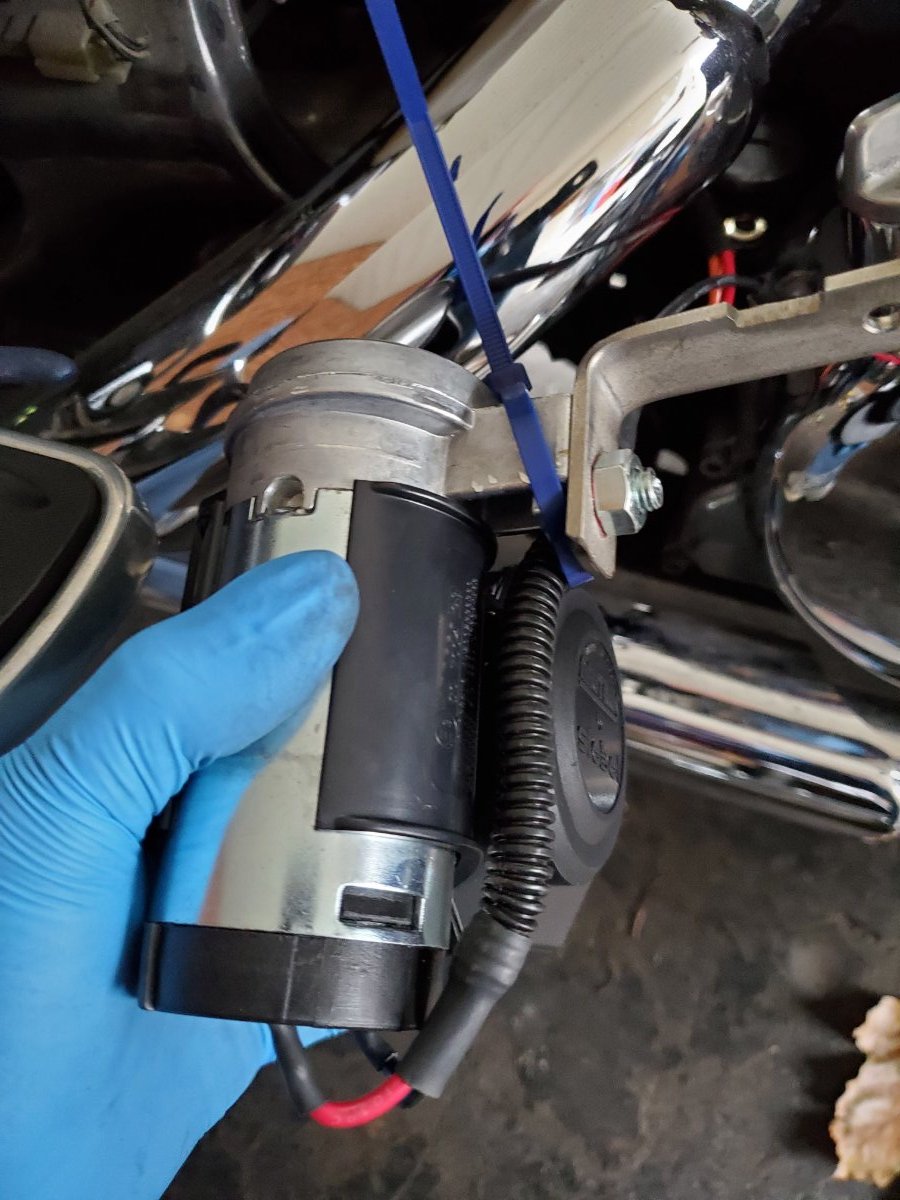
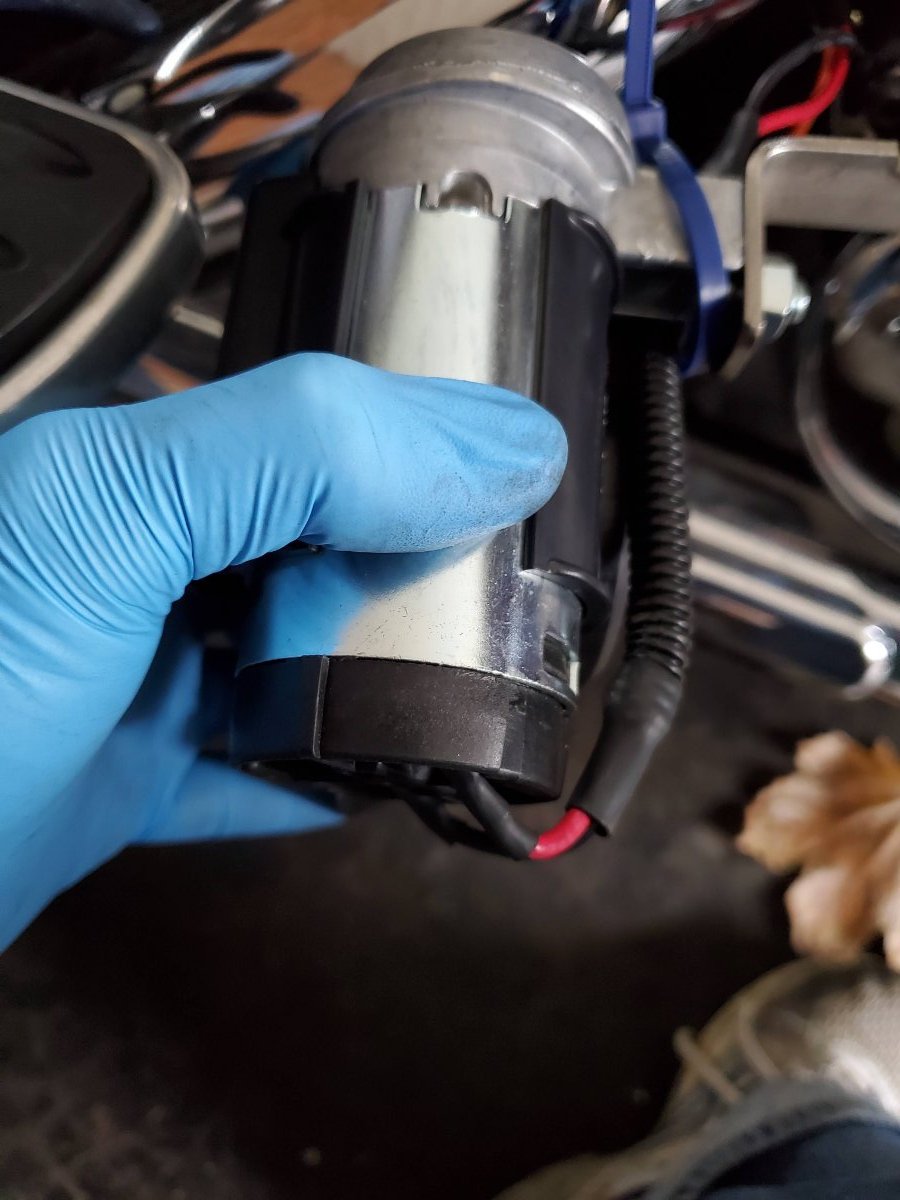
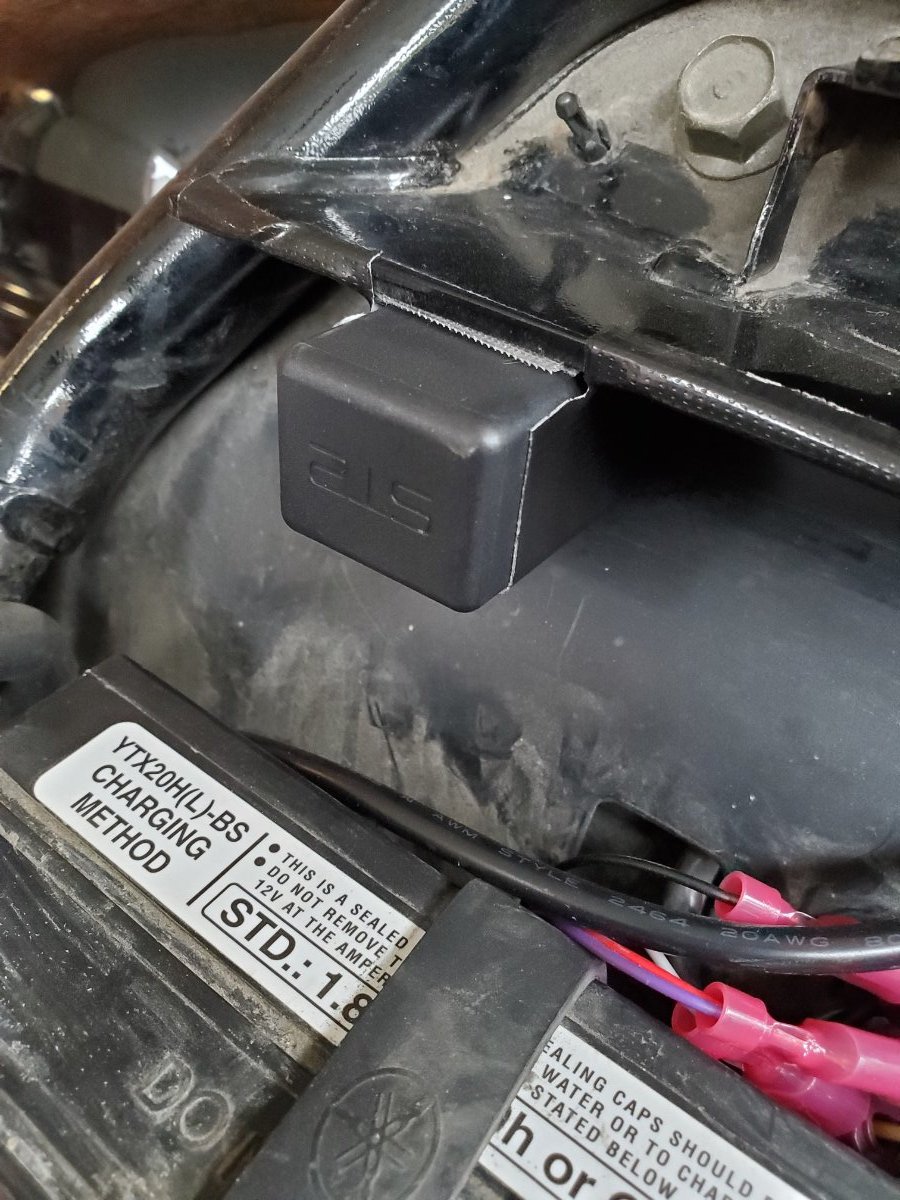
I thought that somebody may be helped by this. Larry's included instructions were well written but I thought pictures might help people as well. Note that I haven't done any install how-to documents like this before so bear with me. Parts needed: wiring harness and mount purchased from Larry Skeels (Carbon One here on the forum) Stebel Nautilus Compact Dual-Tone 12-Volt Motorcycle Air Horn, 139 dB. I purchased from a local retailer but you can get it from Amazon as well. Mine is the black version and I think it looks fine on the bike. Some may prefer the chrome version. On the right side you will find the factory horn placement. Mine was a cheap aftermarket one which was just as anemic sounding as the OEM one. Included with the Stebel horn is a bolt and nut for mounting. It also includes a 12V relay but if you get the wiring harness pre-done by Carbon One, you won't need the one from Stebel. Here is the bolt mounted on the mounting bracket that comes with the kit from Carbon One. I used some red threadlocker to make sure the horn doesn't vibrate its way loose. Then attached to the horn. You will need to feed the harness down the right side of the battery. I taped the leads part way down together to prevent snagging on the way. Note that shining a flashlight from underneath facing up will help with visibility when feeding the harness down. After it is fed down, remove the tape and connect the brown lead to the brown connector that the original horn was on the orange lead to the other one. Connect the leads at the bottom of the horn to the other wires in the harness. You can bend the terminals over a bit to give more clearance to prevent overheating from the exhaust. Behind the OEM horn you will see a bolt that may already have a ground loop on it. This is where the horn is being mounted. Tighten down the mounting bolt and tie the harness back if you wish with some zip ties. At this pint connect the power lead to the positive terminal and tuck the attached relay behind the battery. Here is the overall placement. I think it looks pretty good. And a short video of it working. The video doesn't do the sound justice. 14 sound.mp4
-
With the new site, do you have a how-to on doing up a post with inline pictures? Thanks Roger
-
I thought I would do a short write up on this. Very happy with it. A few weeks ago I installed the Smart Brake Module onto my 05 RSTD. It ships from Slovenia so be patient. Probably took 3 weeks to get to me in Canada. It was an extremely simple install. It comes with the connectors and a guide indicating what wires to tap into. In this case the wires are under the seat and leading through a hole in the rear fender. You can easily access them. The trick for most motorcycles is finding a level spot to secure the module. It is not large measuring approximately 1.5"x1"x.75". Lucky for us, there is the ledge that our seats (at least for the RSTD, I'm not sure about the Venture) sit on. I decided to velcro and tape the module to the underside of that ledge (see pic attached). It needs to be level and facing forward so the magic in the box (accelerometer and motion detection sensors) can do its thing and sense when the bike is slowing due to engine braking or down-shifting. It works exactly as advertised. Definitely feel more safe with it installed. Thanks Roger
-
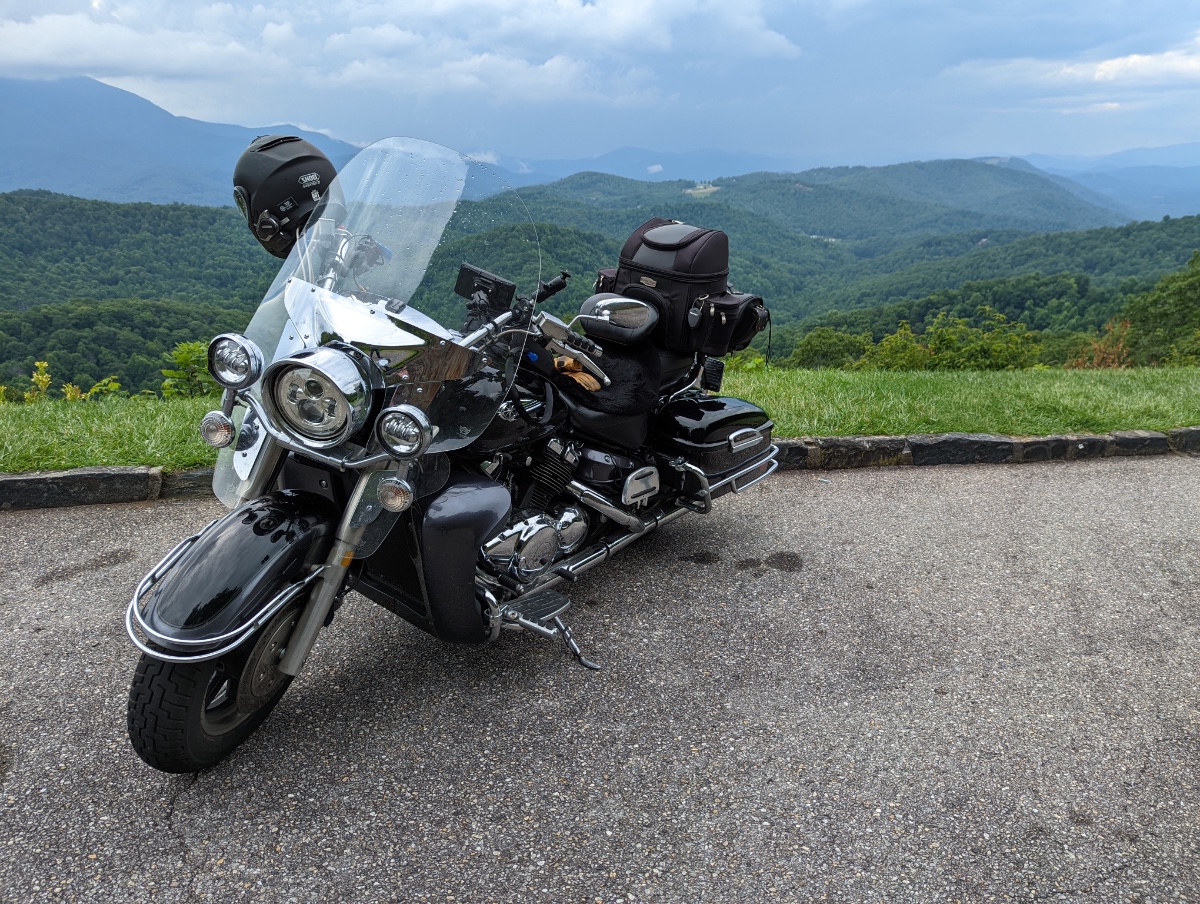
Just picked my “new” 2005 RSTD. Loving it! I noticed with the design of the cockpit we have limited space to mount things. Phone holder, gps unit, cam, etc. Any creative solutions out there? Thanks Roger Sent from my iPad using Tapatalk
-
I’ve had these on my VTX1300 for the last year or so. Works great. No more kneeling and adjusting tire position to get the pressure gauge in. Just installing on my new to my 2005 RSTD this afternoon. Sent from my iPad using Tapatalk