made2care
-
Posts
387 -
Joined
-
Last visited
-
Days Won
2
Content Type
Profiles
Forums
Gallery
Events
Store
Everything posted by made2care
-

please help, what would you do?
made2care replied to made2care's topic in Venture and Venture Royale Tech Talk ('83 - '93)
That's nuts! Must be a trust fund baby -
please help, what would you do?
made2care replied to made2care's topic in Venture and Venture Royale Tech Talk ('83 - '93)
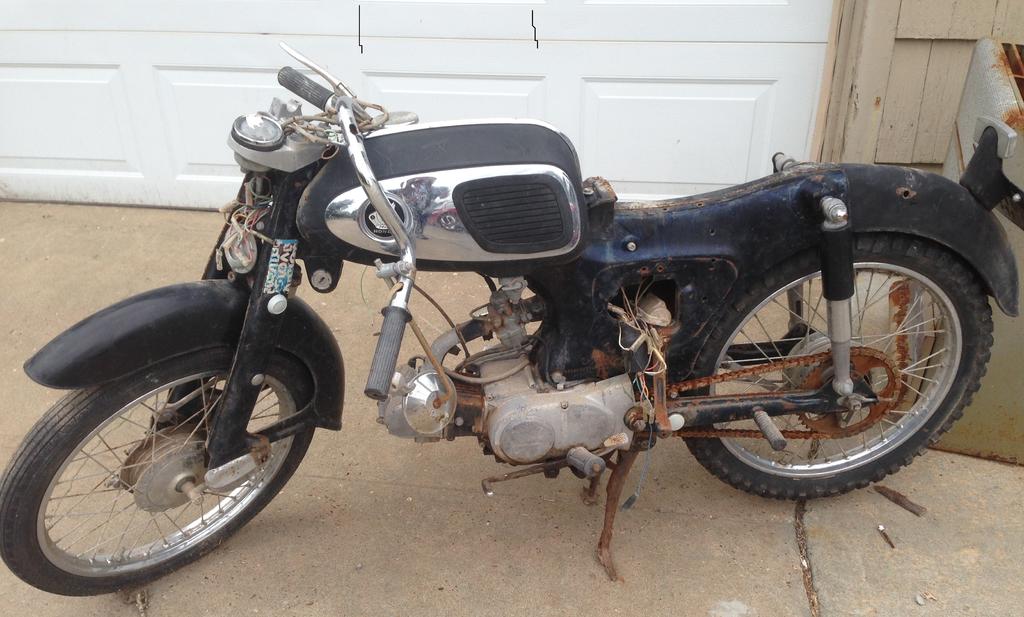
Okay, so here is the old Honda. just given to me. 1965 sport, little 65cc but i plan on upping the engine to 140 with bigger tires.
-
please help, what would you do?
made2care replied to made2care's topic in Venture and Venture Royale Tech Talk ('83 - '93)
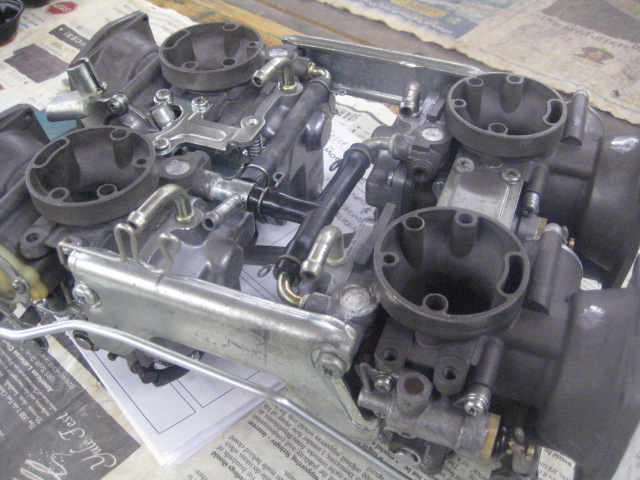
My carb guy just informed me that he is almost done with my carbs. He put together a picture diary of what he ran into: https://www.motorcycleproject.com/galleries/Gallery120/ Here is a current pic of the carbs almost completed.
-
please help, what would you do?
made2care replied to made2care's topic in Venture and Venture Royale Tech Talk ('83 - '93)
Well, i got the old Honda home. Turns out its a small 65cc but still pretty neat. I don't know if I will try to restore since its so small but I have options since it was free! Tried loading pics and receive error message. -
please help, what would you do?
made2care replied to made2care's topic in Venture and Venture Royale Tech Talk ('83 - '93)
I was on my way out of town when I chatted with the gentleman and he gave me the bike. I will be back home Friday afternoon and will take pics of it and post it here. It was black and from what I remember only had 1 carb. He did say it was a 1965. It did not appear to be bigger than my yamaha 180 so I'm suspecting it's a 165. It's very rusted and is missing a headlight bucket. I'm still excited though!! -
please help, what would you do?
made2care replied to made2care's topic in Venture and Venture Royale Tech Talk ('83 - '93)
So I noticed this motorcycle in my neighborhood at the beginning of summer. Owner has it sitting in his driveway and never moved. From a distance it looked very similar to my blue 1967 Yamaha 180 that I spent a year restoring. I ended up selling the Yamaha and immediately had regrets. Today, I saw the owner out in his driveway, never met the guy but decided to walk up and ask him about the old bike that's Ben parked . It's in very bad shape! We started chatting and I ask him what year it was and what he intended to do. He responded, it's a 65, do you want it? I replied if u r giving it away, I will take it! So now .......... looks like it's a Honda dream. I pick it up Friday. Geesh, what have I done!! -
please help, what would you do?
made2care replied to made2care's topic in Venture and Venture Royale Tech Talk ('83 - '93)
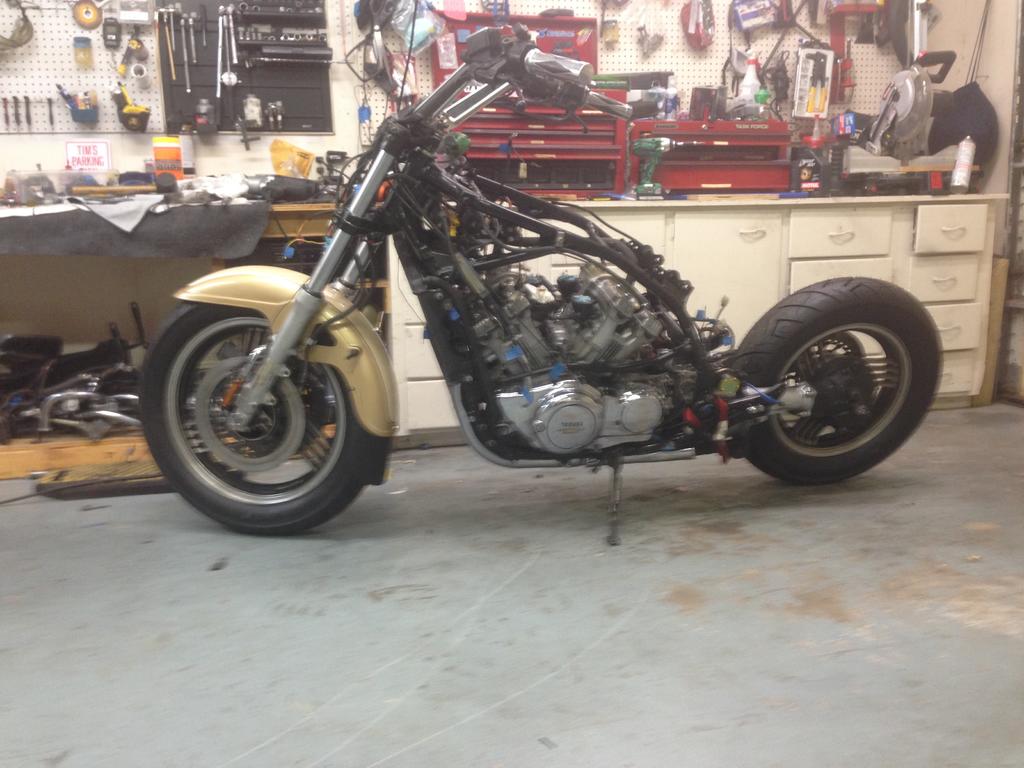
Well, ladies and gents, she is now officially a roller again. Sitting nice and healthy on her newly reinforced frame. Since I purchased her in March many hours have been spent to rectify various blemishes and many more remain but I must state this, getting her back on her wheels is definitely a milestone. I really appreciate all the help and guidance from many on this forum thus far and am looking forward for more help in the months to come.
-
please help, what would you do?
made2care replied to made2care's topic in Venture and Venture Royale Tech Talk ('83 - '93)
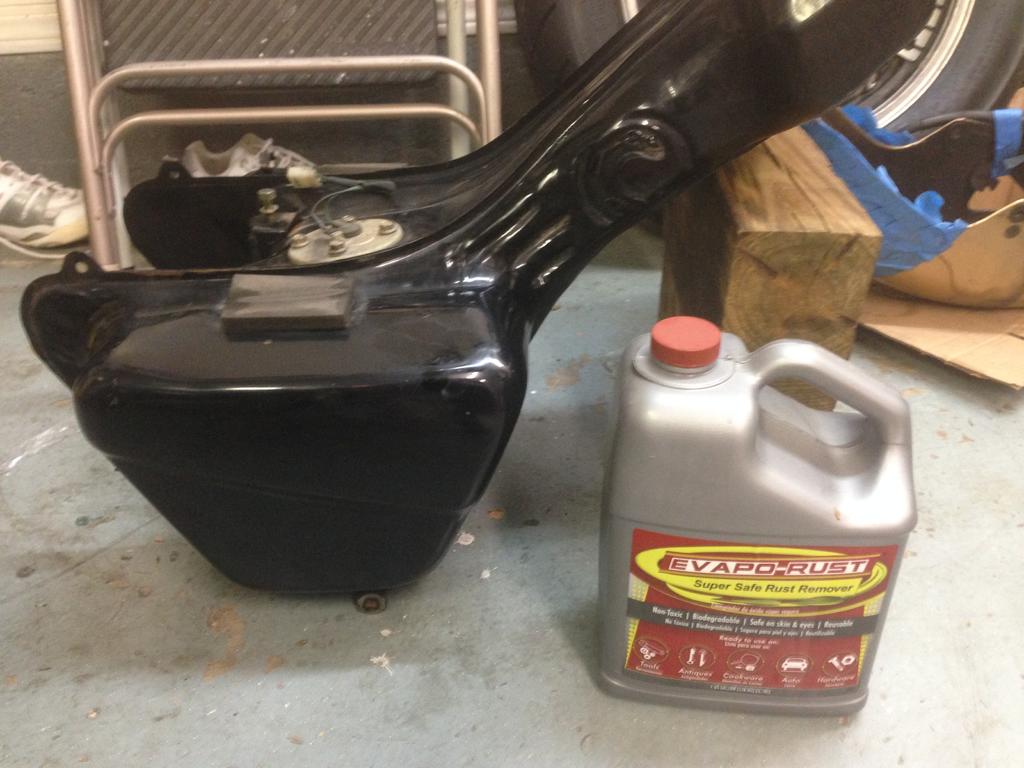
Get excited since I'm close to placing wheels on but decided to derust gas tank. This morning on my way to the shed to get gas tank, a kite(crazy bird) swooped down and almost took my head off! Little bastard!! Come to find out, the entire town is having issues with these birds. A local golfer just the other day ended up going to the ER for stitches. Anyway, I called a a few crack shots to help out. After barely retrieving my tank, I cleaned the exterior, sucked out the loose rust and the poured in some Evapo- Rust. This stuff is great but is pricey, so I just fill it almost halfway and rotate every 2 hrs. While that's working I might move to wheels and handle bars.
-
Draining the fuel tank
made2care replied to Herm1221's topic in Venture and Venture Royale Tech Talk ('83 - '93)
I believe you can remove the entire petcock assembly. Here is the process I would go through. Remove gas lines going to fuel pump. More than likely the fuel pump has rust in it. After draining the tank, put petcock back on tank and fill tank with evapo - rust. Let sit for 2 days then drain. Flush with fresh gas. Clean lines an fuel pump. Fill tank with fresh gas and u should be good. Oh, replace fuel filter. -
please help, what would you do?
made2care replied to made2care's topic in Venture and Venture Royale Tech Talk ('83 - '93)
Mothers polish, I think for aluminum but it still works if I use fine steel wool then buff. -
please help, what would you do?
made2care replied to made2care's topic in Venture and Venture Royale Tech Talk ('83 - '93)
Mike Nixon who owns a carb business known as " the motorcycle project" . He's out of Arizona and has been working on carbs for many years. I will definitely keep your notes you have made and check everything when I get the carbs back. Thanks for the info. here is a current pic of the bike. Still have a ways to go but making progress!
-
please help, what would you do?
made2care replied to made2care's topic in Venture and Venture Royale Tech Talk ('83 - '93)
I cut the spacer in half and went with 410ml. Not as stiff but of course will only truly tell once on the bike. The first fork must have been binding or maybe i overtightened the bolt at bottom. Anyway, both are done now, onto the next part. -
please help, what would you do?
made2care replied to made2care's topic in Venture and Venture Royale Tech Talk ('83 - '93)
Okay, Earl (Skydoc) was nice enough to get back with me and suggested incremental changes to spacer and oil. Thanks Earl. will do. -
please help, what would you do?
made2care replied to made2care's topic in Venture and Venture Royale Tech Talk ('83 - '93)
Okay, back home now. Rebuilt one front fork yesterday with new progressive springs. Followed all instructions. Compressed fork all the way down, poured in new fork oil (10w) 5" from top around 400ml or 13.5 ounces. pumped fork several times to remove air. inserted spring with 1 inch spacer provided by progressive. I have a diy brace i have used previous years on goldwings to thread fork cap on, worked like a charm. This fork is very stiff. I put all my body weight on it and it barley budged. Is this supposed to be so stiff? thanx I might try removing the spacer. -
please help, what would you do?
made2care replied to made2care's topic in Venture and Venture Royale Tech Talk ('83 - '93)
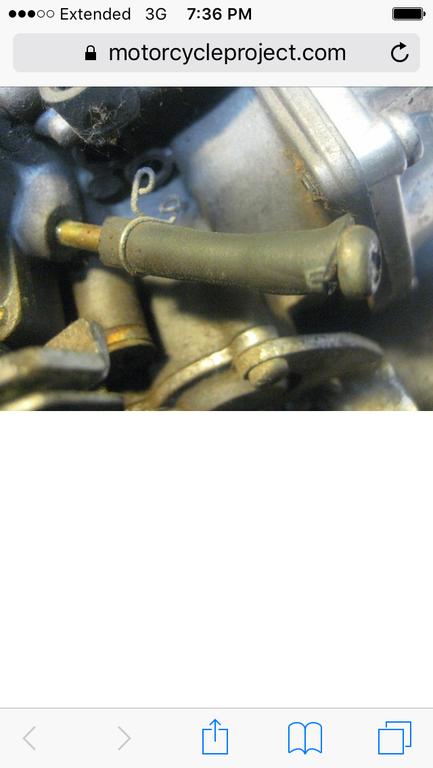
You were correct. Carb guy informed me it's been over 20 yrs since he's rebuilt one and I told him what it connects to. The Venture never had a "vacuum petcock" for the fuel tank. I suspect that he sees the vacuum port on the number 2 carb and thinks that is for a vacuum petcock. Uniquely, on the 1983 only, that vacuum port was connected to the "Boost Sensor" (vacuum advance unit that sent a signal to the TCI). From 1984 on, the Boost Sensor got its vacuum from the intake port of number cylinder. If you still have the original TCI (black label, 26H-10) you need the vacuum pickup to remain on that port on the number two carb. https://www.venturerider.org/forum/attachment.php?attachmentid=117145https://www.venturerider.org/forum/attachment.php?attachmentid=117146 -
please help, what would you do?
made2care replied to made2care's topic in Venture and Venture Royale Tech Talk ('83 - '93)
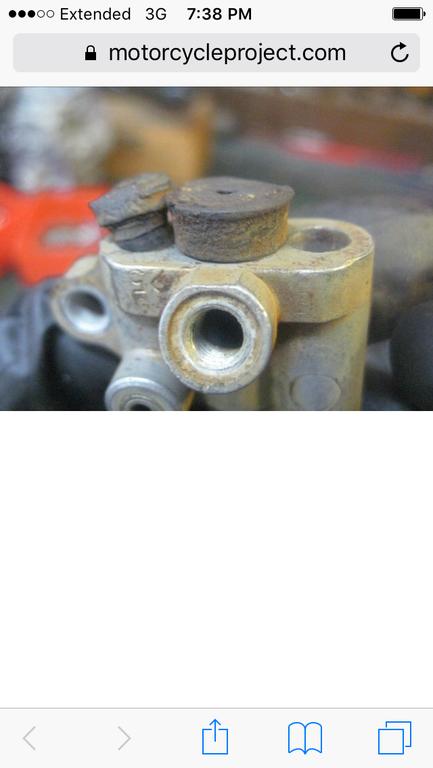
Here is a pic of what he was trying to explain. Also, there is a pic of 2 rubber plugs that are in the wrong place which will cause the bike to run extremely rich.
-
please help, what would you do?
made2care replied to made2care's topic in Venture and Venture Royale Tech Talk ('83 - '93)
My carb guy just informed me of the following: " looks like someone has defeated the vacuum petcock on the bike. Do you want a better plug for this nipple or are you intending to put the vacuum petcock back in service?" Could someone explain this to me. Vacuum petcock? Purpose of blocking off? Thanks -
please help, what would you do?
made2care replied to made2care's topic in Venture and Venture Royale Tech Talk ('83 - '93)
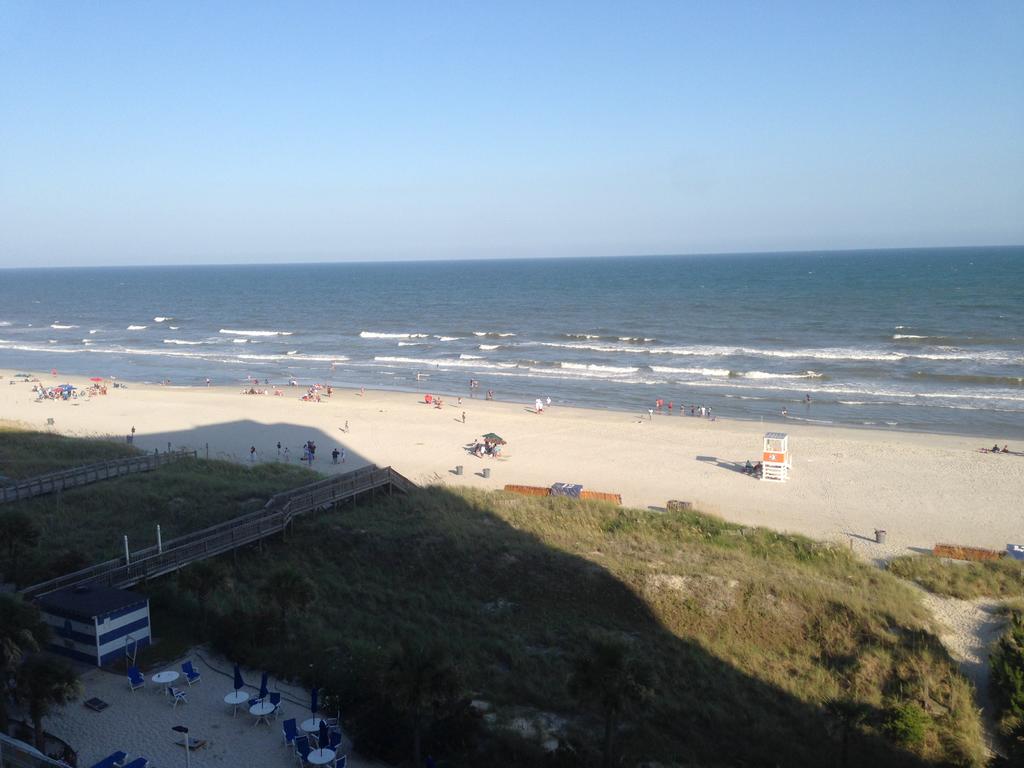
Seen some pretty cool bikes in myrtle beach! Sorry no pics but here's one of the scenery. I ordered progressive springs and will be home upon my return. Right now, some good r & r!!
-
please help, what would you do?
made2care replied to made2care's topic in Venture and Venture Royale Tech Talk ('83 - '93)
Packing for my last vacation before i go back to work next month. Upon my return the lower fork bushings should be in. For some reason they are back ordered. Also been considering putting in progressive springs, so if anyone has a fresh pair lying around and want to sell, let me know. Chow for now. -
please help, what would you do?
made2care replied to made2care's topic in Venture and Venture Royale Tech Talk ('83 - '93)
What battery should I go with and have most of you done the warning bypass? -
please help, what would you do?
made2care replied to made2care's topic in Venture and Venture Royale Tech Talk ('83 - '93)
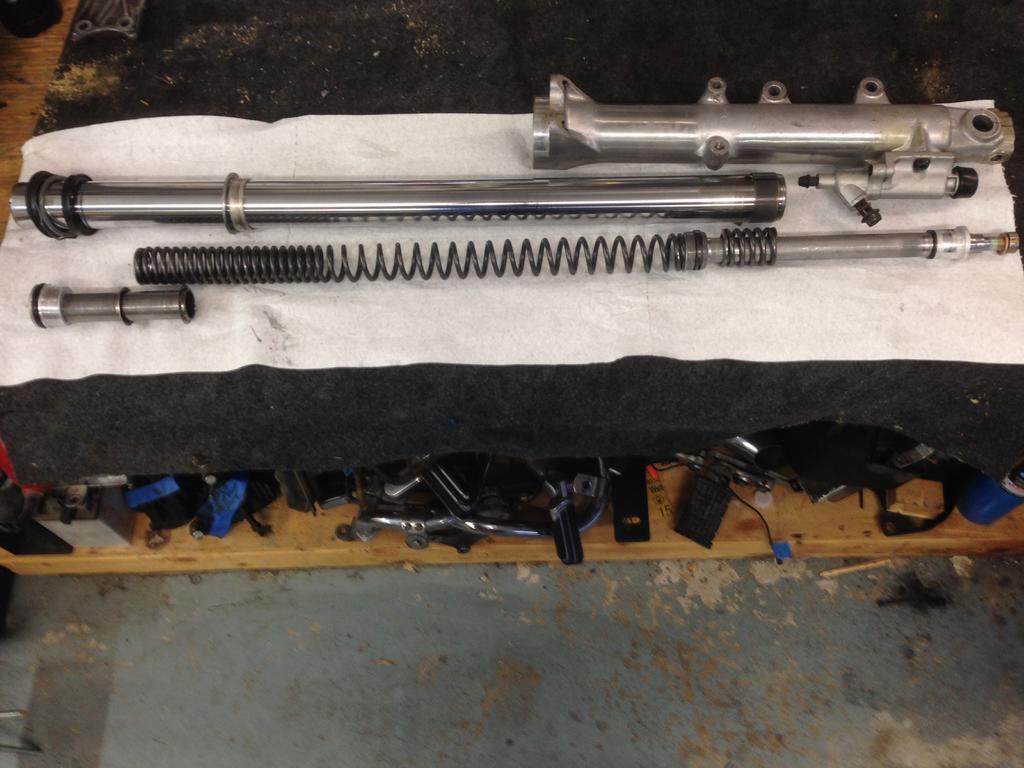
Here is a pic of the fork. Just waiting on some new bushings and seals to complete. Also ordered new tires today.
-
Fixed mid 1985 , engine # 0001413. & up. I fixed mine with the help and guidance from this forum! Good luck!
-
please help, what would you do?
made2care replied to made2care's topic in Venture and Venture Royale Tech Talk ('83 - '93)
Update! Currently rebuilding forks. I really wanted to get this bike ready to ride this summer but , not going to happen. I have another vacation scheduled in a week and have been watching hrs and hrs of Wimbledon too. Not to worry, take my time and enjoy the experience. more pics on the way. -
NGK Plug Caps on Ebay
made2care replied to luvmy40's topic in Venture and Venture Royale Tech Talk ('83 - '93)
Great deal! I just ordered some too. much appreciated bro! -
please help, what would you do?
made2care replied to made2care's topic in Venture and Venture Royale Tech Talk ('83 - '93)
the pin was damaged. no worries.