Johnnycyclone
-
Posts
137 -
Joined
-
Last visited
-
Days Won
12
Content Type
Profiles
Forums
Gallery
Events
Store
Everything posted by Johnnycyclone
-
Is there a reason you don't buy one for Venture? I just bought one off of ebay and it works great.
-
Is it possible it is leaking back through the pump and into the fuel tank? Something to consider.
-
Sounds good, let me know if you have one.
-
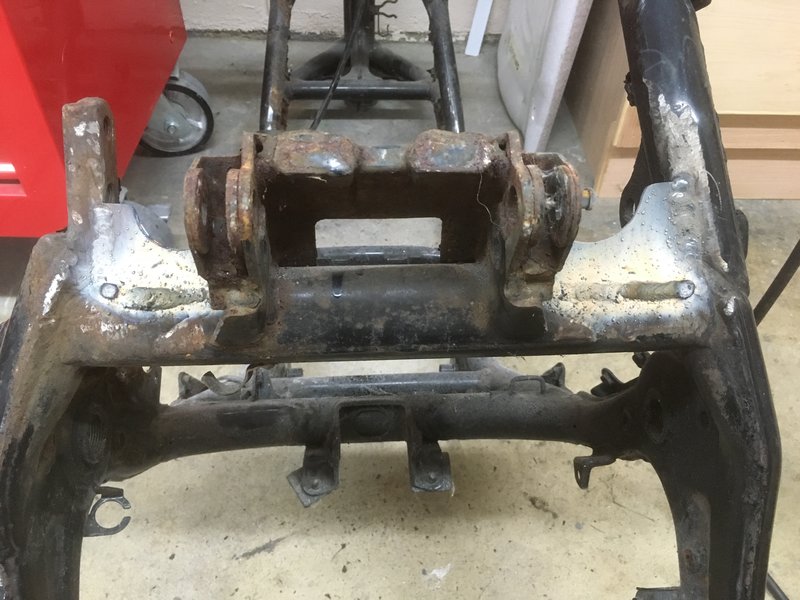
On a more positive note I got the braces for the frame welded in. So now I just need to clean up the frame a little and it's off to the powder coaters.

-
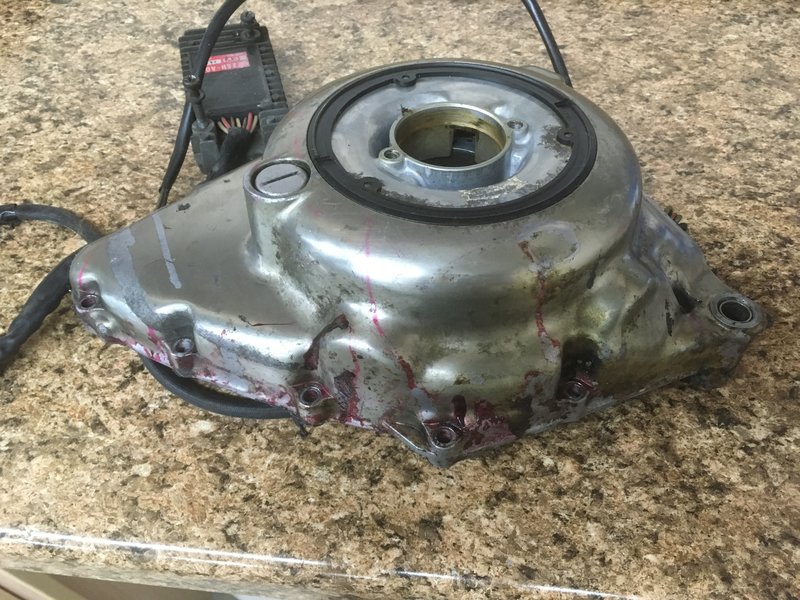
Well, we didn't get to far on the cover other than getting it disassembled. That's about the time I noticed the big dent in the bottom. I can't believe I just now noticed it, but I guess that's the way it goes sometimes. Here is a pic with the dent circled. Looks like I will be looking for another cover.
-
Wasn't aware of that, thanks for the tip Condor!
-
Yep, I have looked at those several time over the years, but really don't have any room for one and I don't polish aluminum often enough to buy one yet. But it sure would save a lot of time versus doing it by hand.
-
My job is in electrical engineering but it's 95% mechanical engineering. Anytime I need to troubleshoot electrical issues it's not as easy. I'm not well versed in reading schematics and working with electronic boards, pretty much lost. So I guess it's just what you are used to working on. I love the mechanical side and so I have always been drawn to it. Not always successful for sure, so there have been a few project failures along the way. Thanks for the comments and I hope you keep following the project.
-
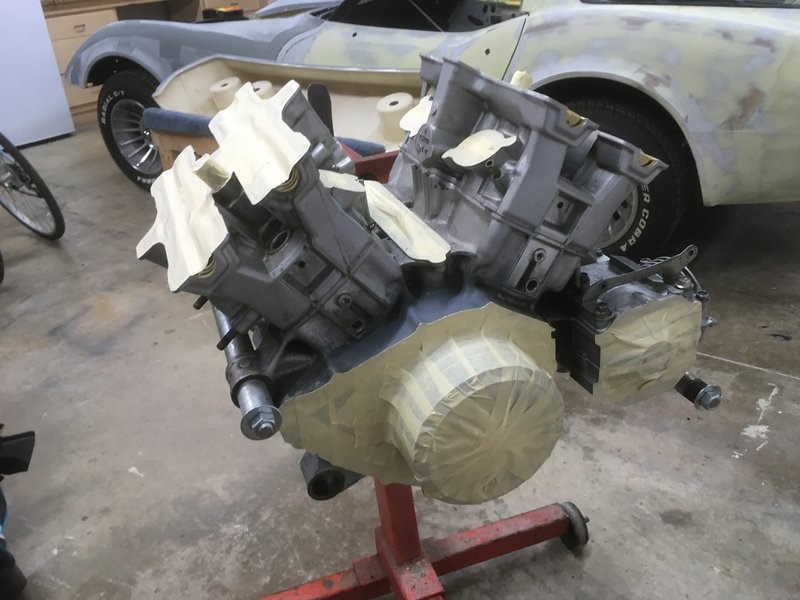
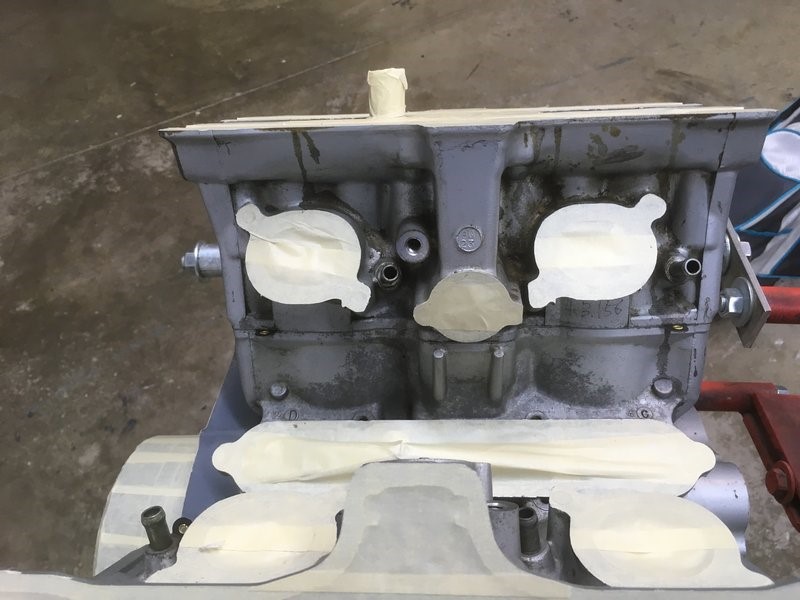
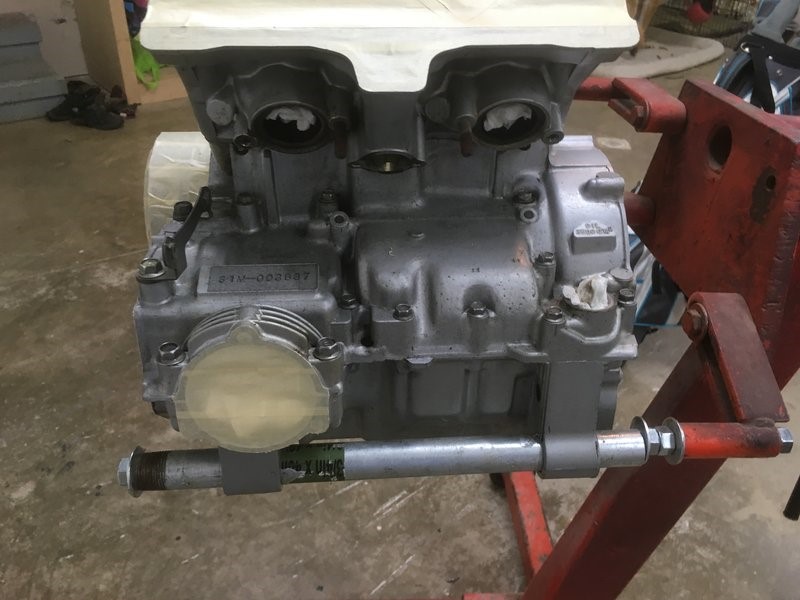
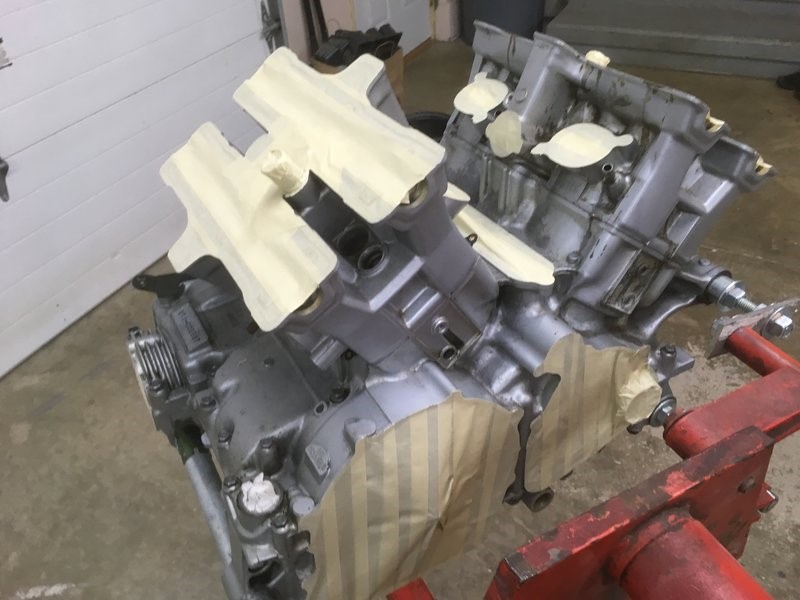
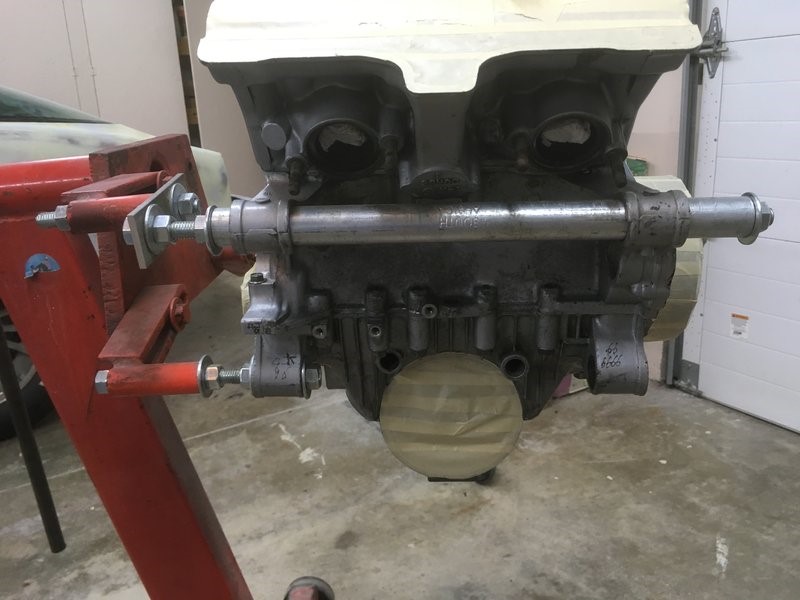
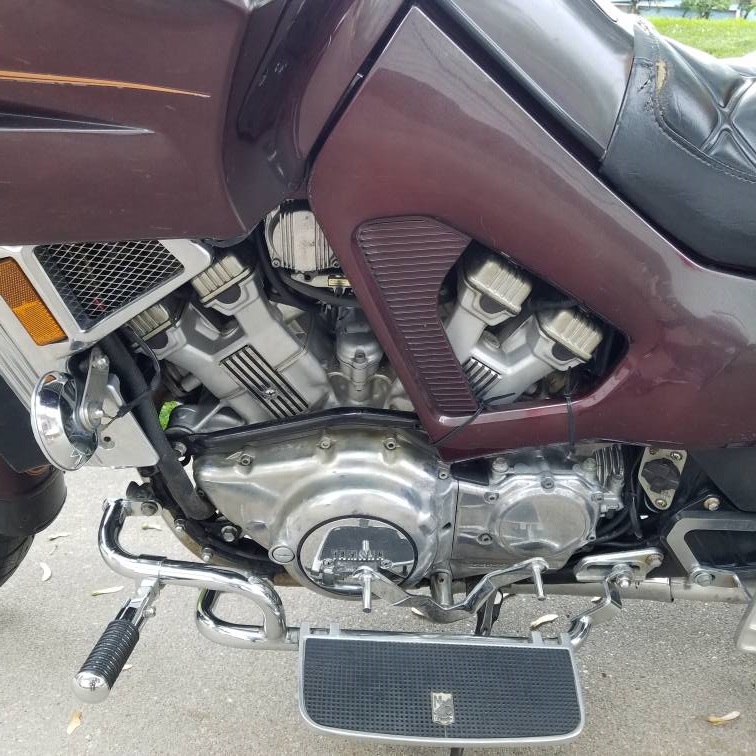
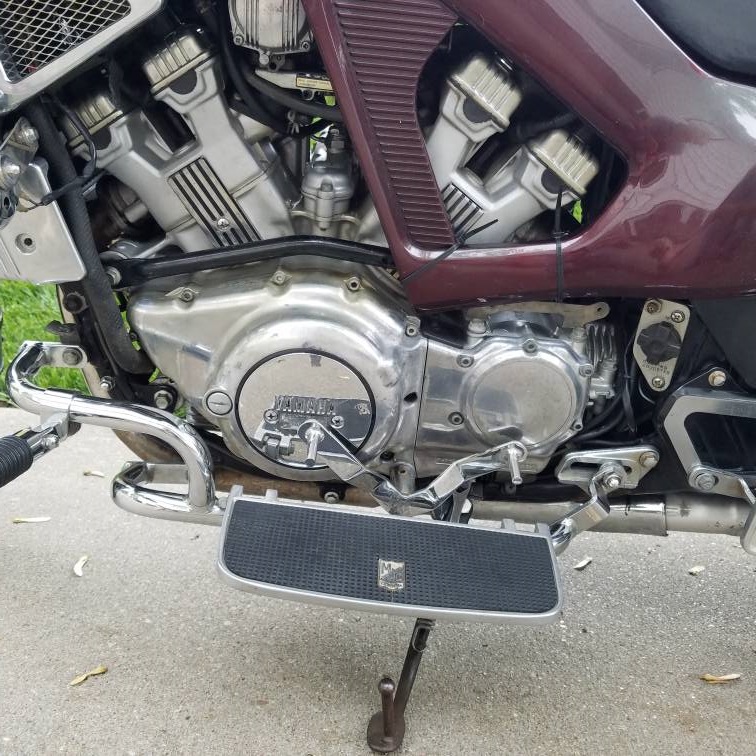
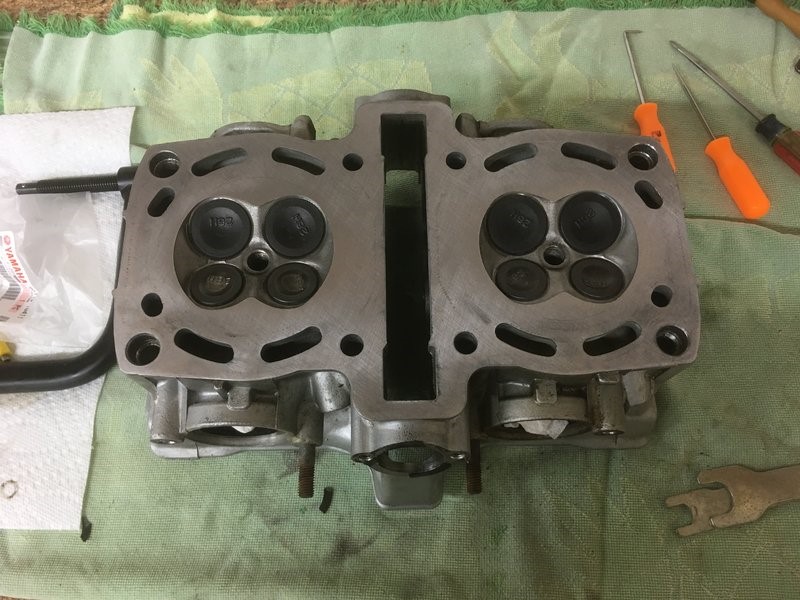
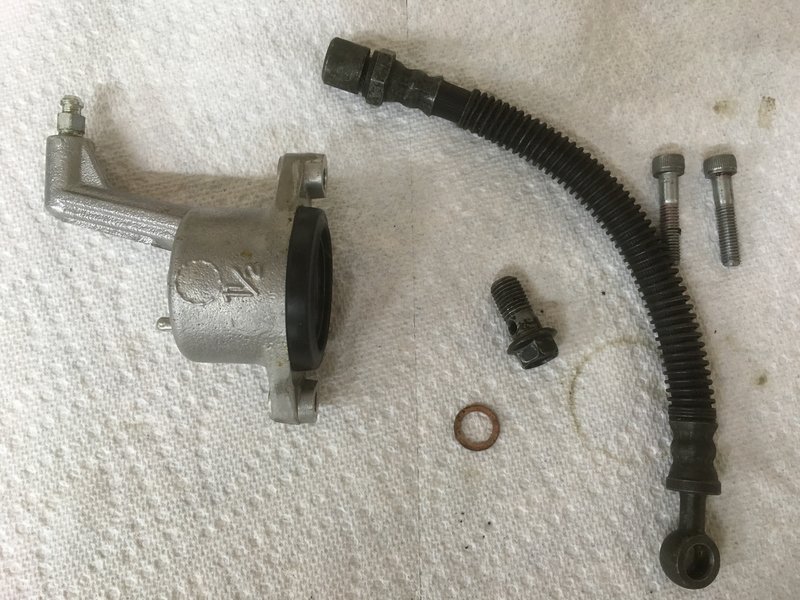
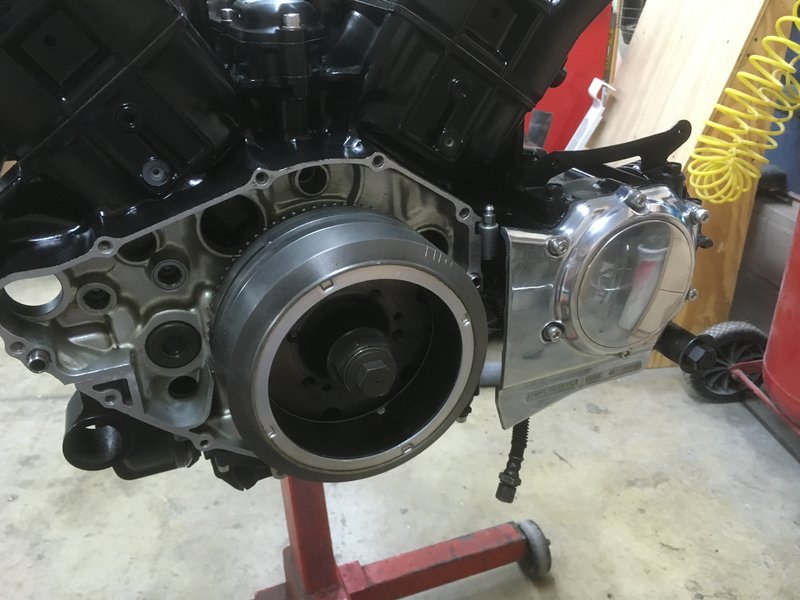
It's been a few weeks and although much hasn't been done I thought I would post a couple of pics. I ended up going backwards and had to take the heads back off. I forgot to put the chain tensioners for the cams in before putting on the heads. I have since printed out the section from the manual on rebuilding the engine so hopefully something like that won't happen again. Now I refer to the manual before putting anything back on! First pic is of the clutch. This looks pretty new so we are going to install it as is. Next is the engine case cover that I cleaned up and polished last year. Looks pretty good against the black engine. And finally for now, I put the oil breather back on along with the oil line. I'm using new stainless hardware where needed. Here's what we will probably be working on next, it's quite the mess, but it should clean up pretty nice. More later............
-
I was looking for a set of seats from a Fiero for another project and came across this little beauty, an 83 Venture with a Fiero front clip, pretty interesting. https://rockford.craigslist.org/mcy/d/1983-yamaha-venture-royalecc/6632001931.html
-
What a pain stripping off the clear and the paint, but it was well worth the effort. Here it is with a few fresh coats of satin black.
-
I took another look at this morning hoping it would change, not so lucky. It still looks like gray primer to me. So I changed my mind and I am going to start stripping it tonight. In the mean time we will be weighing the options on color. I am seriously thinking of going to satin black this time. I don't think I will be able to come up with a silvery color that I would be happy with. I think the polished side cases would look sharp contrasting with a black engine. Stay tuned.....
-
Now for a few pics of the engine.
-
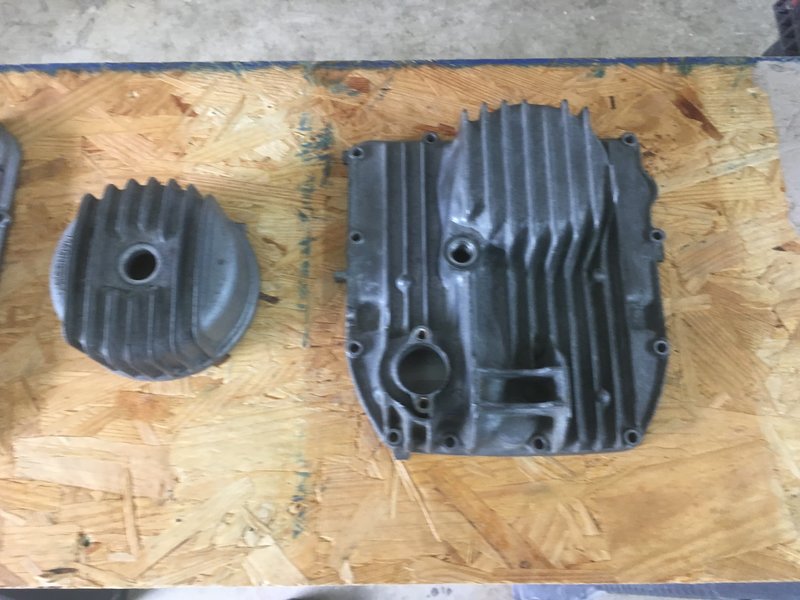
Here's a couple before and after pics of the pan and oil filter cover.
-
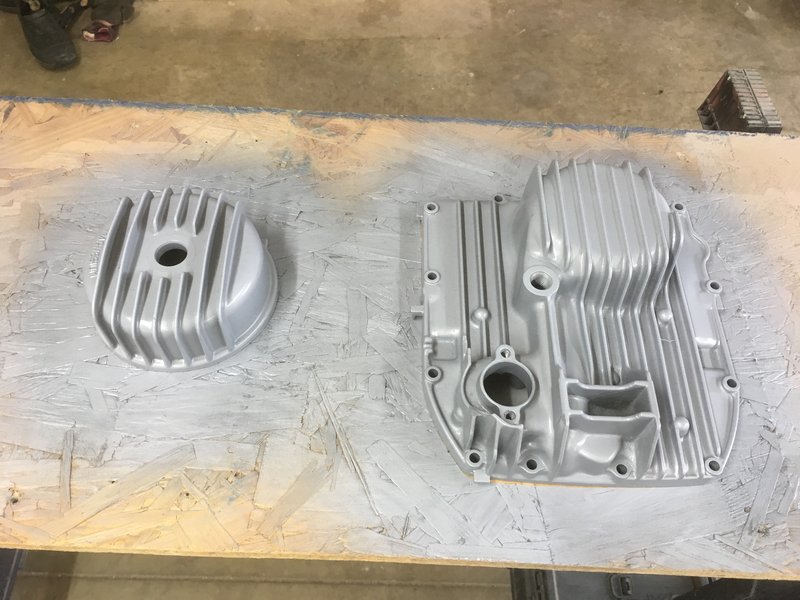
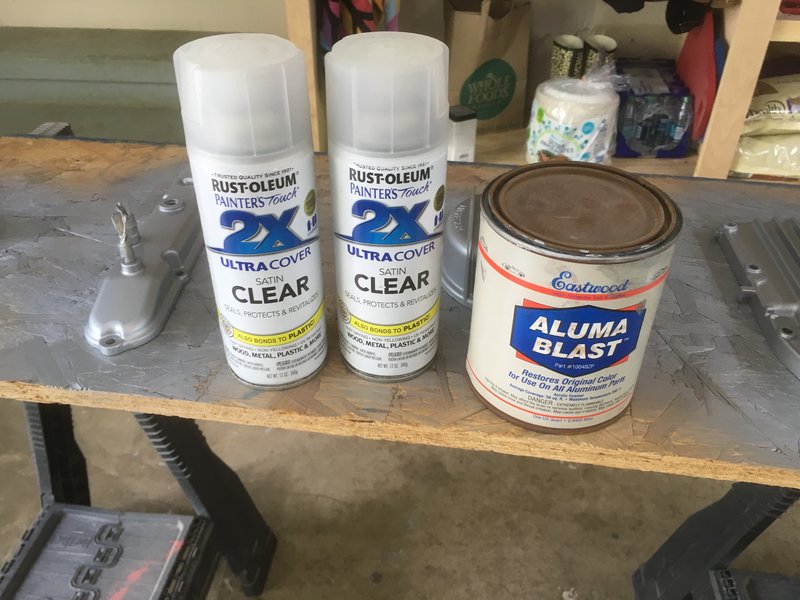
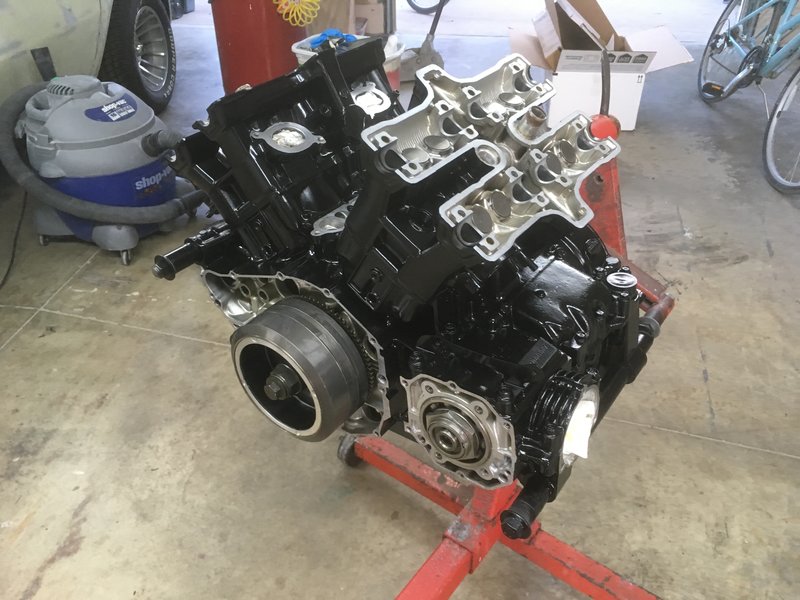
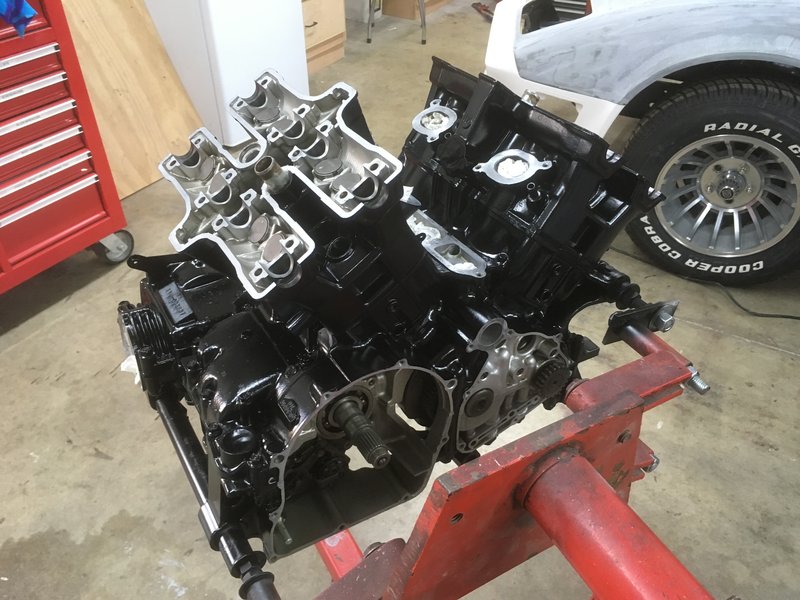
So the engine is painted, and even though I'm a little disappointed with the end result I'm not willing to strip it and redo. Way too much time to do that. Here is a pic of the paint I used, it's Eastwood's Aluma Blast. I really like the paint, it's pretty close to aluminum color, but it's not resistant to gas, so I put a satin clear on top to give it protection. What I found out tonight was the more clear you put on the more it looks like grey and not aluminum. I did one light coat and then two medium coats of both the paint and the clear. I should have stopped with one light coat and one medium coat of clear. If you look at the part to the left in the pic that is after paint but before the clear is on, so you can see how bright it is. I will post a few pics of the engine and you can see the difference. Either way it looks much better than it did yesterday.
-
Time for a small update. Even though not much has happened since the last update I was finally able to spend some time on it this week. I got the engine cleaned up along with a few of the parts that will be bolted back on. I think just about every part that could leak did, it was quite the mess. It's all taped off now and ready for paint. Planning on doing the paint work tomorrow after work. I will post more pics after it's painted.
-
Here is what I posted in another thread with the same issue. I just recently ran into the same issue on another site. The easy explanation I found was that the software for either your phone or camera isn't compatible with the software the website uses to display your pics. So on your phone or camera when it takes the picture it either saves it as a portrait or landscape image. When you download the photo the software on the site doesn't know the orientation, so it chooses how it thinks it should be displayed. So in your case it chose the opposite orientation from what your phone or camera used. One solution is open the pic in any image software and save the file as a Jpeg file, even though it's probably already a Jpeg and it will always display in the same orientation. I use Windows Paint to open and then save my pics to a Jpeg file and it seems to work fine. I also did this with your pics and saved it in all 4 rotational positions. Hope this helps.......
-
Look what you guys built!
Johnnycyclone replied to s.tyler58's topic in Venture and Venture Royale Tech Talk ('83 - '93)
There fixed.
-
Thanks gaj, I'm glad you found the thread.
-
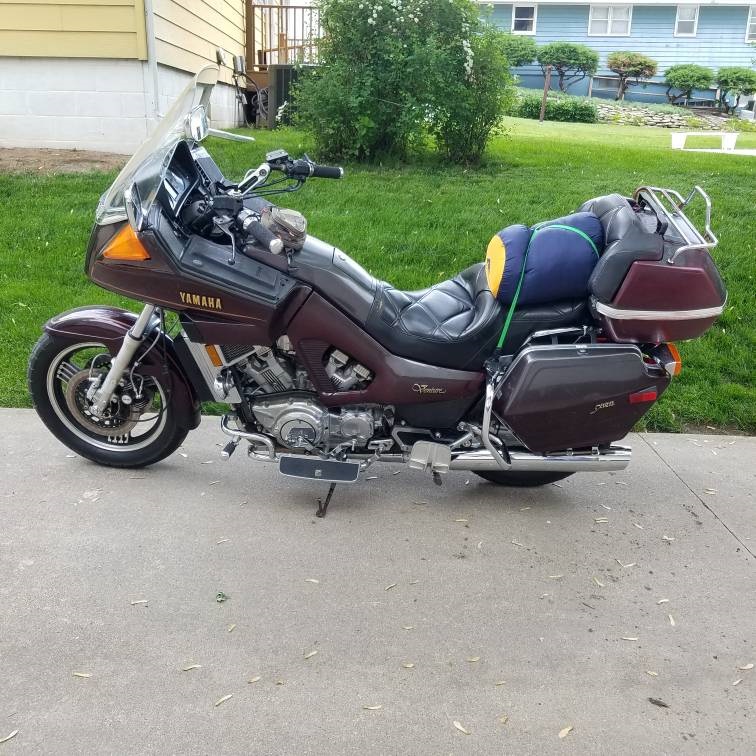
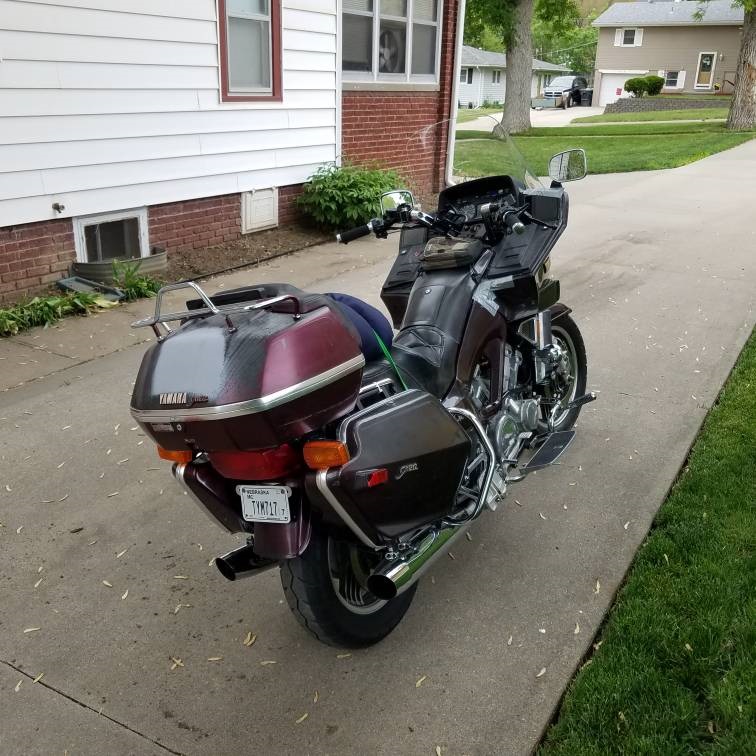
Thanks for following along and thanks for the offer on the Vmax parts. I have thought about the Vmax conversion but for me it's just not in the budget to do. I know I will have more into this than what the bike will be worth, so keeping it as low as possible is the goal. Thanks again and keep checking in from time to time, it's going to be a fun summer!
-
I'm not that familiar with the Venture cruise system yet but on a Goldwing there are switches on the clutch lever, front brake lever and rear brake pedal that disengage the cruise when pulled in or in the case of the rear brake depressed. The most common problem on the Goldwing was a worn out clutch lever that wouldn't activate the switch, so the cruise control could never be set. Others who are more familiar with the cruise control may be able to confirm.
-
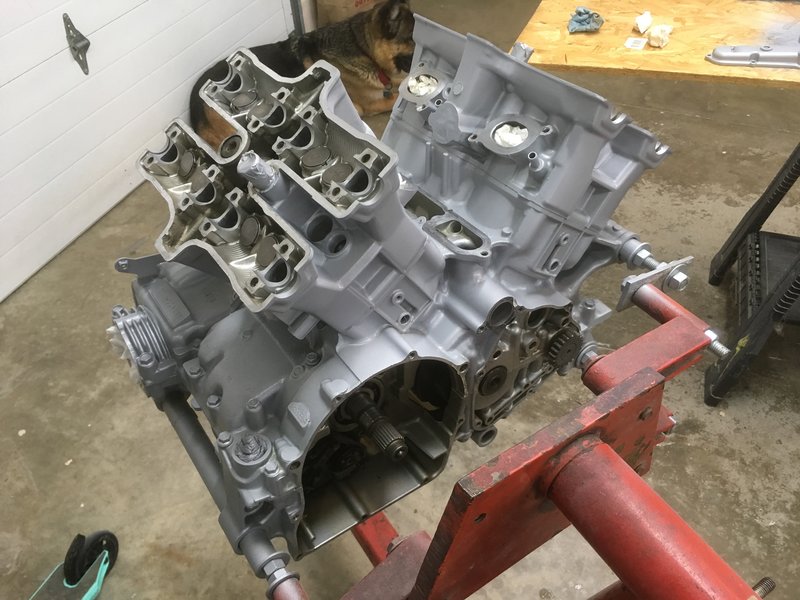
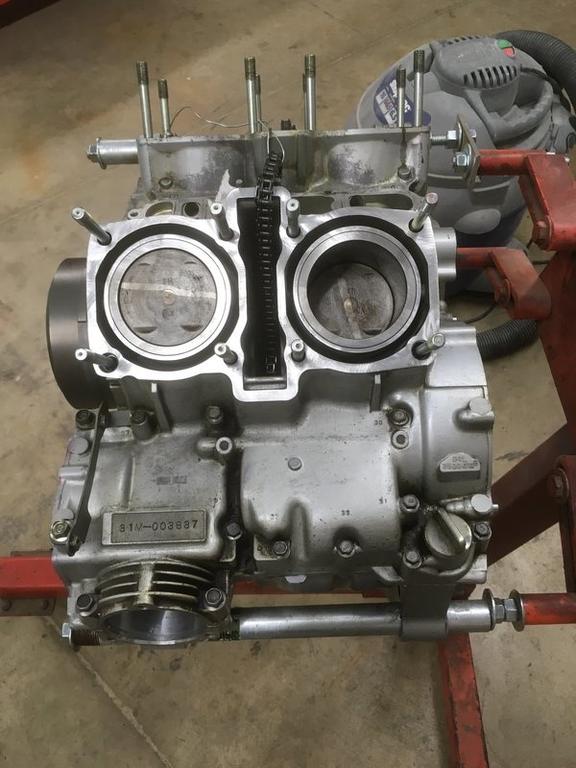
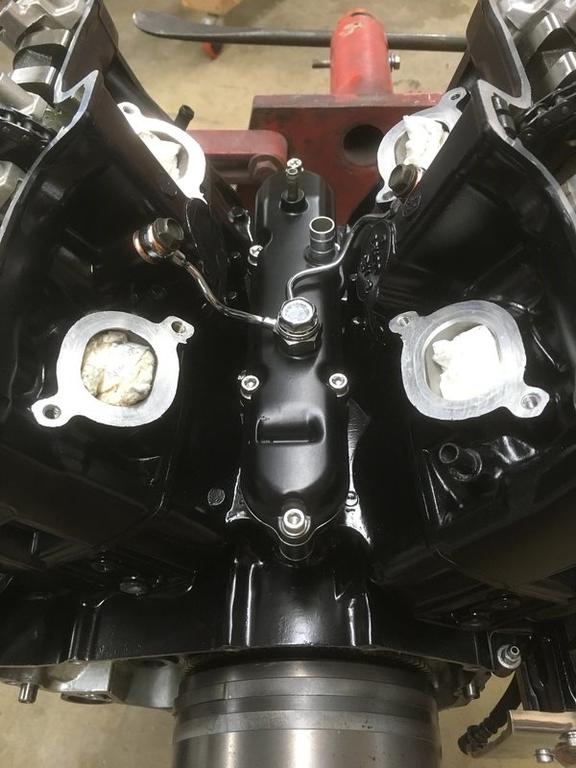
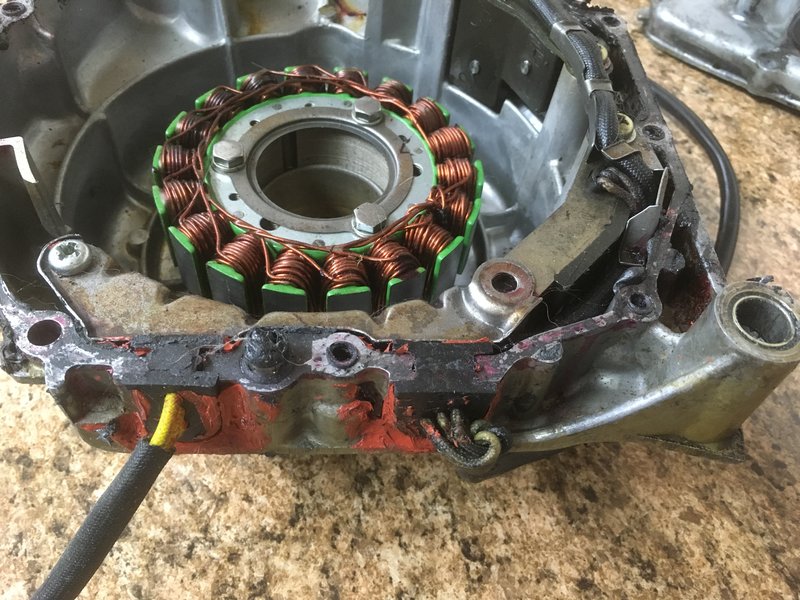
Well, after a long winter I am finally back out in the garage. I'm splitting time between two projects and this one won't get quite as much time as I would like, but the goal is to spend at least one evening a week working on it. I did manage to get the two halves of the engine back together and have started the cleanup. This engine had lot's of leaks over the years and so there is more to clean. I'm also making some progress on the heads. I pulled the valves, cleaned them up, then lapped them to the seats. I finished them up by installing new seals. One head is done and I will start working on the other one next week. Here are a couple of pics for the week, hopefully we can keep them coming over the summer.
-
Sorry, I thought that would work since they are already a jpeg file. I did some more research and one suggestion was to open the file in graphics based software and save the file. I tried my usual and opened your pics in Windows Paint, I rotated it and then saved it as jpeg. Worked fine, so if you don't mind the extra steps this may be work around for now. Hope you don't mind me testing it on your pics. By the way, looks like a nice bike and at a great price. Nice buy!
-
I just recently ran into the same issue on another site. The easy explanation I found was that the software for either your phone or camera isn't compatible with the software the site uses to display your pics. So on your phone or camera when it takes the picture it either saves it as a portrait or landscape image. When you download the photo the software on the site doesn't know the orientation so it chooses how it thinks it should be displayed. So in your case is chose the opposite orientation from what your phone or camera used. One solution is to convert the image to a Jpeg file and it will always display in the same orientation. I used Windows Paint to convert my pics to a Jpeg file and it seems to work fine. Hope this helps.......
-
Dowel Pin(s)?
Johnnycyclone replied to Johnnycyclone's topic in Venture and Venture Royale Tech Talk ('83 - '93)
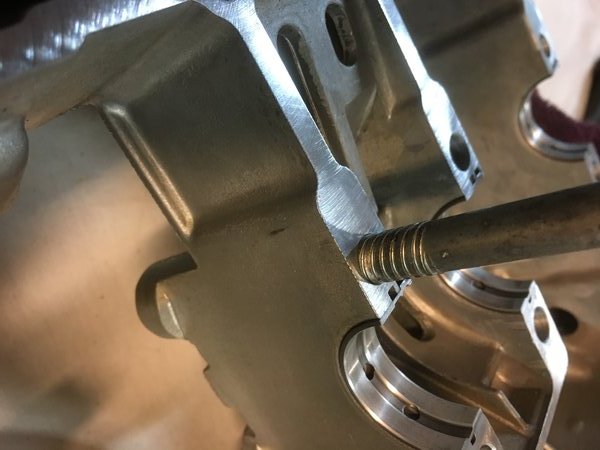
I looked into this a little closer this evening. All of the nozzles are accounted for where they should be. Here is a pic of one of the nozzles. To me they look more like an orifice. They are definitely part of the oiling system. I also checked for other possible locations for another dowel pin, there are three. As suggested I took the dowel pin and checked to see if it would fit in any of the other locations. It did not fit, and by looking at the opening and comparing it to the one with the dowel you could tell it was not finished to accept a pin. The last thing I noticed was the 8 bolts that are closest to the crankshaft have a machined spiral or flute type surface that fits very snug in the case. I believe these are used to make sure the alignment is where it needs to be for the crankshaft. Here is the pic. Finally the online parts store always tells you how many you need to order and it only says one. So I am 100% sure now there is only one needed. Thanks for the input, it certainly helps to get others opinions on what to look for.


.jpg.cf8e849a251a4d770f71e1c852c19699.jpg)