Leaderboard


Popular Content
Showing content with the highest reputation on 04/02/2025 in all areas
-
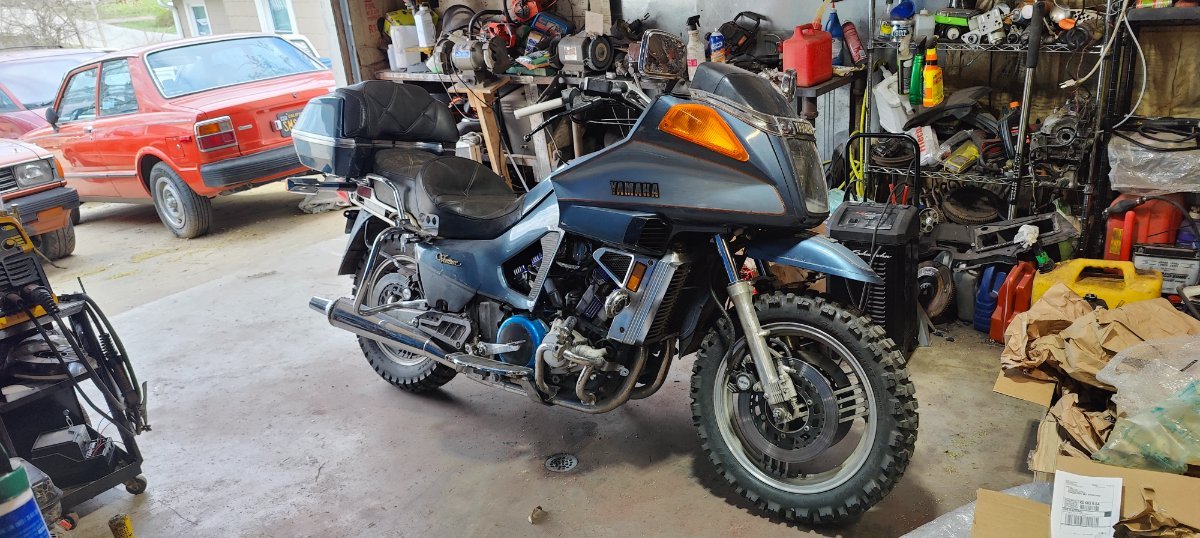
not for the 1200's. it says to warm up the bike, shut it off then check. regardless, i still did a static wet check. two carbs were smack on, the other two were way off. Fixed them aaaaannnnd....nothing changed. checked spark plug boots. Found one of the resistors had a carbon track on it, bypassing the whole resistor. Changed the boot aaaaaaaaand....nothing changed. So, this scenario is very unique to me. I have found the issue for my bike. You see, I wasnt running almost any of the plastics due to them being mostly smashed or cracked, and me wanting to be stupid and do adventure riding with it. Which means the air box is out in the open. From a hunch, while on the highway when it was surging, I decided to cusp the air inlet on the box to help stop the wind shear blowing across it aaaaaaaand...the surging stopped. Removed my hand, surging started again. So, I went back home, reinstalled the fake tank lid, and what do you know, that was it. Turbulent air was causing my lean surge. At least I can ride the bike without the annoying lean surge. Also threw on the messed up side covers. Makes it look like a big Seca~
 1 point
 -
It’s a few days of the best riding you could ask for, not to mention the time setting around the fire hearing and telling stories. Some of them even true!!! I’ve made the last 4 years and it’s a ton of fun with some good people. I recommend the trip if you can.1 point
-
Hi Carl, the bike is in great shape, especially for it's age. Plastic is all excellent although previous owner reinforced some pieces of the fairing but looks good. All the extras still work, radio, cruise, air controller. Next time there's a get together I'll bring this one down so you can have a close up look, Mark1 point
-
Sorry but the Stebel harness was not one of my products. It should be a very simple harness. Connect the OEM plug to a relay to energize the coil and run a fused line from the battery to one side the Normally Open (NO) contact of the relay and connect the input for the Stebel to the other side of the NO contact. Push the horn button and the relay closes making the horn blow. The tricky bit is making sure the relay is rated for the current needed for the Stebel horn, size the wire and fuse accordingly for the current needed by the horn. I could build one, but not having a Venture around to determine what connector is needed or estimate the length or wire needed, I would need some help in the form of pictures of the horn connector, and estimate of length of wire needed to get from the battery to the new horn.1 point
-
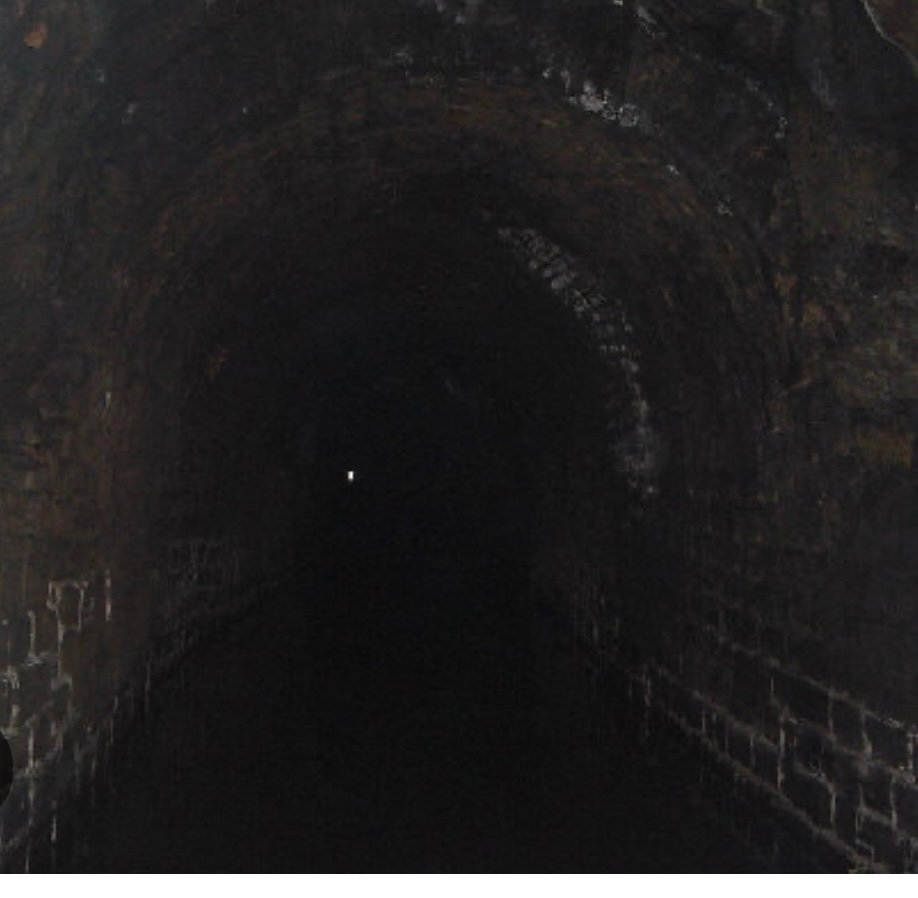
This was me coming thru a tunnel on the parkway last week. I had hit the airhorn to see how much the wife would jump at the echo, laughed at her and exited the tunnel to find carnage. Three cars, two bikes, and a hiker in a pile, parts scattered everywhere. The first car upon hearing the horn and seeing a single yellow light thought he was meeting a freight train panicked, locked the brakes and lost control wreaking havoc. Three cars, two bikes, and a hiker in a pile, parts scattered everywhere. Luckily no injuries but it took two days to figure out which parts went to which vehicle. Lawyers are recommending I add more lights to look less like a locomotive. The best news out of it was that me hitting that broken truck bumper shook two lost 10mm sockets from somewhere in the motor and landed on my floorboard.
1 point
-
Finally done with all the painting! It came out really well, and definitely gets a lot of attention now! We added a bunch of shiny butterfly stickers to really capture the "9 year old with a barbie jeep" vibes it's got going on lol:1 point
-
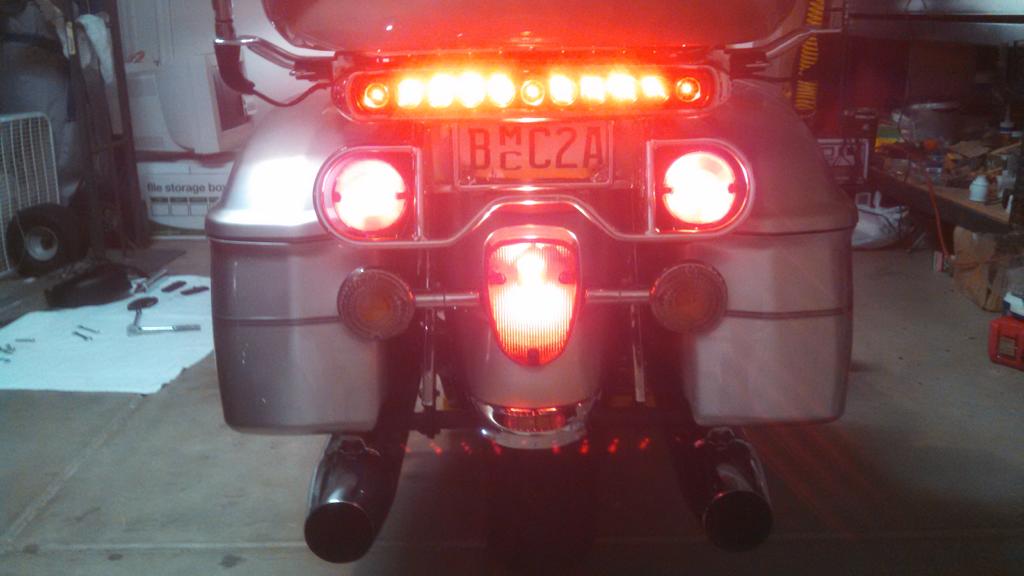
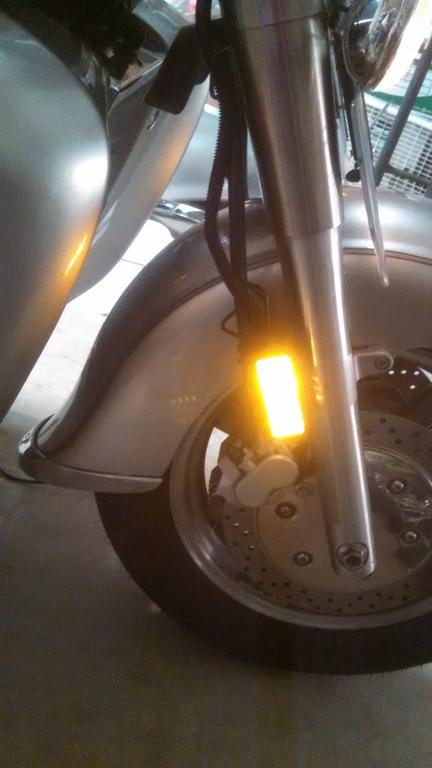
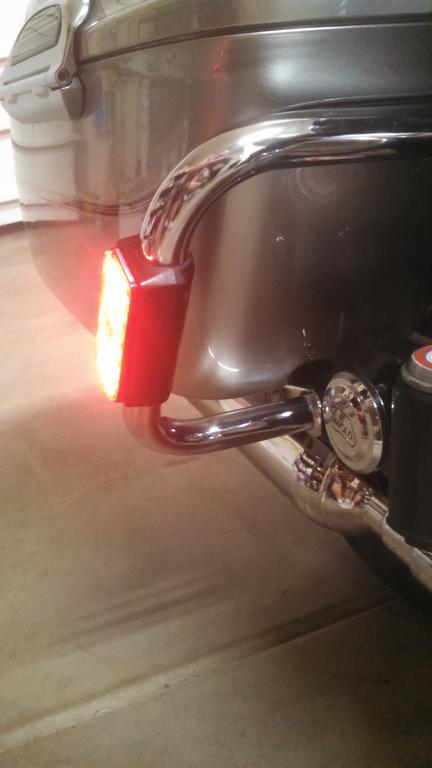
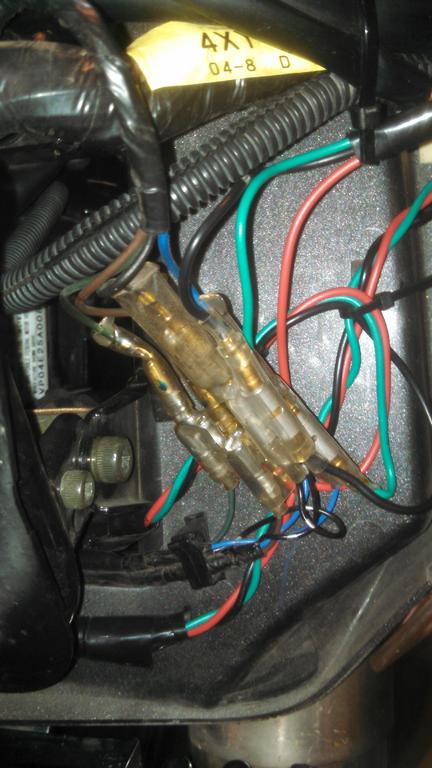
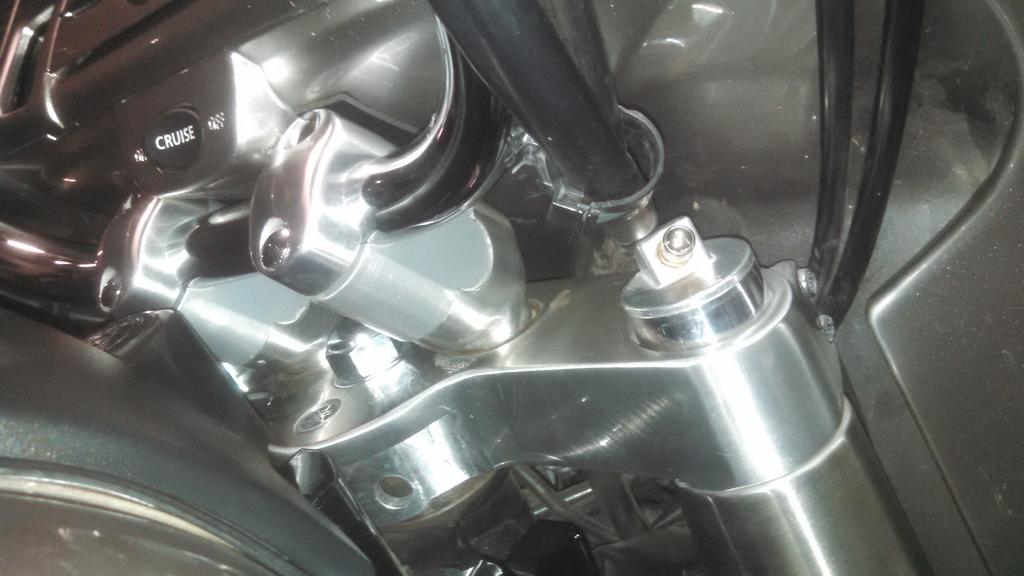
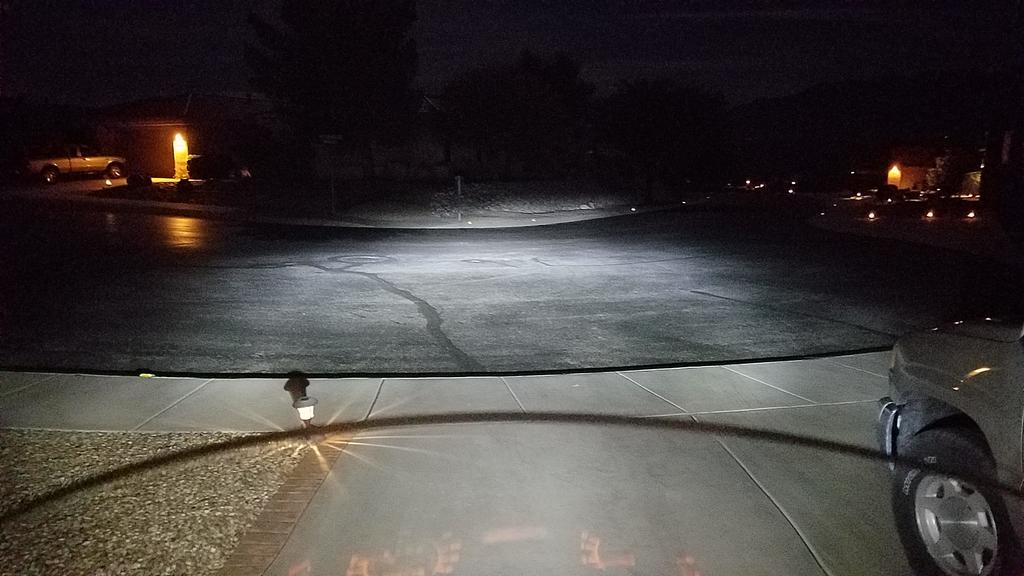
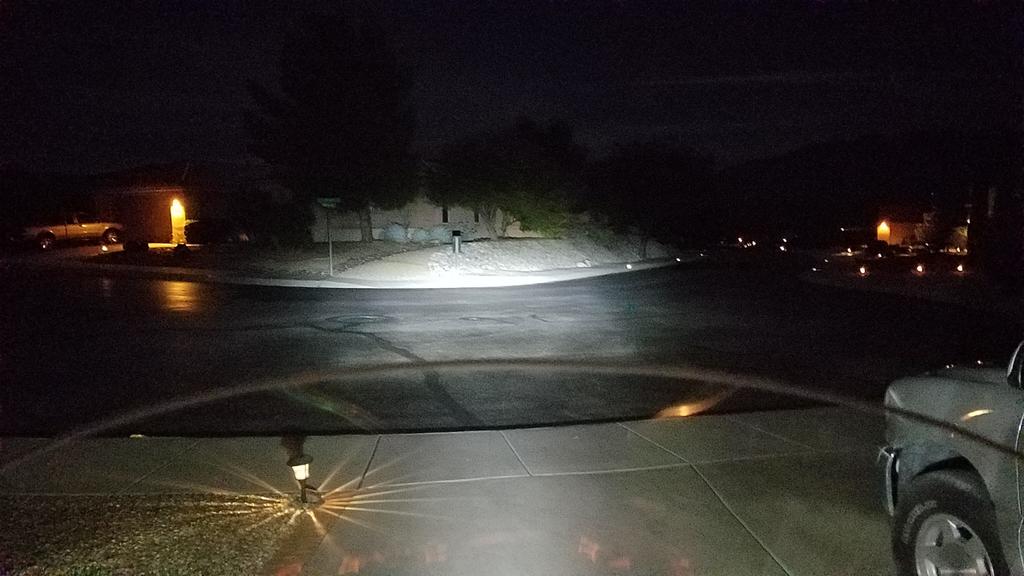
LEDs. Some ideas for you.... I replaced my headlight bulb, reflectors, taillight with LED's. Taillight was sold by Custom Dynamics, about $90. A board replacement that is quite bright. I don't see it available on their site, now, but it fit the VStars as well. Maybe available on EBay. The reflectors I replaced with 2 cheap 2-way LED boards that fit almost perfectly into the reflector spaces...and wired to the taillight and front running and turn signals through plug and play adapter cables sold by a member here. Added an LED strip under trunk and HD style tail light kit for additional running and stop lights. Headlight bulb was a Dot approved LED with low beam cutoff and passive cooling. Fit fine and works very well. Also, you might want to consider the ignition switch modification. As stock, Yamaha runs a ton of current through the switch. Member that makes the plug and play cables also makes a plug and play set up that routes most of the current through a relay instead of the switch. Easy installation, like all of his stuff. Look up above under classifieds, member venders. LEDs in rear Reflector LEDs..run and turn blink. Wires run through rear guard, up front forks. Plug and play accessory cables from Steve. I've used his stuff to wire in the XM radio power, rear lights, front leds and soon the small front spot lights I'll be mounting on the forks. I used the 12 volt power center located under the dash on the lower left side of the fairing. Pics of the headlight pattern. High beam does go out nicely! Much better than stock in both reach and width. Low beam... High I also lowered my front end about an inch. helps level the bike, gives me more flat feet room and makes the low speed handling a touch easier. Currently run 0-4 lbs air front shock, 30lbs rear shock. Front tire at 38 and rear at 40. I change rear to 35-40 for 2 up. david PS. love your part of the country. Spent some time just East of Knoxville picking up my travel trailer. Strawberry Plains Best Western! Been through that area a lot in past few years. Will have to plan a detour south to your area by the Tennessee River next time!
1 point