Search the Community
Showing results for tags 'spring'.
-
I have an 83 venture with a lot of good parts, water pump, rebuilt last year stator still good tci, works carb assembly fuel pump coils good head light assembly have trunk and side bags this bike was on the road last year and run great it just started leakin oil and second gear is gone I had the bike runing this spring. I was going to put this stuff on e-bay but I thought I'd give you guys first shot
-
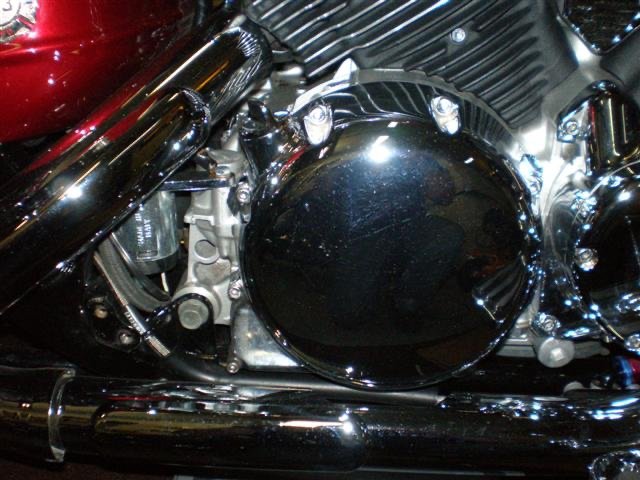
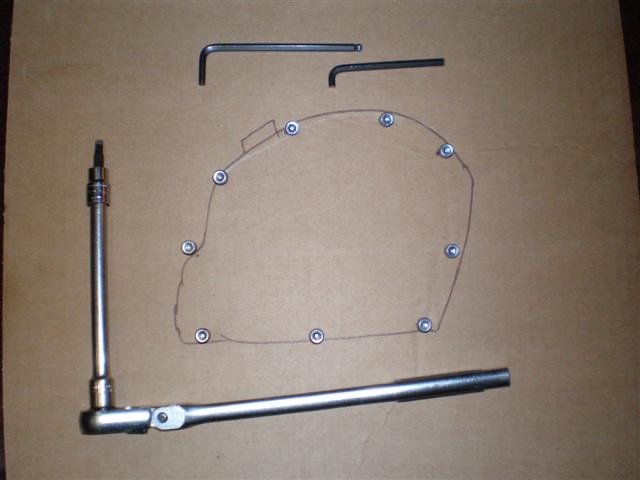
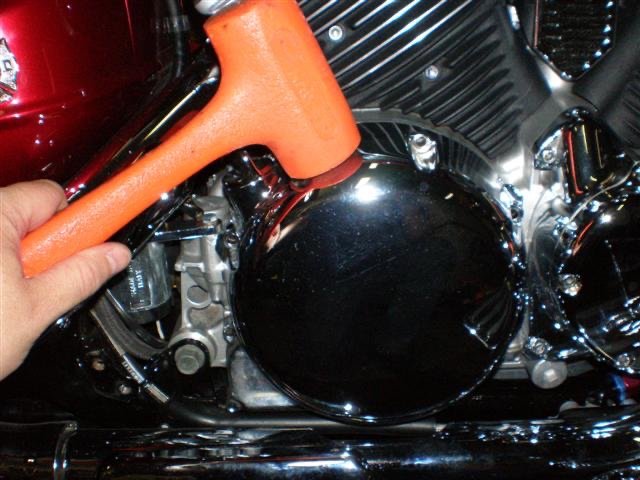
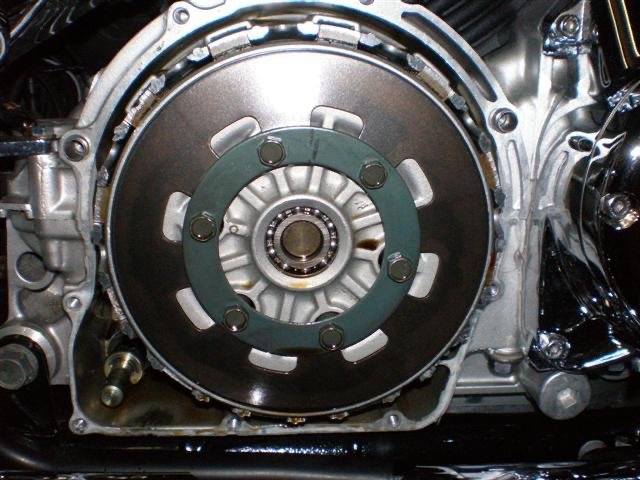
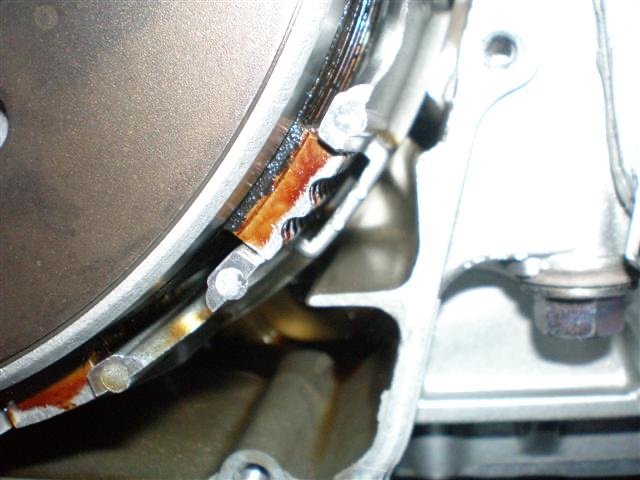
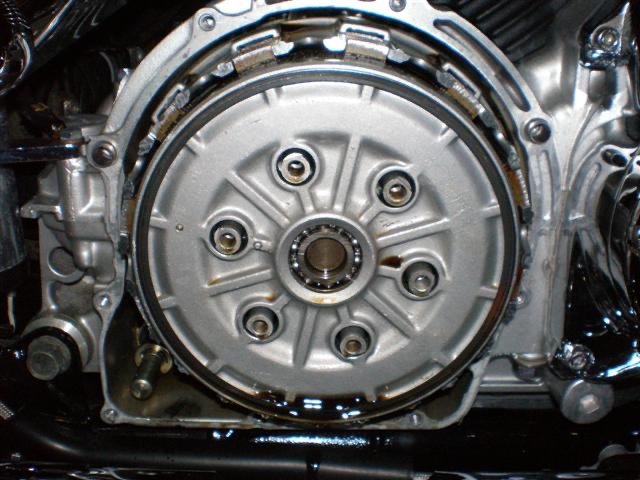
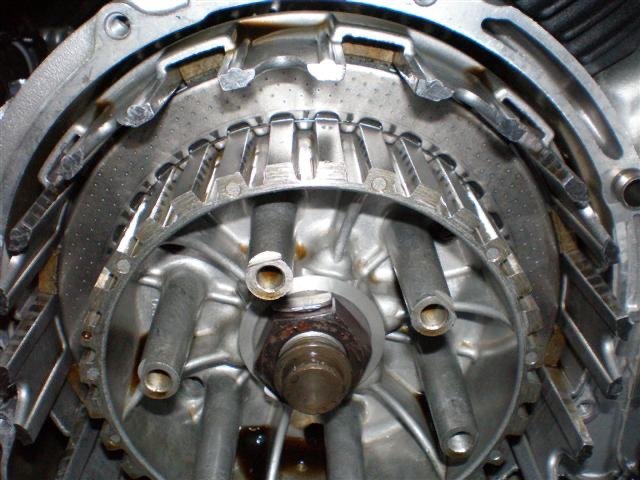
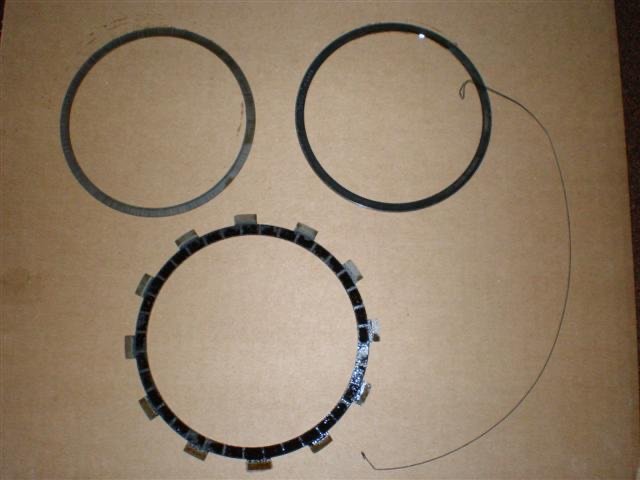
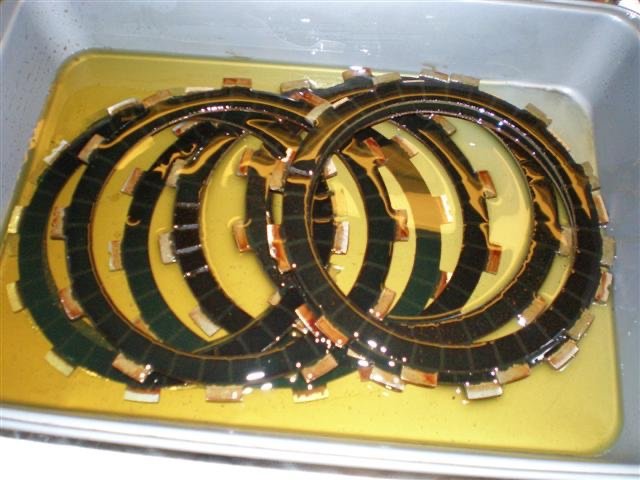
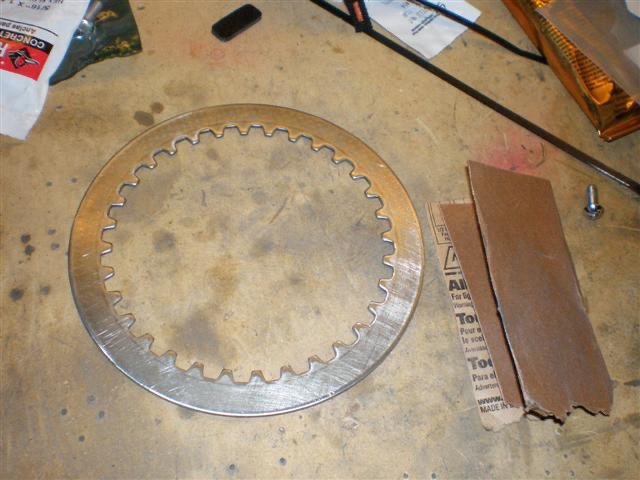
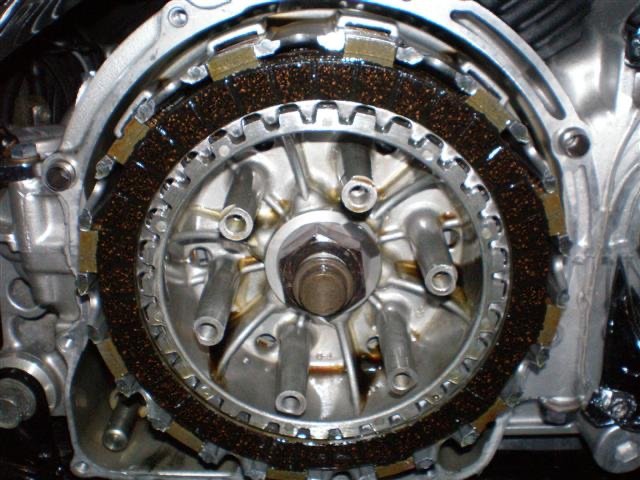
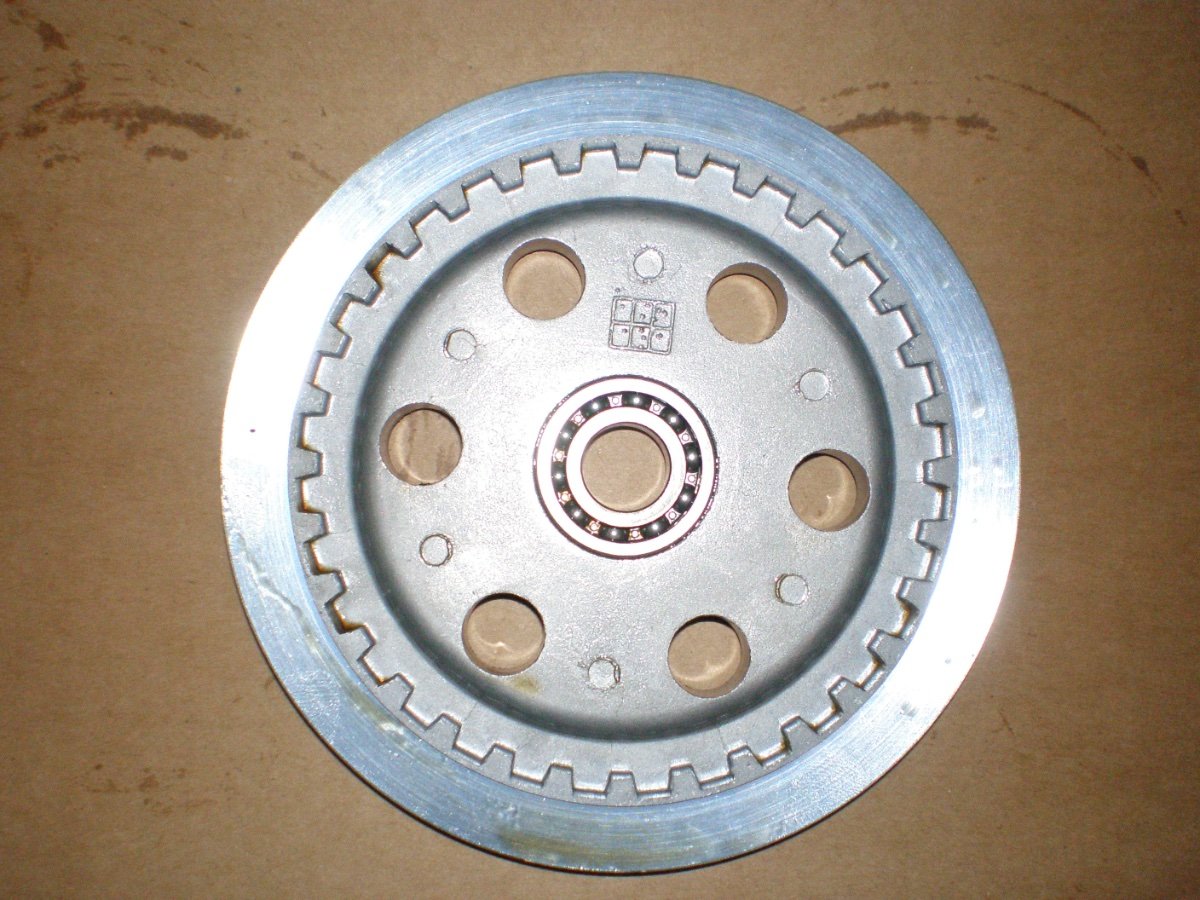
RSV Instructions for Clutch Removal, Install and Upgrade. Thanks to Tartan Terror for this GREAT article. These are instructions for replacing the clutch on a Royal Star Venture. As part of the install on my bike, I also did a clutch upgrade which involved removing several parts and installing an additional full size clutch disc. I found that with this upgrade, I was able to eliminate all of the slip that I was experiencing. At the time I did this upgrade, I also installed a heavier spring available from PCW Racing that also made the clutch more firm. With these instructions you will also be able to do a clutch on your bike completely to stock also. First you need to remove the cover located on the right side of the bike. It is the round cover just in front of the horn. You will need a 5mm Allen key to remove the bolts. In my case, I used a ratchet with a 5mm Allen bit and a ball head Allen key also. To make the removal easy, I also took an old 5mm Allen key and shortened it so that I could loosen the bolts behind the exhaust without removing or loosening the exhaust. When I removed all the bolts, I drew a shape of the cover on cardboard and place the bolts in holes placed in the cardboard so that the bolts will go back in the proper holes. Next you need to gently remove the cover. I did not need to drop any of the oil out of the engine. Although it is a wet clutch, when the engine is not running there is very little oil in the clutch area. Gently tap the cover with a dead blow hammer or something that will not mark your chrome. Remove the cover and clean the old gasket off the cover and surfaces on the block of the engine. When the cover is off, make note of the marks in the clutch basket and on the clutch friction plates. On the basket you will see at one point (5 o'clock position) there are two marks in the basket. You will also see that the with the discs in that all the discs have two marks also. At the 11 o'clock position you will also see one mark in the basket and the same mark on the friction plates. These marks are very important when you reinstall the friction discs. They MUST be lined up. Next you will need to remove the small plate on the outside of the clutch. It is held on by 6 bolts and you will need to use a 10mm socket or wrench. Remove the small plate and spring. Be careful because there is a small metal ring that sits in the pressure plate in a groove under the spring. You now need to remove the pressure plate. All you need to do is lift it off. After you do this, remove all the friction discs and steel plates from the clutch basket. All the way in on the cutch, you will see where you took the plates and friction discs out, a wire. Remove this wire. You will need to break it. This holds in a steel disc like all the others, a half disc and a spring washer. You need to take all of these out. These parts are the parts that you will trash if you choose to upgrade and put in a full size disc. If not, keep all these parts and take note how they come out so that you can return them as they came out. Make sure you get everything out. There is a flat steel washer in there that you have to work at getting out. It does come out and when you get it, the inner surface will be completely flat. Below is a picture of the parts that will be discarded in place of a full sized plate. The plate you will use is the same plate and part number as the rest. Whether you are installing new friction discs or just upgrading and installing one new one with all the others, they must be soaked in oil. As the RSV is a wet clutch, the discs are meant to absorb oil to work properly. Next you will need to prepare the steel plates to be reinstalled. At the recommendation of PCW Racing, I sanded the discs lightly in a crosshatch pattern so that the clutch has better grip. You can also bead blast them lightly as well. Now you are ready to reinstall the clutch. If you decide to use the original clutch parts (the small disc, washer and plate) do so now and install a wire in the groove to replace the one removed. If you are doing the upgrade like I did, you will now install the first friction plate, being careful to line up the grooves like specified so that the two notches match up to the marks on the basket at the 5 o'clock position and one notch at the 11 o'clock position. Install all the discs and plates alternating disc, plat, disc, plate. I also made it a point to spread extra oil on the discs and plates as I installed them. When they are all in, you will have a clutch disc on the outside and all the notches will line up. Next you will put on the pressure plate. The pressure plate has a punch mark on the front - make sure it lines up correctly with the single mark next to one of the bolt towers on the clutch basket. On the back side, you will see that the plate has splines that will match up with the teethe on the inner clutch basket. If these don't fit together correctly, the spring will not sit correctly. After you have this in then place the spring on next, making sure that the small ring is sitting in the groove on the front side of the pressure plate. Now install the spring. In my case, I installed a PCW spring which is heavier than the stock spring but of the same design. The stock spring is installed the same. If you use a Barnett pressure plate, follow the instructions that came with the kit. When installing the spring retainer plate and bolts, be careful not to tighten the 6 bolts too tight. Also, you will need to make sure that the spring is centered. There are notches on the towers that the 6 bolts tighten into that the finger on the center of the spring should rest on. Tighten evenly and crisscross your torqueing pattern. The torque is 5.8 ft lbs or 70 in.lbs. Reinstall the cover being careful not to crimp the new gasket and you are done. Like I said, I did the upgrade and I love it. It is better for pulling a trailer. One thing you will notice with the upgrade is the pull on your clutch lever is harder but not by much and you will adjust to it very quickly. I also recommend the upgrade if you are driving hard or have added stuff to get more power from your bike. Now get out and ride!!!

-
I'm looking for a good set of carbs cheap for my 850 project. Trying to get the scoot running for my brother for spring. He needs a bike to learn on before buying what he wants. He gets his learners permit this week.
-
I have been looking at ads and info on the net about battery desulfators. Given the long rest periods over our Canadian winters, I have had the experience of replacing batteries come spring and thereafter. Anybody have experience with these? They look like a great deal to me! Harvey