darylbandy
-
Posts
17 -
Joined
-
Last visited
-
Days Won
1
-
What are the popouts for anyhow? They appear to be an engineering after thought. I bet Yamaha got this bike into the wind tunnel and discovered some bad aero and these were added to fix the problem.
-
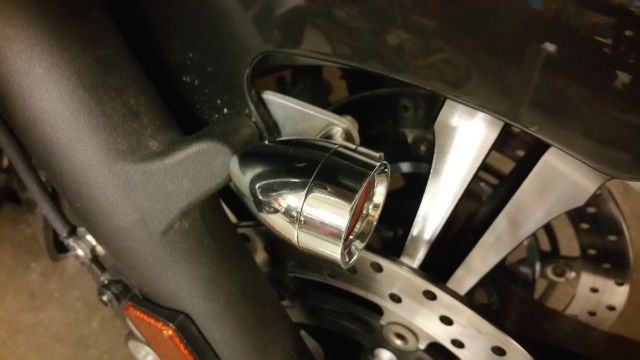
All chromed up and ready to go
darylbandy replied to JR333's topic in Star Venture and Eluder Tech Talk ( '18 - Present)

-
Got rid of the ugly brushed stainless steel parts on the bike. Wanting to do this since I got the bike.
-
All chromed up and ready to go
darylbandy replied to JR333's topic in Star Venture and Eluder Tech Talk ( '18 - Present)
Thanks for the compliment sldunker. The nice thing about hydro dipping is that there are thousands of patterns to choose from and it can be removed and you can polished, painted, powder coat, what ever you feel like doing at a later date to the part. I think I am going to put the carbon fiber pattern on a few of the ugly brushed stainless steel engine covers as well. The passenger foot rests will be powder coated to match the bikes paint. Powder coat is very durable and resists scratches. -
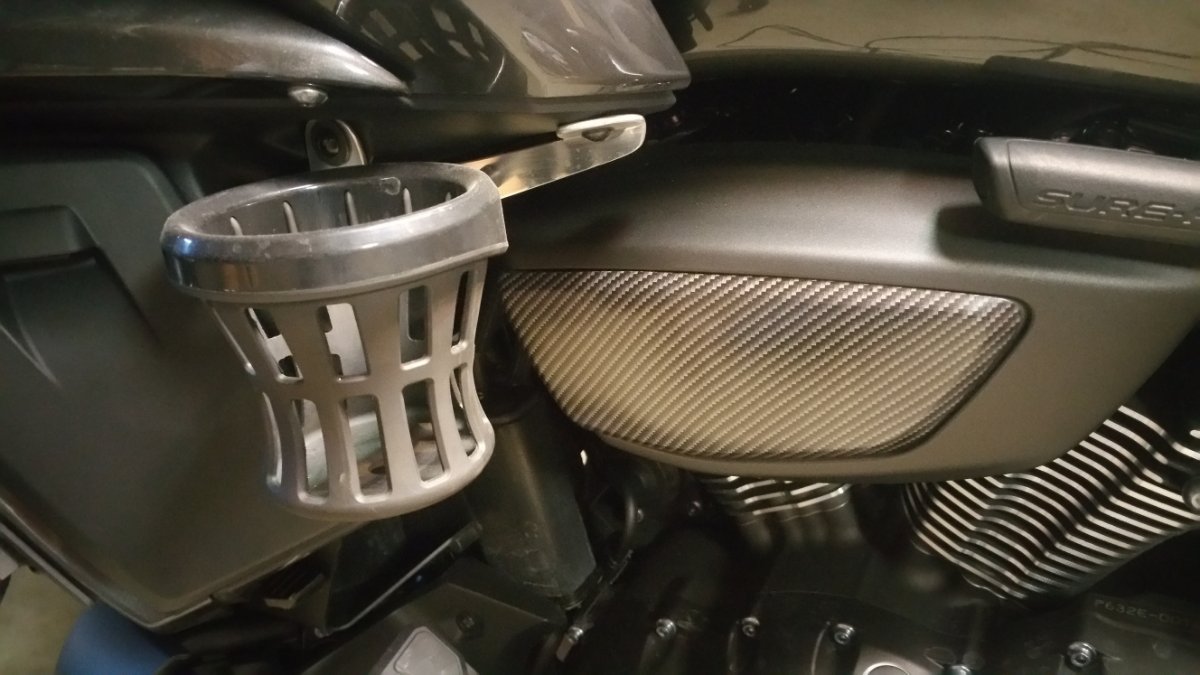
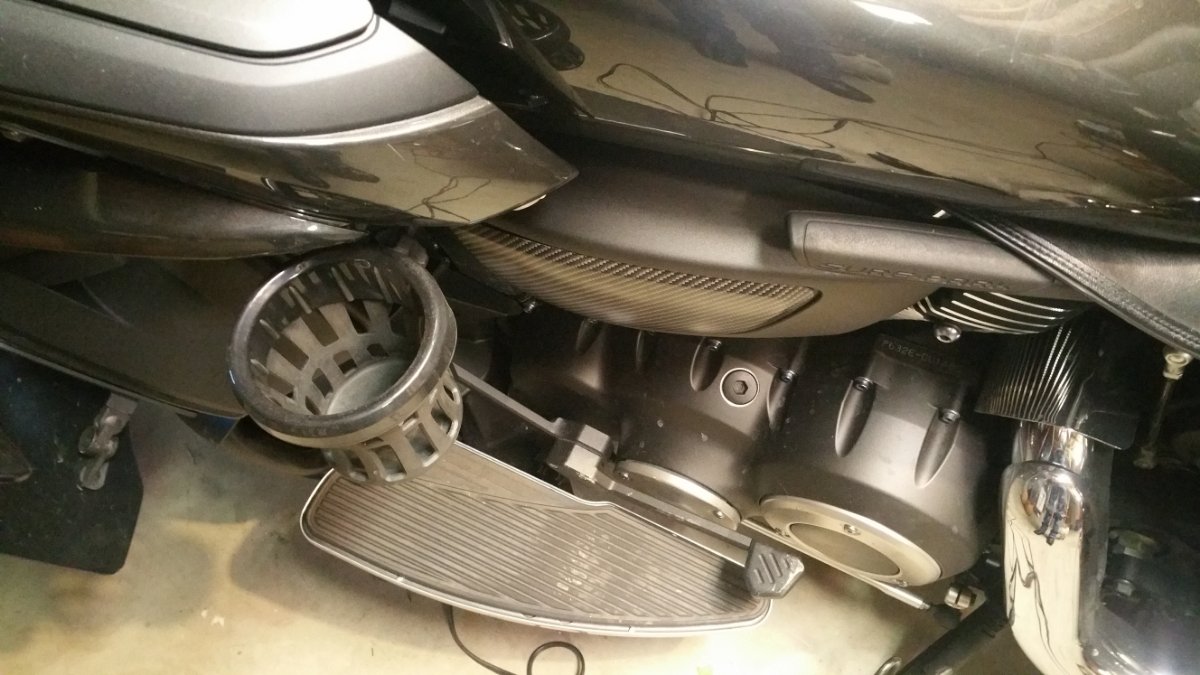
I decided to put a drink holder on the Venture and did not want it attached to the handlebar, so I made an aluminum bracket that uses the factory screws and mounting holes for the side fairing cover. Using a piece of 5052 aluminum sheet .092 thick. 5052 aluminum will bend and not crack like 6061 will. I polished the sheet metal but will probably hydro dip it carbon fiber now that I feel comfortable with the dipping process. Purchased a CIRO DRINK HOLDER WITHOUT MOUNT part #50003 and a CIRO ECONOMY PERCH / UNIVERSAL MOUNT part #50132. I really like this cup holder and it will hold a one quart water bottle with no problem. I am thinking about producing a few of these if there is any interest.
-
All chromed up and ready to go
darylbandy replied to JR333's topic in Star Venture and Eluder Tech Talk ( '18 - Present)
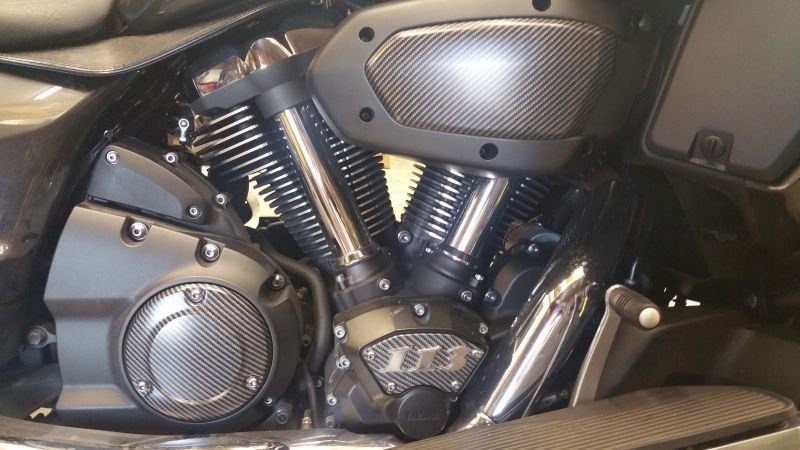
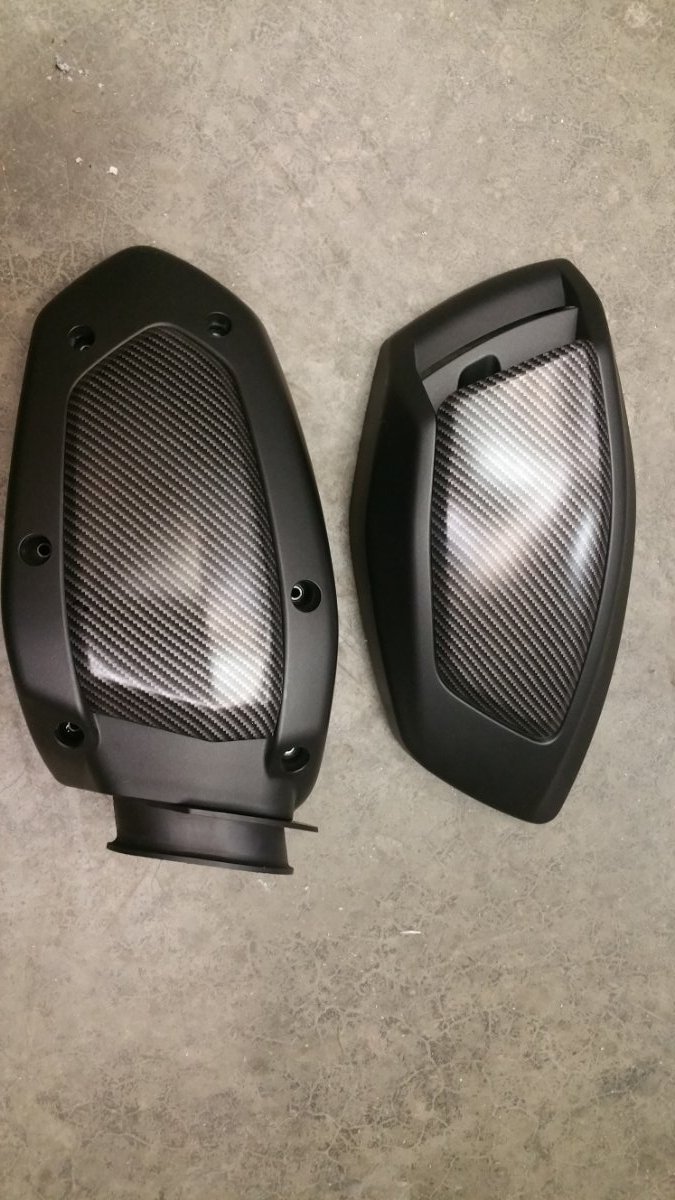
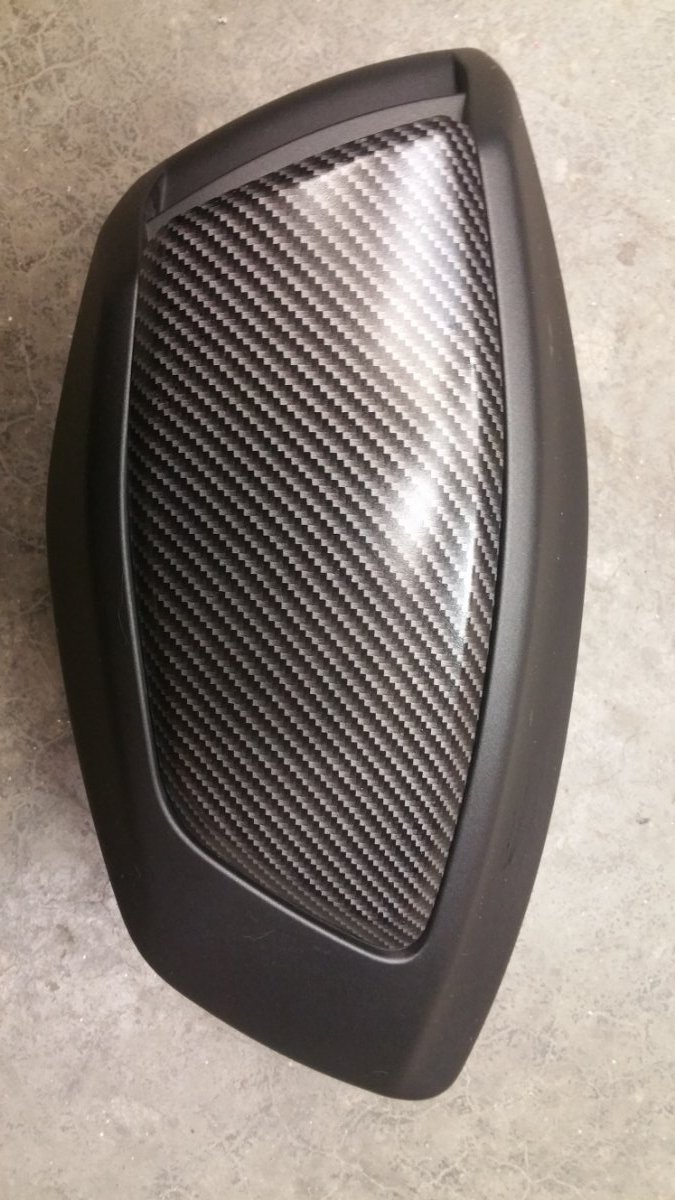
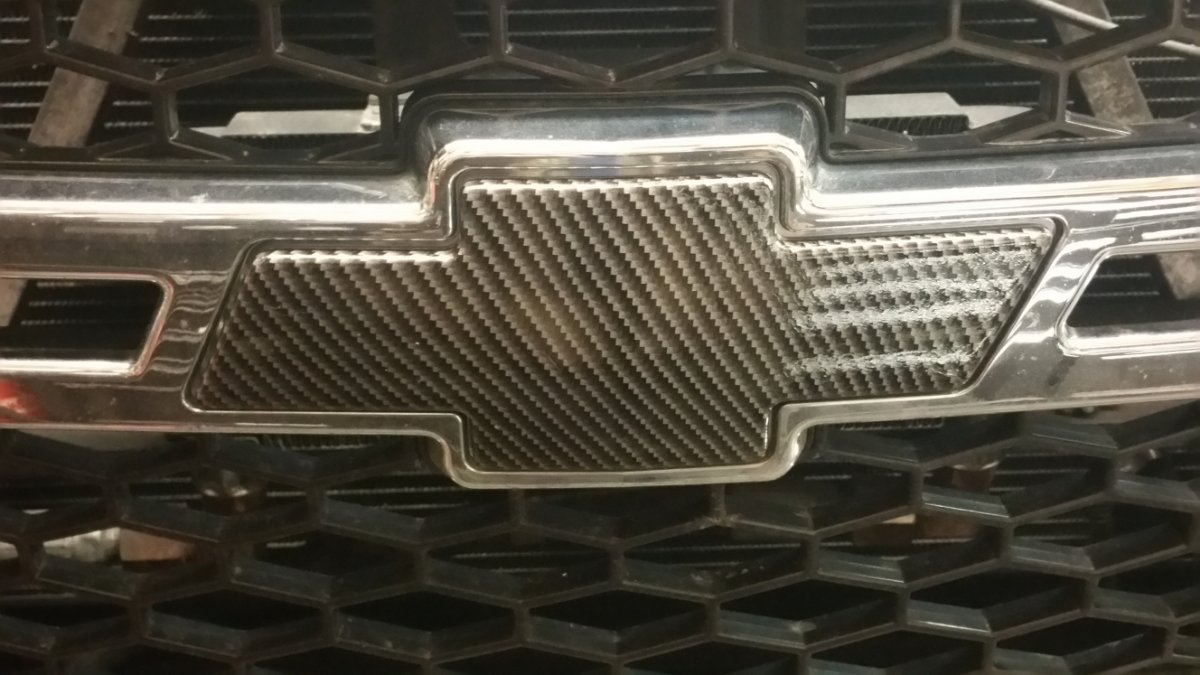
I really did not like the brushed stainless steel plates on the air cleaner cover and left cover as well. I have a gray 2018 Venture and I did not think that the brushed covers went well with the rest of the bike. I debated over painting, powder coating or hydro dipping them and decided to go with hydro dipping. After watching many hours of Youtube videos on how to hydro dip I thought it was something I could do myself and If it did not turn out well it could be easily removed. I used a carbon fiber pattern . To remove the stainless steel plates from the plastic covers I used a heat gun and a plastic pry bar tool and slowly and gently was able to separate the covers. The plates are attached with an industrial strength double sided tape that remains stuck to the stainless steel plates. Goo Gone worked well to remove the remaining double sided tape from the parts. I ordered replacement tape from Cheap cycle parts (Part Numbers 2DF-21732-00 and 2DF-14239-00) After scuffing with 320 sand paper and painting the plates with a silver base coat of paint I was ready to dip the parts. I tested the pattern on my Chevy trucks bow tie on the front grill because i thought if it did not work at least I did not mess up my Venture parts. After dipping the parts were sprayed with several coats of clear. I will put them on the bike and post pictures later. By the way, The chromed plates look great as well JR333.
-
Neighbors feral cat got into my garage last night and walked all over my seat with muddy paws. I like cats but I am about to shoot this cat. Does anyone know exactly what the seat cover materials is and how to properly clean and protect it? I could not find any information in the owners manual. Thanks for the help
-
Bluetooth Pairing Issue (Android)
darylbandy replied to rcmx71's topic in Star Venture and Eluder Tech Talk ( '18 - Present)
Thanks RCMX71 for the work and update. -
Bluetooth Pairing Issue (Android)
darylbandy replied to rcmx71's topic in Star Venture and Eluder Tech Talk ( '18 - Present)
I have had no problems connecting my old Samsung Note 4 -
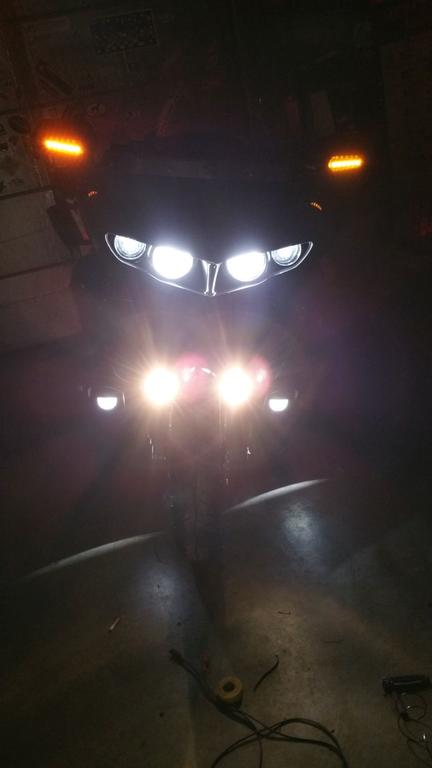
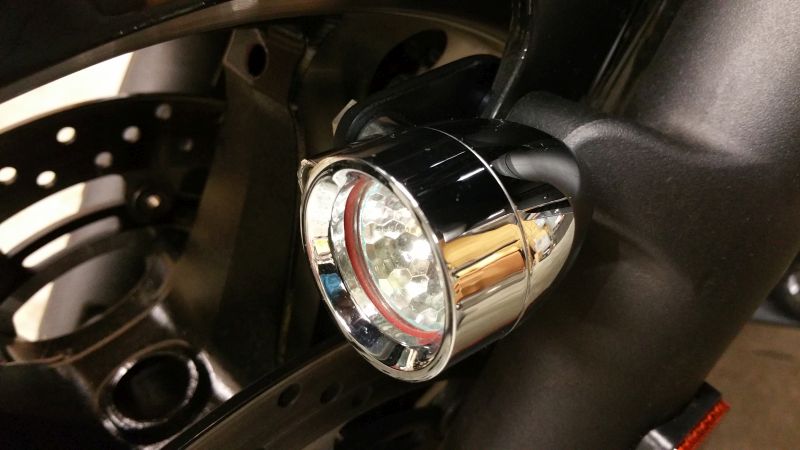
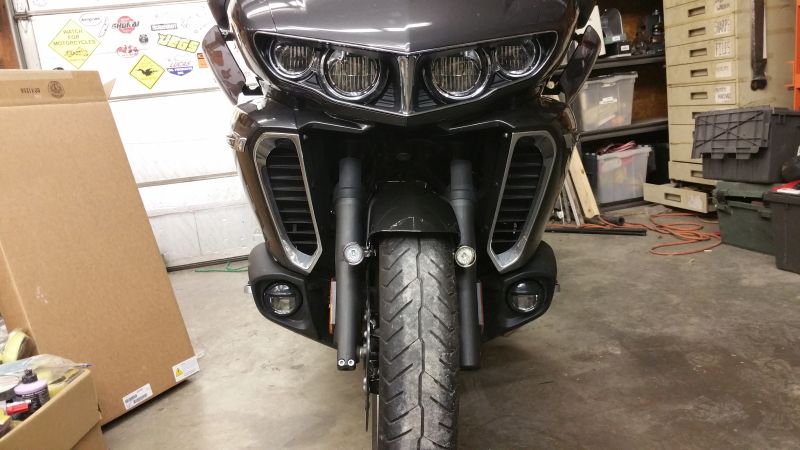
Well I finally got around to installing the lights on the fork brackets. I went ahead and wired them to the lower fog lights because it was the easiest way and I figure that they will always be on at the same time anyhow. They really cast some noticeable light out to the side when you turn the bars. It was better than I had expected for such small lights. I look forward to the weather clearing up and I can get out and see if they light things up better in the corners. I want to thank everyone for their help. Sldunker, Thanks for the wire description and if you pm me your address, I will send you a pair of these brackets if you are interested.
-
Thanks sldunker, this is the exact information I needed. I am currently working on my Stratoliner deluxe and as soon as that project is finished I will be able to get back to the Venture. I will keep all informed on the progress. Thanks again for your help.
-
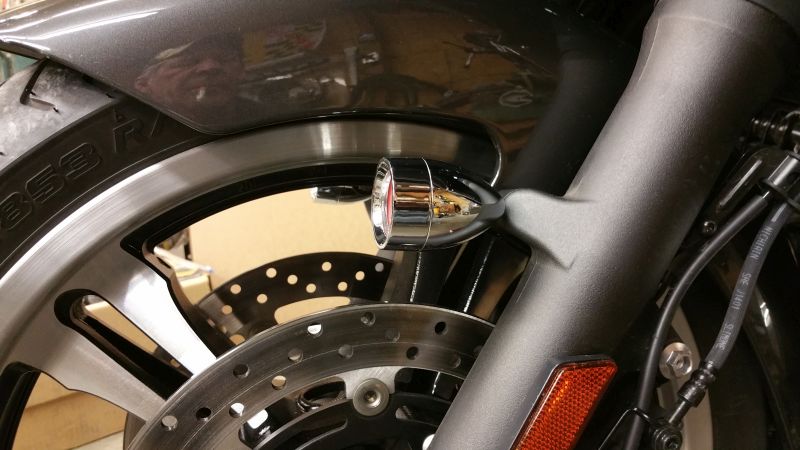
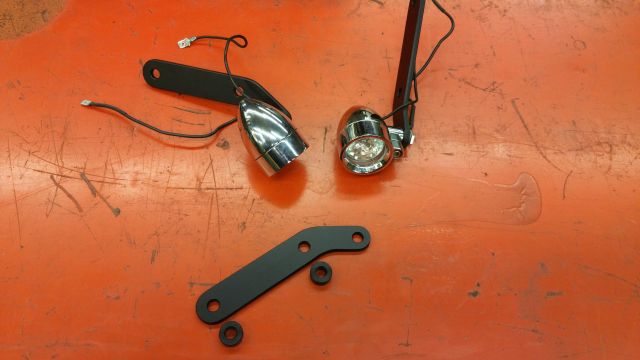
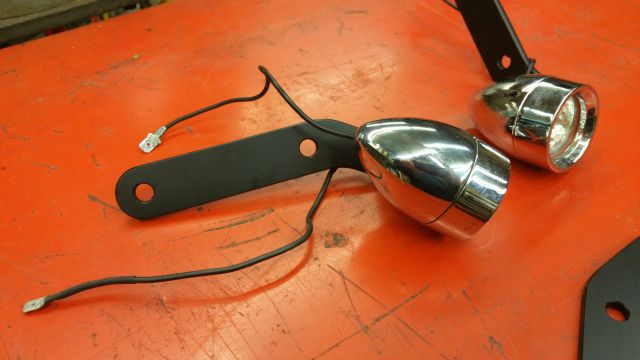
I got the brackets and spacers back from anodizing and I think they look good. That would be great the get the install instructions, so I don't have to go digging through the underside of the fairing to find the wiring if I don't have to. Thanks for the help Sldunker. Bracket,Light and Spacers Rough mounted on bike before black anodizing
-
Jim Beam Devils Cut. I have been drinking bourbon my whole life and Devils Cut is by far one of the best tasting and relatively inexpensive bourbons I have ever tasted. Give it a try.
-
Very Happy New Year everyone. Does anyone know where the wires are located to connect the Touring LED Auxiliary Lights mounted under the fairing (Part Number 2DF-H54A0-V0-00)? I am making brackets to install a pair of Kuryakyn LED lights to the front fender mounting bolts and I plan on connecting the wires to the stock lighting harness. I would like a set of lights to turn with the forks. The parts are being black anodized now and I will share pictures when it is completed. I will have two more sets of brackets available as well. Thanks for the help.
-
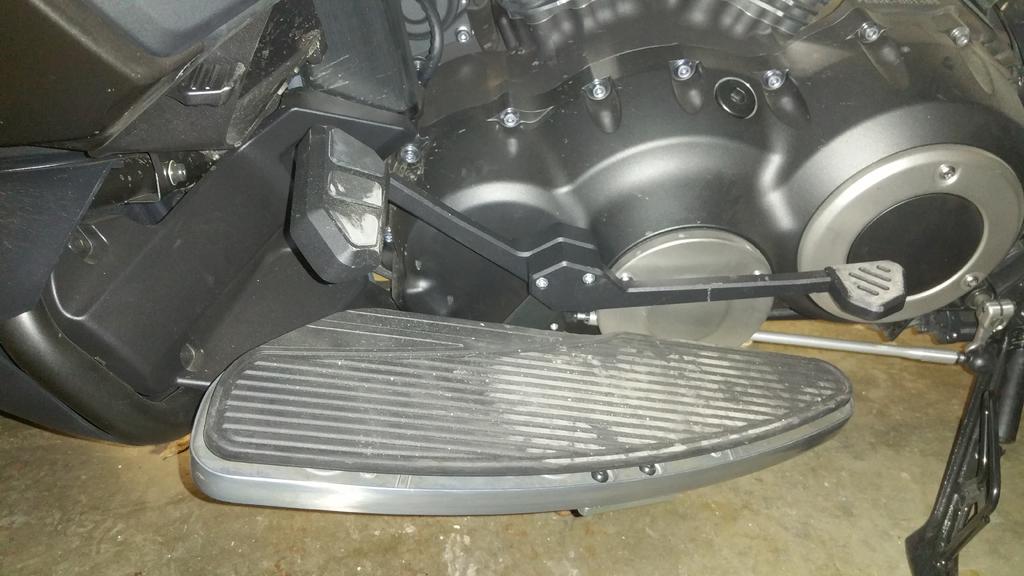
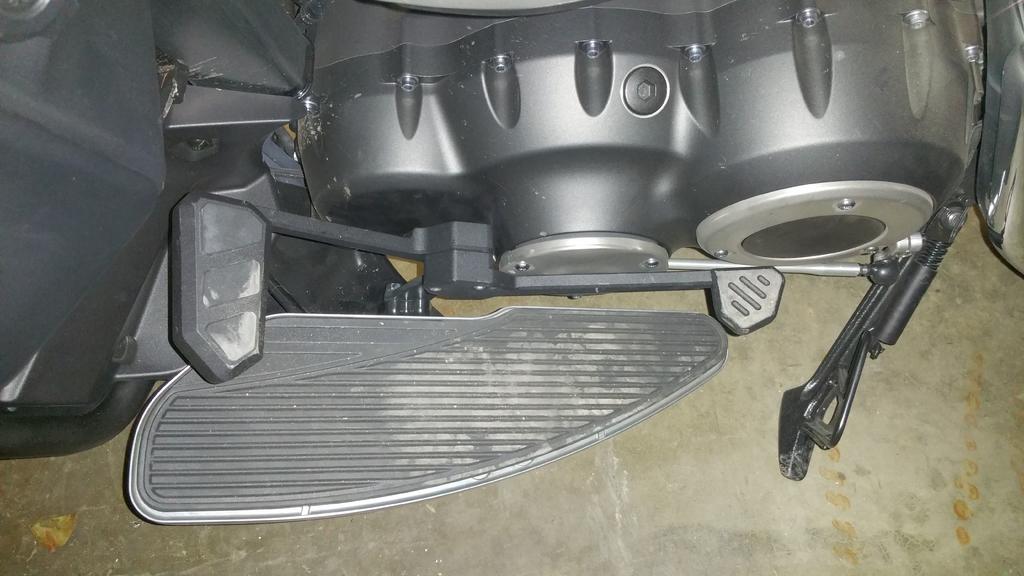
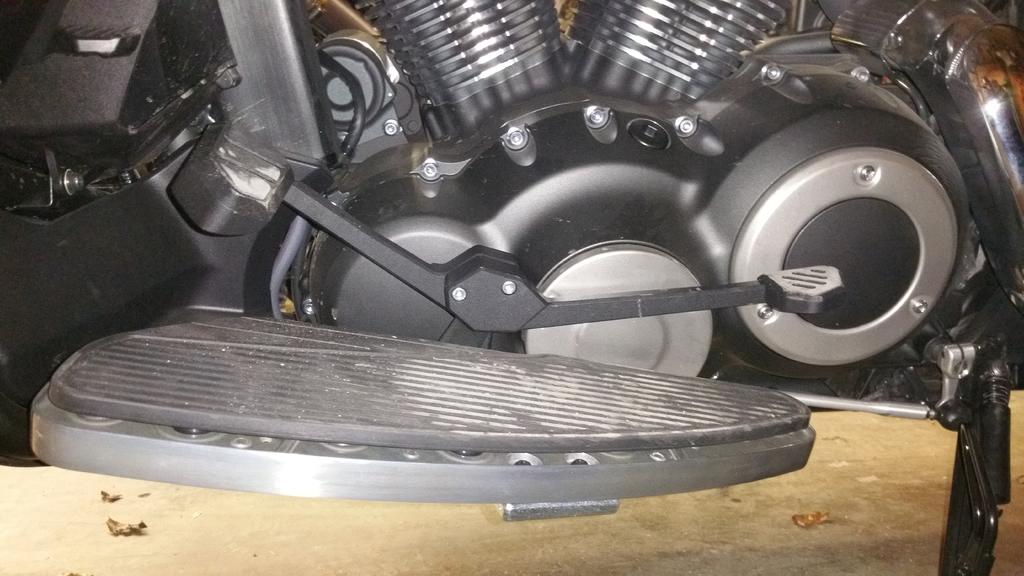
Heal and Toe Shifter
darylbandy replied to Glenabby's topic in Star Venture and Eluder Tech Talk ( '18 - Present)
I just got this installed last night. This part should have come stock on such and expensive bike in my opinion.