Leaderboard


Popular Content
Showing content with the highest reputation on 04/07/2023 in Posts
-
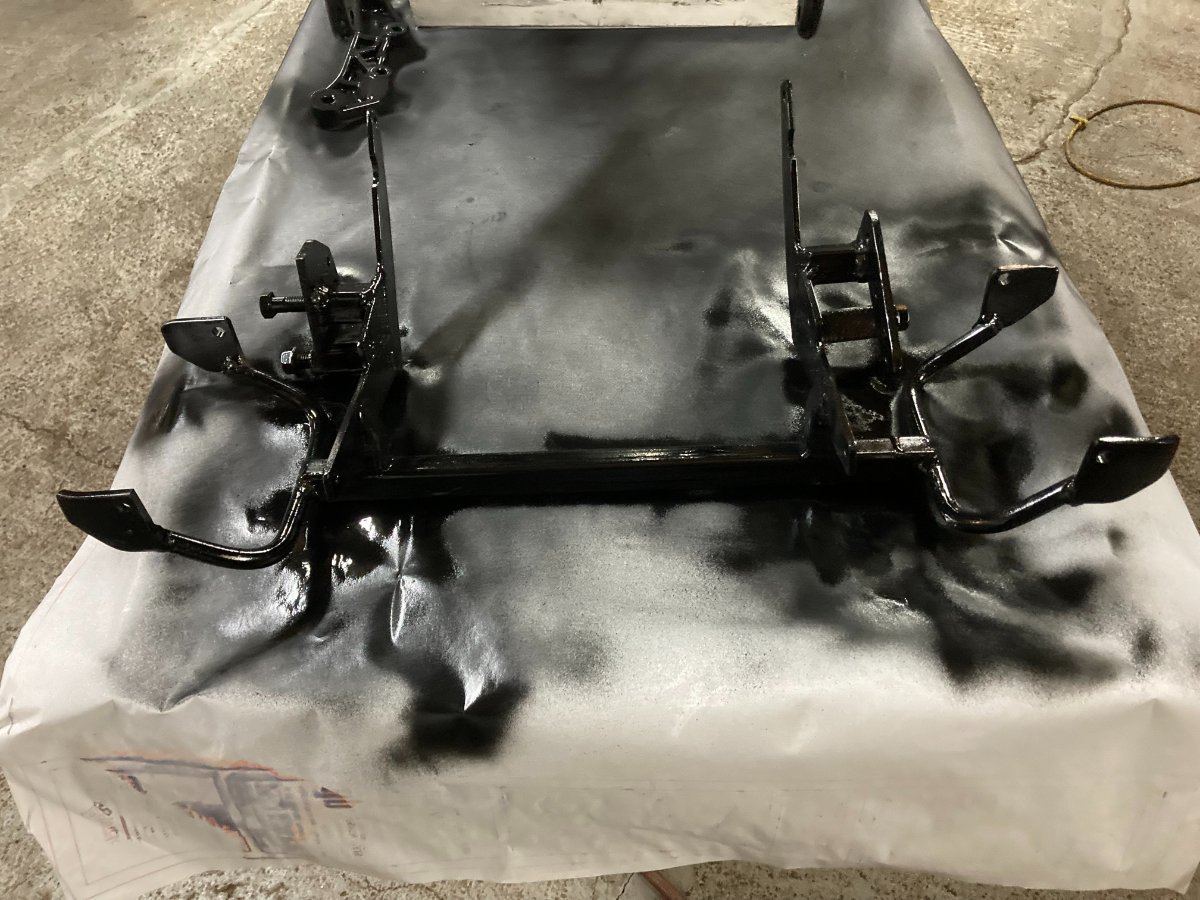
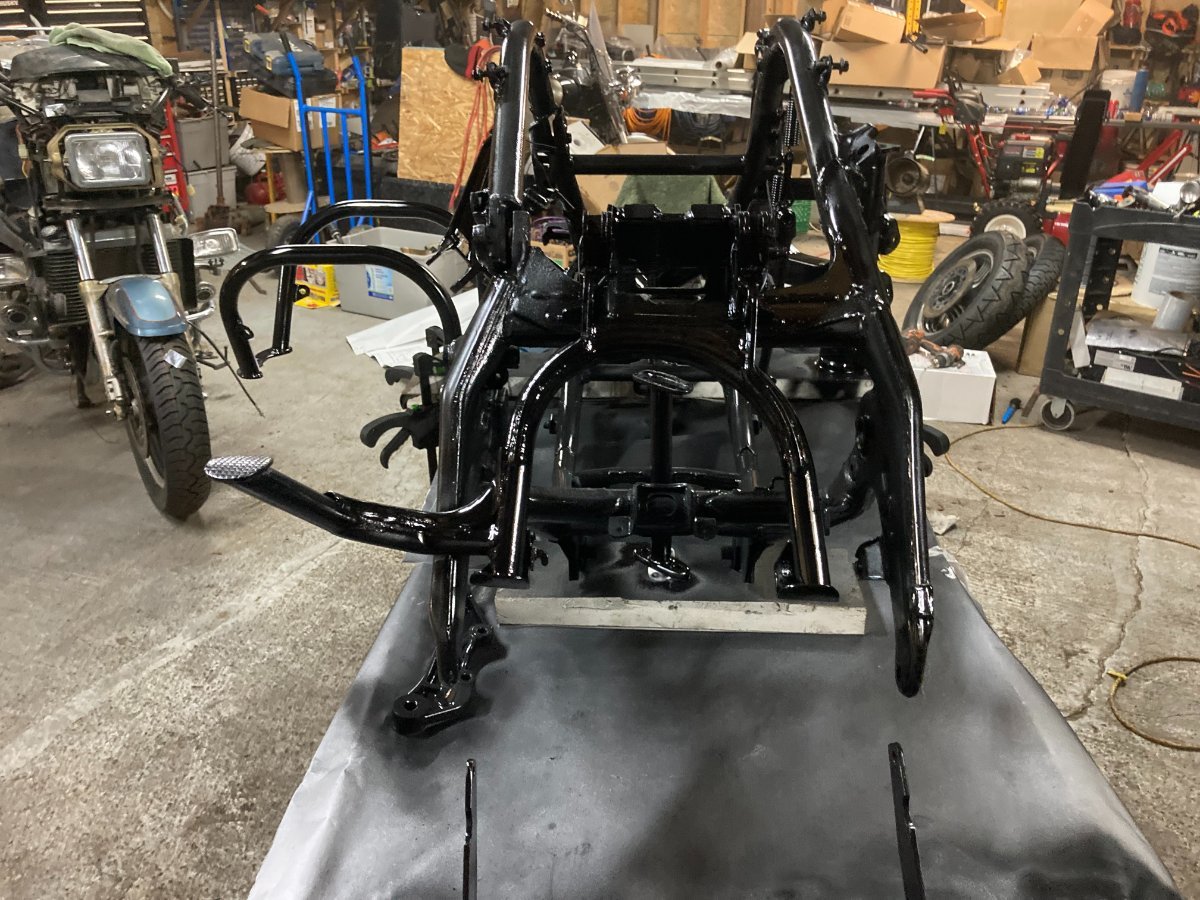
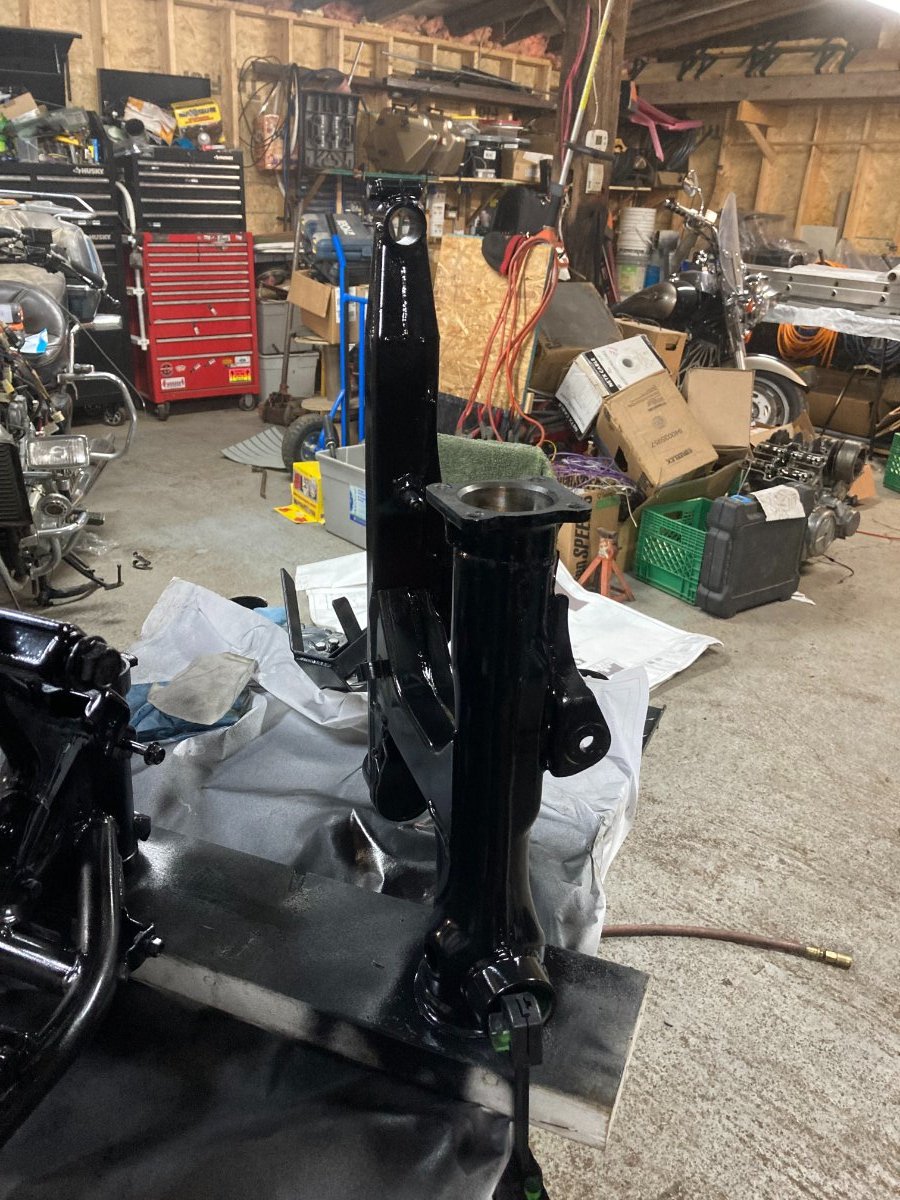
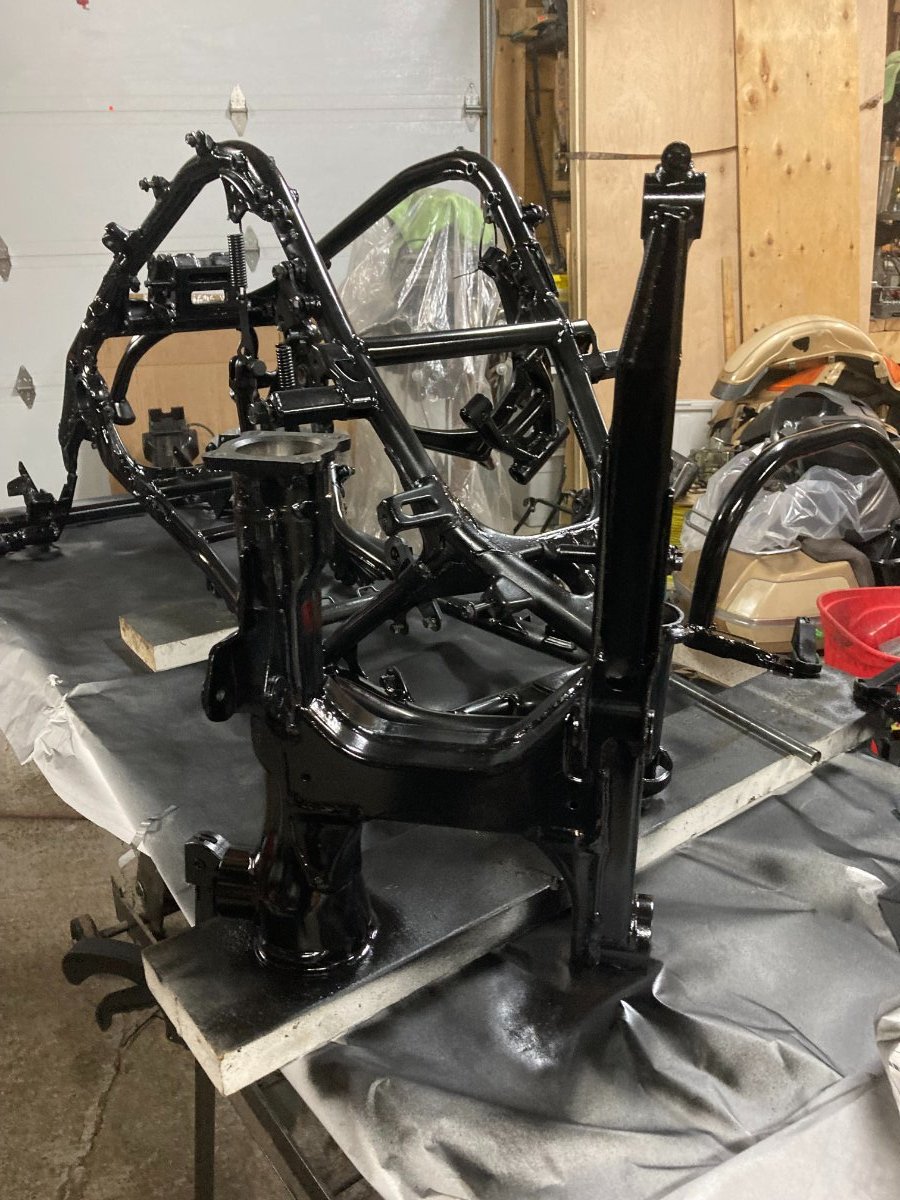
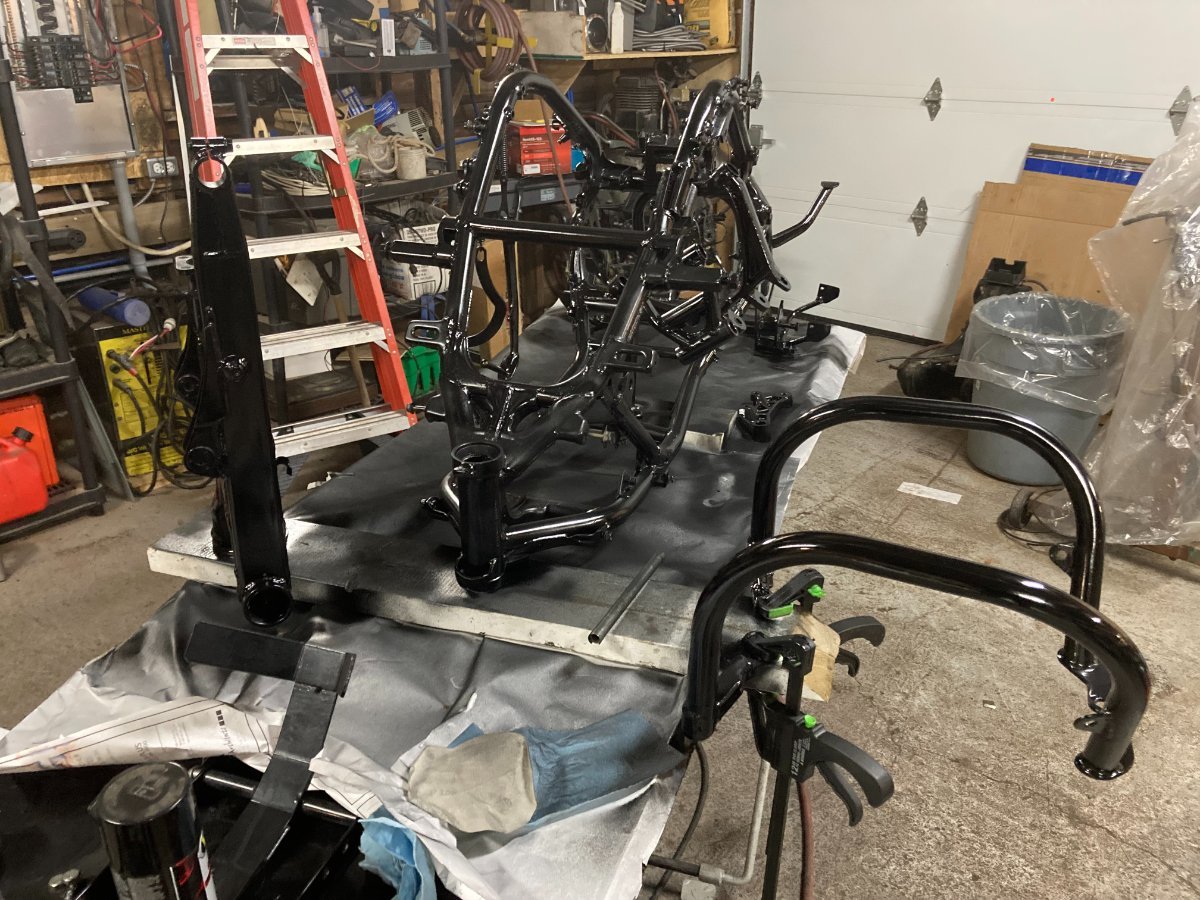
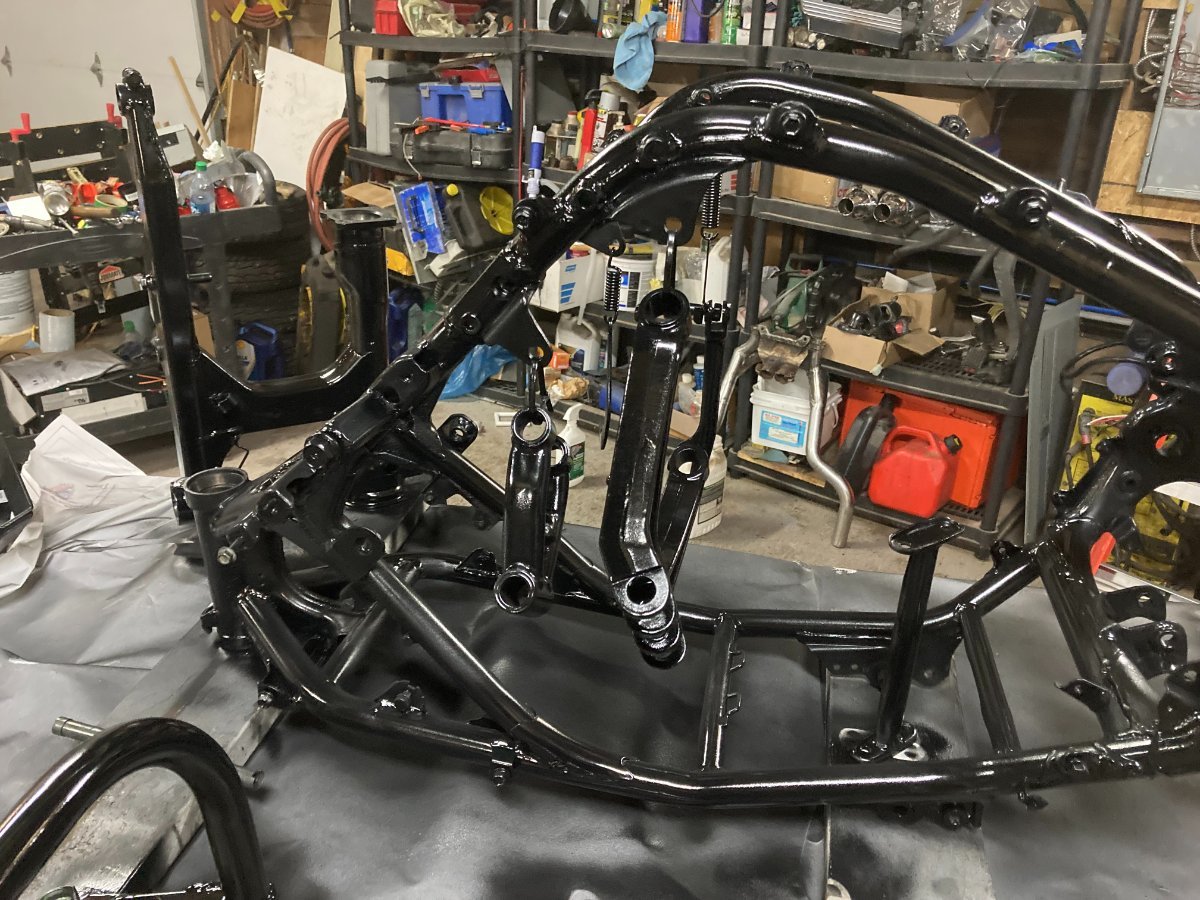
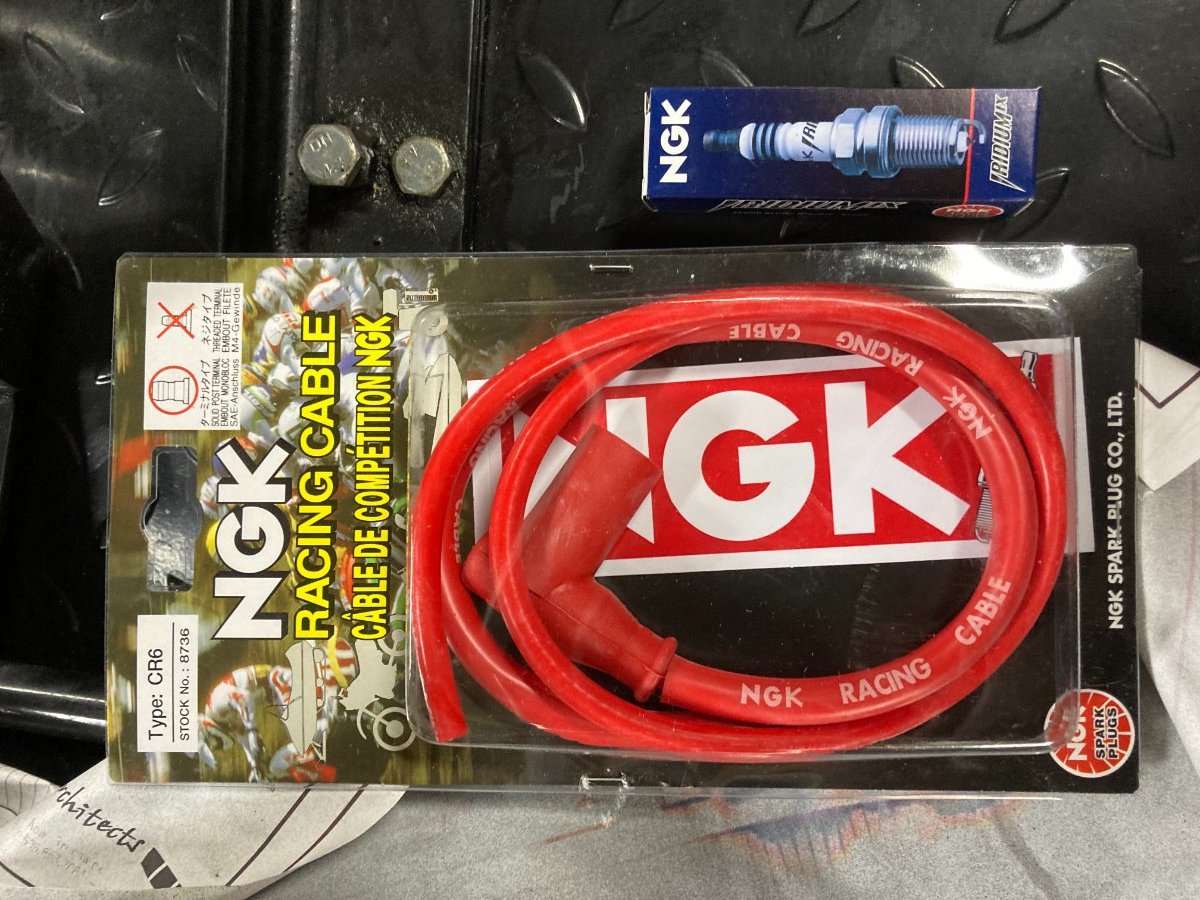
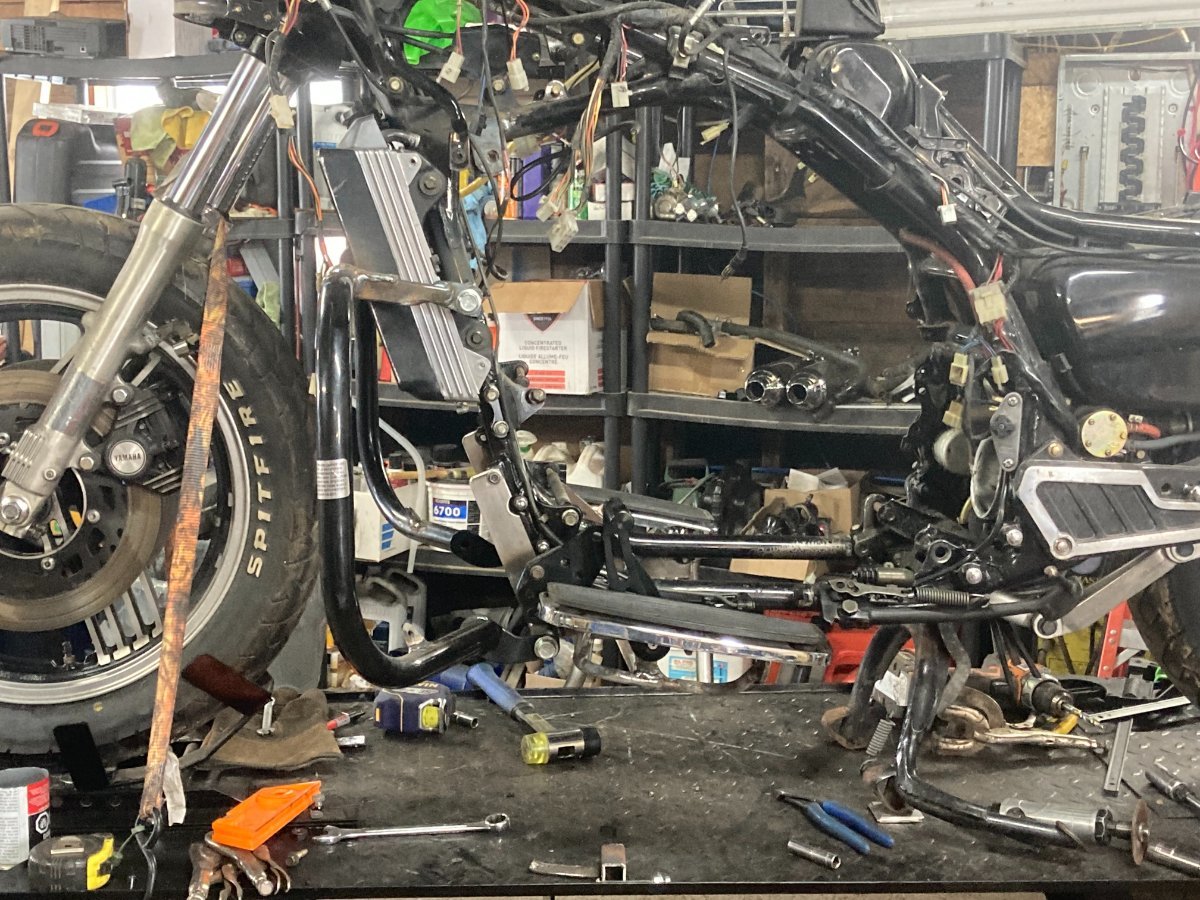
Hi Everyone I have been out in the garage every nite this week as my Wife is Baby sitting for Friends at their house for the week. I now have all the Major frame components sprayed with a fresh coat of Gloss Black Caliper paint, I have been using VHT brand paints for most of my projects as it has very good coverage and is High Heat and Chemical resistant. I have 2 good coats over all the parts; tomorrow after work I will flip over the frame and just need to apply a top coat on the 2 top pipes Friday Morning My buddy is coming over to help me put the engine in the frame then I will continue to re-assemble. I had my new tires installed today and many parts orders arrived including my new Plug wires and Iridium plugs from Fortnine. So the question posed by MarCarl on what to do about the swingarm bushings. I measured the Swing arm sockets and the internal Diameter of the bolts or Sleeves depending on what Pivot point. The worst Bushings were the 2 that are on either side of bottom shock mount of the smaller Steel swing arm link these measure 22 mm on the swingarm socket and the internal Diameter is 18 MM, I have found a source in Canada for metric Bushings but have yet to get a response as to availability of the sizes needed. However My solution at this point is to take some SAE Bronze bushings that are readily available 7/8 OD x 5/8 ID, I will need to turn down the 7/8 (metric value is 22.225 mm) to the 22 mm to fit the swing arm socket then drill the ID from 5/8(16mm ) to the 18mm finish diameter (drill bit should be here tomorrow) drill a hole in the side of the Bushing slightly larger than the Grease nipple to allow grease to be pumped in, press this into the Socket and we should be good for a long time. The Flanged bushings of the larger Aluminum swingarm link that attaches to the bottom side of the swing arm is 23-24 mm sleeve with internal diameter of 18 MM these bushings have very little play in them so I am not going to change them at this time just because of my time constraints to complete the build, however i will be adding grease nipples to these points as well. All remaining Bushings appear to be in decent shape with little to no play, the Swing arm Pivot bearings just require a good cleaning and repack of good bearing grease and should be good for a long time yet. as always see pictures of the progress all thoughts and comments are welcomed. Have a good nite Herman
 1 point
 -
You of all people should it's about the story. Whether or not it's the truth, is totally irrelevant.1 point
-
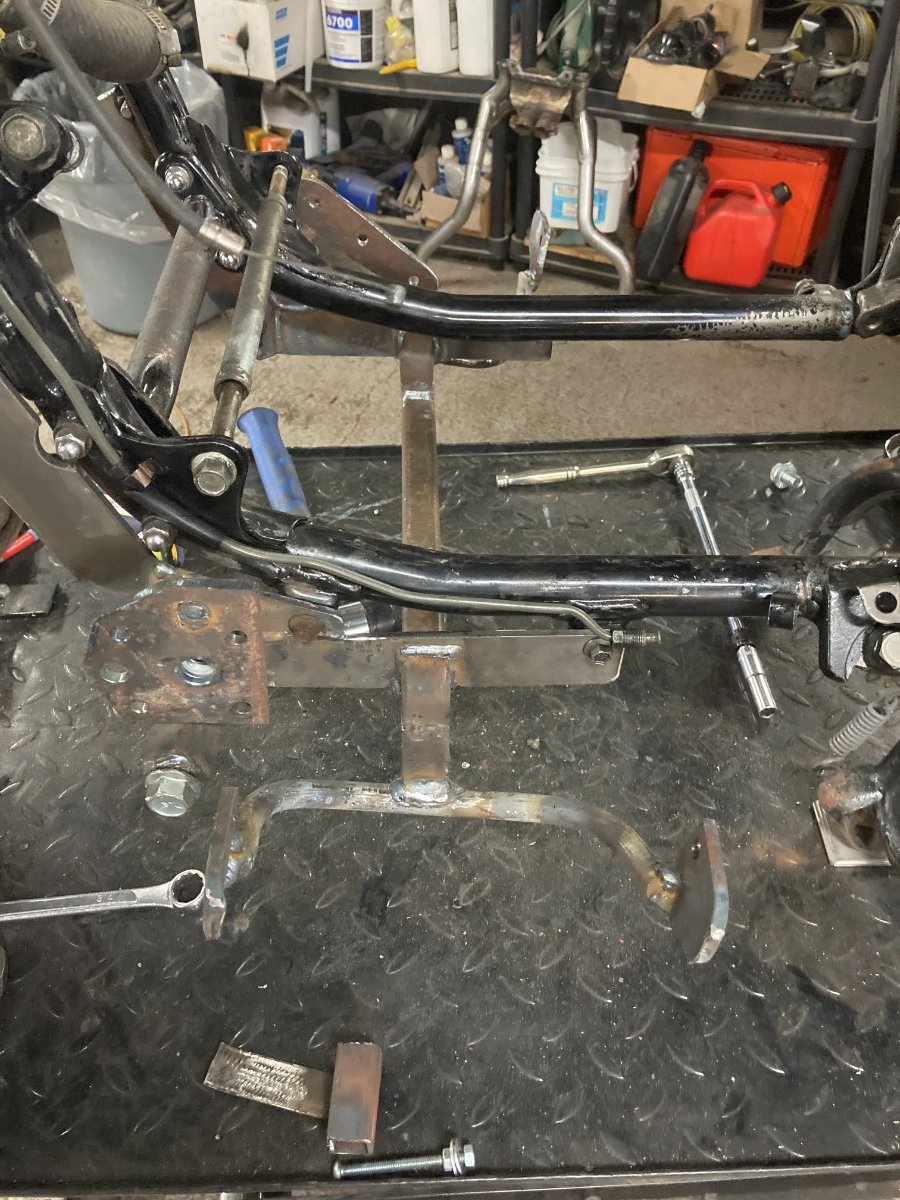
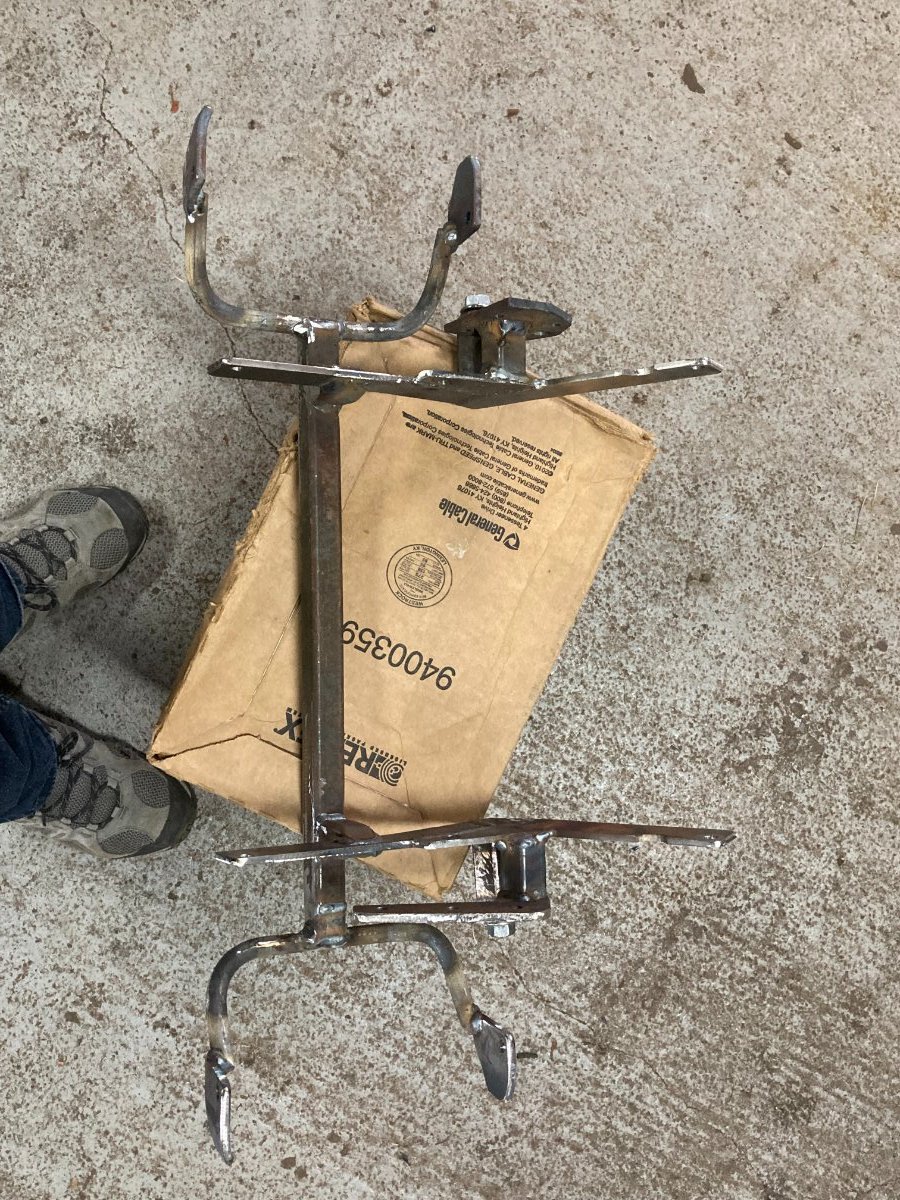
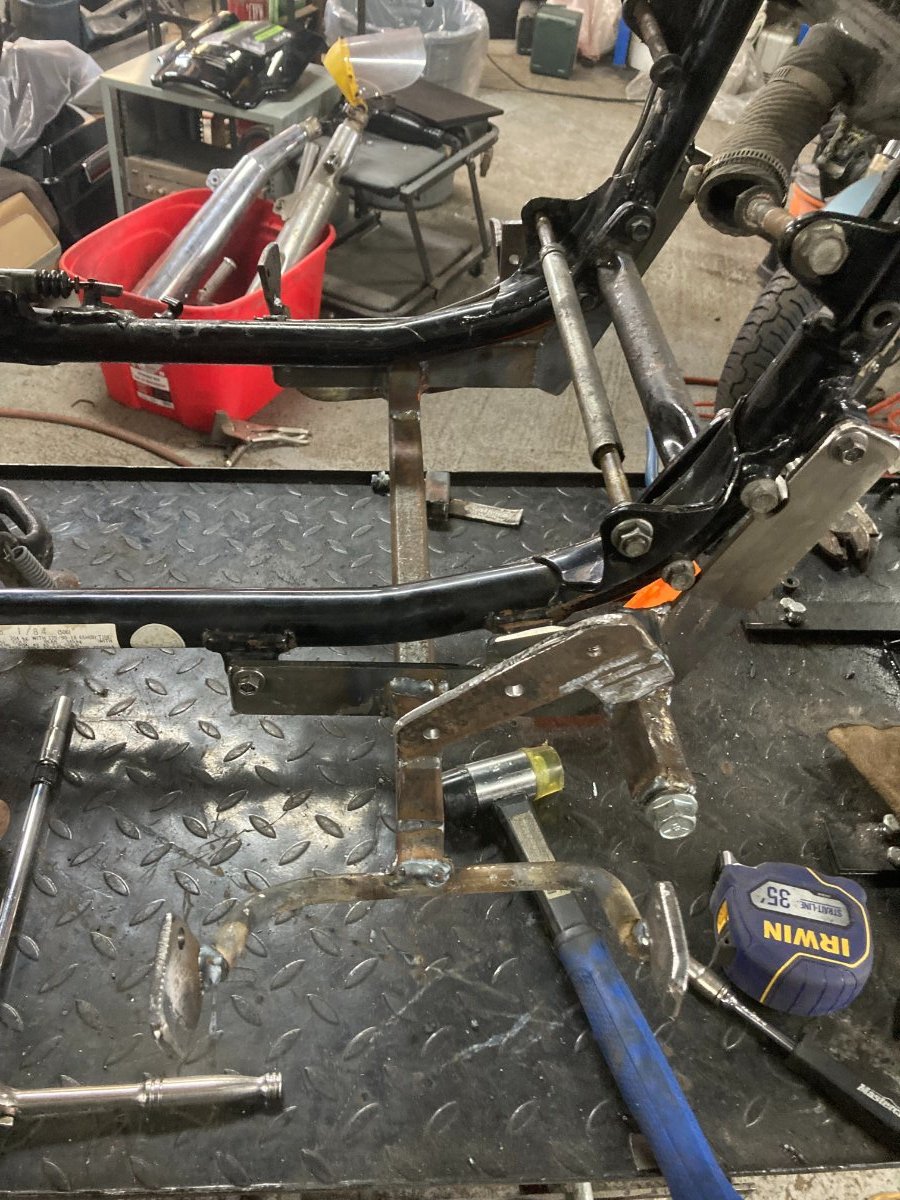
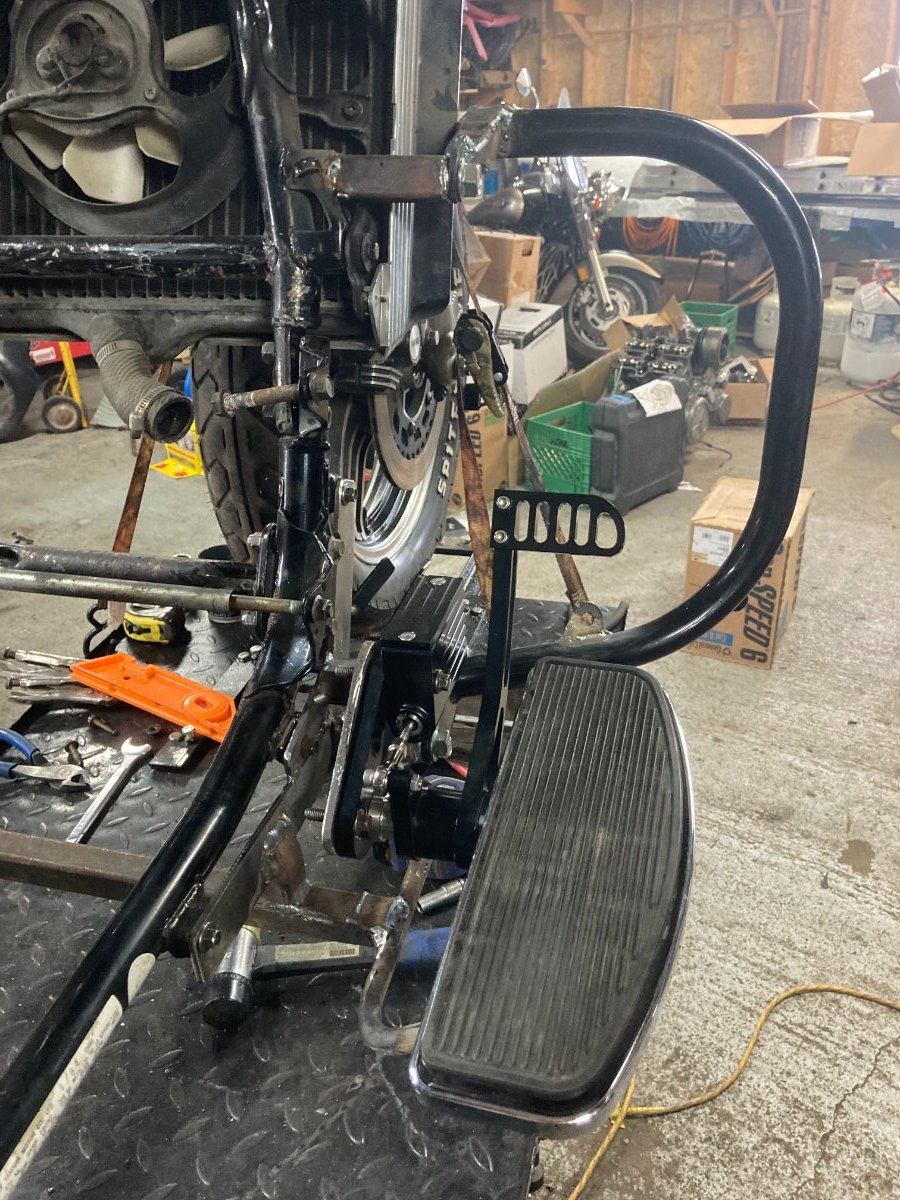
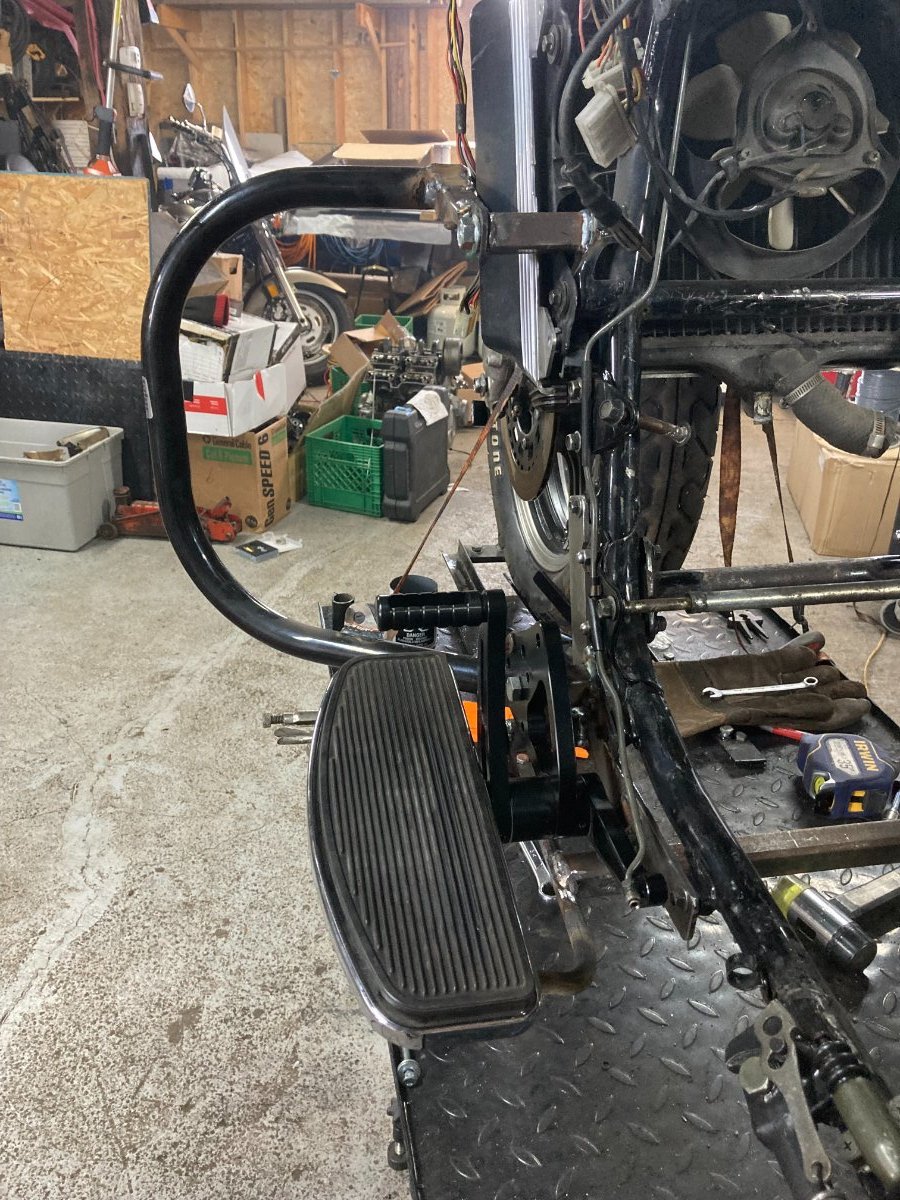
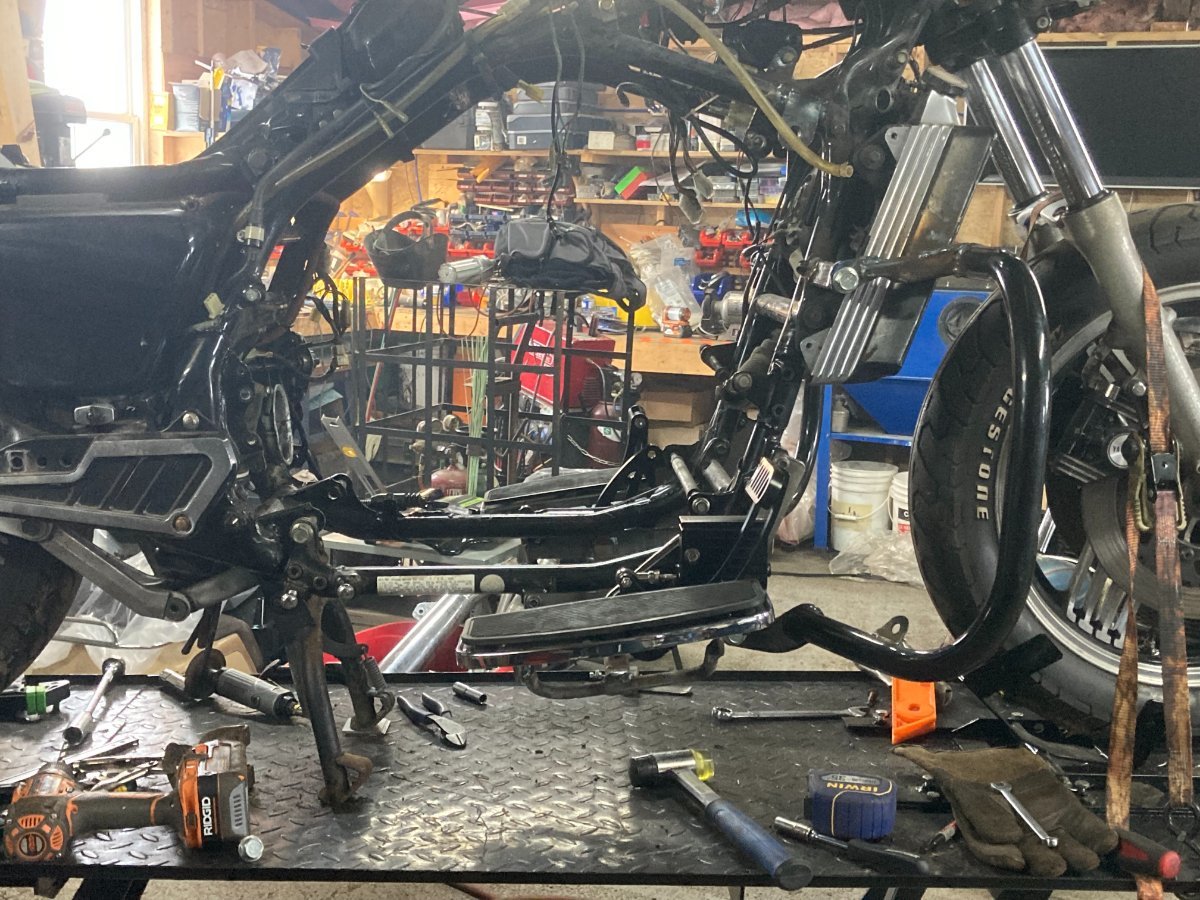
Hi Everyone Finished up the floorboards today and finished all the welding, the Forward control Bracket is complete, this one bolt on Bracket accommodates the Forward controls , Floorboard Mounts and Lower Engine guard Mount, It bolts up using the Original Engine Guard Mounting points on the Frame. Sitting on the Bike My feet are now comfortably forward with my Knee slightly opened up from 90 Deg once the Highway pegs are added I will be able to completely stretch out my legs. Let me know what you all think Disassembly of the front and Rear tomorrow Have a good Night Herman
1 point
-
Hey Jeff, You were already here when I joined in 08'! Your bike was one of the first "Second Gens." I ever saw on this forum. I was truly impressed with you and your bike from the beginning! 160K is nothing to shake a stick at, my friend. You will always be welcome here. There are days when I pass by my garage and just look at my bikes, when there was once a time when I would have been ON my bike! What ever you decide to do in the future Jeff, I am sure you will do it in STYLE, just as you have do it here, Sir. The best of luck to you from Jean and myself! Earl and Jean Harrell.1 point
-
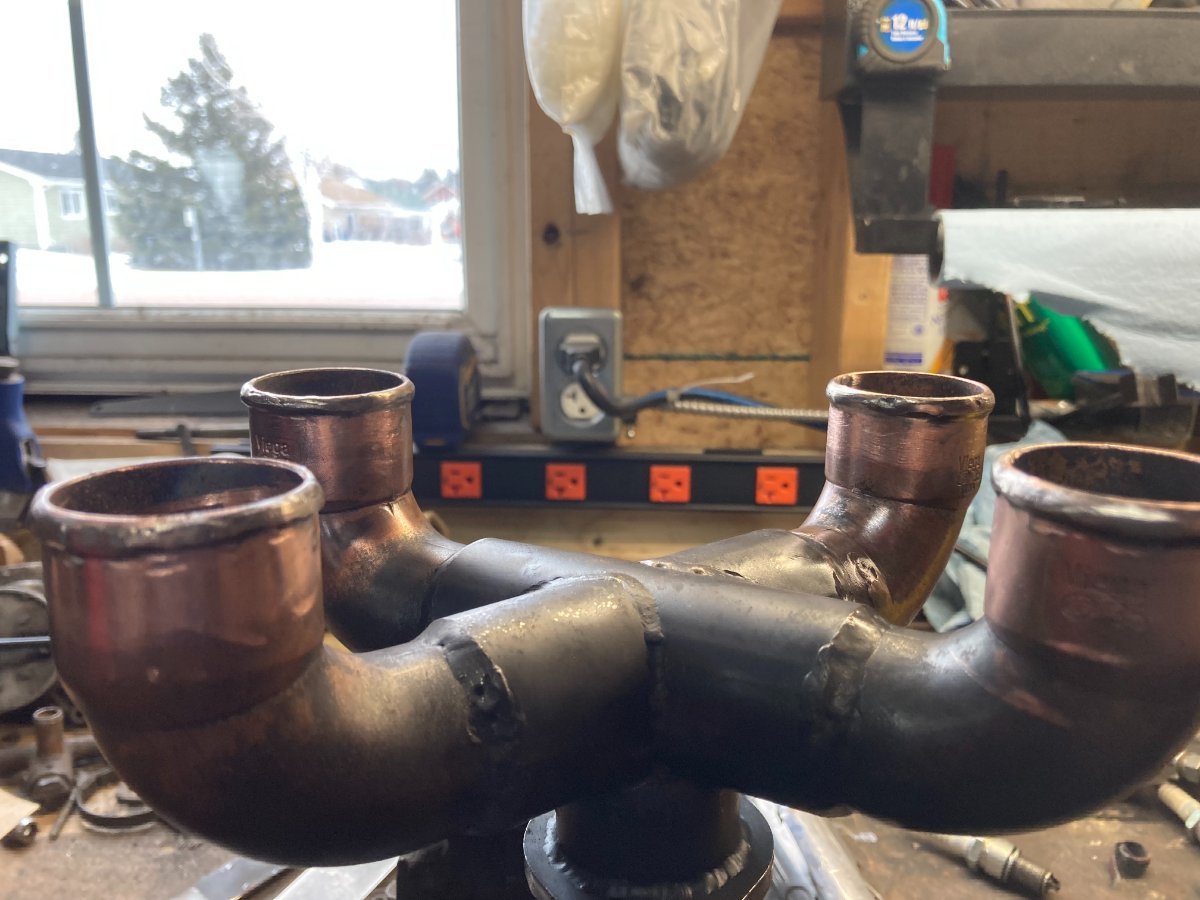
Thanks guys I was happy to hear it run!! This is a 1300 out of an 87 Venture with a set of Vmax heads, Intake manifold is by VTC Motors in Lithuania and the Carb is a VW Pict 34-3, Carb was purchased off amazon for about $120 Cdn. The bonus with this it has a fuel cutoff solenoid when the Ignition is Off as well as an electric Choke, the Carb is easy to adjust and there are many Jet sizes to fine tune this for the bike. When I first ran the engine I knew right away the timing was out as it was backfiring bad and actually dislodged the Intake manifold, I found out these manifolds are built out of Schedule 80 Copper Elbows but they did not provision any Grooves, similar to the carburetor throats to help lock it into the intake boots, so after I corrected the timing I went to work on Fixing the Manifold design. Because I work in the HVAC industry I have access to Silfoss Brazing rods for Welding Copper so I built up a ridge at the bottom of each Runner that now locks into the Intake Boot below the Ridge that goes into the Carbs Groove, it also makes a better seal once the clamps are tightened down so I should Not have any issues with this manifold slipping out of the Boots. Herman
1 point