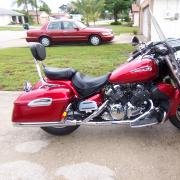
sadicarnot Posted October 4, 2010 Share #1 Posted October 4, 2010 So I decided to spend the next week going over the bike changing oil etc. in preparation for Biketoberfest (I hate it when friends use the week of the event to get their maintenance done) Today I went over 4800 miles and decided to start with the saddlebags. I had read that the screws holding the hinges on need to be checked for looseness. I never really looked close at where those screws are. Good thing Yamaha put them behind the fabric. Out of the 8 screws only one was loose, but I took all of the screws out that were going into metal and put a dab of blue loctite on them. Anyway as others have said here before, check your hinges. Link to comment Share on other sites More sharing options...
V7Goose Posted October 4, 2010 Share #2 Posted October 4, 2010 So I decided to spend the next week going over the bike changing oil etc. in preparation for Biketoberfest (I hate it when friends use the week of the event to get their maintenance done) Today I went over 4800 miles and decided to start with the saddlebags. I had read that the screws holding the hinges on need to be checked for looseness. I never really looked close at where those screws are. Good thing Yamaha put them behind the fabric. Out of the 8 screws only one was loose, but I took all of the screws out that were going into metal and put a dab of blue loctite on them. Anyway as others have said here before, check your hinges. Your use of Locktite was not a particularly good idea. Locktite destroys most plastics, including ABS. Long term damage can be expected. Goose Link to comment Share on other sites More sharing options...
sadicarnot Posted October 4, 2010 Author Share #3 Posted October 4, 2010 Your use of Locktite was not a particularly good idea. Locktite destroys most plastics, including ABS. Long term damage can be expected. Goose Dude I put it on the screws that go into metal, not the ones that screw into the plastic. It will be ok don't worry. One place that is a worry is the vent hoses from the carbs, it is good to check the routing of those because they can eat away the lowers from the inside. It could be happening to your bike right now, better check. Link to comment Share on other sites More sharing options...
RoyalStarRider Posted October 4, 2010 Share #4 Posted October 4, 2010 A couple of weeks ago I stopped to pick up lunch, as I opened my saddle bag the lid just fell to the ground.... talk about getting pissed. Luckily its was an easy fix and didnt do much damage to the paint.... I too have started going over nuts and bolts to make sure everything is good and tight. Link to comment Share on other sites More sharing options...
V7Goose Posted October 4, 2010 Share #5 Posted October 4, 2010 Sorry I wasted my time bothering you - it won't happen again. Goose Link to comment Share on other sites More sharing options...
sadicarnot Posted October 4, 2010 Author Share #6 Posted October 4, 2010 A couple of weeks ago I stopped to pick up lunch, as I opened my saddle bag the lid just fell to the ground.... talk about getting pissed. Luckily its was an easy fix and didnt do much damage to the paint.... I too have started going over nuts and bolts to make sure everything is good and tight. My real rant is over Yamaha's poor engineering/assembly after all these years of making this bike all of the little piddly things like screws coming loose and rear hubs not having enough grease should be fixed. For goodness sake they have had over a decade of no change in the design to figure all of these things out. Link to comment Share on other sites More sharing options...
Beau-Kat Posted October 4, 2010 Share #7 Posted October 4, 2010 So I decided to spend the next week going over the bike changing oil etc. in preparation for Biketoberfest (I hate it when friends use the week of the event to get their maintenance done) Today I went over 4800 miles and decided to start with the saddlebags. I had read that the screws holding the hinges on need to be checked for looseness. I never really looked close at where those screws are. Good thing Yamaha put them behind the fabric. Out of the 8 screws only one was loose, but I took all of the screws out that were going into metal and put a dab of blue loctite on them. Anyway as others have said here before, check your hinges. Funny that you mentioned this. I just tightened mine up last week. Two or three were loose. Link to comment Share on other sites More sharing options...
Condor Posted October 4, 2010 Share #8 Posted October 4, 2010 Think I need to check mine?? I bet it's been a while.... It's something I would have never thought of unless I read it here. Ain't this place the greatest!! Link to comment Share on other sites More sharing options...
etcswjoe Posted October 4, 2010 Share #9 Posted October 4, 2010 Everytime I clean my bike I check the bolts and it seems like I always have a couple that are loose. Link to comment Share on other sites More sharing options...
wes0778 Posted October 4, 2010 Share #10 Posted October 4, 2010 Not long after I got the RSV I noticed the lids seemed loose, so I went in to check the screws. Well they were all tight, but I found the metal stem of the hinge was a little too long and stuck slightly through the plastic lid. This meant that there was no clamping force on the lid. I ground the hinge stem down about 1/16" so that when I re-tightened the screws the washers clamped the lid. Problem solved no more unwanted movement. Link to comment Share on other sites More sharing options...

Recommended Posts
Create an account or sign in to comment
You need to be a member in order to leave a comment
Create an account
Sign up for a new account in our community. It's easy!
Register a new accountSign in
Already have an account? Sign in here.
Sign In Now