lonestarmedic
-
Posts
889 -
Joined
-
Last visited
Content Type
Profiles
Forums
Gallery
Events
Store
Everything posted by lonestarmedic
-
 Thanks franfd- That is what I though. Vacuum advance should not hit until at least 1500 RPM. So I suspect I have found my culprit. Too bad I spent all the time and money on carburetor restoration. Ah no, the carbs were all original so they needed it too JB
 -
How much increase in RPM will a vacuum advance provide? Can an ignition box advance enough to run a bike at 3000 RPM? Have been chasing strange problems on my 1986. Thought it was all carburetor related. Went through with a fine tooth comb about 6 times. Idle has been erratic and throttle seemed to hang and be slow to return to idle. Warmed up bike to check some adjustments. As I was listening to idle after adjusting mixture the bike revved to 3000 rpm without being touched. Blipped throttle and pushed on linkage. All seemed good. This did NOT happen until bike was good and hot. Running on centerstand for 20 minutes or so. Pulled hose for vacuum advance off of the carb and idle dropped down to about 800. Plugged in and up to 3000! Capped off the carb and left vacuum unplugged. Revs up great. Almost too good for no advance. Like ignition box has a problem. Put a Mityvac on advance. Pulled a tiny bit of vacuum and bang up to 3000. Amount of vacuum pulled did not even move needle on gauge. Talking imperceptible. Grabbed a spare vacuum advance and plugged in. Same 3000 rpm. Have NOT bench checked the vacuum units yet. Both are 30 years old. I also have an untested 41R CDI box from a 1986 parts bike. Looks good but who knows? Tomorrows project is test the advance units and clean up ignition box and swap it out. Also compare engine amd electronics hot versus cold. Maybe CDI gets good and hot and goes haywire. I had the box off the bike earlier this year. So hardware will not be a problem. This is a real puzzle. A screwed up ignition would sure explain the low vacuum on the Carbtune. And bike was running ok 2 weeks ago. So this is possibly something that has been going bad and just went flop right in front of me. Sent from my SAMSUNG-SM-T217A using Tapatalk
-
Sad to say carbs need to come apart. Jet blocks need to come out and idle circuits need flushed out. You can try what they call the "Shotgun Cleaning'.
-
I certainly agree that a major brand should have parts for their products. I just remember looking at a lift from a major supplier and seeing so many similarities between it and the Harbor Freight. Of course it may have been their low end lift. I hope you get a speedy resolution to your pump problem. Maybe I got lucky with my lift. It was not made on a Chinese holiday week!
-
Well I place this to you: What would you do if the hydraulics on a $2000.00 POS crapped out and the bike was on the lift? The quad rings, o-rings, and back up rings are all probably the same quality. I would take my floor jack and a block of wood, stack them to raise the lift off of the safety bar. Then lower down on wooden and concrete blocking. Down a bit at a time and reset the stack. With the parallelogram arms I could do this at the front. Sent from my SAMSUNG-SM-T217A using Tapatalk
-
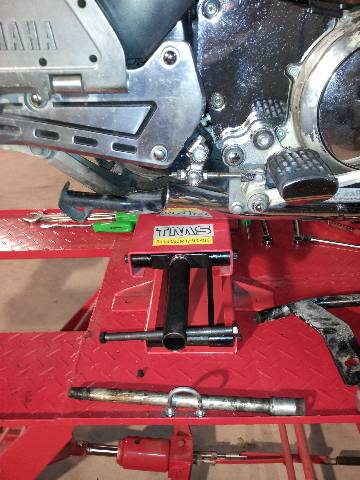
I drop the rear suspension and no problem. Put in 1st gear and leave the brakes alone. Feather the clutch to slow the descent. Of course bike is not running. Sent from my SAMSUNG-SM-T217A using Tapatalk
-
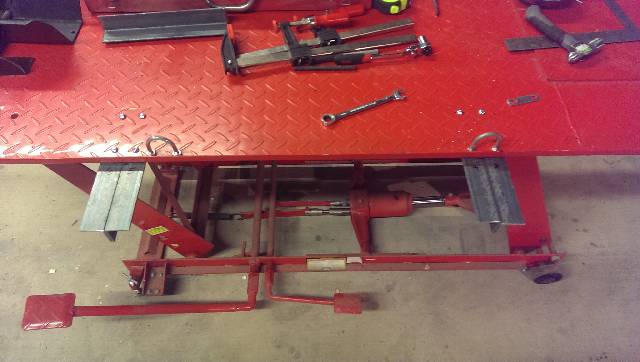
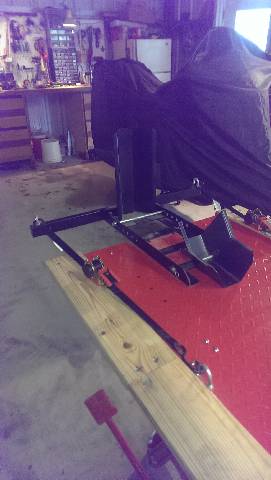
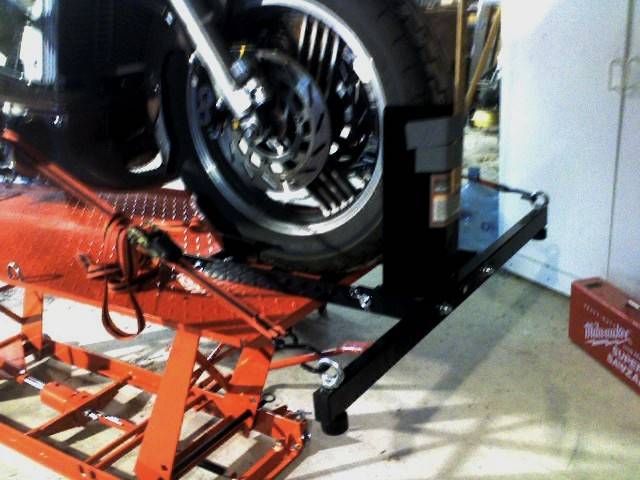
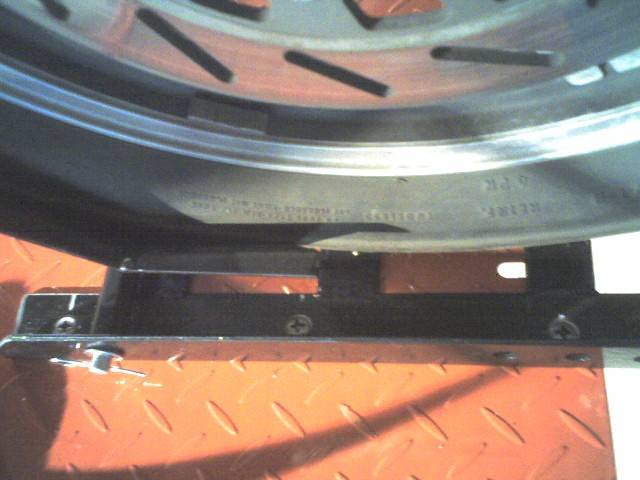
And the side wings:

-
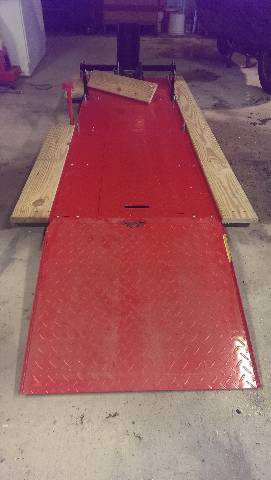
Next set of pictures
-
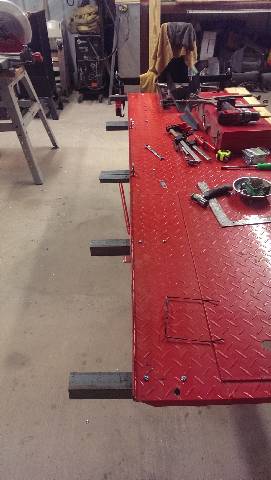
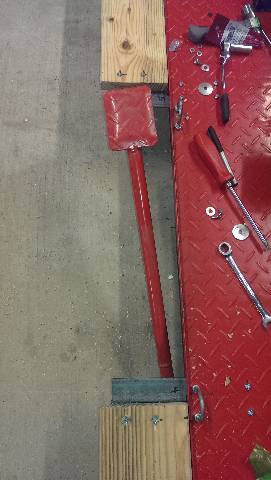
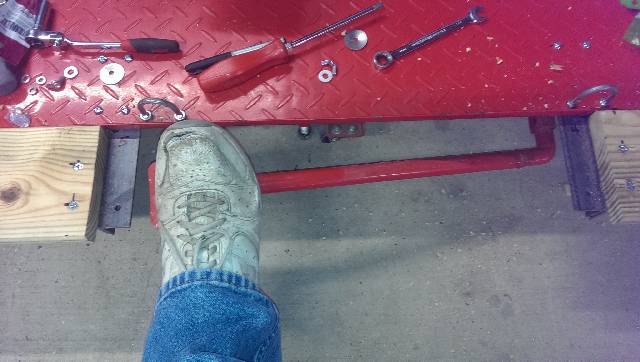
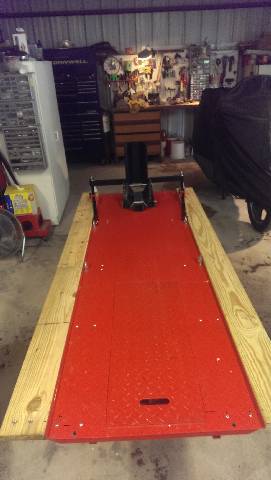
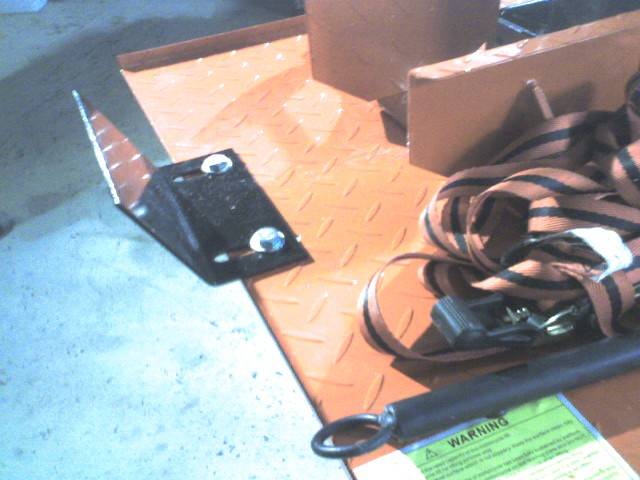
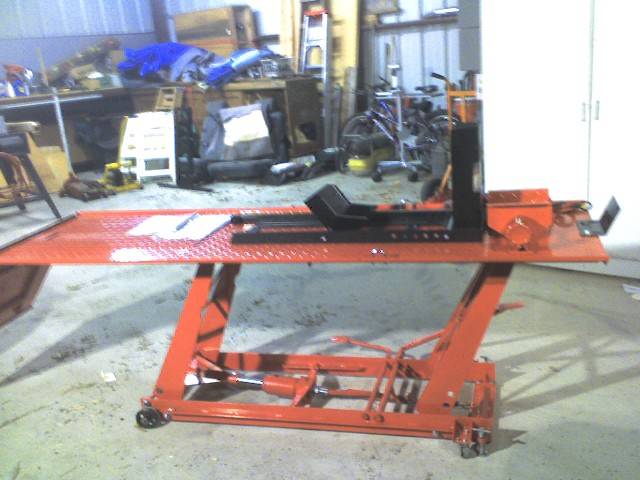
Pictures of my lift as it has progressed.
-
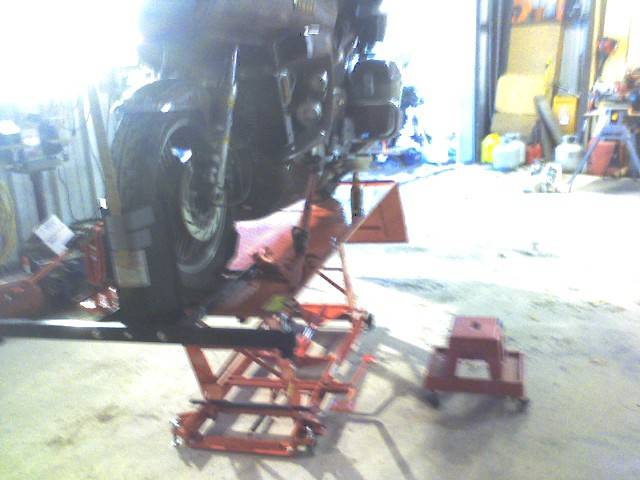
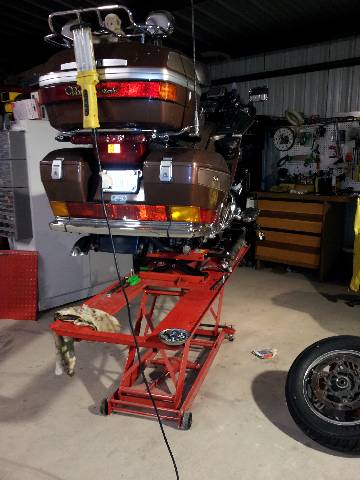
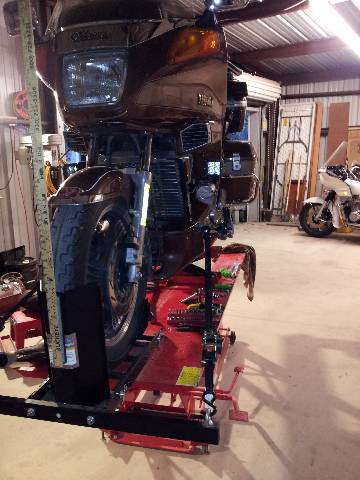
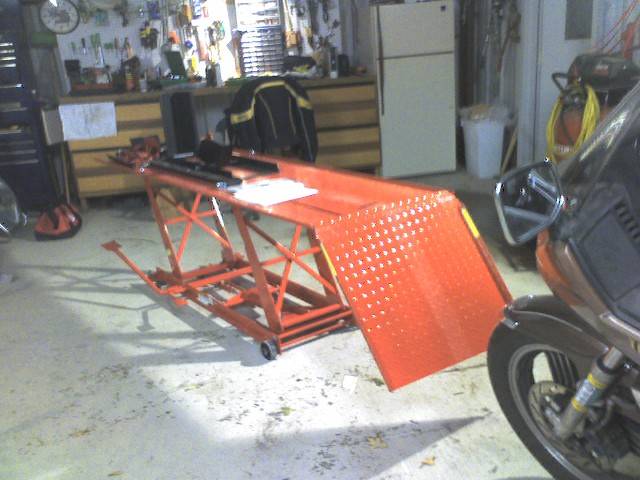
My 1986 is on a Harbor Freight manual lift right now. The lift is about 5 years old. Works great. I added wings down the side for an extra bit of width. Six inches each side. I put a different wheel chock on the front and repositioned it a bit. I use a small screw scissor lift under the bike instead of a center stand. I can use the rear wheel drop that way. Mine is the generation with the solid safety bar. And has the lips of the frame bent differently than a second generation. Not sure what is available now. I had to set my pressure relief valve upward when I first got it. It would not lift my first gen. I put a Harley Electraglide on the lift and then adjusted the relief valve until it would just lift the Harley. Never touched it since. If the lift is under load, it will sit against the hydraulics and not drift down more than a couple inches in a week. Unloaded it will drop about a foot or so in a week. Load must push the O-rings and seals outward a bit and cause a tighter seal. After the modifications, I have about $400.00 invested. Including the new chock and the side wings. I would not give it up now. I do ride the bike up the lift under power. If bike is dead, takes two people to push it up on. JB
-
No, I did not remove the outer fairing at all. Windshield, Front chrome trim, Headlight surround, Headlight. Then access the instrument cluster bolts through the headlight area. Remember the speedometer cable! JB
-
I run the original Dually series. The original 4 LED Dually series draws 1.1 amp per side. I have them protected by a 5 amp fuse. The 6 LED Dually D2 series draw 2.5 amps. That is each lamp pod.
-
Make sure you get a spot pattern. The others I have seen are OC Gizmo. An 8-10 degree spot. 6 leds. Less than a hundred a pair on Amazon. Look like Rigid Dually D2 lights.
-
I think things have advanced a bit on the LED market. I would bet the Opt7 LED driving lights are good also. I did not pay that much for my Rigid. It was under $200.00. I have the original Dually 2×2 lights. 4 Cree in a spot pattern. The new 6 led Dually D2 are expensive. Rigid also makes a nice 3 led. Think it is the M series.
-
The horns are pointed forward using an L bracket made out of 1/4" steel. The original tabs on both these and the Squidley brackets attach at the horn mounting point. Squidley used the factory horn bracket with the locator tab. The Ventureline mounts remove the little horn bracket.
-
http://images.tapatalk-cdn.com/15/08/09/f0506927d1e2ae0cd3cfb06e67ea5122.jpghttp://images.tapatalk-cdn.com/15/08/09/7e631263d24e6331f4d5b1aed7ab92be.jpghttp://images.tapatalk-cdn.com/15/08/09/65ccf919025edfdf632071d1fb493a35.jpg
-
I have the D2 Dually Spot lights. Not cheap but lifetime guarantee. And they honored it. Had circuit boards that caused radio interference. They did a recall and fixed asap. If I remember they sent a call tag. I asked them to fix the plug leads. They installed a set of 14 inch so the comnector was behind the fairing edge. My mounts are a set of rare Ventureline mounts. Before that I had a set that Squidley used to sell. All of LED driving will have black surface, cooling fins, and a more industrial look
-
Syscrusher, I cannot recall coming across a CMU with bad diodes. Maybe because the are not stressed with current and/or heat like the TCI? JB
-
OutKast- If you look at the CMU you will see that one side of each reed switch is soldered to a common board trace. I chose to do my modifications from the component side of the board. If you go from the back side, just use some 18-20 gauge wire and solder to the individual spots. All of the reed switches are connected to ground on one side to keep the module indicators turned off. I chose the common idea to reduce my soldering. JB
-
The RLU on my 1986 was forward of the instrument cluster. It sits on a steel tab using rubber sleeve as a mount. Yes the LED fits in the stock housing and there is just enough room behind the housing. Rubber dust boot will not go back on.
-
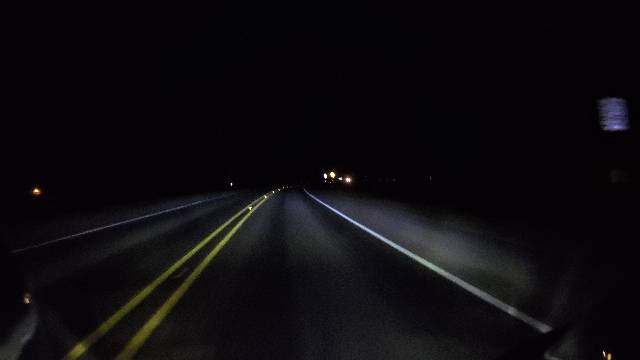
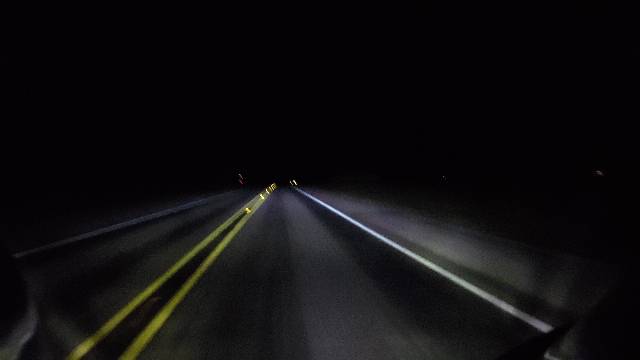
LED headlight results: 1) The OPT-7 unit does NOT seem to emit any RF on my bike. I use an aux. input through the 1st Gen cassette player modification. I am sending my phone through and streaming Pandora radio or MP3s. I do have a stereo ground isolator between the phone and the input. I had to put this in for the normal ground problems not the LED. 2) I do know the problem with the LED emitting a hum in a stereo. My first Rigid LED driving lights had it badly. And Rigid did a recall on the lights and replaced the driver circuit. When I got the lights back, the hum/static was gon. 3) You can hear the little cooling fan on the LED when you turn on the ignition just before you start the bike. I actually now listen for it. 4) I uploaded a video clip onto my Facebook page. I am am public. Joseph Slye. My cousin is Joe Slye. I am the one in Floresville, Texas. (joseph.slye.7 on FB) 5) I am thoroughly amazed at the quality of the light and its performance. I have chopped out the reserve lighting unit permanently and modified the harness. It will still work for a standard bulb should I need it. I did retain a headlight indicator out signal. TURN ON BIKE. IF AREA AHEAD OF YOU IS DARK, A BEAM IS OUT! Seriously. I have the headlight on my walk around every morning anyway. Here are some pictures of the headlight on our dark rural road. Pictures were snapped in motion using my Garmin Virb action cam. It does video and will take still at the same time. Inside dark garage out to driveway. Out on road. Should be low beam. I believe high beam High beam and Rigid LED driving lights
-
All interesting compared to my install. My forward hitch mount is sandwiched between the muffler tab and the frame. Therefore on the OUTSIDE of the frame rail. Now, I currently have MAC mufflers on so I do not have that huge rubber mount on the muffler. However I did have it that way with the stock mufflers. Everything lined up that way including the rear mounts. I will take some pictures later today and see if that helps.
-
Mine is behind the muffler flange mount.
-
I would agree. Not a lot of bolt extra there.
-
The Amazon link goes correctly to the correct light bulb.