


dna9656
-
Posts
1,123 -
Joined
-
Last visited
Content Type
Profiles
Forums
Gallery
Events
Store
Posts posted by dna9656
-
-
Hey Doug,
Where to begin! The "Spring Washer" that you are assuming is a wavy washer is in fact a tube with a washer on each end. The "tube" preloads the fork springs, and this is why your current springs are so much shorter than the new Progressive springs. The lower set of bushings are usually good, and don't need to be replaced...usually. ID mic of both the top and bottom bushings will tell the story. The top bushings are the ones that get sloppy. Unfortunately, they are no longer offered from Yamaha for either the MKI or MKII motorcycles. The upper bushings are made from a free machining mild steel called Leadloy. I have had good luck machining them from bushing bronze as well. The bushing bronze makes for a smoother fork action, but doesn't last nearly as long as the mild steel. In your PM, you asked about electroplating the existing worn out bushings, The issue with this would be the upper fork tubes are hard chrome plated. Usually with a bushing/slide mechanism, one surface is hard, (hardly wears at all) and the other surface is sacrificial. (wears the most) With the hard chromed upper fork tubes being hard, and the electroplated inner bushing surfaces being hard as well, you would most likely wear out the upper fork tube in the area where the fork seal rides, causing a leak, and requiring the upper fork tubes to be replaced. That's why the sacrificial surface is usually the cheaper of the two parts. It's just a shame that Yamaha no longer makes these parts for our bikes. To make these bushings, machine a ring OD to the size of the bore in the lower fork tube. (Which requires the measurement of that bore to .0001", to get a "push fit") Then machine the ID of the bushing to the OD of the upper fork tube +.002". (Which would require the measurement of the OD of the upper fork tube as well) Then take a hacksaw and split the ring in two. You also asked about the PVC shim that comes with the Progressive springs. I weigh 185 lbs. and used half of the provided shim in each tube. Other factors are the weight of the fork oil, if you weigh more or less, are riding two up, etc. Like I said earlier, you will be lucky if you get it right the first time. But to answer your question, you will need some shim to preload the springs, or your front end will be too bouncy.
Earl
So can you give me the P/N of the upper bushing Yamaha no longer offers? I got the pistons and the slide and I got the little ^%$#*&^& washers. Do you mean that aluminum piece just below the "Piston"?
-
Any one know of a free video hosting site?Well apparently there are no free video hosting sits besides youtube and they said they would get back with me in 3 to 5 days about my pass word. That's a big help.
-
no! Not like that!
The seat plate must be flipped around, so the seal is up!, not down like you have pictured.
Concerning the drawing i made of the damping rod with oil lock and seat plate; there may have been some confusion about that drawing and the orientation of the various components depicted. To be clear: The drawing reflects the improper orientation of the oil lock as found, not as it should be.
https://www.venturerider.org/forum/attachment.php?attachmentid=113853i have edited the drawing to add disclaimer and clarification.
The correct assembly is depicted in this drawing:
https://www.venturerider.org/forum/attachment.php?attachmentid=113854
ok, got it!!!
-
I'm in the process of rebuilding my forks. Look at my post(s) and you'll get quite an education. In my 88 there are THREE washers but Yamaha calls one a SPRING, valve, (it's own P/N (that's the wavy one) and the other two (Flat and Yamaha calls them "washers" share the same P/N and they go one both sides of the SPRING, valve forming a stack. The fork needs these in each tube.
-
I removed the "piston" on each side of the fork and installed the 2 seals above and the slider, metal. I have new copper washers to use on the 10mm Allen bolt when I put the outer lower back on. Right now I'm waiting on new pistons. It out to be a pretty nice fork when I'm done. I sure appreciate y'alls help, patience, and understanding! And what about that drawing! WOWZERS! Thank you Prarrie Hammer!
-
Doug, Doug, Doug.
The Oil Lock is the aluminum thing.
https://www.venturerider.org/forum/attachment.php?attachmentid=113845
The seat plate, "top hat" is the steel and rubbery seal thing.
https://www.venturerider.org/forum/attachment.php?attachmentid=113846
And NO, my drawing reflects how your set up is NOW, NOT HOW IT IS SUPPOSED TO GO BACK TOGETHER!
The correct way is: damping rod> wave washer>flat washer>wave washer>oil lock (FLANGE DOWN)>seat plate (seal UP).
Just like this photo, with the addition of the seat plate:
https://www.venturerider.org/forum/attachment.php?attachmentid=113847
Did you not read the tech article on VRO, that I linked too? The ONLY difference between how the article describes the process and your 1988 is the addition of the seat plate ("top hat") with the SEAL UP!
The tech article didn't show the steel things with the seal.... so I needed to know how the seal thingy was installed. I hope my prev. corrected post is correct.
-
26H-2319L-00-00 is the part number for the FLAT washer; 26H-2319M-00-00 is the part number for the WAVE washer! I hope you just mistyped.
https://www.venturerider.org/forum/attachment.php?attachmentid=113843
You said that the seat plate would not come off the damping rod. Since the oil lock was installed upside down, I wonder if the three washers have fallen down inside the oil lock where you can't see them. I also wonder, because the oil lock was installed upside down, that the small end of the oil lock has been rammed into the seat plate (top hat), effectively wedging the two together.
https://www.venturerider.org/forum/attachment.php?attachmentid=113844
I got the Oil lock (Top Hat) off and found the 3 washers inside not wedging the 2 parts together. I take it the proper way to install the oil lock (top hat) is shown in your wonderful drawing? The "TOP HAT" or Oil Lock is 2 pieces pressed together; as mentioned above the 3 washers (are no longer) inside as I separated the 2 pieces. In the Photo they are on the right and re-joined. The so called "spring washer" is a pretty _ iss poor example of a spring washer and the other 2 washers are not flat either. 2 of the washers must be the "flat" ones as they are the same color, sort of copper in color, maybe plated... the other is defiantly different and PRETTY FLAT. Now the pictures in the tutorial don't show the steel piece that I have. The part that is pressed into the steel part with the black seal looks like the one in the instructions but the pic in the instructions has no steel seal part

New info: Been out in the shop....
Like so?
-
Doug, right here on THIS site is a tutorial for rebuilding the forks with lots of good self explanatory pics:
https://www.venturerider.org/forum/showthread.php?496-Fork-Seal-Replacement
Well;
Thanks to your drawing, $12.00 and my own $12.00 per I FINALLY GOT what you have been getting at! I got a light and a poky (pointed tool) and found the three washers you're talking about! They are INSIDE the "Top Hat"! How are they replaced? They must be replaceable as they are listed separately in the parts Illustrated Parts Breakdown (IPB), Exploded Parts View (EPV) or what ever you'd like to call it... I GENTLY tried to separate the top hat from the shaft and that worked ok but what is the procedure to replace these washers? The "Top Hat" doesn't seem to want to come apart....
So since I was looking in the lower (outer) tube for washers and there weren't any and I could NOT UNDERSTAND how the washers could have "fallen out" of the lower (outer tube) as any washer in the lower (outer tube) had to be 2" or so in diameter I figured they were missing and ordered them. So, I am pretty sure I can cancel the 4 flats washers but am unsure of the 2 spring washers I got the 4 at $6.60 each and the spring for $15.?? each.
Should I just get these washers and hold on to them for my own or other's (sell them) use or cancel the orders? I have also misteakenly (arg, arg, arg) ordered an extra set of sliders, metal....
I got the parts apart, they were assembled incorrectly by a PO I suppose
Considering the shape these washers are in I think I'll just replace them.
-
Found and ordered 4 Wave or spring washers P/N 26H-2319L-00-00 and 2 of the P/N 26H-2319M-00-00 flat washers. Those washers are just NOT in the assembly.
Correction: I reviewed my order and I actually (from 2 different places) ordered 2 of the "L"s and 4 of the "M"s. I put it this way because the P/Ns are the same except for the "L" and "M" letters in the P/Ns.
P/N 26H-2319L-00-00; flat washer, fork, (washers)
P/N 26H-2319M-00-00; Spring valve ("Spring" washers)
-
OK, I am not correct in telling you the damping rod will come out the bottom. It will come out the TOP of the inner/upper fork tube. Please excuse me, for I have erred.
OH NO IT WILL NOT! NOT until the "top hat" is removed and it looks like it's welded in place to me. There is no "Obvious" fastening device holding it in place.
But after all that, you needn't remove the damping rod to complete the fork rebuild, but it might behoove you to pull (push) it out to examine the oil seal at its top. If that oil seal is bad, then the fork damping will be compromised. Also, you may find the errant wave washers and the flat washer that are supposed to be at the lower end of the damping tube, although I can't imagine anyone was that incompetent.
If the oil lock was installed upside down (as in your photos) then damping would be severely compromised.
It doesn't look to me like that rod will come out without removing that oils seal at the bottom.
Again, very sorry to mislead you about the direction the damping rod can come out of the upper/inner fork tube. Mea culpa.
That's ok, I'm lost too!
-
OK, so how does one remove the "piston" from the tube?; pry it enough to fit over the ring below? How does one install the metal slide, metal?
-
I just gave 3m pretty good "yanks" on those (they did not come out of the upper....) skinny tubes, I could feel the spring inside working just a little bit but I don't feel confident YANKING any harder, unless further encouraged to do so. I DO think some one that's no M/C mech. (the PO said his mech. wasn't a M/C mech. ... Imagine that!) worked on this bike and reassembled the fork incorrectly.
I ordered the 2 pistons from Partszilla today. They are on eBay cheaper but I had other items to order to so it worked oyt that Partszilla was reasonable.
So I noticed that there is a seal (oil) at the bottom of the upper (outer) tube. Does this seal need to come out to get the skinny rod out?
-
No. As I illustrated, they are supposed to be on the lowest end of the damping rod, (BUT INSIDE THE UPPER TUBE?) but may have fallen off (NOTHING FELL OFF WHEN I REMOVED THE OUTER LOWER) (CAPS TO SEE; NOT TO YELL OR EXCLAIM) when you separated/removed the lower fork tube from the upper fork tube. The Allen socket cap screw that you removed from the bottom of the lower fork tube, secured the "plate, seat" (top hat piece), the oil lock, and the three washers in place at the end of the damping rod. When you removed the Allen socket head cap screw and slid the lower tube off the upper tube, the aforementioned pieces were now loose and unsecured to the damping rod and may have remained in the lower fork tube. Since the seat plate and oil lock are now on the damping rod in the picture, you must have retrieved them from the lower tube? Or did the oil lock and top hat stay attached to the damping rod? Since you removed the Allen head screw that held all those pieces together, I don't see how the oil lock and top hat could have remained on the damping rod.
The "skinny tube" is the damping rod (or "cylinder" in Yamaha parlance). The top of the damping rod is fitted with an oil seal. The oil seal creates a friction fit with the interior of the upper tube. Simply pull the damping rod out of the upper tube.
A picture of the "skinny tube"/damping rod/cylinder:
https://www.venturerider.org/forum/attachment.php?attachmentid=113834
Note that there SHOULD be a rebound spring as pictured. It is loose on the damping rod.
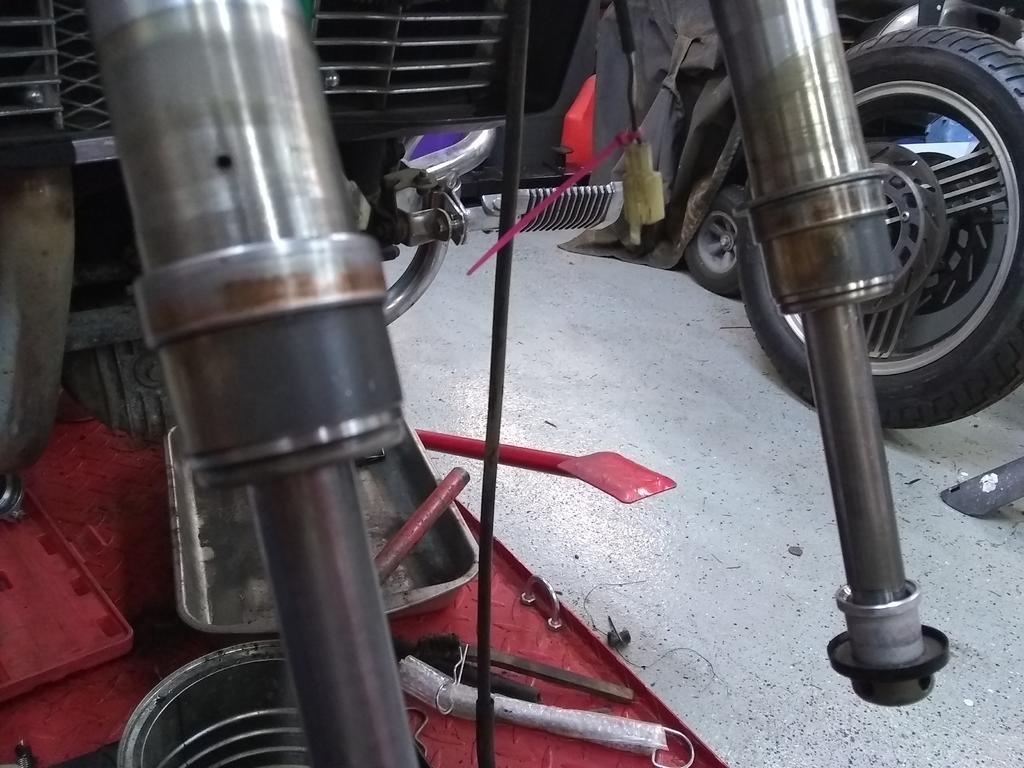
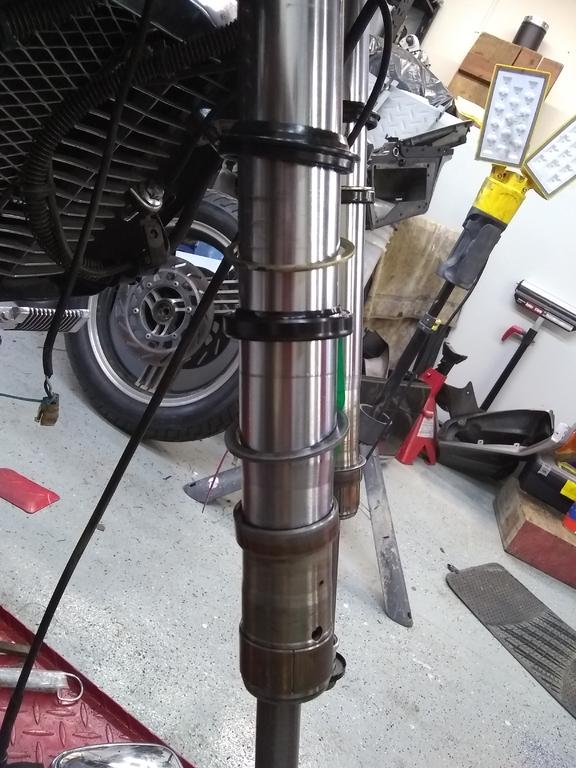
The only washers I have seen are the ones pictured; besides the little copper washer (seal) used behind the Allen head bolt that holds the lower BOTTOM (outside tube) to the outside UPPER tube. I have not gone beyond the picture(s) I have posted so the dampening rod (the skinny one) has not been removed to see if there are and washed inside the UPPER OUTER TUBE. I have gently pulled on the skinny rod; it sure feels like it has to come out the other end of the upper outer tube that's still clamped in the triple tree.
-
Doug, you haven't stated what year/model these forks are from, but since I see the "plate, seat" on the "cylinder" (more commonly called the dampening rod), you must be rebuilding the 1988 forks. The "plate, seat" was used on the 1988-1993 forks. That "plate, seat" is no longer available, so treat it gently. The rubber lip/seal on the "plate, seat" is easily damaged.
While we are talking about the "cylinder"/damping rod, I should point out a couple things: Those three washers that are mentioned in an earlier post by you (26H-2319L-00-00 WASHER FORK 1 EACH SIDE, 26H-2319M-00-00 SPRING WASHER AKA WAVE WASHER**** ) are located above the oil lock aka "taper spindle", at the bottom of the cylinder/damping rod. There should be two wave washers (Yamaha calls it "Spring, valve" PN. 26H-2319M-00-00) with a flat washer (PN 26H-2319L-00-00) between them. This stack of washers acts like a valve spring for the oil lock, oil lock acting as a valve for the fork oil. Here are couple pics showing the three washers on the damping rod http://www.venturerider.org/forum/attachment.php?attachmentid=113827http://www.venturerider.org/forum/attachment.php?attachmentid=113828 Please note that second illustration photo shows the oil lock upside down. Your pics of your forks also show the oil lock upside down. The spring, valve/wave washers 26H-2319M-00-00 are still available if you are missing any, but I would look for them still remaining in the lower/outer fork tube. The flat washer, 26H-2319L-00-00, is no longer available.
This illustration is of a 1988-1993 fork assembly.
Green items are the three washers (2 wave, 1 flat) that make up the stack acting as a valve spring for the oil lock.
The oil lock is blue.
The "Plate, seat" is red. Looks like a top hat....right?
The bushings are yellow.
http://www.venturerider.org/forum/attachment.php?attachmentid=113829
The lower "bushing", part number 3JJ-23171-00-00, (Yamaha calls it a "Piston") is still available from Yamaha and the normal OEM parts outlets, albeit not cheap.
https://www.boats.net/product/yamaha/3JJ-23171-00-00
The upper "bushing", part number 3JJ-23125-00-00, (Yamaha calls it a "Slide, metal") is also still available from Yamaha, Partzilla, eBay, etc.
https://www.boats.net/product/yamaha/3JJ-23125-00-00
I've never made bushings. In an earlier post in this thread from Earl, HE mentioned making the bushings. (I don't know why he said the bushings are no longer available.)
I'm prolly getting responses between you and Earl confused!!!!
Here is what to do next accding to the inst. on the http://www.venturers.org site:
You will see the inner fork damper rod (complete cylinder) hanging out
of the bottom of the top tube. If the oil lock piece and three special
see 3 washers are they in the upper tube?
washers are still on it, consider yourself good. Otherwise use the magnetic
pickup tool to remove them from the lower tube. Be sure you have all four
pieces. Check the oil lock piece for wear, if its worn, replace it (OEM
price $46 US each). This piece must work or your EAND air suspension won't!!
How does the skinny tube with the "TOP HAT" (Seat, plate) come out of the upper tube?
-
Doug, you haven't stated what year/model these forks are from, but since I see the "plate, seat" on the "cylinder" (more commonly called the dampening rod), you must be rebuilding the 1988 forks. The "plate, seat" was used on the 1988-1993 forks. That "plate, seat" is no longer available, so treat it gently. The rubber lip/seal on the "plate, seat" is easily damaged.
While we are talking about the "cylinder"/damping rod, I should point out a couple things: Those three washers that are mentioned in an earlier post by you (26H-2319L-00-00 WASHER FORK 1 EACH SIDE, 26H-2319M-00-00 SPRING WASHER AKA WAVE WASHER**** ) are located above the oil lock aka "taper spindle", at the bottom of the cylinder/damping rod. There should be two wave washers (Yamaha calls it "Spring, valve" PN. 26H-2319M-00-00) with a flat washer (PN 26H-2319L-00-00) between them. This stack of washers acts like a valve spring for the oil lock, oil lock acting as a valve for the fork oil. Here are couple pics showing the three washers on the damping rod http://www.venturerider.org/forum/attachment.php?attachmentid=113827http://www.venturerider.org/forum/attachment.php?attachmentid=113828 Please note that second illustration photo shows the oil lock upside down. Your pics of your forks also show the oil lock upside down. The spring, valve/wave washers 26H-2319M-00-00 are still available if you are missing any, but I would look for them still remaining in the lower/outer fork tube. The flat washer, 26H-2319L-00-00, is no longer available.
This illustration is of a 1988-1993 fork assembly.
Green items are the three washers (2 wave, 1 flat) that make up the stack acting as a valve spring for the oil lock.
The oil lock is blue.
The "Plate, seat" is red.
The bushings are yellow.
http://www.venturerider.org/forum/attachment.php?attachmentid=113829
The lower "bushing", part number 3JJ-23171-00-00, (Yamaha calls it a "Piston") is still available from Yamaha and the normal OEM parts outlets, albeit not cheap.
https://www.boats.net/product/yamaha/3JJ-23171-00-00
So if that's the BUSHING (piston) what is the Seat, plate?
The upper "bushing", part number 3JJ-23125-00-00, (Yamaha calls it a "Slide, metal") is also still available from Yamaha, Partzilla, eBay, etc.
https://www.boats.net/product/yamaha/3JJ-23125-00-00
I've never made bushings. In an earlier post in this thread from Earl, HE mentioned making the bushings. (I don't know why he said the bushings are no longer available.)
The seat,plate isn't to be had for love nor money.
I haven't been "IN" the upper tube that the shaft with the oil seal, dust seal and 2 washed pictured. I have only gone as far as the picture shows. The WIDE bushing at the bottom is (I think) the "piston"...I wonder why Yamaha shows the oil lock on (every one I have seen) Upside down? Is this oil lock being upside down why the forks bottomed out?
-
To ALL: I'm sorry, I didn't mention the model year of my Bike, It's an '88, XVZ13U.
-
Doug, the stock Venture springs are somewhat "progressively" wound in appearance. Some folks categorize the stock springs as "dual rate".
The Progressive® Suspension springs for the Venture are longer (thus negating the need for the stock spacer) and heavier gauge wire is used for a higher spring rate.
Pictured is a comparison of stock springs and Progressive® springs as for a MKII Venture. Most have found the preload offered by the use of the stock aluminum plug under the fork tube cap is sufficient (no need to use any of the Progressive® supplied PVC spacer). All of this information is applicable to MKII forks only, the MKI forks have other needs.
http://www.venturerider.org/forum/attachment.php?attachmentid=113820
So what do you think of the pictures in the above post? Those wider, lower bushings (I have since learned are "PISTONS and can be purchased), I doubt the parts bikes I have would have any in better shape, i do have a 1300 fork of unknown condition. How should I proceed, use these bushings with heavier fork oil? Try to find a (I have a 1200 83.5 fork that was working just fine) better fork? I have R-1 brake master cylinder and calipers....Some one mentioned that you have made bushings in the past....do you still do that? If so we should talk....
-
In guessing that the existing caps do not screw on/off or easily come off the wires as I can find no way to remove them without cutting the wire. The new caps are due to arrive tomorrow. The plan is to trim off the old caps and install the new ones.
I would ditch the old caps and ignition wire then put in new plugs, new everything. When you get the new caps you see what the other guys were explaining much better.
-
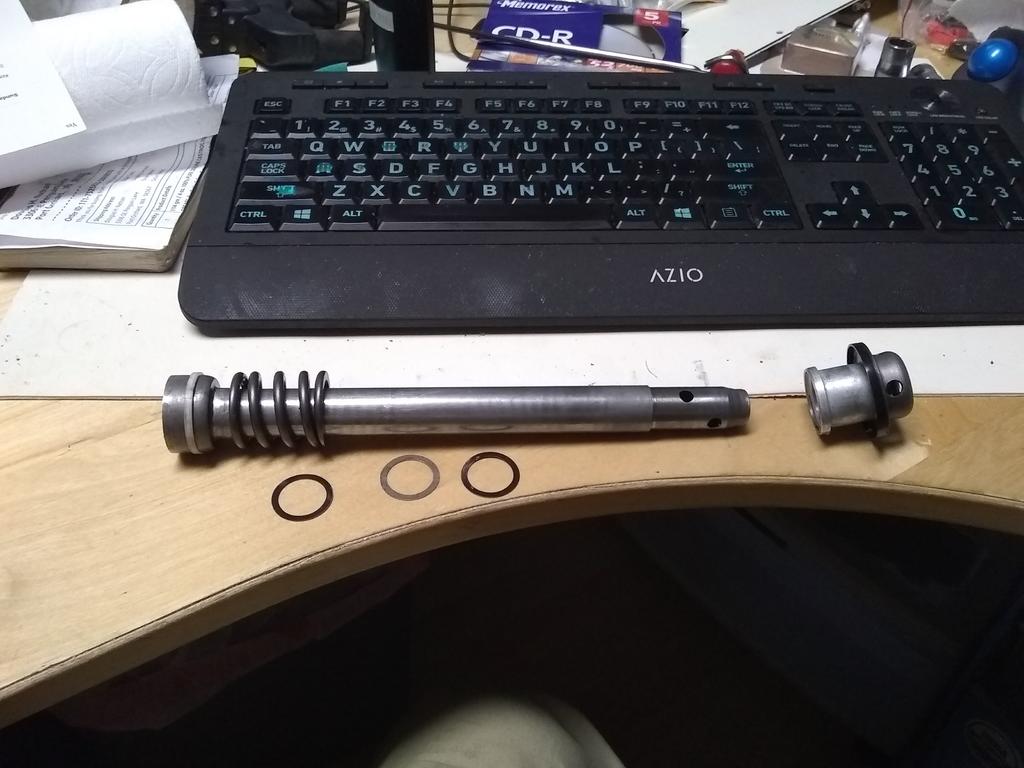
Here are some pictures of the lowest bushings. About 1/3 has a brass (sorta) color and the other 2/3s is gray or black (if you chose) in color. the pictures show the different ares. Both sides have the same 1/3 / 2/3 wear.
Now I have plenty of extra forks on the 85 and below parts bike, I also have another 1300 cc bike fork whose condition is unknown but they sure aren't cosmetically as nice as the pair I have on the bike.
-
Hey Doug,
Where to begin! The "Spring Washer" that you are assuming is a wavy washer is in fact a tube with a washer on each end. The "tube" preloads the fork springs, and this is why your current springs are so much shorter than the new Progressive springs. The lower set of bushings are usually good, and don't need to be replaced...usually. ID mic of both the top and bottom bushings will tell the story. The top bushings are the ones that get sloppy. Unfortunately, they are no longer offered from Yamaha for either the MKI or MKII motorcycles. The upper bushings are made from a free machining mild steel called Leadloy. I have had good luck machining them from bushing bronze as well. The bushing bronze makes for a smoother fork action, but doesn't last nearly as long as the mild steel. In your PM, you asked about electroplating the existing worn out bushings, The issue with this would be the upper fork tubes are hard chrome plated. Usually with a bushing/slide mechanism, one surface is hard, (hardly wears at all) and the other surface is sacrificial. (wears the most) With the hard chromed upper fork tubes being hard, and the electroplated inner bushing surfaces being hard as well, you would most likely wear out the upper fork tube in the area where the fork seal rides, causing a leak, and requiring the upper fork tubes to be replaced. That's why the sacrificial surface is usually the cheaper of the two parts. It's just a shame that Yamaha no longer makes these parts for our bikes. To make these bushings, machine a ring OD to the size of the bore in the lower fork tube. (Which requires the measurement of that bore to .0001", to get a "push fit") Then machine the ID of the bushing to the OD of the upper fork tube +.002". (Which would require the measurement of the OD of the upper fork tube as well) Then take a hacksaw and split the ring in two. You also asked about the PVC shim that comes with the Progressive springs. I weigh 185 lbs. and used half of the provided shim in each tube. Other factors are the weight of the fork oil, if you weigh more or less, are riding two up, etc. Like I said earlier, you will be lucky if you get it right the first time. But to answer your question, you will need some shim to preload the springs, or your front end will be too bouncy.
Earl
Well apparently there are no free video hosting sits besides youtube and they said they would get back with me in 3 to 5 days about my pass word.
-
Hi guys, sorry the manual I have is hard to read, what do I all have to do to get the stock ignition box out ? As in where is it located and what has to come out to get to it ?
Thanks
Ken
Here's your very own easy to read Service manual and it's FREE!!!! Now, get yourself a computer and a large screen TV (monitor) out in your shop and you'll be able to see the pictures better, that aren't so bad once they are 12" square!
-
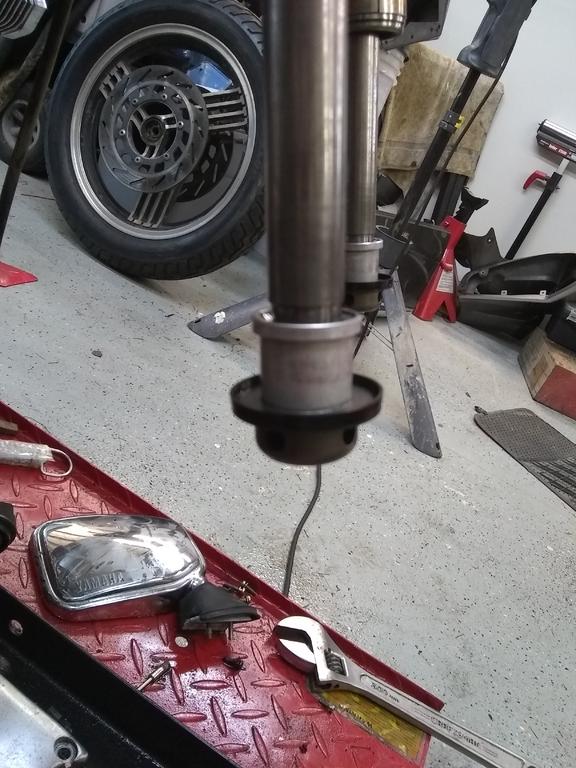
OK, I got out to the shop today and cleaned up both lower outer tubes, chased the threaded holes with taps, and chased the bolts/screws with a die and wire wheeled the threads. Cleaned the aluminum casting with brake clean and paper towels. Had a stuck copper washer on one side that was fun getting out but I got it!
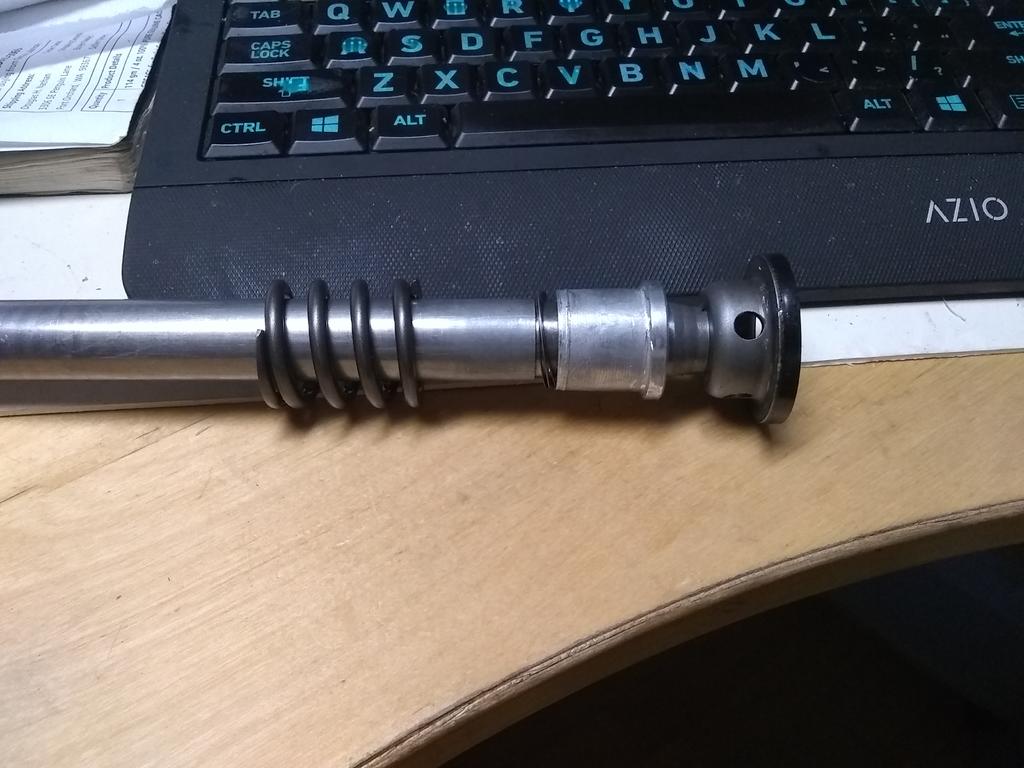
Now on to the point of confusion. The picture below is what I have on the cylinder ID'ed as "Cylinder Front Fork" Item 12 on the Parts Fitch.
Seals and washers on left. This is hanging out the of the tube shown in the pic o the far left.
Do these 2 bushings at the bottom need to be replaced? I can get the P/N 3JJ-23125-00-00 Metal Slide, I don't know if the WIDE one is the Metal Slide or the NARROW one is but the METAL SLIDE is available. I suspect the one that can slide up and down is the slide! Your input would be appreciated!
I have a video where I ask if these parts need to be replaced. Apparently Photo Bucket no longer supports hosting vids so to not waste the entire evening trying to find a site that hosts vids for free please ask to have me send it to you!
From the top I have the dust seal (item 8 on the Fitch), (the oil seal clip; item 5, is not in in place), next, the oil seal washer, (item 20 in the Fitch), the oil seal (item 6 on the Fitch), the upper spring (is this washer a wavey washer or a washer that is used with a spring? As you can see I have TWO flat/conventional washers, no wavey washer, nothing like that) washer, the metal slide 1, then (what I call) a bushing; it's hard to see, it's about an inch long and is split and called a seat plate, it looks a lot like a bushing to me.....plates are flat, that's why we eat off of them or use them for clutches.....
The instructions are on www.venturers.org He's working on a XVZ13DS/DSC.
It says this at step 16: You will see the inner fork damper rod (complete cylinder) hanging out
of the bottom of the top tube. If the oil lock piece and three special AHHH DIFFERENT AREA!!!!
washers are still on it, consider yourself good. Otherwise use the magnetic
pickup tool to remove them from the lower tube. Be sure you have all four
pieces. Check the oil lock piece for wear, if its worn, replace it (OEM
price $46 US each). This piece must work or your EAND air suspension won't!!
I count TWO washers on mine, where is the THIRD Special washer? I can't find that P/N on any page in the Yamaha Parts Catalog, at Boats.net or Partzilla.com.
Near as I can tell the guy is talking about what must be a discontinued part or one that has changed.
Here's his parts list:
- 2 YA26H-23144-00-00 SEAL DUST
- 2 YA1NL-23145-00-00 OIL SEAL FORK
- 2 YA26H-2319L-00-00 WASHER FORK 1 EACH SIDE
- 4 YA26H-2319M-00-00 SPRING WASHER AKA WAVE WASHER****
- 2 YA3JJ-23125-00-00 METAL SLIDE FORK BUSHING
- 2 YA3JJ-23171-00-00 PISTON, BUSHING
- ***This is the one I don't have and no one on the Internet has it. So, has this gone away or is there a new P/N?***
- Do I not need this part?
- 2 YA26H-23144-00-00 SEAL DUST
-
Backrests are great if they keep you from slumping over. Mine push me upright so that I'm forced to keep my back straight which gives much less fatigue.
"Why is my back tire literally disappearing before my very eyes after every 50 mile or hundred mile trip? I mean it wasn't an expensive Tire, a Shinko tourmaster, but front barely shows any wear?"
Years ago I decided to do my own tire evaluations to see if I could save something on the cost of rubber. Shinko's were the worst and simply ground away almost immediately. In the end, the effort and cost of changing tires was the determining factor. I have two bikes, both running Metzeler tires simply because their running life was reasonably long.
zag
The more you spend on tires the longer it'll last, USUALLY! The surface you ride affects the longevity of tire tread. Smooth asphalt is really easy on tires but that 30 year old concrete out there on the Interstate or down town is rough, really rough and will be harder on your tires. Most of the weight is in the back of the bike so....it's VERY important to keep your tires at the factory max PSI (measured when they are COLD, not after you drive to where ever the nearest air compressor is) for max mileage and performance.
-
pulling that bent crash bar on the right side back into place was no big dealhttps://uploads.tapatalk-cdn.com/20180718/beb2cea1eb8b08344adb0ab202b8b332.jpg
sent from my sm-g935v using tapatalk
Hooray!!!!


Fork Overhaul
in Venture and Venture Royale Tech Talk ('83 - '93)
Posted
Waiting for those little, tiny washers!