oldbikerjimi Posted April 29, 2013 Share #1 Posted April 29, 2013 I would like to remove the tour pack on my 02 Venture and when the bike was in the shop this winter, I asked them to do it..They advised against it saying there were too many things involved in doing so.. I am curious if anyone here has removed theirs and how much is involved in doing so..I do not use the C-B radio at all and would only need to remount the radio antenna..Thanks. Link to comment Share on other sites More sharing options...
etcswjoe Posted April 29, 2013 Share #2 Posted April 29, 2013 (edited) I removed mine on one of my 99's and it is simple and you can even relocate the CB to one of your saddle bags. You will have to hide the wires and either cut the brackets that hold the wriing on to the rear fender or get a tourdelux rear fender like I did. If you are not going to use the CB would you consider selling it? Someone on here did theirs and really made it look sharp cut down windshield fender rack custom seat the works. Mine is a work in progress I keep changing thinks on it. 1. remove the trunk 4 screws I belive 2. remove antennas 3. remove CB 4. remove grab handles 5. remove trunk rack 6. remove passenger seat 7. replace or mod fender 8. Put everything on a shelf incase you everywant to go back. 9. Make antenna bracket if so desired Edited April 29, 2013 by etcswjoe Link to comment Share on other sites More sharing options...
oldbikerjimi Posted April 29, 2013 Author Share #3 Posted April 29, 2013 What is the box under the tourpack, is that the C-B....I wiould most likely run her with a solo seat to, so I'd put a bender rack there. Link to comment Share on other sites More sharing options...
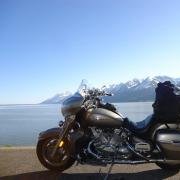
etcswjoe Posted April 29, 2013 Share #4 Posted April 29, 2013 The first pic is the seat, the second one is a tank bag I had strapped to the back with all my camera stuff in it. Link to comment Share on other sites More sharing options...
adventurer 08 Posted April 29, 2013 Share #5 Posted April 29, 2013 I just took the tour pak off my first gen. Look kool!!! Link to comment Share on other sites More sharing options...
csdexter Posted April 29, 2013 Share #6 Posted April 29, 2013 (for completeness only) The tour pack itself (topcase or travel bag, as Yamaha calls it) is attached to the trunk frame with 6 allen bolts: two towards the front (or forward, if you like ships) and one towards the back (or aft) on each side. The ones forward have small washers on them, try not to lose them The ones aft, depending on whether your 2nd gen. Venture is made before or after 2001, will either have a large steel plate washer and a smaller rubber one under (old) or a big metal plate and a matching rubber mat under (new). If you have the newer version, note that the two plate+mat pairs differ left from right and the left one has a big L stamped into the rubber mat. You then need to disconnect the wires that go to the trunk. To do that, both rider and passenger seats must come off first. Then, look right where the passenger seat used to be and locate the big cylindrical connector that connects the passenger intercom socket to the bike harness. It has a safety catch, you have to push that in while you're pulling the connectors apart. Next are the two square connectors that connect the passenger remote control and passenger speakers to the bike, they sit on two metal ears on the trunk frame, just at the point where the trunk wall (the one with the backrest) would intersect the trunk frame. Depending on how big your fingers are and how stubborn the connectors, you may have to remove them from the eyelets first and then push the latch in and take them apart. Lastly, remove the passenger intercom socket from its rubber holder on the left side of the rear fender. The trunk now comes cleanly right off the bike. Of course, it helps if the antennas are folded down ;-) The CB box is bolted in the middle of the trunk frame and there is no wiring that goes between the CB box and the trunk, so you can leave it there if you wish. If you decided "everything must go!", then continue as follows: Undo the two rubber bands holding the CB box's lid in place. Remove bands and lid. Disconnect the CB power connector (white, three position, rectangular) -- depending on the model, it's either inside the CB box or under the rider's seat, trace the wiring to find it in the latter case. Disconnect the CB control cable (black, cylinder, DIN-13) inside the CB box. Disconnect the CB antenna cable (black cable connecting to gray cable, male banana connector on the black side) inside the CB box. The CB radio itself now comes off, remove. The CB box is bolted to the trunk frame by four hex head bolts. If you're removing the trunk frame as well, there's no need to undo them now as the frame will come off with the box as one piece. Loosen the FM antenna, disconnect the cable and remove the antenna. Do the same for the CB antenna noting that its black cable (the short one) now becomes free, so remove it. For reference, the CB antenna is the one with the black insert at its mid length, on the left side of the bike. Once again, if you're removing the trunk frame, there's no need to remove the antenna brackets separately as they will come off with the frame as one piece. Note that the CB control cable and FM antenna cable go all the way to the front fairing while the CB power cable goes all the way to under the rider's seat. Think about either removing them completely or coiling them up and hiding them somewhere on the bike. If not already done, remove the two square connectors from the eyelets on the trunk frame. Remove the hex head bolt that holds the ground connection (black ribbon wire) onto the frame. Once again, think about what you're going to do with the ground ribbon and the wire going to the two connectors. Loosen the two hex head bolts that secure the grab rails to the trunk frame. If you have a short enough (as in "not tall") ratchet, you may be able to reach the trunk frame allen head bolts without removing the sidebags. Loosen all four bolts for the trunk and the two ones for the grab rails, remove both from the bike. That's it! Link to comment Share on other sites More sharing options...
bar836 Posted May 28, 2013 Share #7 Posted May 28, 2013 Simple to do - have it down to 15 minutes including the seat change. I made a wood holding device that I have snap pins that hold the trunk up when off the bike to keep it from getting scratched up. Link to comment Share on other sites More sharing options...
ken Posted May 28, 2013 Share #8 Posted May 28, 2013 Took mine off too. Pretty easy. Link to comment Share on other sites More sharing options...
etcswjoe Posted May 28, 2013 Share #9 Posted May 28, 2013 Simple to do - have it down to 15 minutes including the seat change. I made a wood holding device that I have snap pins that hold the trunk up when off the bike to keep it from getting scratched up. What kind of seat did you use? Link to comment Share on other sites More sharing options...

Recommended Posts
Create an account or sign in to comment
You need to be a member in order to leave a comment
Create an account
Sign up for a new account in our community. It's easy!
Register a new accountSign in
Already have an account? Sign in here.
Sign In Now