


dfwthompson
-
Posts
39 -
Joined
-
Last visited
Content Type
Profiles
Forums
Gallery
Events
Store
Everything posted by dfwthompson
-

Front fork...what the hell
dfwthompson replied to dfwthompson's topic in Venture and Venture Royale Tech Talk ('83 - '93)
Thank you Gary for taking time to help me! I'll let you know what I find out. john -
Front fork...what the hell
dfwthompson replied to dfwthompson's topic in Venture and Venture Royale Tech Talk ('83 - '93)
Thanks Gary.....your cutaway of a fork tube on the inside looks nothing like mine. Yours are flat on the bottom to accept the tapered spindle where I'm guessing the raised portion on mine is designed to accept just the tapered damper. I've never seen a spindle but would think its' diameter would exceed the diameter of the raised portion at the bottom of my tubes. Are you thinking my tubes require a spindle? -
Front fork...what the hell
dfwthompson replied to dfwthompson's topic in Venture and Venture Royale Tech Talk ('83 - '93)
Thanks guys....maybe this fork doesn't use spindles??? The left side had no spindle either. Have you ever seen forks without spindles? The left side looked like the right but it had all the washers unlike the right side. Since I've never viewed the inside of these tubes I've attached a pic. The damper is tapered so possibly no spindle is required on this application. I'm sure someone will know or has seen an application like this one previously. Gary....I may hit you up for a couple spindles once determined they're definitely required. Let me know your thoughts and how much to send you. The flat and wave washers are available so no worry there. Thanks john -
Front fork...what the hell
dfwthompson replied to dfwthompson's topic in Venture and Venture Royale Tech Talk ('83 - '93)
I wish that was the case. Both tubes clean! Thanks for the response. -
'83 xzv1200 std. After removing the forks and disassembling, I found no washers (2-wave & 1-flat) or spindle on the right tube damper. How can this be??? and that was the leaky tube. Also it appears the spindle is now obsolete. Can't wait to break the left side apart....damn dealerships. Any ideas? Or is it time for a used fork tube? Your thoughts I welcome! Thanks john
-
Oil change related question
dfwthompson replied to dfwthompson's topic in Venture and Venture Royale Tech Talk ('83 - '93)
Thanks Pete...that makes sense. Now I'll go find a shim. -
Oil change related question
dfwthompson replied to dfwthompson's topic in Venture and Venture Royale Tech Talk ('83 - '93)
Thanks Randy and Steve....wonder if any damage was done with the spring behind the oil filter and where does one find a shim. I've gone this long w/o, not sure what its' function is. Does anyone know? -
Each and every time I change my oil I scratch my head wishing I had paid better attention to the spring location......does it go before the oil filter or after????? I've placed it both locations. I found nothing in the manual referencing this spring nor have I seen any related posts. Can anyone explain the location and purpose of this spring? Thanks john
-
#3 not firing
dfwthompson replied to dfwthompson's topic in Venture and Venture Royale Tech Talk ('83 - '93)
George, In response to your question below.... Have you checked the Intake stacks on top of carbs, to make sure the Alignment , Marks, are in the proper position. ??? Yes, after careful inspection of the air box I visually verified the intake stacks to be properly aligned. Never noticed these marks before. Thanks for the heads-up!! I'll re-set and re-sync tomorrow and advise. Thanks again for your help! -
#3 not firing
dfwthompson replied to dfwthompson's topic in Venture and Venture Royale Tech Talk ('83 - '93)
Thanks George...let me answer all your question as they appear in your response. but are you sure that your Carb Linkage is " Synced" properly ??? carb linkage synced properly.....not sure of procedure or understand the verbiage "linkage synced" If referring to the slide adjuster...yes, it's properly adjusted Does your " Pull " throttle cable, have some " Slack " before the mechanical linkage starts to move, ??? Yes, Pull throttle cable = 1/8" play Have you carefully inspected, the Intake Manifold Rubber section for cracks, and leaks !! ( Intake leaks ) Yes, also sprayed starting fluid with no increase in rpm Have you done a " resistance check " of the Plug caps ?? Yes, also swapped plug and cap with known working #1 cyl Have you removed the plug wire from that cylinder, and nipped off 1/4 inch, then Re-Installed the 7MM plug wire, At the Coil, and at the Plug cap ?? Yes, wire looked good and I left just a tab of wire protruding from the plug wire ensuring a better connection at coil and cap. Possible a " sticking " float valve -- ?? Carb not flooding and fuel bowl is filling with fuel Intake Air Leaks ??? Have you checked the intake manifold mounting bolts, ??? or possible a Leaking O-Ring where the manifolds are bolted to the heads. There have been reports, that even after replacing the O-Rings, still leaking, and adding a sealant to the O-Rings was required to stop the " Intake Leak " !! Checked that with starter fluid with no increase in rpm... Have you checked the Intake stacks on top of carbs, to make sure the Alignment , Marks, are in the proper position. ??? No...was not aware there were alignment marks. Please explain. Are your sure the Clamps, Above, and Below the carbs, are makeing a tight Intake seal ?? Not sure now after just learning there are adjustment marks on the carb stack. Have you done a " compression Check " ???? If you find nothing else, well, maby you have a badly leaking valve , or stuck ring. Not likley, but a possibility. No compression check done yet. Even if you are sure the Sync is OK, I would try, RE-Setting the Pull cable to 1/8 inch of free play. Cable is good Reset, the Master Idle to " Just makeing contact " Reset all three Sync screws, to " Just makeing contact " NOW, Re-Do the SYNC proceedure with your --- Morgan Carb Tune ---- tool ( you do have one don't you ??? ) No Morgan...just a SyncPro and will re-set master idle and 3 sync screws to just making contact. Do a resistance check of All 4 plug caps, make sure they all are the Same, I think its 5000 ohms, main thing is that they are all Same !! I swapped cap and plug from working #1 to #3. No change... I played with the air/fuel mix settings per Pete last night and greatly improved the throttle response. I still don't understand why #3 is not getting as hot as the other cylinders. Thanks George...I'll re-set and re-sync and advise of outcome. -
#3 not firing
dfwthompson replied to dfwthompson's topic in Venture and Venture Royale Tech Talk ('83 - '93)
Thanks again Pete...#2 and #4 plugs at 2.5 out looked picture perfect where #1 and #3 looked a bit on the rich side. I'll adjust per advisement and let you know the outcome. Thanks john -
#3 not firing
dfwthompson replied to dfwthompson's topic in Venture and Venture Royale Tech Talk ('83 - '93)
I'm wondering if I have covered all basis before removing carbs for cleaning. What I've done so far: verified there is fire at #3, verified fuel in bowl and soaked and drained bowl several times with berryman's and staybil, removed air/fuel mix screw/spring/washer/o-ring, cleaned passage through PA1 and and that of PA2 with carb cleaner and re-set I/M screw at 2.5 turns out, all diaphragms replaced earlier this year, inspected tank to be very clean, fuel filter previously changed. I still have a sluggish throttle, does not maintain higher rpms on repeated revs and #3 still has a much cooler exhaust temp at cyl. compared to the other 3 cylinders (very hot 2 touch). Is there anything else I can do prior to pulling carbs for cleaning? Below is a list of parts replaced on a rebuild by mbrood. Is there anything else I should add? Thanks guys for all your HELP and advice!! ’86 VR carb parts list by mbrood I know there are more parts that some might find needed... but here's the parts that went into mine. 4 22U-14147-00-00 O-ring (goes on the post under the jet block) 4 22U-14968-00-00 Cap, rubber, large (goes into the base of the jet block) 4 22V-14968-00-00 Cap, rubber, small (goes into the base of the jet block) 4 3JB-14199-00-00 Gasket (jet block gasket) 4 4G0-14142-37-A0 Pilot Jet, 37.5 (tiny idle gas jet inside jet block, MKI used a different size) 4 3LD-1490H-00-00 diaphragm set 5 (coasting enrighment valve, I suspect ethanol may have caused this to deteriorate) -
Welcome neighbor! Glad to have you.
-
#3 not firing
dfwthompson replied to dfwthompson's topic in Venture and Venture Royale Tech Talk ('83 - '93)
Tried that already George...no change. -
#3 not firing
dfwthompson replied to dfwthompson's topic in Venture and Venture Royale Tech Talk ('83 - '93)
Pete, I confirmed I have fire....checked air/fuel mix screws, all are 2.5 out. Guess it's fuel related. Never pulled the carbs on this one. Is there something I should do prior to cleaning the carbs? I think I'll pull the airbox and introduce #3 to a lil chemtool. Can you recommend a place for the carb kits? Thank you for all your help. I'll advise when problem is found and resolved. -
#3 not firing
dfwthompson replied to dfwthompson's topic in Venture and Venture Royale Tech Talk ('83 - '93)
Thanks Pete...No I did not confirm there was no fire. Not sure I know how unless grounding the plug and watching for spark is the test. I'll confirm and drain #3 again. Vacuum checked with starter fluid...no increase in RPMs, 43k miles-carbs have never been off. Fuel tank very clean and recently treated fuel with staybil and berrymans. Soaked and drained carbs several times prior to syncing. Will advise....Thanks again Pete for your response. -
Well I've exhausted the extent of my knowledge on this one. During the sync I noticed a lack of throttle response. In checking #3 was considerably cooler than the others. I swapped plug and cap from working #1 to #3....no change, #1 still HOT, #3 much cooler. Checked fuel in #3 by drain screw...ok, fuel drains. Checked primary at 2.9 ohms and secondary at 12.10 ohms per cap test doc. What have I missed? If the plug wire was bad the Secondary test would not have checked out at 12.10 ohms. If the plug or cap were bad, #1 would have shown signs of not firing after swap. TCI connectors clean. I'm missing something. Where do I go from here?
-
NOPE... but I wear seat belts now! Bad habits are truly hard to break.
-
-
-
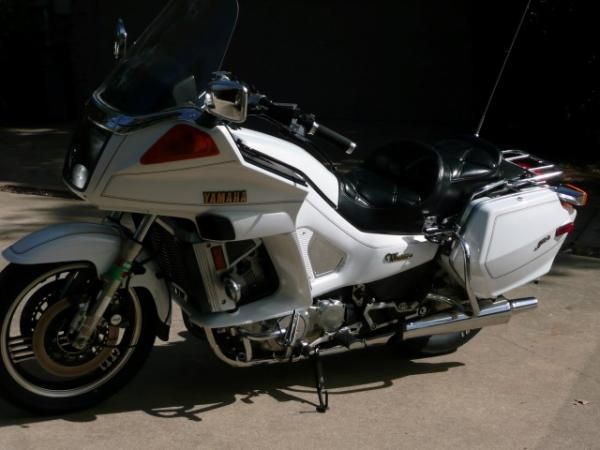
From the album: '83 White Pearl xvz12 Std
-
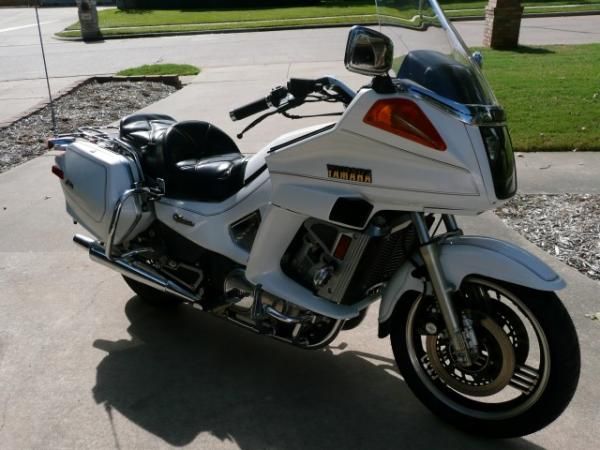
From the album: '83 White Pearl xvz12 Std
-
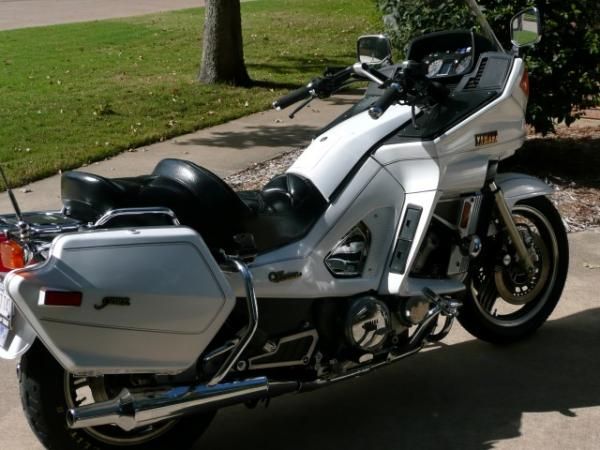
From the album: '83 White Pearl xvz12 Std
-

From the album: '83 White Pearl xvz12 Std
-
No Headlight or Meter lights
dfwthompson replied to dfwthompson's topic in Venture and Venture Royale Tech Talk ('83 - '93)
Agreed...Andrew I also ride an '83 White Venture. Just luv it! -
No Headlight or Meter lights
dfwthompson replied to dfwthompson's topic in Venture and Venture Royale Tech Talk ('83 - '93)
Guys....An update to the lighting issues which have been resolved. The meter lites problem was due to excessive crimping at the wire connector to the R/W wire at new fuse block....I somehow crimped the wire connector to a point it cut the wire found only after a continuity test of the wire. As for the headlight problem...I replaced the RLU which was not the issue and then proceeded to re-solder connections in the CPU. I have read many posts about this and decided to give it a try. Well it does require a lil skill because my joints looked terrible and way too much solder...BUT it solved the headlight issue and ALL those pesty warning icons I thought were due to sticky or dirty sensors. I've put up with that blinking red lite for so long....what a pleasure to ride without it!! Thanks everyone for your help on this one. Couldn't have done it without you!