


Johnnycyclone
-
Posts
137 -
Joined
-
Last visited
-
Days Won
12
Content Type
Profiles
Forums
Gallery
Events
Store
Posts posted by Johnnycyclone
-
-
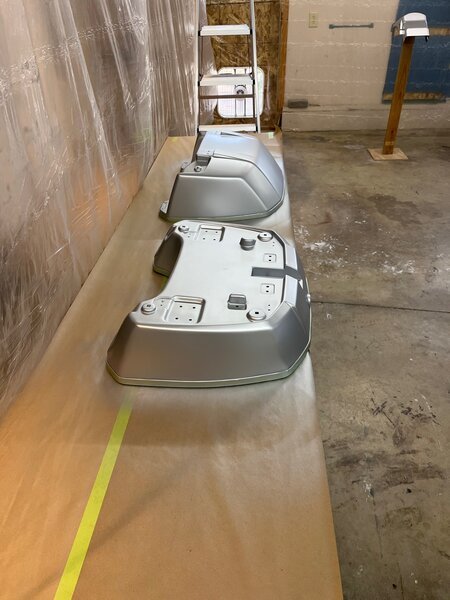
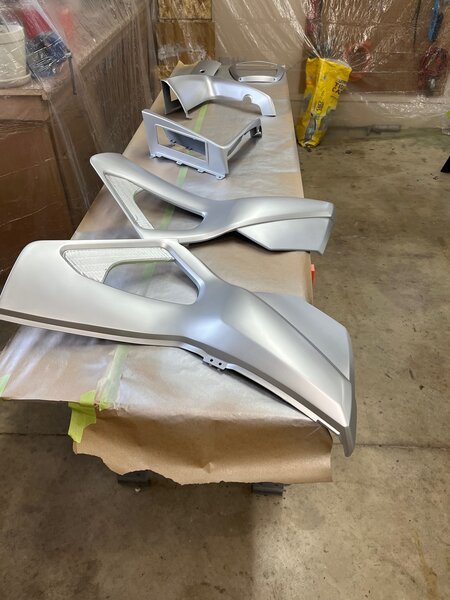
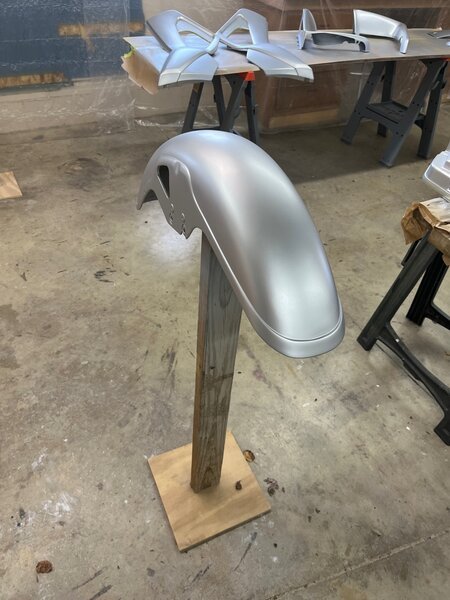
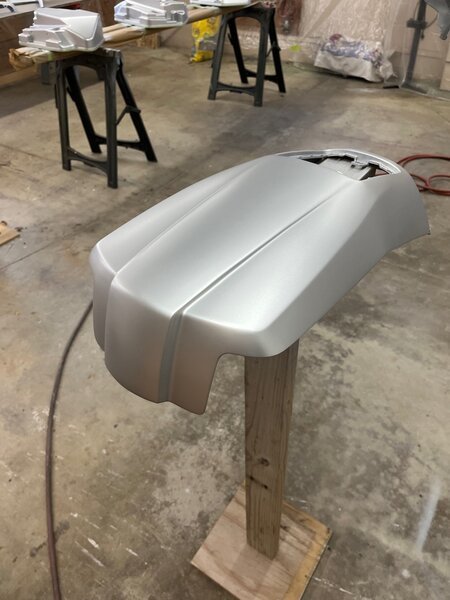
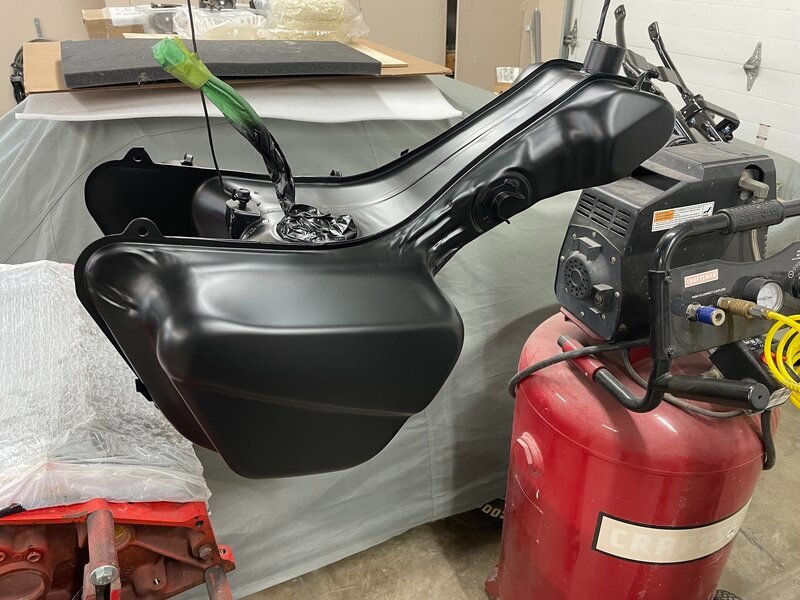
Next I sprayed a silver basecoat, Galaxy Silver, which I think is a GM color. I did a test over the summer where I sprayed a white sealer, a gray primer and a silver color. I then sprayed the final color on the test part and the final color looked much better with the silver base. So that is why I am spraying a silver base coat. Here are some more random pics after the silver is done.

-
 1
1
-
-
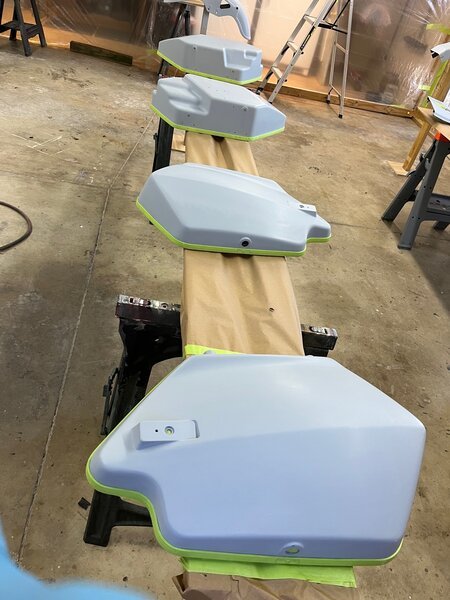
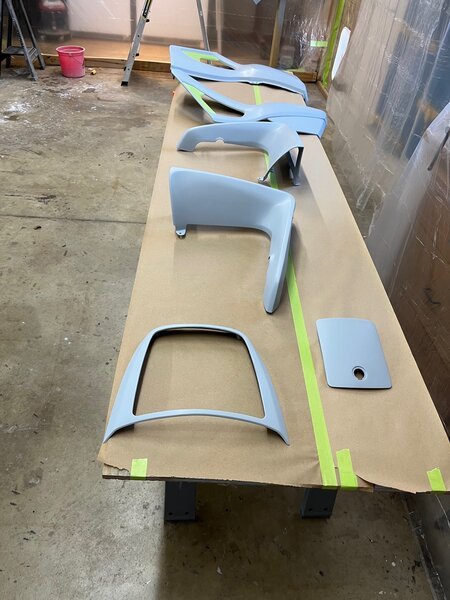
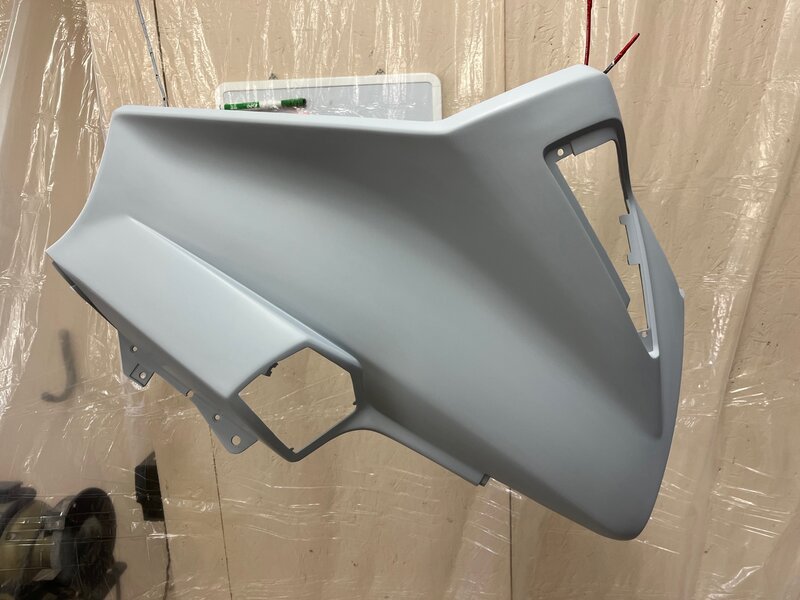
Well tomorrow will be 6 years since my first post, and the work goes on. Hopefully this will be last time I utter these words, time to get back on this project. Actually I have been working on it, buying a few more parts and working on the plastics. A lot of time has gone in to getting the plastic parts ready for paint. So here are some random pics from this past weekends work.
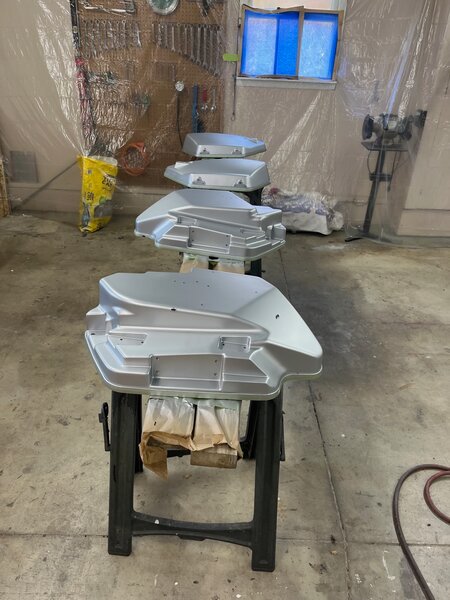
First set of pics is of the plastics ready for paint. I sprayed two coats of Slick Sand, then a guide coat, and then block sanded all the parts. I then sprayed three coats of 2K primer and wet sanded all the parts with 600 grit sand paper. I'm not sure it this is the best method, being a novice painter, but it sure made a nice and smooth surface for the paint.
-
1
-
-
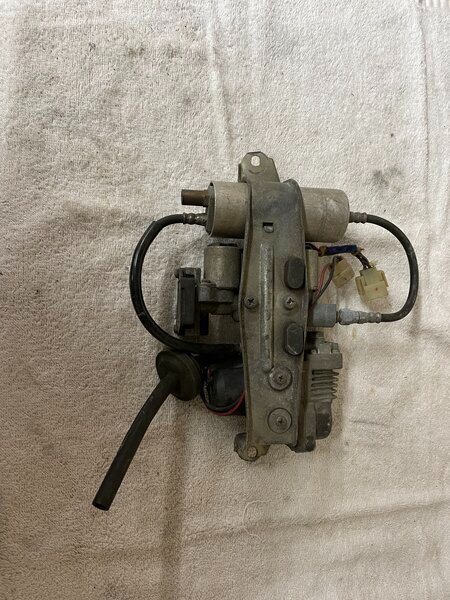
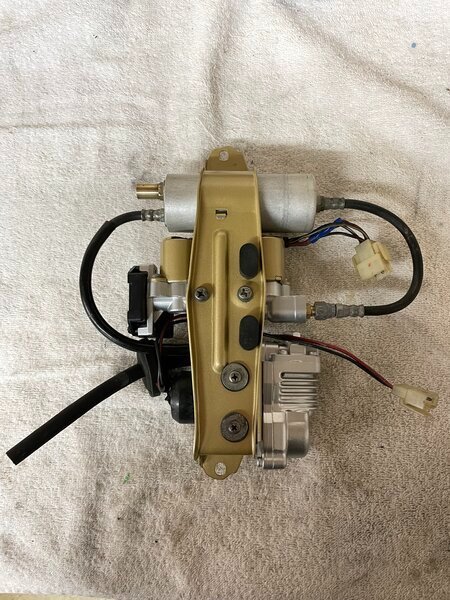
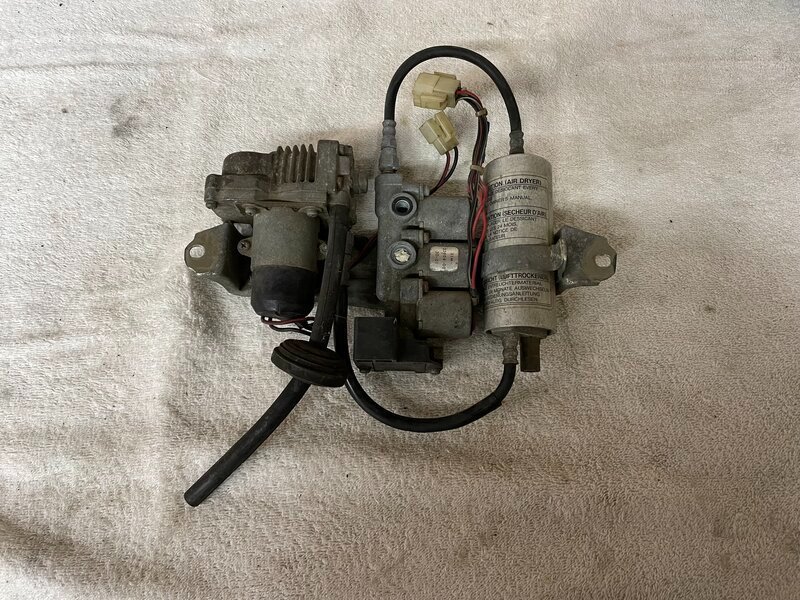
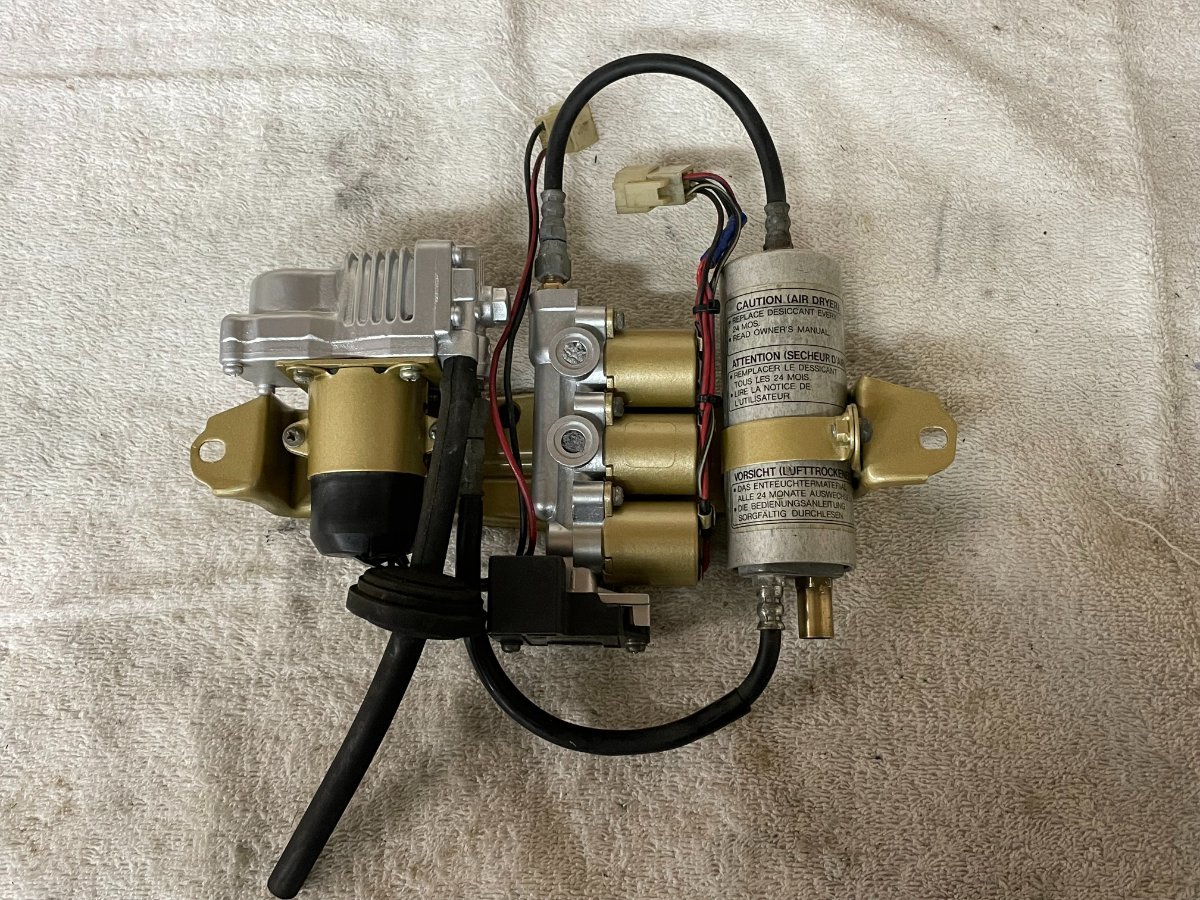
Been a slow couple of weeks but I am still making some progress. Working on the air compressor unit and I just finished it up. Disassembled, cleaned, painted and then reassembled. Also changed out the old desiccant with new. Here are a few pics. Enjoy!
-
6
-
-
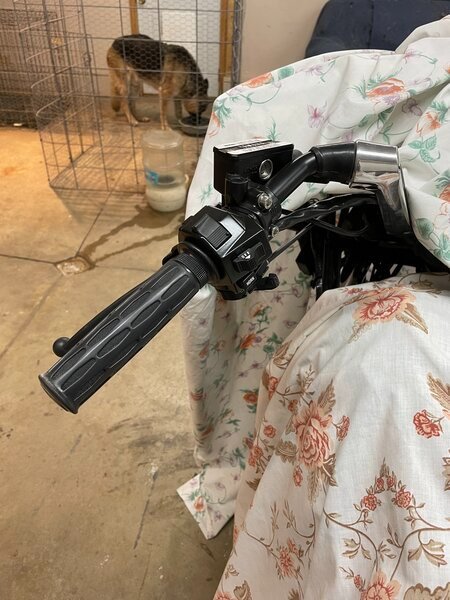
New grips from Honda were purchased. The ones for the GL1500 model look to be an exact match. Mine didn't have any grips so I can only go by what I see in pictures on ebay.
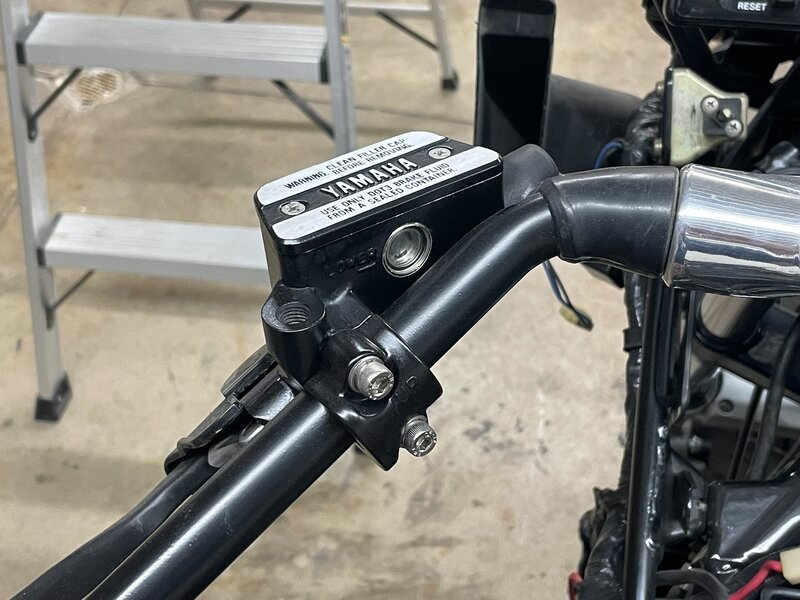
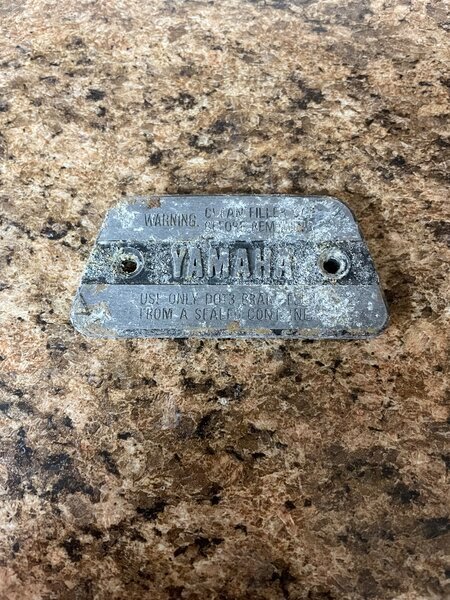
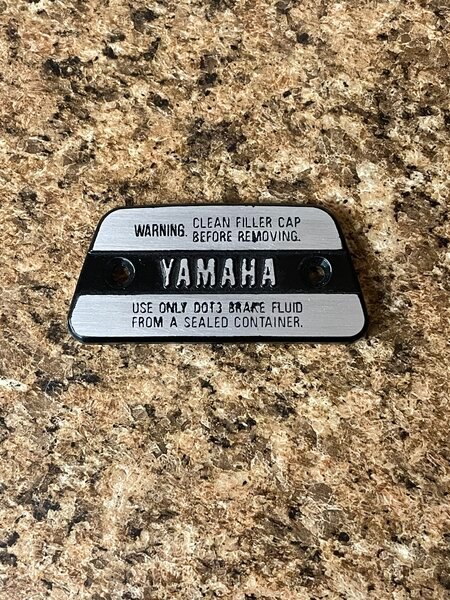
I also finished rebuilding the front brake master cylinder and have it installed
I'm also working with a company to reproduce the letters to go on the controls. Most are completely gone and even though the decals won't be an exact match I think they will look pretty good. I will post some pics when I get them on the controls.

-
1
-
-
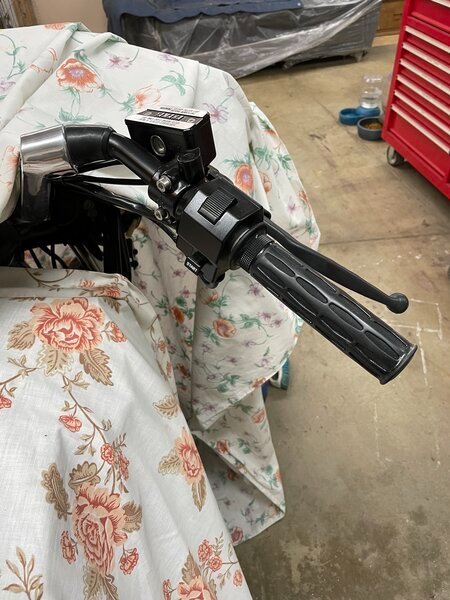
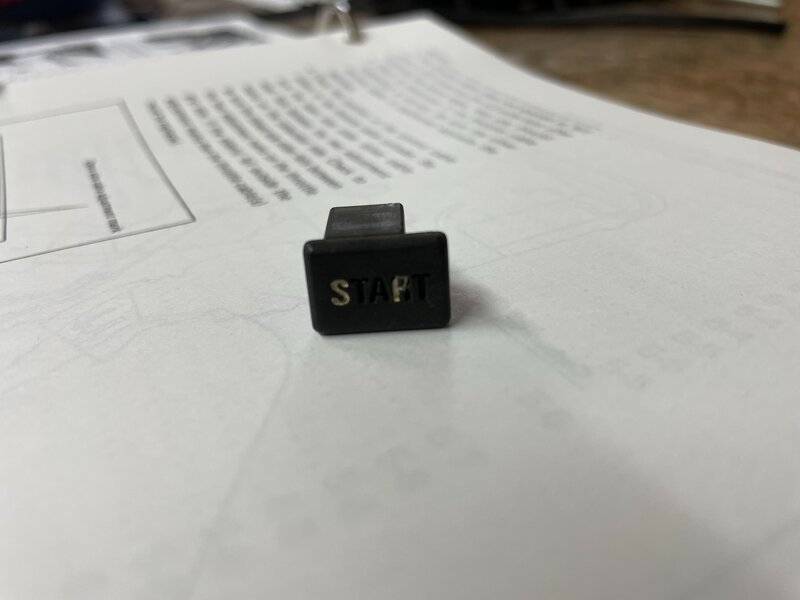
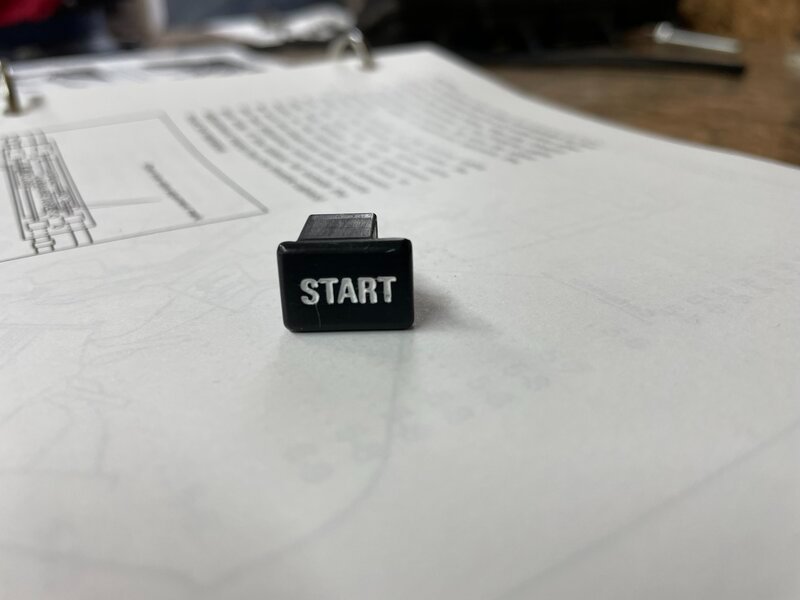
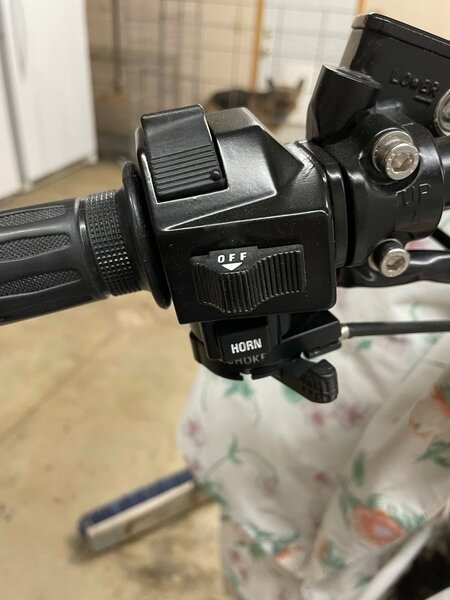
Still working on the hand controls this week. I also finished up the rebuild of the front brake master cylinder. Here is one of those small detail pics. I touched up the painted letters for the start button, along with the horn button and the turn signal switch. Here is a before and after pic of the start button.
-
1
-
-
On 1/1/2022 at 9:49 PM, cimmer said:
Who did you get the diaphragms and slides from?
Rick F
These were the only ones I could find that were complete, but I didn't look very hard either. The quality seems good, but I won't know for sure until it's running again. There are certainly more options available, like the one's saddlebum has had success with. Spend a little time and do your research and then go with what you think will work best for your situation. Hope this helps!
-
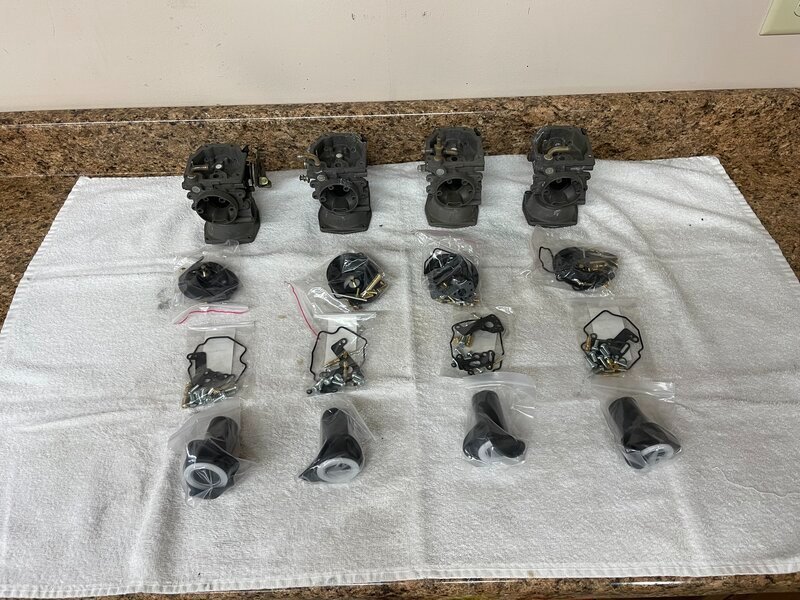
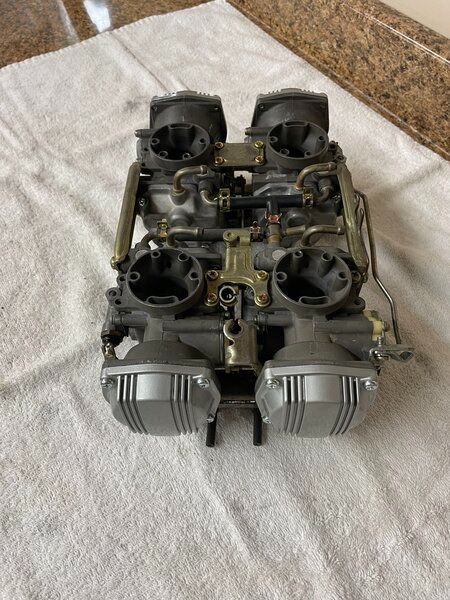
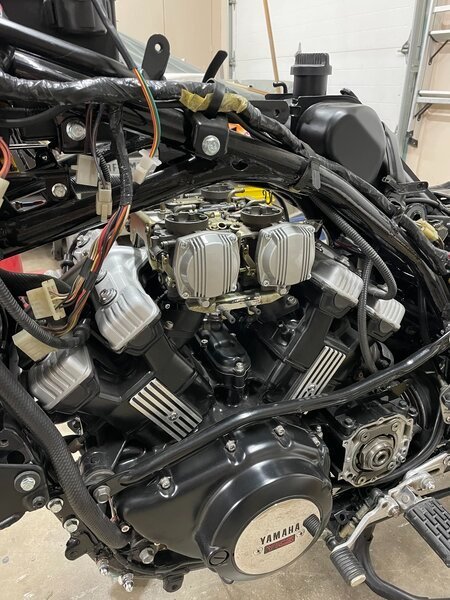
I started the carbs this past fall when I disassembled them and cleaned them. I had to purchase 3 different kits to get the parts I needed for the rebuild. I finally finished them up this past week and have them back on the bike. Here are a few pics.
-
3
-
-
On 12/19/2021 at 5:14 PM, bpate4home said:
This is awesome to come along on this journey.
It's just to bad this journey is taking so long, going on the sixth year. But this is the one and it should be finished mid summer if all goes as planned. I'm glad you can follow along!
-
2
-
-
Here is the clutch master cylinder that has been rebuilt, which included new sight windows.
-
3
-
-
I have also been working on the handlebar controls. Reworking the covers using the same technique as the side plates.
-
2
-
-
I also did the upper plates this time I mixed the clear up and so the clear is less shiny and more of a matte. For now I will leave them both as is, but later I will probably redo one of the other depending on which version I like the glossy clear or the matte.
-
1
-
-
One of the small projects was the lower side plates. I sanded the clear off of the front and then painted them black. Once dried I sanded the paint off of the areas that were bare aluminum. I finished it up with a coat of clear. The interesting detail on the clear is I bought matte clear but because I forgot to stir the clear all of the matte was on the bottom. So when I mixed up a batch and sprayed these, the clear is actually glossy and not matte. Here's a before and after.
-
1
-
-
Time to play catch up on the progress. I have a few minutes this morning to share a pic and some details.
Here is a short list of what has been done that isn't really picture worthy.
- Shifter linkage
- Battery box
- Positive and negative battery cables
- Fuel tank
- New speedometer cable
- Ignition switch
- Voltage regulator (eliminated connectors and soldered wires together)
- Clutch hard line
I will be posting more yet this week as more has been done I just need to work on getting some pics.
-
1
-
On 12/15/2021 at 7:50 PM, Marcarl said:
If you are going to shine up the aluminum then you will probably get black hands. I did mine back in 2014 and so far so good, and if it does go bad,,, well 10 minutes work and all is good again.
Another good point, thanks!
-
On 12/5/2021 at 6:08 PM, Marcarl said:
I didn't have much luck with that stuff when I tried it, so went with shrink tubing instead and am now quite happy. It will leave a small hole in the end though but nobody has remarked on that yet, but then he's not around very often either.
Thanks Marcarl. It seems a little soft and not very durable, but since this can has been sitting on the shelf for awhile now, I thought I would give it a shot. If it doesn't work out I will probably strip it back off an just shine up the aluminum and leave it at that. Thanks again....... -
Pasta Burner - thanks, that's one thing I have learned over the years is the details can make the biggest difference in a project. Too bad that the details are what slows down the progress. This is taking way too much time to get done. And yes, no special tools or any fancy shop, just me working out of my garage with Craftsman and Harbor freight tools.
RDawson - that's the funny thing is I don't have a lot of patience and I just want it to be done. Sometimes my lack of patience causes me to have to rework the same parts more than once. I am only posting the good stuff, not the parts I mess up and have to redo. Haha!
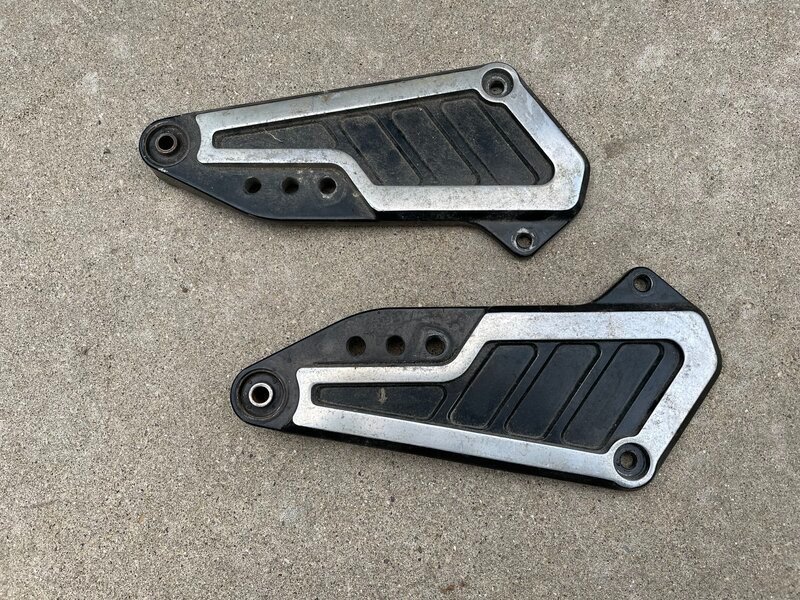
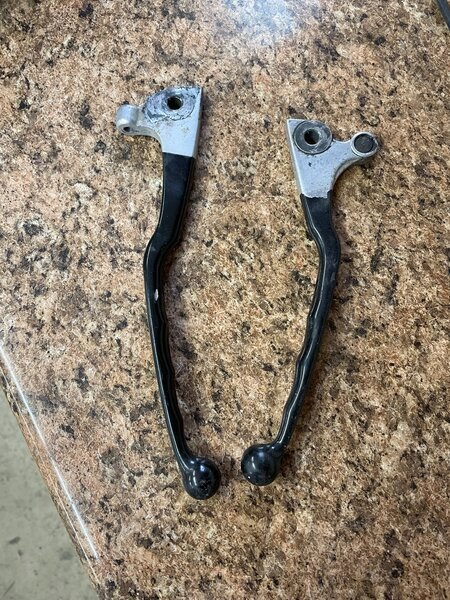
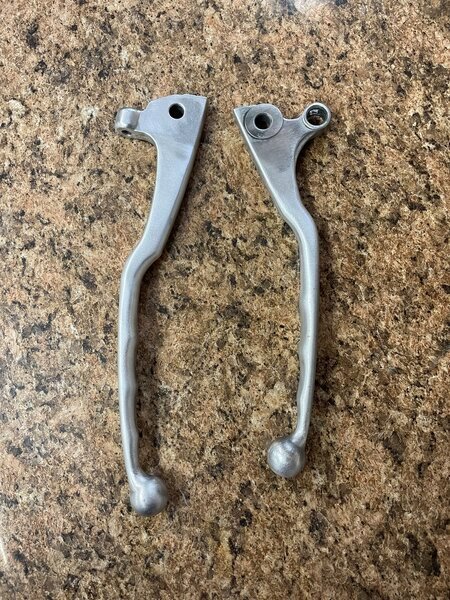
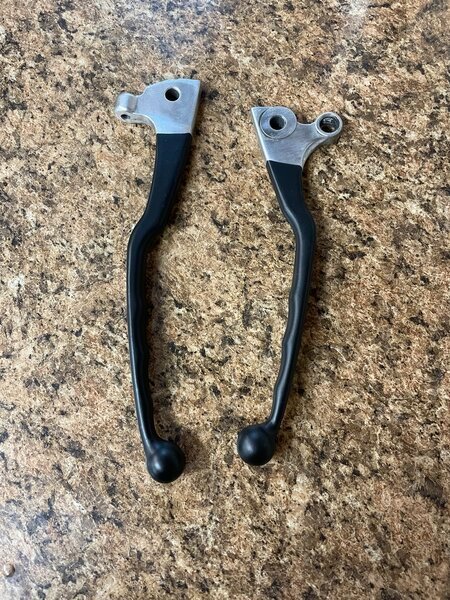
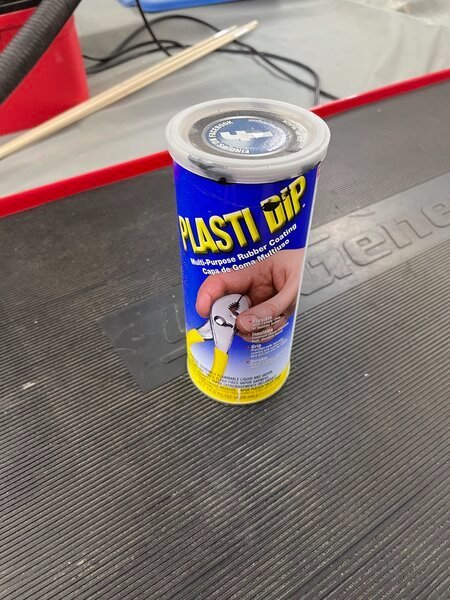
This weeks mini project is the clutch and brake levers. The ones I have aren't too bad but there are some chips in the coating. So removed the original coating with a wire wheel and then I am trying a product called Plasti-dip. It looks real good, but I am not sure how well it will hold up over time. So if it doesn't work then I will have to think of something else to try.
So here is a before, after removing the coating, and the after the parts have been dipped. Actually this was quite easy to do, so hopefully it holds up well.
-
2
-
-
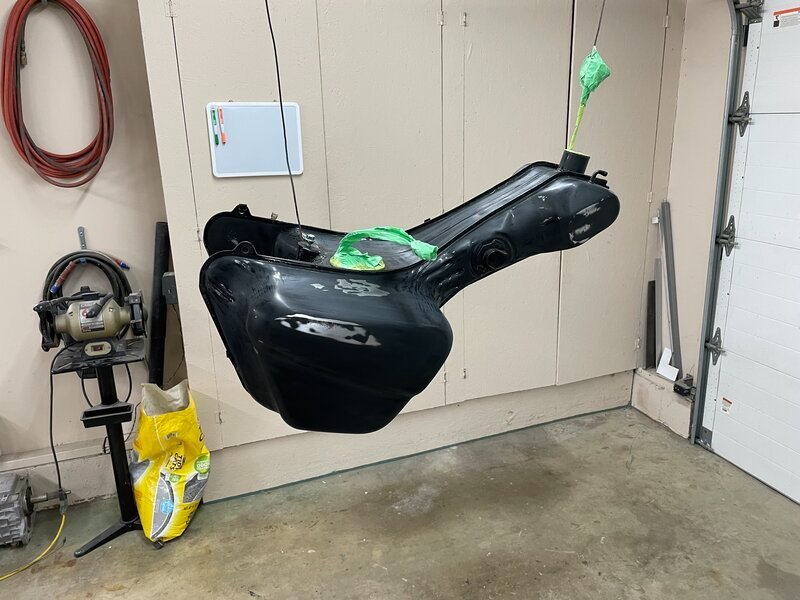
This weekends project was the fuel tank. At first I wasn't going to do anything with it because is looked pretty good, only a few scratches. But once I had it installed it looked a little worse than when it was out on it's own. So I sanded down the tank and sprayed on some old satin black paint I had leftover from another project. Not the gloss black as before, but it turned out real nice. Here is a before and after pic.
-
5
-
-
On 4/1/2021 at 10:21 PM, Geobob said:
I managed to get mine all back together a couple of weeks ago and got most of the bugs worked out. It does not look as good as yours is going to look but there is only so much detail I can manage. It always has me saying "dam I love the way this bike rides" when I get on it. Along with appreciating the look even after all these years, this bike is not going anywhere soon. Maybe someday they will be worth more but I am not holding my breath. I think I will be dead by then.
Geobob - thanks for the compliment, but don't sell yourself short. You have a beautiful bike there. You can always make small improvements as you go. The bike you have is just like the one I saw in the parking lot at work that got me interested in the Yamaha Venture, until that first look I didn't even know they existed. Thanks for sharing the pics of yours, it looks great!
-
Time to revive an old thread. I spent the last summer working on plastics and they are about 80% ready for paint. I tried hard to find plastics that didn't have any cracks which is near impossible. I went as far as buying 3 different right side saddle bags where the sellers said they were crack free. I even pointed out to them where to look for cracks before I purchased them and they still had cracks. So I gave up on finding any that didn't have cracks and settled for pieces that had minimal cracking. So those will be getting some paint next spring/summer.
Now on to what has been done recently.
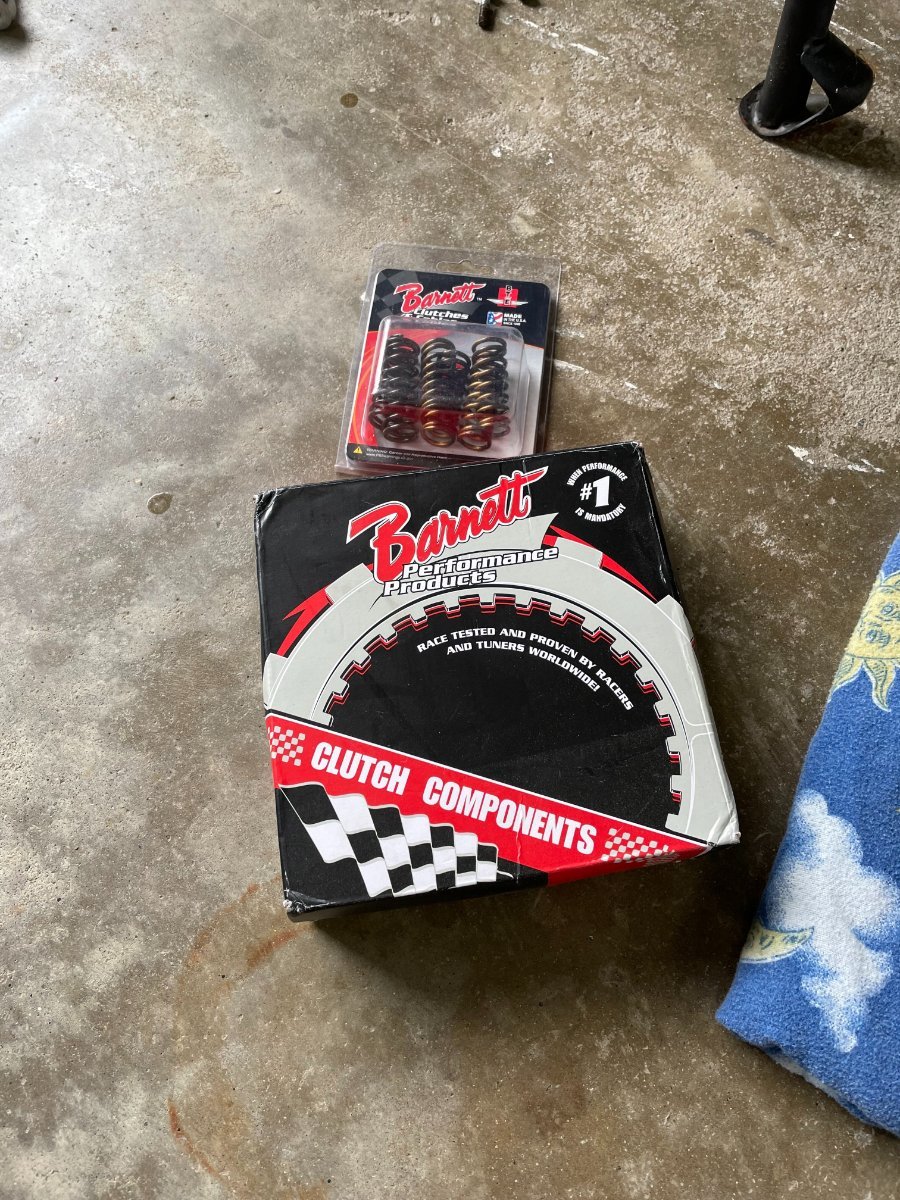
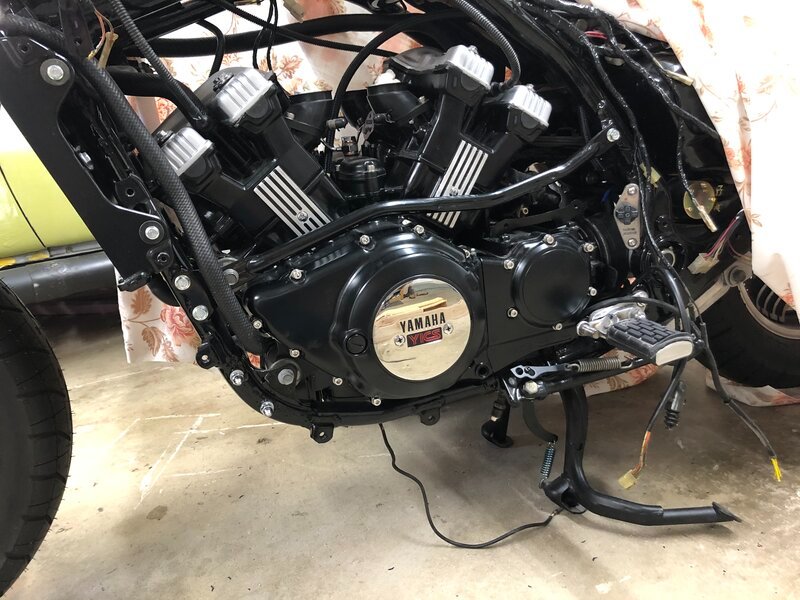
First up is a set of Barnet clutch plates and springs, along with a re-chromed clutch cover. I also installed the rear clutch master cylinder and a new braided stainless steel brake line. I just need to come up with a plug for the front brake line since I am delinking the brakes.
-
4
-
-
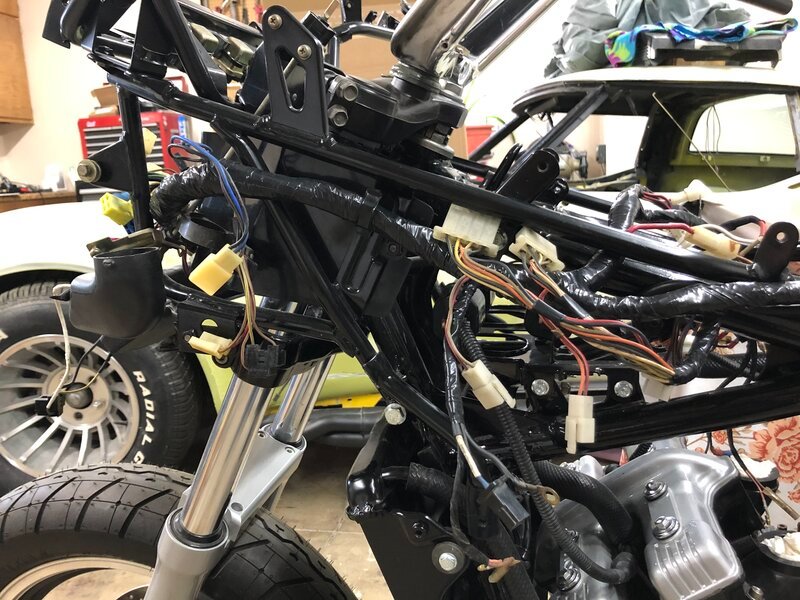
Finished up the repairs to the wiring harness and put a fresh wrap on it. Now to get everything back on and connected!
-
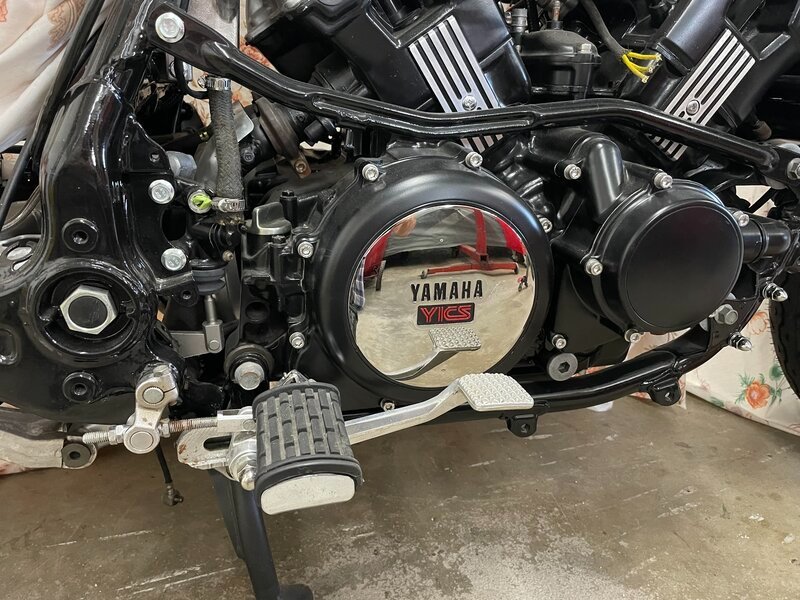
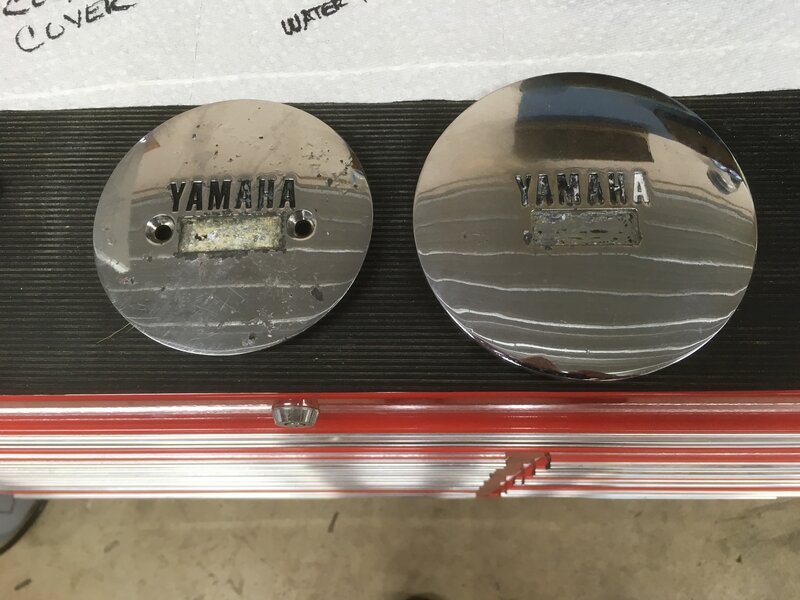
Here is a before picture of the clutch cover plate and the generator cover plate. I sent them out to be stripped and chromed. They turned out really nice, and look great on the black engine.
-
2
-
-
No earth shattering progress this week, but I have a couple of pics to share. I did work on the new wiring harness I purchased. I spent an evening re-wrapping it only to find out it's for an 84-85 model year. So I decided to stick with the one I have. I worked on fixing the issues with it this afternoon and started to re-wrap it. I am also working on putting the generator coil back in the engine cover. The should be back together this weekend. Here are the two pics for tonight. I'm told it's in the details so even though these are small they needed to be freshened up a little. Not perfect when up close, but much better than before. This is the before and after pic. More to come this weekend.
-
1
-
-
3 hours ago, Patch said:
So @Johnnycyclone I have 3ish projects in my shop a 745i and at easily 2 bike projects in the go. What's say you come pick one and make it yours? HMM
I'm not sure if you are kidding or being serious Patch. I'm leaning towards you are kidding. Haha! I also have another project in the garage so one of yours would make 3. My wife is a great supporter of my fun, but she draws the line at 2 at one time. I mentioned adding another one before and it didn't go over very well. Haha! But thanks for the offer! What year is your 745i?
-
Pasta Burner, it would be nice to finish this up over the winter, but there is just to much to do. My wife doesn't mind me spending time in the garage, but as I get older I am less inclined to spend a lot of time working on projects. I tend to get burned out much quicker than before. I like to try to keep a steady pace and work at least on something each week. For polishing the aluminum I bought a kit several years ago from Eastwood. It came with several buffing wheels and an assortment of rouge. I bought the smaller wheels that I use on my small bench grinder. It works pretty good and makes quick work of the project. For the painting so far I just clean up the parts, sand them with some 400 grit and then apply the paint. The plastic body panels will involve a little more than just sanding and painting. For degreasing it's just carb cleaner, nothing special. I would love a solvent tank cleaner but I just don't do enough work or the space for one. That's pretty much my motto also use what you have. Thanks for taking a look at the project. I am pretty confident we might have it done by late fall, at least that's the goal.
-
1
-


83 Venture Rebuild/Restoration
in Venture and Venture Royale Tech Talk ('83 - '93)
Posted
The final coat is a Chrysler color, Inferno Red. Here's a few pics after basecoat and the clear coat. I still need to do the stripping, so they aren't totally done, but I thought I would share what the overall color is going to be. I will continue to post over the fall and winter, and hopefully finish this project up for spring. Enjoy, and stay tuned.