

.JPG.c2747617a09ed1b676cd6ca95b48afa1.JPG)
lsutley
-
Posts
315 -
Joined
-
Last visited
Content Type
Profiles
Forums
Gallery
Events
Store
Posts posted by lsutley
-
-
I am in the process of installing a set of 85 Vmax heads on my 86 Venture. If I understand the performance issues correctly, the stock carbs do not flow enough air or fuel for good results. If the bore of the stock carbs is the same as the Vmax they likely can be re-jettted. If not I will be looking for a set of replacement Vmax carbs. What year Vmax carbs will fit the 85 heads if the V-boost is not installed? Thanks for any technical information and any thoughts on the basic installation.
-
I have an OEM backrest available. with mounting brackets. I also have an aftermarket seat with an integral backrest available. Both are for the 86 to 93 models.
-
Believe it or not, this diagnosis was one featured on an episode of "Mystery Diagnosis" and is evidently a rare occurrence. Whatever the cause and rate of occurrence, we offer our prayers for a complete recovery.
-
I have spoken with Mary, who I believe is the owner, and Gary, who I believe does everything technical. Honestly, I have gained the impression that there are not too many people involved in the day-to-day operations at Motorvation. I do not think Gary moves the paperwork as well as he prepares the hardware. I have waited for some replies longer than I had hoped but the information was good and all the parts that I have received have been spot on for fit and finish.
If you have a way to identify the trailer with a serial number or other specific information I'll bet that they have the original build information on file. My guess is that with so few people doing so many things that only the things that are on fire get a lot of attention. Good luck with your endeavor, I am sure that they will come through.
-
Have you tried to contact Motorvation. They are a most accommodating group when it comes to providing information and parts. My sidecar was fabricated in 1986 and they still had the original build specs and shipping documents on file; made copies and sent them FOC.
-
How did yours brake
I don't know the cause of them original repair as it was that way when I bought the bike. It had the heel/toe shifter and a set of floorboards installed and I thought the shifting issue was due to the heel/toe shifter. I did not know the cover had been welded until I began to investigate the poor shifting. I bought a new cover and replaced it when I did the starter clutch and stator upgrades. It all seems fine now and I did reinstall the heel/toe shifter. I believe that one could apply more force with the longer heel/toe shifter arms but that is a matter that is under the operators control.
-
I laid out the OEM components along side the Progressive spacer and found that the resulting spring compression would be nearly identical. I liked the thought of using metal instead of plastic components and didn't use the Progressive spacer. The amount of force needed to reinstall the spring caps was not what I might call moderate; I don't look forward to removing them for an oil change when the anti-dive block-off plates are installed this winter. My rig is heavy with the Motorvation Formula II sidecar attached and have had no issues when not using additional air pressure assistance.
-
I have heard the expression that you "ride a motorcycle and drive a sidecar" and that is a true statement. My 86 Venture had the sidecar attached when sold new. When I bought it 5 years ago, the steering was still stock and I learned that long rides were not a pleasurable experience. The muscles in my back would cramp severely, after about 50 miles of curvy roads, and would not lessen until I stopped and got off. The triple tree has since received a Steeright modification (+ 7 1/2 deg. rake) and along with the addition of the electric lean option for the car the riding experience is much improved.
I bought a complete attachment upgrade assembly for my rig from Motorvation for a lot less than $1,400.00. The quality of the components is impressive; uses a four point fully adjustable mounting system that is stronger than the bike frame. Check in with the guys on SCT sct@yahoogroups.com as they are some of the most knowledgeable people there are concerning sidecars of all shapes, sizes and configurations. I am sure that one of them has mounted a URAL to a Venture or knows exactly how it should safely be done.
Enjoy the sidecar experience,

-
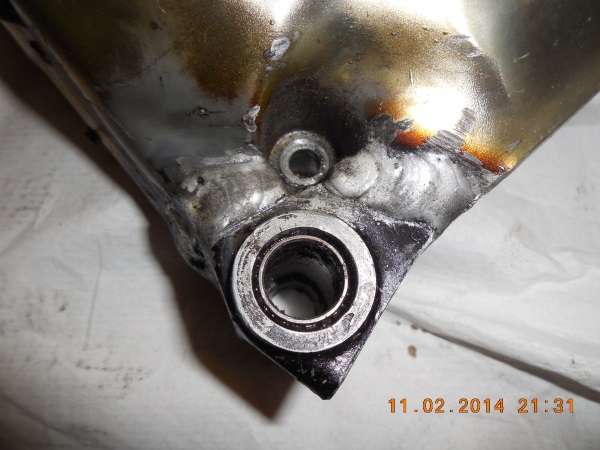
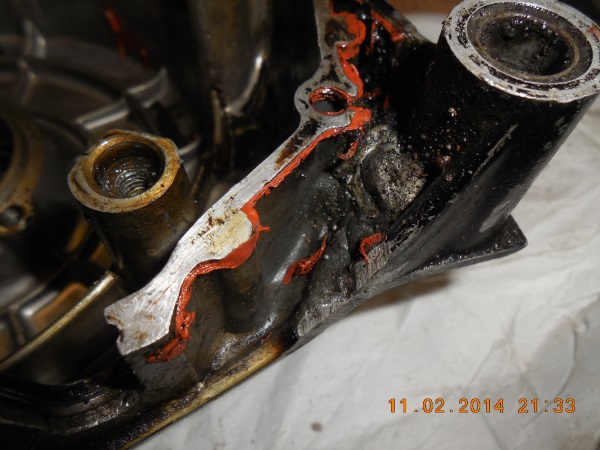
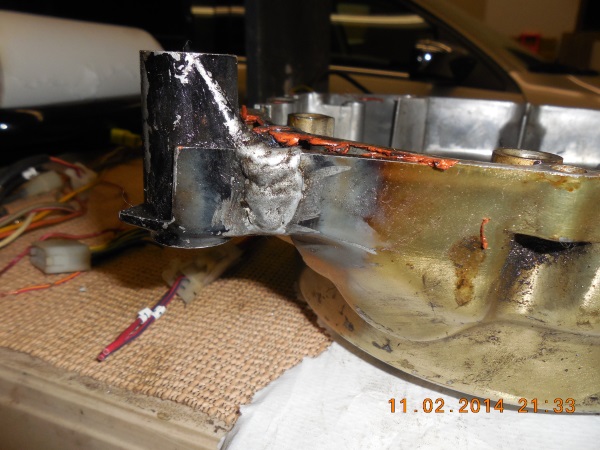
This is what was found when the cover was removed from my rig. The weld repair did not reposition the pivot bushing correctly and made for stiffer shifting.
-
My rig is now set up for the sidecar only. The bike is in a vertical position at all times; I do not have to worry about putting my feet down and the heel/toe shifter is nice. When I rode without the car I preferred the simplicity of the conventional shifter. If I had more than one rig on the road I would go with a conventional shifter on all of them. It is too hard for me to adjust to the different styles interchangeably. I can remember, more than a few years back, when there was a lot of attention given to the marks that a shifter made on the toe of your left boot. There were leather pieces, to strap to your shoe, for protection from scuffing and the heel/toe shifter was touted as the ultimate solution. I could never become accustomed to lifting my heel to up-shift, much simpler to just lift the toe and live with the scuffs.
When I removed my left side cover, to do the starter clutch and stator upgrades, I found the shifter pivot bushing area to have been previously welded. The realignment of the bore was less than accurate and had caused some shifting issues. The repaired cover has been replaced with a good used unit and now works much better. Given what I have seen of the casting configuration in the shifter pivot area, a good weld repair should be stronger than the original design. The pivot bushing alignment is obviously important and additional strength could be added with careful welding application.
:2cents::2cents: -
I cheated and used the kit from skydoc17 with the SS braided lines(nice setup) but the process can be accomplished on the cheap by using a Vmax splitter and a second OEM line for the right caliper. I am not sure if the OEM line from the rear caliper can be re-purposed for any part of this conversion as I did not give that a try.
-
Is this what you are looking for http://www.vbulletin.org/forum/showthread.php?t=304635
-
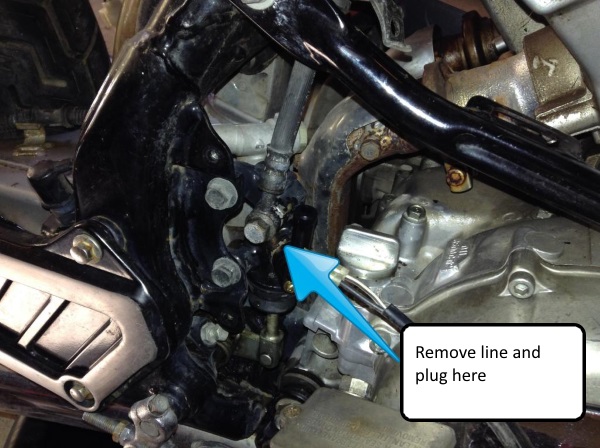
The de-linking procedure eliminates the fluid line running from the rear master cylinder. That line can be removed and the port on the rear master plugged. If a double banjo setup is used at the front master a duplicate line assembly will need to be installed to the left front caliper. If a double banjo setup at the right front caliper is used then a shorter line from the right to left calipers will need to be installed.
The original junction block, fork mounted between the front master and the right front caliper, can be replaced with one from a VMAX that gives two outlets that would supply both front calipers from the single input from the front master. A duplicate of the right lower line is then used on the left. You would need to acquire only three parts, right front lower line, VMax splitter and a plug for the rear master. If you chose the front splitter conversion I may have a right lower line in my spare parts box that you can have.
-
Prayers up for you, Jeff.
-
Prayers up for you and your family. May His blessings be upon all of you in your time of sorrow.
-
I found a list of the psychological meanings of colors on the net. Let's see what psychological meaning a combination of Orange and Black could present: Warm, sensual, glamorous, passionately sophisticated or depraved, immature, frustrated with poor digestion?
Blue and yellow are nice?
Some combinations can have a really scary interpretation.
RED: Physical
Positive: Physical courage, strength, warmth, energy, basic survival, 'fight or flight', stimulation, masculinity, excitement.
Negative: Defiance, aggression, visual impact, strain.
BLUE: Intellectual
Positive: Intelligence, communication, trust, efficiency, serenity, duty, logic, coolness, reflection, calm.
Negative: Coldness, aloofness, lack of emotion, unfriendliness.
YELLOW: Emotional
Positive: Optimism, confidence, self-esteem, extroversion, emotional strength, friendliness, creativity.
Negative: Irrationality, fear, emotional fragility, depression, anxiety, suicide.
GREEN: Balance
Positive: Harmony, balance, refreshment, universal love, rest, restoration, reassurance, environmental awareness, equilibrium, peace.
Negative: Boredom, stagnation, blandness, enervation.
VIOLET: Spiritual
Positive: Spiritual awareness, containment, vision, luxury, authenticity, truth, quality.
Negative: Introversion, decadence, suppression, inferiority.
ORANGE:
Positive: Physical comfort, food, warmth, security, sensuality, passion, abundance, fun.
Negative: Deprivation, frustration, frivolity, immaturity.
PINK:
Positive: Physical tranquility, nurture, warmth, femininity, love, sexuality, survival of the species.
Negative: Inhibition, emotional claustrophobia, emasculation, physical weakness.
GREY:
Positive: Psychological neutrality.
Negative: Lack of confidence, dampness, depression, hibernation, lack of energy.
BLACK:
Positive: Sophistication, glamor, security, emotional safety, efficiency, substance.
Negative: Oppression, coldness, menace, heaviness.
WHITE.
Positive: Hygiene, sterility, clarity, purity, cleanness, simplicity, sophistication, efficiency.
Negative: Sterility, coldness, barriers, unfriendliness, elitism.
BROWN.
Positive: Seriousness, warmth, Nature, earthiness, reliability, support.
Negative: Lack of humor, heaviness, lack of sophistication.
-
Good idea... I have the same problem as Kevin with the antenna hitting the aftermarket lights when laying it down to put the cover on. Sometimes I can be real dense...
If Kevin does not want the spacers you are welcome to them.
-
The mounts that I have are about 7 inches long and I had some interference with the antenna and my side lights. I added a 2 inch spacer to clear the antenna base. If these are the correct mounts, please PM me for price and shipping arrangements.
-
I have a couple of mounting arms from my 86. I was using extension spacers to allow the install of the lighted trunk trim rails. I did the Marshall Modification using a strip of 1/4 inch aluminum to replace the arms on both sides of the trunk. If you want one or both of the OEM arms they are available.
-
lsutley, how you connected TPS a sensor? Interests interaction with gates.
If you are referring to a Throttle Position Sensor, I am not using one? The TCI is connected to a vacuum sensor that regulates the spark timing.
-
Les, where is the battery? And the ignition coils?
Here are some pictures of some other "opportunities" that have caused this project to go into overtime. The OEM coil package has been scrapped in favor of Honda CBR1000 COP's. The OEM TCI has been replaced with the Inigtech unit from Gary. The R/R is a new MOSFET unit from Earl, that is relocated to the side of the electrical component tray and the battery relocates to the sidecar. All of the original main and satellite fuses, with the exception of a large dual 40 amp main that is visible to the right of the Bussmann panel, have been relocated to the Bussmann panel. Any relay that is available in an ATC compatible configuration is on the way to the Bussmann block. I bought the tools necessary to fabricate the needed battery cables and those needed to reconfigure the OEM connectors to the Delphi waterproof style. The "opportunities" are endless and I need to draw the line on any more modifications, if I am ever to finish this project.
-
I am using a Bussmann marine ATC fuse block for the basis of the 86 rewiring project. All the wires go in from the underside and the panel will hold several styles of relays as well as fuses. All the wires use grommets and the cover is gasketed to keep out any moisture. The blocks can be purchased with a power buss or independently serviced spaces.
This has been an interesting project and unfortunately keeps expanding each time there is a new option to explore. I hope to have this operational by next spring.
-
I built a dolly for the rewiring project on my 86. I used some 2x4's, some OSB, five casters, and some steel plate under the center stand. The bike is up about 8 inches and that helps with the clutch and stator work. The total investment is about $50.00.
-
The video was very well done and had every nuance of the real thing. The most disturbing aspect were the comments that followed. Some of those folks are in need of a reality check, their attitudes are more frightening than the video.

 :2cents:
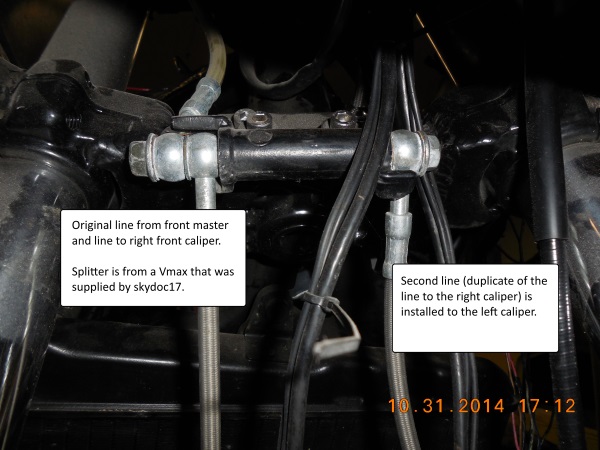


VMax carburetor for first Gen.
in Venture and Venture Royale Tech Talk ('83 - '93)
Posted
I did some checking with members of the VmaxForum.net and was informed that the heads are basically all the same. The carburetors from 86 on have the same bore as the Vmax and can be re-jetted for $45.00. Looks like I am good to go!!