

.JPG.bdf177e700c5bc9732a5448288c6c703.JPG)
Royal Star Ronnie
-
Posts
30 -
Joined
-
Last visited
Content Type
Profiles
Forums
Gallery
Events
Store
Posts posted by Royal Star Ronnie
-
-
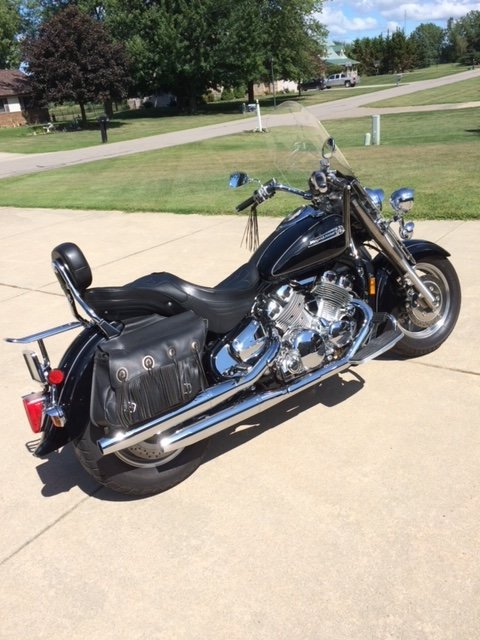
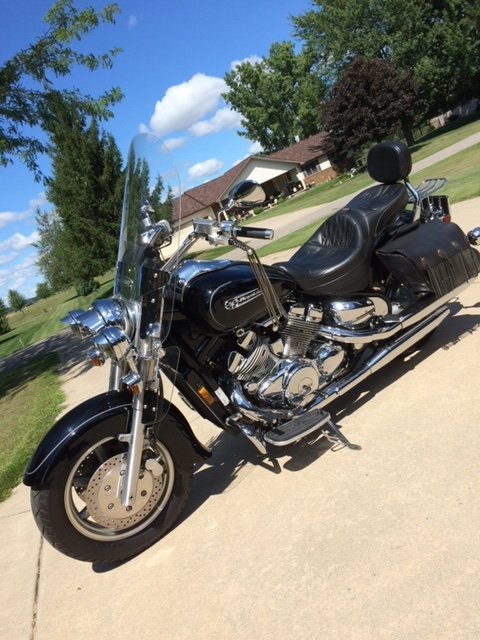
Yamaha Royal Star 1998, black and chrome.
11,665 original miles on 6-10-2023, original owner.
ME 880 Marathon tires with ~1,000 miles.
Use non-ethanol recreational gas whenever possible.
Garage kept with Yamaha cover daily.
Heated storage in winter.
Extra windshield.
Extra seat (custom Corbin).
Extra exhaust pipes (Jardine slash cut).
Yamaha shop/service manual.
Stebel horn (and original horn).
Yamaha rear back rest.
Yamaha saddlebags.
Yamaha handlebar pouch.
Yamaha winter storage stand.
Yamaha lower wind defectors.
Various Yamaha chrome pieces.
Yamaha chrome rear fender storage rack.
SAC luggage case.
SAC duffle bag.
Two Shoei XSP helmets with cases and extra face shields.
Two sets of rain gear (used once).
Two black leather riding jackets.
Two pairs of black leather riding chaps.
Wife no longer interested in riding for ice cream.
Collectively, $5,000 (wife not included).

-
 2
2
-
-
The Story: I have an original '98 Royal Star with only 11K original miles. And have just experienced loss of power and gas mileage after servicing carbs and an oil change.
I tried to address most questions right out of the gate....so be patient with me.
1. Stored in air conditioned garage with Yamaha floor length cover.
2. Change oil (Rotella 15W-40), oil filter and gear lube yearly, and Sta-Bil for winter nap.
3. Dealer rejetted in 2002 with Dynojet 4148.001 and installed K&N filter at that time.
4. 2014 I cleaned carbs thoroughly:
a. Replaced all 4 valve seats, 4 needle valves and 4 o-rings.
b. Inspected and cleaned diaphrams, slides, jets and carb bodies.
c. Set float heights at 8.5mm with 0.1mm tolerance (carbs up side down) required only slight adjustments.
d. Per Dynojet: (No changes.) Fuel screws out 3.5 and circlip at middle (#3 position) on jet needle.
5. Synchronized #1-#4 carb vacuum while at 1050 rpm.
a. Original exhaust.
b. Premium gas.
c. Starts instantly - no choke required at any time.
6. Idles smooth, but since carb clean:
a. Bike has no guts from any speed.
b. Top speed 73 mph (down from 105 mph).
c. 20-25 mpg (down from 30 mpg).
d. At approximately 2,800 rpm bike begins to pull much better in 1st-4th, but not in overdrive.
e. No exhaust smoke. No fuel smell. No popping or backfires.
7. Checked all 4 spark plugs (DRP7EA-9) after ride and idle, and again after ride and throttle chop at 70 mph. All spark plugs are identical with:
a. Totally white insulator (no deposits) along its full length.
b. Light tan electrodes with ground electrode showing heat range coloration to 60% along its length toward shell rim.
c. Inside of the shell (and its rim) is black but NOT sooty.
d. All plugs show equal spark when grounded externally.
8. Fuel pump tested and working properly. I always shut off gas petcock when engine is off.
9. After removing gas tank and airbox, I reconnected the gas tank along side and started engine:
a. Started and idled well.
b. Attempted throttling caused engine bog and backfires at nearly all rpm's, which occurred with fuel pump feed and also with straight gravity feed from gas tank. (Apparently too lean without airbox restriction.)
10. See 4c. above. Pulled carbs (carefully leveled the quad) and checked float heights with external fuel level gauge and gravity fed gas source: (From center mark of diaphram cover to 25.4mm below - the Service Manual specification.)
a. #1 - #4 are all exactly at the Manual specification.
b. No apparent gas leaks anywhere, so I'm assuming the the valve jet(s) and valve seat(s) are sealing properly.
11. Oil level through site glass is 1/8" below upper mark when cold.
a. No smell of gas from the oil fill opening.
b. Could my crankcase oil volume be too high causing loss of power by increased friction?
Review 6a-e and 11b above.
Does this make sense...? Due to spark plug condition, bog and oil level, I'm thinking of:
1. Lowering each jet needle's circlip one notch to see if more fuel will improve performance and consequently mileage.
2. Adjusting the fuel mixture screws 4 turns out.
3. Draining engine oil to 1/8" above lower mark.
Any comments, questions or wisecracks are appreciated.
Otherwise, if I need to change internal carb components, then I might as well do it now since the carbs are off. Thanks to all.
-
My Corbin seat has a proprietary UPC sticker (with model number) attached to its underside.
Contact Corbin with their build information and ask them specific questions. (800-538-7035)
-
Ah-ha! The hunt is on!
The shop that did this removed the airbox, then removed the carb covers, ditched the old needles, original springs, and should have removed the brass blocking items that cover your idle screws. They have installed the DynoJet kit's adjustable needles and longer springs and put in a K&N. Your Jardines flow a LOT of air, so it is not surprising you would set that needle at position #3. (Instructions at http://www.dynojet.com/pdf/4148.pdf).
From the description, your plugs sound very good. I do a lot of plug reading via plug chops and if you are not seeing "white hot" (all white; small dots showing heat damage from lean condtion) and not all sooty from a rich mixture, you are in the sweet spot. Most important is not to stray too far into a lean condition - a rich mixture may soot up everything, but a lean condition causes seizures in the worst case scenario. Stray/expermiment into a lean condition with your eyes wide open!
So I would go/stay with position #3. However, you should closely follow advice on http://www.mrlarsson.com/pdf/files/dynojet-troubleshoot.pdf, especially the section on Acceleration Problems with an eye to how the bike responds at steady cruising (my ref. above to the "twist grip" evaluation).
Really sounds like you are in good shape all around. At this point, proper idle adjustment and a spot-on synch should be job 1, after which you can safely run the bike and evaluate its performance. TIP: Get a VERY long screwdriver to perform your synch adjustments - trust me! I bought one of about 8" in length to reach in to the screws.
Hucklecatt, your advice is logical, and after reviewing your links, I agree.
My bike has always run well, except for this year's "popping" issue.
I've reassembled the carbs with jet needle E-clips at #3.
I'll remount the quad within a few weeks, but since local temps are ~40*F and rainy, I'll likely wait until spring to gas-up and sync.
DynoJet indicates the pilot fuel screw has an unusually large impact on mileage with BDS28 carb, so after syncing, I plan to adjust the pilot fuel screws to the leanest position which allows smooth idle in hopes that my milelage will improve.
Also, I wonder if Gunson's Colortune ($64) is worth it for optimizing the pilot fuel screw setting.
Thanks again, and I'll repost with my final results.
-
Unless I am mistaken, the 1998 used a Mikuni 95 main and 20 pilot jet. I also seem to recall that the original needle was not adjustable - it simply used a shim.
What numbers did you read off your jets when you removed/cleaned them? If the needles are adjustable, you may have an aftermarket kit installed (DynoJet; Barons). If so, you may be reading jet sizes of 110 - 117.5, with a 22.5 to even 25 pilot.
If you can get those numbers to us, along with your pipe brand name and airbox mods if any that would help. But from the hip? Yes, go with the 2nd position and try the throttle on/off method to determine if you are running too lean.
Additional info:
1. Yes, main jet is #95 and pilot jet is #20. This is the first time carbs have been removed, so the inaccessible internals were original.
2. I have installed new float valves and needles, and needed to (slightly) level two of the floats to match the other two.
3. NOTE: I just found my original paperwork from the 2002 aftermarket muffler install and it shows a DynoJet kit #4148 was installed. The jet needles are DNO470 with instruction to set E-clip at #3. (The original jet needles were not given back to me.)
4. Jardine slash-cut mufflers, which are the same length as the original mufflers.
5. K&N air filter.
Thanks for assistance.
-
Question #1:
What is the default position (of the 6 available positions) for the circlip on the jet needle of a stock original BDS28 Mikuni from a '98 Royal Star?
Bike:
1. Original owner of '98 Royal Star with 9,000 pampered miles. (Kept fully covered in an air conditioned garage. Oils and plugs changed yearly along with Sta-bil, etc.)
2. Ten years ago aftermarket mufflers were installed by a dealer and (as best I can recall) the dealer said he richen the carb to compensate for increased exhaust flow. He did not remove the carbs, therefore he must have richened by adjusting the pilot fuel screws and/or the circlips on the jet needles. (Hmmm, or maybe the jet needles were replaced.)
Story:
1. Bike has seemed to run rich with 30 mpg, but has run well and started easily.
2. Rebuilding all four carbs due to afterfire from right rear cylinder believed to be carburetor related. Right rear carb was indeed dirty(er) within float bowl, and had a slightly sticky jet needle slide as well.
3. All four carbs are fully cleaned and ready to reassemble with new o-rings and new float valves and needles.
4. Spark plugs are all equally colored with clean white insulator, sooty plaque on threads, and light brown electrodes. (Thoughts?)
Naturally, I will resync carbs as well as adjust the pilot fuel screws, but I'm wondering if I should alter the circlips position on the jet needles. Current circlip positions are #3 (down from the top clip end).
Question #2:
What are your thoughts about leaning it out a bit by installing the circlips at position #2?
Thanks.
-
The good ol' days!
And it all happened everyday; rain, snow or shine!
-
thanks for the help. Installed it today and it works great.
Any installation pics?
Also, which model Biker's Choice tach did you purchase, BC-49-0293?
Thank you.
-
Folks need to quit being so serious and take more things with a "grain of salt". Don't sweat the small stuff as the saying goes. If you read something and you're offended by it, and it's not directed specifically at you, then that offended feeling you have is yours. Own it and quit whining and move on. This is a "public" place ... face the fact that there will be times when you will read something offensive (to you). Bear in mind that what "you" find offensive is not necessarilly shared by the majority, or for that matter, by anyone else. If you feel you must take issue with it, do it in private.
Thanks for reading my post.... if you are offended, too bad!
+2 ! -
It's an Obamanation.
I'm a struggling self-employeed small business owner with three kids in college. Over the last 11 years I've gone from 3.5 employees to 1.5 employees, and written off more than $1,200,000 in uncollectible charges. WTF! Nobody is lining-up to bailout my arse. No pension for me.Yep. Let's keep bailing out the big-boys, and ignoring the illegals; that's the answer.
We all have to take our lumps and keep moving along. -
I like the Baron's mini tach just fine on the brake resivoir.
Would you please post a pic of this brake reservoir tach? My 1998 standard Royal Star has no tach, and I want one. Is this tachometer "plug-n-play"? If so, exactly where does it plug in? Thx.
-
Original owner of '98 standard Royal Star with 9,100 miles. Lol; it stands pristine and covered in a heated garage.
BTW looking for 'plug n play' tachometer. Please post or PM links. Thx
-
:15_8_211[1]:Rode Royal Star 52 miles to purchase Pressure Plate for YZ250F clutch rebuild. Then rode 54 miles of MI tight whooped-out single track trail http://ktmtalk.com/html/emoticons/whoop.gif . Need Aleve badly. 52 yo knees can't take that chit
. -
Here is my c.a. (cheap arse) version.
Works great, but takes longer since you have to move it around for each paired sync.
30' of tubing, 50ml gear oil and an old board. -
I simply wear a dew rag, and then wash it afterward.
-
I use Rain-X on my original 11 year old windshield; works great and it looks like new. Clean first with very warm soapy water.
Also, I called Cee Bailey (an aircraft windshield manufacturer) for advise on their replacement motorcycle windshields, and they said Rain-X is OK to use.
-
As far as doing it yourself you will save major bucks buying a sync tool and it will pay for it self in a couple of uses.
From what I've seen dealers are asking between $50 and a couple of hundred bucks to do it for you. Some give a sermon about how many shop hours it takes. In reality, once you get to where you can reach everything it's maybe 15 minutes to do a sync (after the 1st time.) practice ya know.
I do check mine in the spring and again midsummer just because. If the bike is backfiring or chuffing a bit it is a good time to check it. And you won't believe the new friends you will make with your new skills. LOL!
I think Kitesquid had a thread on here somewhere listing out the opitions for sync tools. Pretty informative.
Yep....here it is.
http://www.venturerider.org/forum/showthread.php?t=34596&highlight=sync+tools
Mike
Check out post #27 and #45.
-
My '98 Royal Star manual says I have a 3.9 gallon tank; I think includes the reserve.
Anyway, after being on reserve for a while, I put 4.0 gallons in it!
-
Very cool pics.
I rode 2100 miles from MI and back over Memorial weekend and rode the Dragon and Cherohala. On my way down, I stopped for barbeque at Corky's in Memphis, TN.
Did you eat at that little sandwich shop just before Cherohala? The one operated by the aussies. Nice folks and good food.
www.killboy.com usually has a few good pics of you riding through the Dragon's Tail.
-
Just did 2100 miles on my new Corbin seat. ('98 Royal Star) No problems. Yeah they are harder, but like others have said, it holds your butt in the right place and keeps you from sliding around.
My only issue is that the passenger portion is about 1" higher (than orighinal), which makes it harder to install and remove, even with the tall backrest.
Overall, I'd buy another.
-
$9.00 for 32' of tubing and $0.50 for 50ml gear oil. Worked perfectly!
(Well, there was the $35 tachometer and the $5 10" #2 screwdriver.)
http://hosting11.imagecross.com/image-hosting-01/2397Homemade-Manometer-3-.jpg
-
Just got my carb stick (manometer) from Saber. $46 shipped. Buy from there ebay store NOT the web site. Saved me $20. After seeing www.sabercyclesucks.com , I'll try Kandaje's "$3.50" manometer. No Paypal = red flag.
-
Hey Ronnie,
I am sorry to say that I can't help you as far as the Syncing screws on your second gen. But to answer your question about why not set the carbs. to a set vacuum here's the answer to that one.
When you turn screw "A" you are actually BALLANCING the vacuum between Carb.#1 and #2. The same with screw "B", ballancing Carb. #3 to #4. Then when you turn screw "C" you ballance the right bank to the left bank. Thats why I made the remark about "Carb. Sync" not being the correct term.
Hope this helps,
Earl
Ah yes. Now Kandaje's post #27 makes sense.
Now then, anyone know exactly where my three sync-ing ('vacuum balancing') screws are located? '98 Royal Star.
-
Thanks to KiteSquid for the Harbor-Freight lead.
****************************************************
HELP.
I have a '98 standard Royal Star. My service manual lacks accurate instruction, and the carb drawings do not label the sync-ing screws.
I carefully searched the underside of my carbs for the "sync"ing screws, and I found five brass slotted/philips adjusting screws. Are these the adjustment screws?
I can see four of them from the left (choke-pull) side looking under the carbs and upward toward the right side; two are immediately under the left side carbs (#1 and #2) with one angled to the front and the other angled rearward, and the other two are straight across immediately next to each other between the right side (#3 and #4) carbs . And there is a fifth brass adjusting screw between the left side carbs, which can be seen when looking from the right side of the engine under the carbs.
Which of the five do I adjust? The manual says #1 to #2, then #4 to #3, then #2 to #4 and quit! What if #3 is wrong to start with, and after adjusting #2 would it then be different than #1?
And do I attach all four carbs to the manometer before doing any adjustments?
Lastly, instead of "sync-ing", why not simply adjust each carb to a single optimal vacuum pressure at idle?
 Contact Corbin with their build information and ask them specific questions.


 +2 !
+2 !


 .
. 30' of tubing, 50ml gear oil and an old board.

 After seeing
 Lastly, instead of "sync-ing", why not simply adjust each carb to a single optimal vacuum pressure at idle?
Selling my Royal Star.
in Links to Classifieds, Craigslist, Ebay, Sales, Etc.
Posted