cb1313 Posted October 18, 2010 Share #1 Posted October 18, 2010 2006 Venture, changed fluidin the brakes with no problems. Changed and Bled the clutch and now NO pressure. Purchased a Mighty Vac and still no Pressure. Help........thank you Cb Link to comment Share on other sites More sharing options...
jemorrisonjr Posted October 18, 2010 Share #2 Posted October 18, 2010 You have air in the system.... KEEP pumping.... Link to comment Share on other sites More sharing options...
Condor Posted October 18, 2010 Share #3 Posted October 18, 2010 2006 Venture, changed fluidin the brakes with no problems. Changed and Bled the clutch and now NO pressure. Purchased a Mighty Vac and still no Pressure. Help........thank you Cb The clutch is one of those areas that's a PITA to bleed. If unsuccessfull try reverse bleeding the thing. I got tired of retyping the proceedure every time so I went ahead and made up a file. Here's a copy. When trying to bleed a clutch that is completely empty of fluid on a Venture, it’s very difficult…maybe impossible… to get all the air purged out of the lines normally because of the location of the reserve to the slave. Unlike bleeding the brakes where the pressure is built up by rapid pumping the pedal or lever, the clutch does not build pressure. Squeezing the clutch lever has to be done slowly and constantly. Using this method causes the air bubbles in the lines to move down toward the slave with each stroke. During the release of the lever the air bubble rises upward in the line. Air rises. So in effect you end up with these bubbles rising and falling and going nowhere. I seen threads over the years where the owner has struggled for days to get the clutch properly bled. Reverse bleeding is done by forcing DOT fluid into the bleeder valve and forcing the air up the line and into the reserve. This can be done several ways. If you have a Speed-Bleeder installed it will have to be removed. If you have a regular bleeder, the reverse bleed can be done with the valve in and open, or you can remove the valve like a speed-bleeder. I find the removal of the valve the easiest. Take a rubber ear wax remover blub that you can find in your local drug store and snip the tip off a little bit at a time until it fits into the threads of the removed valve. It should fit snuggly and the opening should be a bit off the bottom of the hole in the caliper. Remove all the fluid in the reserve. Suck up enough fluid to fill the bulb, insert it in the threads of the slave and force the fluid into the slave. Keep an eye on the reserve to make sure it doesn’t overflow. Not good. Sometimes you can hear bubbles as they make their way out of the line and into the reserve. If the bulb runs out of fluid it can be reloaded. The hole can be blocked off with your finger while refilling. When no more bubbles appear stick the bleeder valve back into the slave, adjust the level of the fluid in the reserve to about half full, replace the reserve top and you’re good to go. This whole process can be done in about 15 minutes. When done go for a ride. PS: After first opening up the reserve, lightly squeeze the clutch lever a tad. The surface of the fluid in the reserve should deform slightly. Squeeze hard and you’ll end up with fluid on you and the bike. Not good. What this shows you is that the expansion orifice is clear and functioning. If it’s plugged the hot expanded fluid will have no place to go, and start to push on the slave as if you were actually pulling the lever. The clutch will start to slip. This is also why the reserve should be only filled half way. I have seen owners spend a lot of money rebuilding their clutches, and all the reserve had was a plugged expansion hole. Hope this helps Link to comment Share on other sites More sharing options...
mrich12000 Posted October 18, 2010 Share #4 Posted October 18, 2010 This may sound strange. When I worked at a Volvo truck dealer, We serviced the European truck clutch slaves with a rig made up of a windshield washer pump. This was setup to flow brake fluid up from the ww pump to the slave to the master, this would eliminate the bubbles and the need for pedal bleed, this is also the way to do this as I have done i this way for years. Any one here ever done this way before? 1) Trico WW pump 2)1/4x4ft clear washer hose. to be connected to the fluid (drill the brake fluid cap insert the hose. Connect to the input of the pump, output to the slave open bleeder. Make sure the master is semi empty .You need a turkey baster empty the master.. 3) 5ft 14 g insulated wire,black,red. 4) 2 insulated alligator clips to be soldered to the clips, and to the pump wires wired for proper polarity. B+, Neg- for the battery connection. also a momentary switch (Radio shack, Napa, Auto Zone) and some shrink tube for insulation.. 5) New dot 4 Brake fluid. 6) Power point, Battery 12 volt source. Make a mount for the pump, fluid container. source out the bikes battery connect and go to bleed the system. this will also do any bike brake system to. have fun with this fun hobby, Mike R... So I hope you have the skills to make this up it's fairly ezy.. Link to comment Share on other sites More sharing options...
Jerry W Posted October 20, 2010 Share #5 Posted October 20, 2010 The clutch is one of those areas that's a PITA to bleed. If unsuccessfull try reverse bleeding the thing. I got tired of retyping the proceedure every time so I went ahead and made up a file. Here's a copy. When trying to bleed a clutch that is completely empty of fluid on a Venture, it’s very difficult…maybe impossible… to get all the air purged out of the lines normally because of the location of the reserve to the slave. Unlike bleeding the brakes where the pressure is built up by rapid pumping the pedal or lever, the clutch does not build pressure. Squeezing the clutch lever has to be done slowly and constantly. Using this method causes the air bubbles in the lines to move down toward the slave with each stroke. During the release of the lever the air bubble rises upward in the line. Air rises. So in effect you end up with these bubbles rising and falling and going nowhere. I seen threads over the years where the owner has struggled for days to get the clutch properly bled. Reverse bleeding is done by forcing DOT fluid into the bleeder valve and forcing the air up the line and into the reserve. This can be done several ways. If you have a Speed-Bleeder installed it will have to be removed. If you have a regular bleeder, the reverse bleed can be done with the valve in and open, or you can remove the valve like a speed-bleeder. I find the removal of the valve the easiest. Take a rubber ear wax remover blub that you can find in your local drug store and snip the tip off a little bit at a time until it fits into the threads of the removed valve. It should fit snuggly and the opening should be a bit off the bottom of the hole in the caliper. Remove all the fluid in the reserve. Suck up enough fluid to fill the bulb, insert it in the threads of the slave and force the fluid into the slave. Keep an eye on the reserve to make sure it doesn’t overflow. Not good. Sometimes you can hear bubbles as they make their way out of the line and into the reserve. If the bulb runs out of fluid it can be reloaded. The hole can be blocked off with your finger while refilling. When no more bubbles appear stick the bleeder valve back into the slave, adjust the level of the fluid in the reserve to about half full, replace the reserve top and you’re good to go. This whole process can be done in about 15 minutes. When done go for a ride. PS: After first opening up the reserve, lightly squeeze the clutch lever a tad. The surface of the fluid in the reserve should deform slightly. Squeeze hard and you’ll end up with fluid on you and the bike. Not good. What this shows you is that the expansion orifice is clear and functioning. If it’s plugged the hot expanded fluid will have no place to go, and start to push on the slave as if you were actually pulling the lever. The clutch will start to slip. This is also why the reserve should be only filled half way. I have seen owners spend a lot of money rebuilding their clutches, and all the reserve had was a plugged expansion hole. Hope this helps Where is the expansion orifce located & what is the best way to clear the orfice? Thanks. Link to comment Share on other sites More sharing options...
Condor Posted October 20, 2010 Share #6 Posted October 20, 2010 Where is the expansion orifce located & what is the best way to clear the orfice? Thanks. There are two holes drilled in the bottom of the clutch reserve. The one on the right is for fluid supplied to the master piston. The one on the left.. looks like someone tried to drill a hole and stopped... is very small and allows expanded fluid back into the reserve when the lever is not being applied and at rest. The instructions mention that the surface of the fluid in the reserve will deform a bit when squeezed, so it stands to reason that the hole would be in the bottom of the reserve. To clean it use one of those wire twist ties with the cover stripped off. Usually found in the produce section of your grocery store, or on just about every electrical cord supplied with a new GPS, radio, MP3 player... etc..etc.. Link to comment Share on other sites More sharing options...
Jerry W Posted October 21, 2010 Share #7 Posted October 21, 2010 Thanks Link to comment Share on other sites More sharing options...
Seaking Posted October 29, 2010 Share #8 Posted October 29, 2010 I hate to sound or look like a simpleton but I'll take that risk.. Can you point out in a photo or diagram where these ports and slaves and valves? I read the instructions provided (thanks) but I'm coming up blank.. My clutch fluid darkens rather soon, the fluid level seems to dissipate over time and the friction zone changes over a period of time.. I end up adding a bit of clutch fluid into the reservoir and it helps.. However, I'm not sure if the whole system is in proper shape or not.. :/ Link to comment Share on other sites More sharing options...
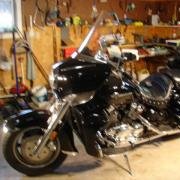
Ponch Posted October 29, 2010 Share #9 Posted October 29, 2010 There's several pics on this thread. Link to comment Share on other sites More sharing options...
cb1313 Posted October 29, 2010 Author Share #10 Posted October 29, 2010 Hi, I finally got my clutch bleed, with 25 years in aircraft hyd. this just did not make sence. facing the bike on the left side, just behind the rear cylinder is a little black rubber cover about 1 inch square. To help with space remove the rear cylinder cover ( 3 screws). be careful when removing the rubber cover, it has a loop around the clutch bleed port screw. The main clutch bleeding problem I had was the bleed scew is soooo lose the I kept sucking air through the threads. I took some white plumbers thread tape around the bleed screw and in 1 hour I was done. I used a Mighty Vac to remove the air and then the squezzed the clutch handle and opeaned and closed the bleed value without the Vac. Put some news paper or card board under the bike to catch any brake fluid. Brake/clutch fluid will eat through most any material and remove paint over time so wash the lower area , I used Simlpe green, lets it sit , then washer with water. Cb Link to comment Share on other sites More sharing options...

Recommended Posts
Create an account or sign in to comment
You need to be a member in order to leave a comment
Create an account
Sign up for a new account in our community. It's easy!
Register a new accountSign in
Already have an account? Sign in here.
Sign In Now