mtman Posted June 26, 2008 Share #1 Posted June 26, 2008 Got this 86 VR last week. It has not been running for months(many, many months). It won't start and I am working on that. Got some Seafoam and have begun to see if I can get fuel to the carbs. But first... should have been an easy one. No rear brakes. Fronts(rt side) work fine. So just bleed the air out right. Put DOT 3 on the res. and pump, pump, pump(bottoms out each time). Open Lt. front bleeder... nothing. Did this a half dozen times. OK, plan B. Found the bleeder by the neck. Could only find one so I guess it's the right one:) Pump, pump, pump. Nothing. Not a drop of fluid. Still bottoming out on the bakes. On to plan C... the rears. Same drill... nothing. Resivour(sp) is still full. Seems the brake fluid isn't getting out of the res. Now what?? I know absolutely nothing about these bikes(and this one in particular) but I am willing to try to get it to work. Will take any suggestions... TIA, Wayne Link to comment Share on other sites More sharing options...
Gearhead Posted June 26, 2008 Share #2 Posted June 26, 2008 Could be a bad master cylinder, but before we go there... Sometimes air gets caught in funny places. You could try first bleeding at the banjo bolt on the rear MC if it is accessible. Crack the bolt, put a rag around it, and pump the handle, see if you get fluid. Also, try a Mity-Vac - they will often bleed systems that are hard to bleed. For some reason, MC brakes and clutches tend to trap air in difficult places more often than car systems. Jeremy Link to comment Share on other sites More sharing options...
GeorgeS Posted June 26, 2008 Share #3 Posted June 26, 2008 Well I would say the first thing to do is loosen Remove the Rear Master Cyl. and at least Clean it out. Most likley needs at least a rebuild kit. While doing this, also disconnect the hoses from the Calipers, and the Proportioning Valve. Then blow out the lines with compressed air, make sure they are clean. BE sure you do not force crud into the proportioining valve ( Located up by the Steering head ) Follow lines to the valve. Some folks have found blockage in the Bottom section of the Rear master cylinder. So I would start there. Then the lines. Then go to rebuilding the Calipers. Link to comment Share on other sites More sharing options...
GeorgeS Posted June 26, 2008 Share #4 Posted June 26, 2008 Be sure to completly Drain the tank. Remove the Petcock, check the Screen on it, for being plugged. This is common. Change filter, then remove the " Output " hose from the pump, With Key ON, the Pump should Squirt out fuel. Then reinstall the hose, open Carb Drains on each bowl, pump should pump fuel thru the 4 carb bowl drain hose's. If your still getting dirty fuel, reomve the Quantity Sender from top of tank, now you can see what inside the tank. Link to comment Share on other sites More sharing options...
mtman Posted June 26, 2008 Author Share #5 Posted June 26, 2008 Thanks all... Couple quick questions.. I live about 40 miles from the nearest anything... period! including a Yamaha shop. Where can I get brake rebuild kits, etc, that are dealer specific items cheapest on the internet. And non-dealer items... do you use eBay or have you found some specific shops that cater to our group. Link to comment Share on other sites More sharing options...
Yammer Dan Posted June 26, 2008 Share #6 Posted June 26, 2008 Take rear master apart carefully and cleanm it. Just went thru same thing. Mine had sat for years. I got BRAKES!! Took 1/2 day to break it all down and clean then good luck getting it to start pumping fluid Link to comment Share on other sites More sharing options...
hipshot Posted June 26, 2008 Share #7 Posted June 26, 2008 MTMAN. my '86 sat for about 3 or 4 years. rear brake problem turned out to be the ENTIRE system. the brake fluid, had crystallized in the reservoir, lines and BOTH front and rear cylinders. take the whole linked brake system apart, one part at a time. clean everything up, spotless, then go to the next part. DO NOT try to bleed the brakes , during this process, as you will likely "redeposit" trash in the parts you just cleaned. after you are sure everything is clean, refill your reservoir with NEW fluid, and begin the bleeding process. i always start with the left front brake , first. then the rear master cylinder, then bleed the air out of the "tree area bleeder". hope this helps. just jt Link to comment Share on other sites More sharing options...
CrazyHorse Posted June 26, 2008 Share #8 Posted June 26, 2008 MTMAN. my '86 sat for about 3 or 4 years. rear brake problem turned out to be the ENTIRE system. the brake fluid, had crystallized in the reservoir, lines and BOTH front and rear cylinders. take the whole linked brake system apart, one part at a time. clean everything up, spotless, then go to the next part. DO NOT try to bleed the brakes , during this process, as you will likely "redeposit" trash in the parts you just cleaned. after you are sure everything is clean, refill your reservoir with NEW fluid, and begin the bleeding process. i always start with the left front brake , first. then the rear master cylinder, then bleed the air out of the "tree area bleeder". hope this helps. just jt I' agree with hipshot your fluid has probably cystalized and is in the porpotioning valve also. Take apart and clean the heck out of it. Link to comment Share on other sites More sharing options...
mtman Posted June 27, 2008 Author Share #9 Posted June 27, 2008 Be sure to completly Drain the tank. Remove the Petcock, check the Screen on it, for being plugged. This is common. Change filter, then remove the " Output " hose from the pump, With Key ON, the Pump should Squirt out fuel. Then reinstall the hose, open Carb Drains on each bowl, pump should pump fuel thru the 4 carb bowl drain hose's. If your still getting dirty fuel, reomve the Quantity Sender from top of tank, now you can see what inside the tank. Thanks George.... Was curious about the fuel system(more than the brakes for the moment cause I'd really like to hear it run)and followed your advice...mostly. I noticed the petcock was on open and not reserve, so I put it on reserve. Took the fuel pump out, mostly to get to the filter, and saw the "in" hose from the filter. Decided to drain the tank from that if I could, so I hooked up a see-thru filter I picked up yesterday and drained the bikes tank into a 5 gallon gas can. I watched the fuel... looked clean and the new filter is clean. So took out the sender, had a look at the 2 filters on the petcock. From the looks of the reserve filter, it was never used. The other looks dark but not dirty/crudy and the bottom of the tank looks pretty good, not all rusty. Forgot to say I also removed the "out" hose before I drained the tank and fuel shot out of it pretty good so I must be getting fuel to the carbs. Don't know where the carb bowl drain hoses are... Is it a screw or something that allows the fuel to go out of the bowls. Little lost here... Anyway, will put everything back the way it was and concentrate on the carbs end of things. Thanks again for everyones help..... Wayne Link to comment Share on other sites More sharing options...
Snaggletooth Posted June 27, 2008 Share #10 Posted June 27, 2008 The black rubber lines that stick out of the brackets on each side of the carb assembly are the drain lines. Two to a side. Always wondered what those were huh? Take a look under the bracket to the right side of each lower carb body and you will see a screw head recessed into the bowl. Either extend the drain lines with a nipple and another piece of hose or simply hold a beer bottle (empty to avoid confusion later) over the end of the line and open the screw up 3 or 4 turns. Gas will drain out of the bowls into the bottle. Drain them and then with the SeaFoam added to the gas in the tank let the pump refill the carbs. Then let it sit over night. Do the same thing the next day. SeaFoam seems to work best if it can just sit and soak for a while. I did mine for 4 day before it would fire up. Don't worry about using too much as you really can't over do the SF. As for the brakes, are you getting any pressure to the pedal at all or is it just pumping with no resistance? If you have resistance, do the meter valve on the tree first, then the left front, then the rear. As they say, you may have a pretty clogged up system all the way through. All you can do it try to blow out all the crap and then bleed, bleed, and bleed some more to refill the system with fresh fluid. Rebuilding the master is a good idea at this point anyway. Keep us posted. Mike Link to comment Share on other sites More sharing options...
ctraylor Posted June 27, 2008 Share #11 Posted June 27, 2008 Brake fluid is water soluble. It the bike sat for a long time the master cylinder will sometimes rust on the inside and the first time you mash the brake the piston will stick in. Remove the rear master cyl. and clean and it will probably pump up. Link to comment Share on other sites More sharing options...
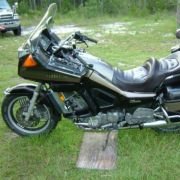
mtman Posted June 27, 2008 Author Share #12 Posted June 27, 2008 Thanks again... OK, got everything(fuel pump, lines, etc.) put back and bolted back down. I need to order a new fuel filter but the one I have is working so it should start. I took one plug out and grounded it and it did spark but I was not impressed. Guess I need to pull them all out and either get new ones or clean these up a bit better. I cranked it a few times and got nothing. From what I have read it seems like these bikes either start or not, no half way about them...haha. Probably should at least take the diaphragms out and clean them up. They seem pretty stiff... probably dirt and gunk.. would also find out how many holes are in them..haha. I know you haven't had a really good laugh all day so I am going to try to include a picture of my "garage". Link to comment Share on other sites More sharing options...
Neshobanakni Posted June 27, 2008 Share #13 Posted June 27, 2008 I have my '83 in a similar garage right now - starter seems to be bad. As for the rear brake, get a mighty-vac and bleed, bleed, bleed. Then bleed some more. It took me days. This thread has some great carb advice, which I'm gonna use on my Vmax. Only ridden twice since I bought it; can't trust it yet. It handles like a hog on roller skates, nothing like the Venture. Link to comment Share on other sites More sharing options...
mtman Posted June 28, 2008 Author Share #14 Posted June 28, 2008 Hey Snaggletooth(Mike)... Thanks man... yer right, didn't have a clue about the drains. OK.. did the drains; #1 nada, nothing #2 nada, not even a drop, #3 weak but getting some out, #4 runs out like the dam broke. So.. turned the key on and did the "run" and got the pump to fill 3 & 4 again. Looks like I'll be doing the sea foam thing for a few days. Also took the diaphragm out of #1 and it has 2 very small pin holes. Cleaned it all up, including the varnish on the needle. I think I will try to get by with it for now. Ran out of daylight... will start again tomorrow. Thank y'all for your inputs... they are invaluable to a greenhorn like me:bowdown: Wayne Link to comment Share on other sites More sharing options...
mtman Posted June 28, 2008 Author Share #15 Posted June 28, 2008 Well, in between rain showers, got the 3 & 4 carb draining fuel pretty well. Still nothing from 1 & 2 . Added some more sea foam to the tank and removed the small hose that goes to 1 & 2 from the red hose. Squirted some carb cleaner into the carb from there and added a little sea foam. I'll be nursing that for the next few days. Got to give time and sea foam a chance to work. Went to work on the brakes. Thanks to y'all for your many suggestions. Didn't even hesitate... totally removed the rear master. Don't look crystalized but does look like I used my grease gun inside everything. Also removed the rear caliper. The pucks are almost frozen, so I got gobs of cleaning to do. One good thing tho... the pads look nearly new:happy34: I'll keep y'all posted. Link to comment Share on other sites More sharing options...
mtman Posted June 29, 2008 Author Share #16 Posted June 29, 2008 Tried, for several hours, to get the pucks out of the rear caliper. Can only seem to get the two outside ones. Got them out with the air compressor. The other two won't budge. So I guess I'm gonna start looking for another rear caliper. Got to get busy on the master cyl. also; the plunger is frozen on it. Probably end up getting another one of those as well. I've used DOT 3 and brake-free cleaner. Maybe I should be trying something else. Link to comment Share on other sites More sharing options...
Snaggletooth Posted June 29, 2008 Share #17 Posted June 29, 2008 Hey mtman. I don't know how far you have opened the old girl up but here's a way to get to no fuel to the bowl problem. If you have removed the air box and are able to see the tops of the carbs you will see what I'm talking about. On the top of each carb where the 90 degree angled fuel pipe goes in there is a plug in the top of the carb body. NO! don't try to take it out! Under the plug is a small net filter that is the last stop for crap before it enters the carb needle and seat. I'd would try to remove the rubber fuel line connectors and try to shoot in some carb cleaner then using a piece of extra fuel line pour in some Sea Foam and let her soak. I'm not a big fan of carb cleaner sprays as they are rather intense but diluting the spray with SF should be fine. Cleaning the net filter is best done from the inside of the carb by blowing it out with air through the seat but you have to pull the carbs and open them up to do that. Something that may be in your near future. As you are getting fuel from one or two carb bowls I do suspect the net filters my be clogged. If it comes down to that it is a bit of a project to remove the plugs and replace the filters. Been there, got the tee-shirt. Trying to clean the net filters is the best bet before a rebuild. Keep us posted. Mike Link to comment Share on other sites More sharing options...
CrazyHorse Posted June 30, 2008 Share #18 Posted June 30, 2008 Tried, for several hours, to get the pucks out of the rear caliper. Can only seem to get the two outside ones. Got them out with the air compressor. The other two won't budge. So I guess I'm gonna start looking for another rear caliper. Got to get busy on the master cyl. also; the plunger is frozen on it. Probably end up getting another one of those as well. I've used DOT 3 and brake-free cleaner. Maybe I should be trying something else. Before I pop them out I try to get them all moving. I push them in and pump them outward a few times. You cant get all four out unless you plug the holes up to create pressure. Link to comment Share on other sites More sharing options...
mtman Posted June 30, 2008 Author Share #19 Posted June 30, 2008 Before I pop them out I try to get them all moving. I push them in and pump them outward a few times. You cant get all four out unless you plug the holes up to create pressure. Jimbob5, The two pucks I am having a problem with are the two that would be closest to the wheel(furthest from the brake line). When I used the air, I got the two outside ones(one at a time) and they took some doing. I don't have a huge compressor, but it'll give me 120psi. The inside two are all the way back in their holes and don't want to move at all. Even tried a big pair of needle nose... won't move. Gonna try some more brake-free and let them soak a few hours and try again. Can't pump them out... master is out also. Snaggletooth, I know about the 90 degree pipes. Took the hose off the one on #1 and had a two foot piece of gas hose, so I used carb cleaner and sea foam and dumped it down 'till the thing filled up. Sat there all night with the drain open... nothing. I didn't think about force feeding it... I got a squirt bottle I use, kinda like those ketsup bottles you see at restaurants and I use it to put the brake fluid in... could use it to squirt some sea foam in. Do ya think the screen is pugged or ?? Can you remove the drain screw and get a squirt in that way or through the drain tube ?? I do have the air box out. If I can't get some fuel running through there soon, I'm gonna have to take the carbs out and I am really over my head on that one:puzzled: Thanks all... Wayne Link to comment Share on other sites More sharing options...
86er Posted June 30, 2008 Share #20 Posted June 30, 2008 Hey Snaggletooth(Mike)... Thanks man... yer right, didn't have a clue about the drains. OK.. did the drains; #1 nada, nothing #2 nada, not even a drop, #3 weak but getting some out, #4 runs out like the dam broke. So.. turned the key on and did the "run" and got the pump to fill 3 & 4 again. Looks like I'll be doing the sea foam thing for a few days. Also took the diaphragm out of #1 and it has 2 very small pin holes. Cleaned it all up, including the varnish on the needle. I think I will try to get by with it for now. Ran out of daylight... will start again tomorrow. Thank y'all for your inputs... they are invaluable to a greenhorn like me:bowdown: Wayne You can use "Liquid Electricians Tape" to fix those holes. New diaphragms are really expensive. Link to comment Share on other sites More sharing options...
Dano Posted June 30, 2008 Share #21 Posted June 30, 2008 If you're looking for online parts, www.Flatoutmotorcycles.com is the best bet. The best online prices around. I just rebuilt my entire bike using their online ordering system. Of course, since I only live 10 miles from their shop, I saved on the shipping, but their prices are hard to beat. Just make sure you mention in the comments box that you are with Ventureriders, and Chris will take care of you. He is also a member here, Chris@Flatout is his screen name. Any questions about parts, don't hesitate to ask. Plenty of free opinions around here!! Good luck, Dan Link to comment Share on other sites More sharing options...
Tupperj Posted June 30, 2008 Share #22 Posted June 30, 2008 Jimbob5, The two pucks I am having a problem with are the two that would be closest to the wheel(furthest from the brake line). When I used the air, I got the two outside ones(one at a time) and they took some doing. I don't have a huge compressor, but it'll give me 120psi. The inside two are all the way back in their holes and don't want to move at all. Even tried a big pair of needle nose... won't move. Gonna try some more brake-free and let them soak a few hours and try again. Can't pump them out... master is out also. Wayne Wayne, Couple of suggestions on the stuck pucks: First, complex and wonderful. It's possible to make a fitting to really put the air pressure to the caliper. You can pick up brass fittings that will fit inside a banjo fitting on a brake line. If you drill a hole through the pipe, like the banjo bolt on the caliper, you can cobble up something to allow you to hook up directly to your air line. Took a number of washers of appropriate sizes, and I put a valve on it to help control things. Then, bolt the open end of the brake line to the caliper, close the bleeder and use clamps of some kind to hold the pucks you can remove in place and turn up the pressure. Carefully! Things can fly about and cause pain and suffering. Nobody wants that. But it will put the pressure where you want it. Second, simpler and messier. Stick an appropriate bolt in the brake line opening and put a grease gun on the bleed nipple. Again, hold the pucks that move in place and pump in the grease. The grease will force the puck out, but will also fill your caliper with grease, that you will then have to clean out. Hope this give you some ideas. Standard disclaimers apply, your mileage may vary, etc. Good luck! Paul Link to comment Share on other sites More sharing options...
mtman Posted June 30, 2008 Author Share #23 Posted June 30, 2008 Wayne, Couple of suggestions on the stuck pucks: First, complex and wonderful. It's possible to make a fitting to really put the air pressure to the caliper. You can pick up brass fittings that will fit inside a banjo fitting on a brake line. If you drill a hole through the pipe, like the banjo bolt on the caliper, you can cobble up something to allow you to hook up directly to your air line. Took a number of washers of appropriate sizes, and I put a valve on it to help control things. Then, bolt the open end of the brake line to the caliper, close the bleeder and use clamps of some kind to hold the pucks you can remove in place and turn up the pressure. Carefully! Things can fly about and cause pain and suffering. Nobody wants that. But it will put the pressure where you want it. Second, simpler and messier. Stick an appropriate bolt in the brake line opening and put a grease gun on the bleed nipple. Again, hold the pucks that move in place and pump in the grease. The grease will force the puck out, but will also fill your caliper with grease, that you will then have to clean out. Hope this give you some ideas. Standard disclaimers apply, your mileage may vary, etc. Good luck! Paul Thanks Paul... I'll try the direct air first... Got some fittings.. we'll see what happens. Thanks Dan... Got them bookmarked. Got to get the rebuild kits to this stuff. Thanks 86er.. I actually think I have some of that somewhere. I'll keep y'all posted. Wayne Link to comment Share on other sites More sharing options...
mtman Posted June 30, 2008 Author Share #24 Posted June 30, 2008 Well, for those that are sort of following this project... I got the master cyl. apart and it had crystalized inside the plunger. Got it cleaned out and now awaiting a rebuild kit from Flatout. The portion valve was remarkably clean and required very little additional cleaning. The rear caliper was another story. Tried the air thing again. Got frustrated so looked up calipers on eBay. Found one . So now I am waiting for that too. Tried the carb thing again. Forced some sea foam & carb cleaner mix into the carb. We'll give it some time... if not I'll have to go to plan B. Been ducking the thunderstorms all day so going to give it a rest... Wayne Link to comment Share on other sites More sharing options...
Gearhead Posted July 2, 2008 Share #25 Posted July 2, 2008 The problem on those two carbs may also be that the drain is clogged. Fuel may be getting in, but not draining out. Try to shoot some carb cleaner up the drain tubes with the drain screws open a few turns. Jeremy Link to comment Share on other sites More sharing options...

Recommended Posts
Create an account or sign in to comment
You need to be a member in order to leave a comment
Create an account
Sign up for a new account in our community. It's easy!
Register a new accountSign in
Already have an account? Sign in here.
Sign In Now