Search the Community
Showing results for tags 'note'.
-
 Some one has a sent of humour. The note said ..I made this just for You, Charlie :rotfl:
 -
Just to say I miss them. If they had lived Patrick and Rebbeca would have been four today. On a lighter note , we took them ridding today. We miss you kids, Love you Daddy
-
The FIRST day of winter!!!!! On a good note, the days will start getting longer and on a bad note, tomorrow's low here is to be about 13 degrees F. It has been a good day today and I did get in about a 40 mile ride at about 57 degrees. This may be my last ride of 08 and I have put a little over 8,000 miles on the bike this year. It has been a pretty good year. RandyA
-
I seldom go on You Tube, but a friend flagged this to me. It is an intersection car/cycle crash where the car obviously ran a red light. This is not for the faint at heart as the biker took a bad hit. But, on a lighter note, there are many more short videos attached near that are down right funny and it is amazing how stupid some people are. RandyA [ame]http://www.youtube.com/watch?v=a68i-NDjdlc[/ame]
-
Had a problem with my iWAY 350C shutting off after about a half hour of operation in hot weather. Unit is mounted on a RAM handlebar mount. Others here noted the same problem. Some linked it to heat, others to vibration. I contacted Lowrance and sent them copies of the messages on this board showing others had had similar problems. Got a return authorization even though my unit had been out of warranty a few months. They received it and sent a note back saying they'd send it to engineering for test and evaluation. I responded thanking them for their offer but asked them to send it back "as is" and I would limit its use to my truck and get a specific unit for motorcycles (the iWAY is not weather proof). The next thing in this sequence is a new 350C was delivered by UPS--no charge. Of course, I can't verify the malady is fixed until hot weather arrives, but just wanted to post this note to let everyone know what a great customer service operation Lowrance is. If you're having problems with their products, I highly recommend you contact them. Nothing to lose except a few minutes at the keyboard or on the phone.
-
the days are now getting longer and longer. RandyA
-
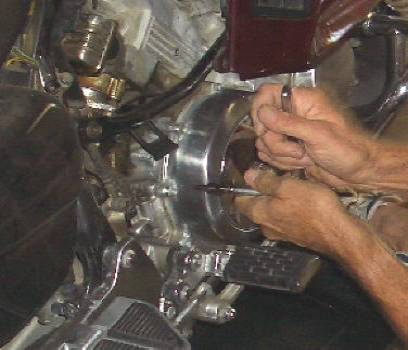
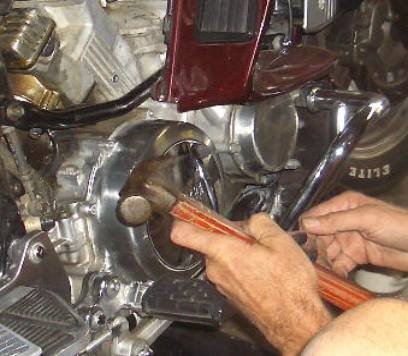
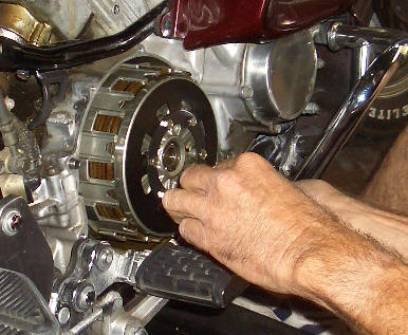
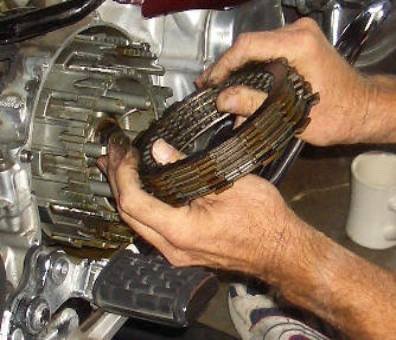
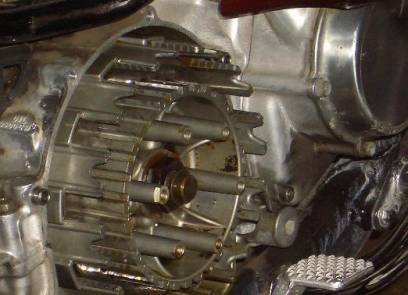
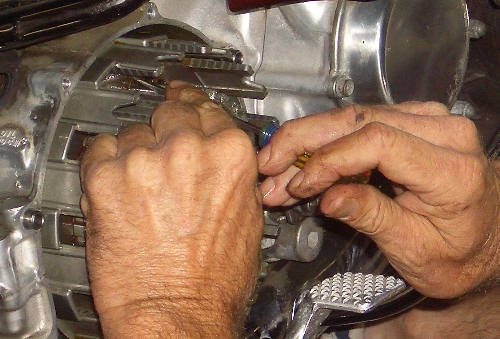
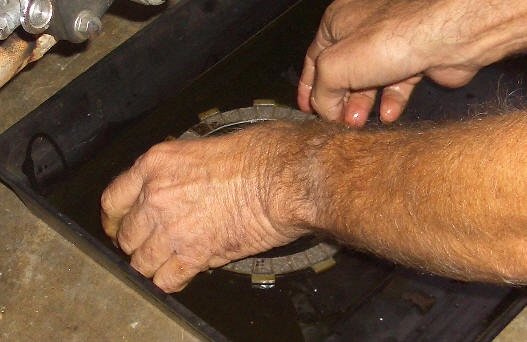
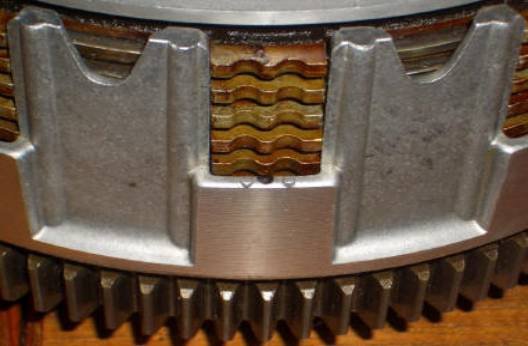
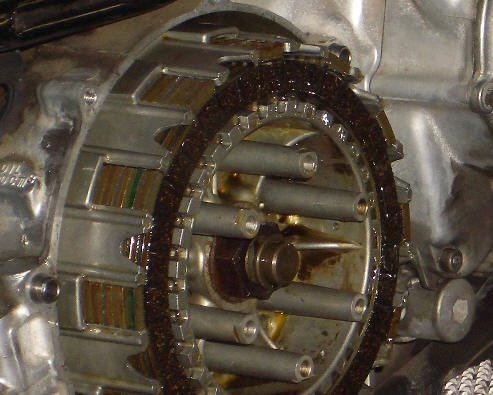
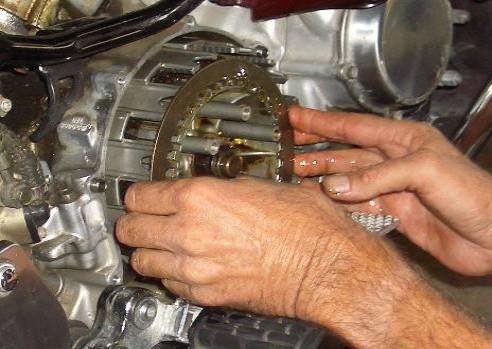
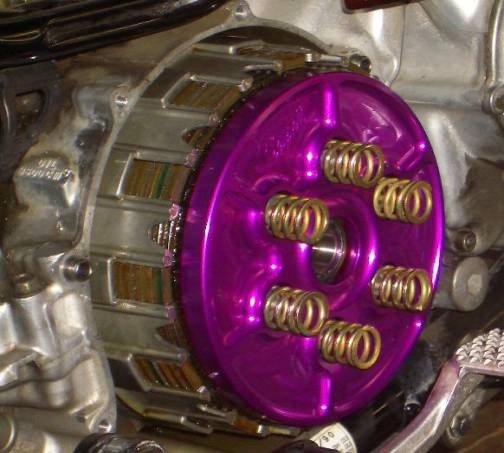
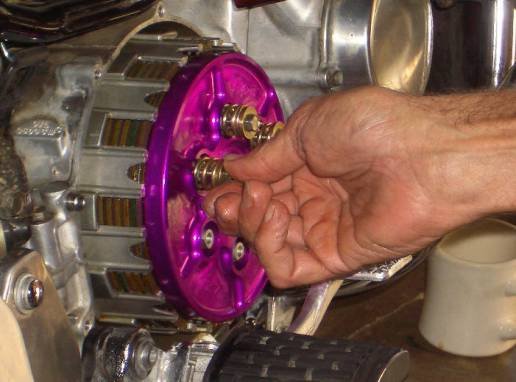
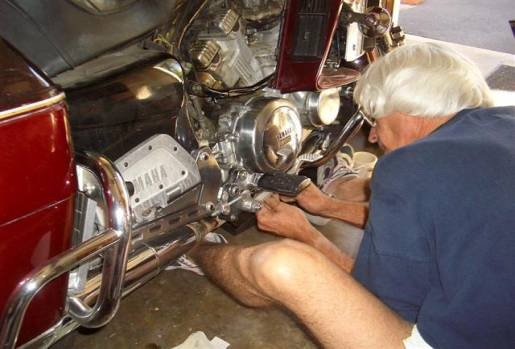
BARNETT CLUTCH CONVERSION INSTALLATION The parts were ordered from Rick at Buckeye Performance in Ohio. The fiber discs ONLY were replaced given the wear and mileage, the plates were reusable. Parts used: FRICTION PLATE #YA26H-16321-01-04 (notched/6 ea.) FRICTION PLATE #YA26H-16307-01-00 (un notch/1 ea.) Retaining wire BNT-SR-2 CONVERSION SR-2 SPRING CLUTCH (1 set) STARTING NOTE: This was done without removing the clutch pedal or linkage. Also note that with the bike on it's side stand, there is little or no loss of oil. 1. Remove the clutch housing cover. After removing the bolts the cover may need a bit of persuading to give it up. CAUTION! A rubber hammer is recommended, as one was not available when this was done, a hammer was employed along with a very thick towel to soften the taps to the housing. 2. With the cover removed the next step is removing the diaphragm and pressure plate. These items won't be used and can be discarded or stored. This time the 6 bolts were reused. Others have replaced them with new bolts. 3. Next remove the old friction plates and discs. Note: there is a set of 1 plate and 1 disc held at the very bottom of the clutch basket by a thin retaining wire. The wire is held in place by a couple of bent ends that are pushed through a hole in the basket. The wire needs to be removed and the last two pieces taken out. 4. The empty basket. Clean and get ready for reassembly. Check the edges of the uprights for any burrs or imperfections. NOTE: When inserting the discs make sure that you have the tang with the double notches aligned with the two 'dots' on the clutch basket. 5. Place one disc and then (the odd) friction plate (#YA26H-16321-01-00) and one re-used spacer into the base of the basket. Make sure they are soaked with fresh oil. (take note that there are no notches on the first disc) Place the NEW wire into the channel cut into the basket and into the notches of the basket uprights and secure it by pushing the bent ends into the hole. Be patient. A long thin screwdriver also facilitates the job. NOTE: You can never have enough oil on the new discs and plates. When inserting the discs and plates, double check to make sure that the notches are lined up with the two dots on the lip of the basket. NOTE: Here is what a full basket looks like. 6. The final plate goes in. 7. Place the Barnett Clutch pressure plate on the basket. The instructions with the Barnett show the "Barnett" label up, but you will probably need to rotate it until it fits right. Just rotate the plate until it is seated without any gap between the plate and the top disc. 8. With the plate sitting correctly in the basket and the ease of the spring compression to start the bolts. Torque the bolts at 8 lbs. 9. Put the new gasket on, the housing on and secure the cover. Time involved is about an hour to an hour and a half.

-
This is Tech Bulletin M85-014 which refers to the parts wear resulting in second gear failing. NOTE: The 2nd gear problem was fixed in 1985 after serial number 0001413 M85-014 Transmission Repair Diagnoisis Tips.pdf
-
Written by Fred Vogt, submitted by HDHTR. Thanks. To start remove the engine guard on the left side. 1.Remove the shifter and peg or floorboards. 2.Remove the oil 3.Remove mid-gear cover, (the case cover on the left to the rear) this will drain more oil and free the wiring to be removed. 4. Now remove the left front cover. NOTE: this cover is hard to remove because of the magnetic pull on the stator. Note: the position of the shifter shaft as you remove the cover. 5.Place the cover on a suitable work aria so we don’t scare the case. 6.Remove the retainer for the wiring. Remove the retaining ring [This is where you need the Impact Driver] Reverse the above steps to install Thanks to Fred Vogt. He has a picture for everything!!