Search the Community
Showing results for tags 'fairing'.
-
Graphic Equalizer in place of Cassette. Submitted by John Richie Most of the credit for this installation process goes to Kevin Wisor who brought up the topic back in Dec 06. I am providing the steps with photos. The 7 band graphic equalizer is the Pyramid Model 403G, $25.00 at www.etronics.com, advertised as 100 watt amp with a 12 db boost for each band. Dimensions are 4.8"W x 4.75"D x 1"H. The new sound is an improvement over factory, especially if you boost all of the bands, but is only for the speakers, not the headset. This setup disables the cassette player and removes the connector for the CD player (attached to cassette circuit board). The equalizer fits perfectly in the original case for the factory cassette player, but does require modifying the face plate to accept the front of the equalizer. Removal of the cassette player also removes the factory AUX plug, so run an extension line from the factory head unit to a new location on the inner fairing. The speakers work both with the power turned on or off for the equalizer. Installation requires tapping into the speaker wiring harness, as the equalizer needs an output source from the factory amplifier. I cut the wires from the front left/right speaker harness, and used as the left and right “output” as shown on the electrical connection diagram. These go to the “input” on the equalizer. Run new wires to all speakers from the equalizer. Since I could not locate the rear speaker wire in the front fairing harness, I just ran new wires to the rear speaker(s). This disengages the factory fader control on the handlebar remote, but the equalizer has a fader control for the front to rear. The basic installation steps follow, with photos: Remove (split) the Front Fairing. Remove headlight assembly. Remove the brackets holding the stereo head unit, move head unit to left side (out of the way). Remove the four mounting bolts for the cassette deck, and remove the two screws that hold the cassette face plate to the inner fairing. Unplug AUX line and cassette deck wire connector. Keep the cassette deck front door closed for removal of cassette unit from the inner fairing. Carefully (toward the front of the bike) pull the cassette unit out of the inner fairing. Photo of cassette deck. Cut clear protective tape, remove the two lid screws, and lift the top from the deck. NOTE: Do NOT remove the side screws that hold the door assembly! Bottom: remove screws, clamps, and remove the cassette works (mounted with four rubber shock mounts). Pull off the rubber grommet protecting the rear deck wires and reuse when installing the equalizer. Also, I used the connector cap for the CD connector to cap off the original wiring harness connector for the cassette deck. Measure and cut the face plate of the cassette housing to allow mounting of the equalizer. Carefully cut the plastic face plate with a Dremel. The equalizer should be pushed into the face plate enough to use the fader and power button, but not too far or the front door will not close properly. The cut area should be made to fit between the top lip and the 2 fairing mount screw holes at the bottom of the cassette plastic face plate. After I did the rough grinding, I carefully used a small file to fine tune the cut area until the equalizer fit snugly in the face plate. Final mounting of the equalizer in the housing. I did not use the supplied mounting brackets for the equalizer, but instead removed the side screws from the equalizer box, drilled a hole on each side of the cassette housing, and mounted the equalizer with a metric machine screw on each side. The equalizer is held in the front by the plastic face plate and on the sides by the two mounting screws. Re-use the rubber grommet from the cassette deck wires to mount the wires from the equalizer on the rear slot of the housing. Re attach the top lid to the cassette housing and cover with clear packing tape to protect from water damage. Make sure that the door opens and closes properly. Reinstall the equalizer/cassette housing unit in the inner fairing, and again check the door for smooth operation. Disconnect the wire to the rear speaker(s) and run a new set under the seats and gas tank to the front fairing. Since I removed the trunk from my RSV, I only use one speaker in the rear, mounted between the bars of the passenger back support. For those with the trunk, the factory configuration uses only one set of wires for the two rear speakers (mono sound), so now is your chance to run two sets of wires, one to each rear speaker, for true stereo sound in the rear. Hook up all of the wiring for the equalizer using the supplied wiring diagram. Turn on the key, power up the equalizer, and check that all is well. Re-mount the front fairing and enjoy. Thanks, John Richie
-

Premeaux Batwing Fairing
bobbyduck posted a topic in Royal Star and Royal Star Tour Deluxe Tech Talk
I am considering installing a Premeaux batwing fairing with radio kit and 6.5 inch speaker holes onto my 2006 RSTD. Has anyone tried one of these on an '05 or later RSTD? Feedback? Thanks! -
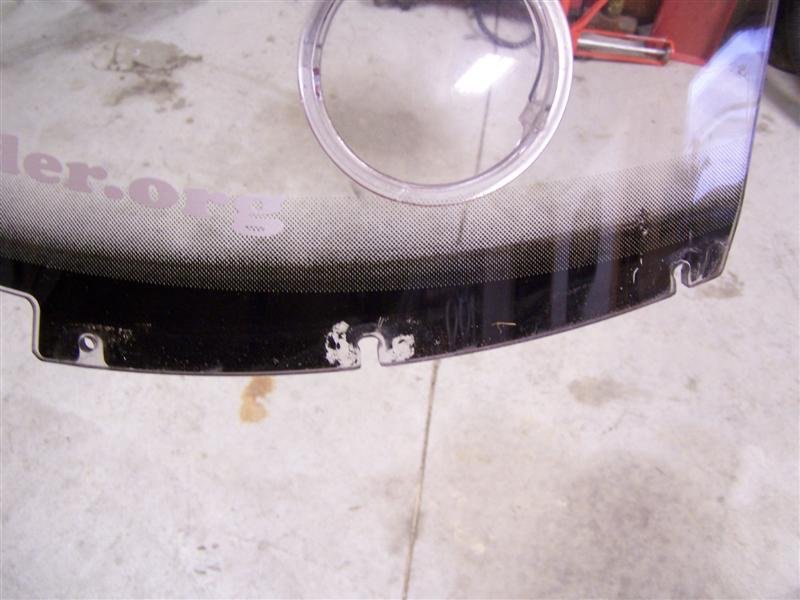
remember seeing on this site somebody writing on plastic repair . While taking my fairing apart found out that the plastic stub that holds the far end of shield support was broken off .I will have to repair it but I need some kind of glue or repair kit.I will have to make myself an other support but I will have to glue it or weld it to the fairing .
-
Submitted by bbstacker: ok, actually it was easier than I thought it would be, if you just jack up the front of the bike so the wheel is off the ground it is easier. first the front half of the fairing comes off, you have the small chrome strip on top with 2 screws, then you have 7 more for the front half of the fairing, 6 on the back and 1 under the headlight, then the windshield, 8 small screws holding that on. Once you have the front half of the fairing off, you may have to unplug just a few of the cables, I did the bigger round ones, because once you take out 2 nuts that hidden behind all the cables, once you get those off, you can pull the other half of the fairing away from the triple tree. Now you need to make sure you have a good pad laying across your tank for your handle bars to rest on. There 2 allen bolts on the front side of the triple that hold the bracket on for the fairing, take off the handle bars, then the big nut and washer holding the top of the triple tree. Just loosen the 4 bolts (2 on each side)used to clap the top part of the triple tree to the forks, take the top part off, you then can slide the 2 top fork covers off, there will be a big washer and rubber gasket inside. Before you loosen the 4 (2 on each side) bolts on the bottom part of the triple tree, make sure you mark where the forks are set, so you can measure up 1 inch from that mark down to top side of the bottom of the triple tree,once all the bolts are loose the forks will probably slide on you. All you have to do is either slide the forks up or down to get your 1 inch, lock one side then measure and lock the other side, put the covers back on making sure you put the washer and rubber gasket in correctly, put the top of the triple tree back on,then the washer and nut, tighten that then reinstall the 2 allen bolts, everything is just in reverse putting it back together. All this may sound complicated but trust me it is not, it's about a two hour job, that is unless you get it back together and forget to put the two forks covers back on like I did and have to take it apart again. I didn't take any pictures, I should have. As far as the kickstand, no problem, bike still leans on it the same just shorter, I will say the bike comes up on center way easier also. If you find you don't like it it's easy to change it back, myself, no way will I change it back. I have 40 lbs of air in the shock, I ride 2up and pull a trailer, (one that I made)and no the pipes don't drag. Hope this explains it well enough, if not send me an email and I'll try and do a better job. I would find a hard time believing you won't like the new ride. Good luck, any questions be sure to email me, I've been riding for over 40 years and do most of my own maintenance and all of my own mods. Hey I know this isn't for everyone, but that's what choices are all about. Take care and ride safe. Picture courtesy of Rosebud.
-
How can I protect the fairing from damage when the bike goes down? Are there any bumpers that I can attach to the top of the fairing?
-
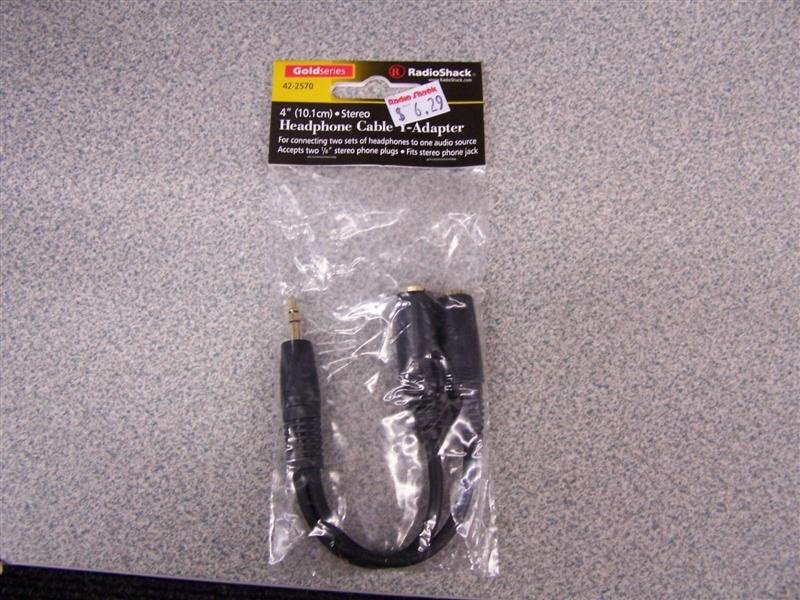
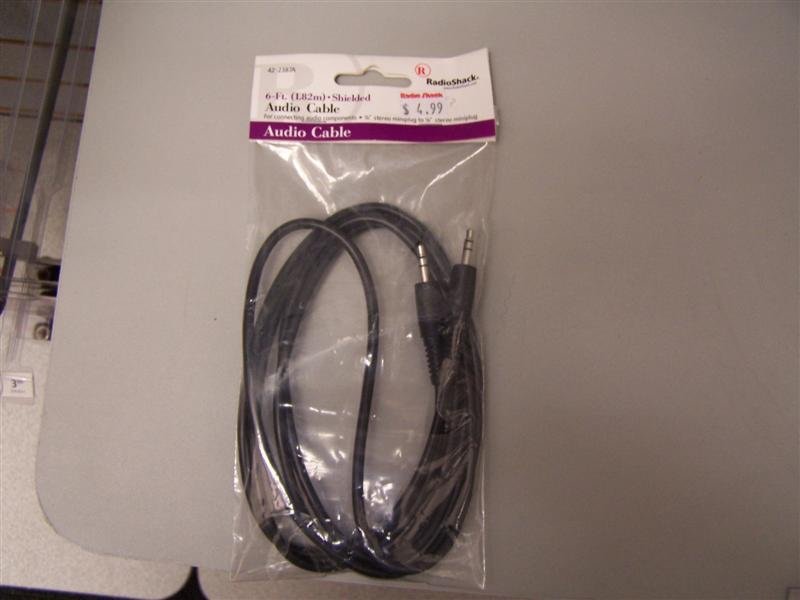
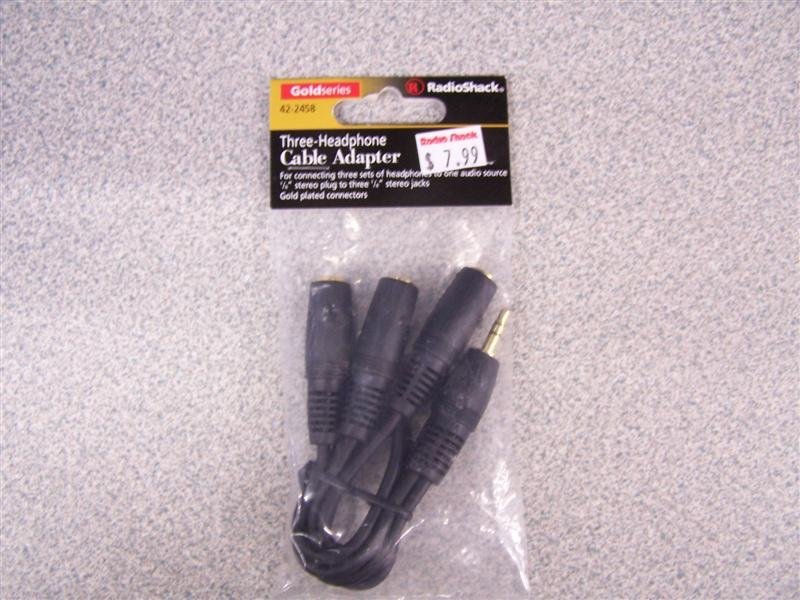
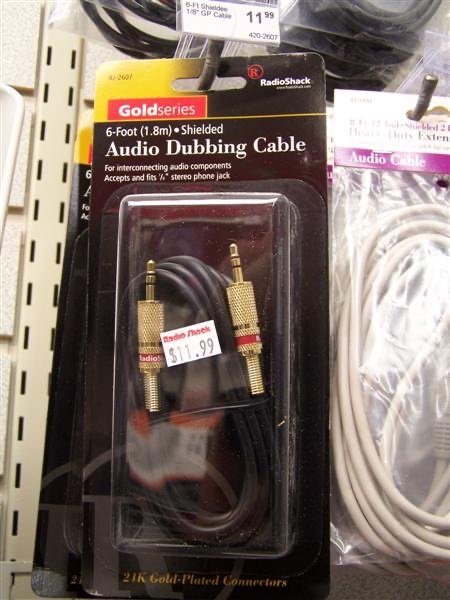
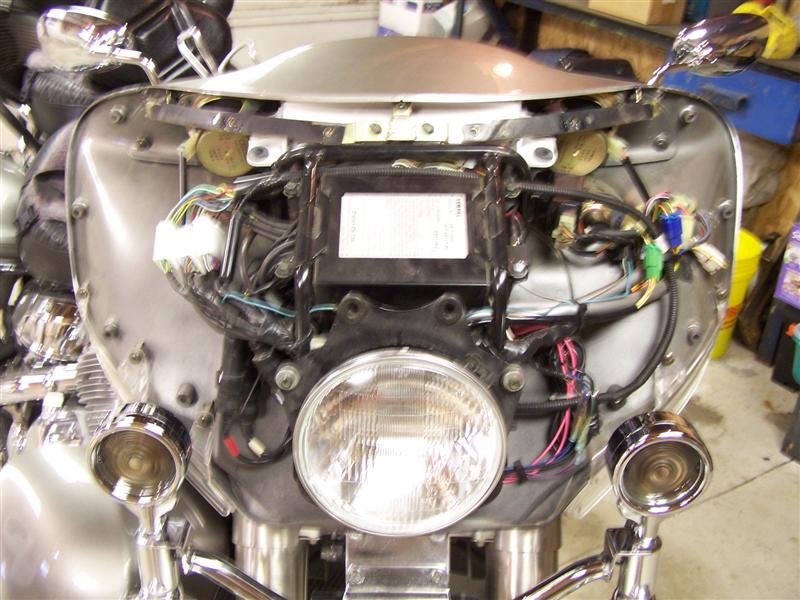
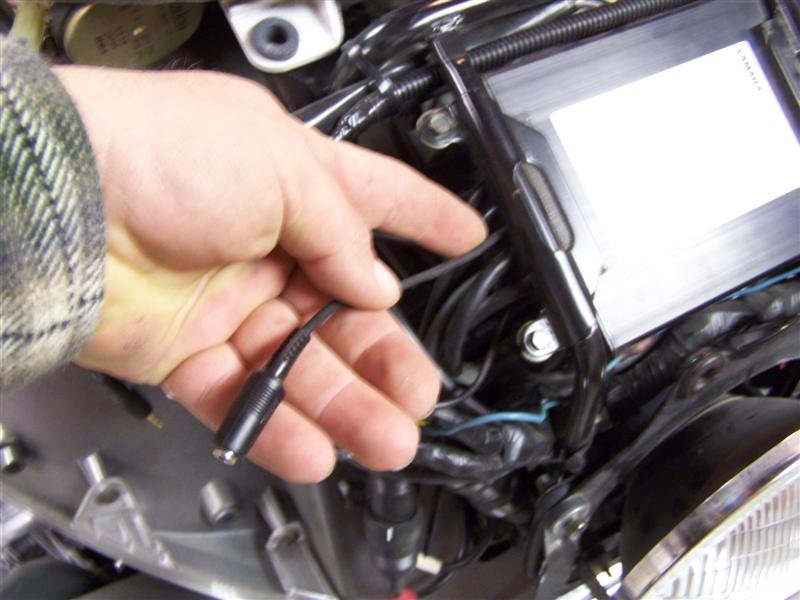
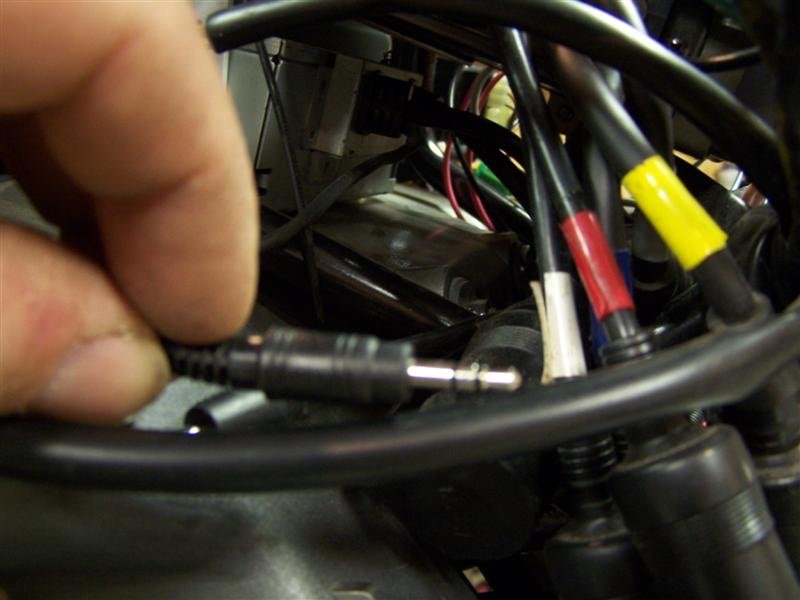
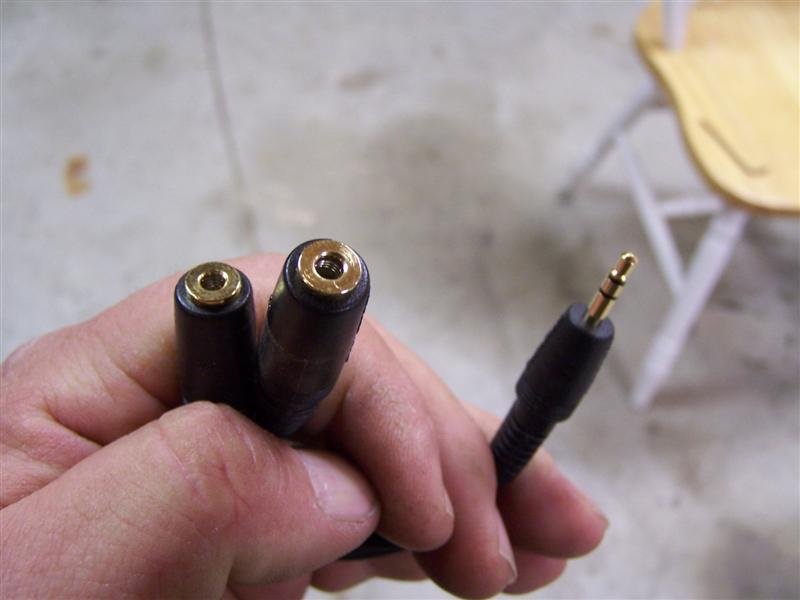
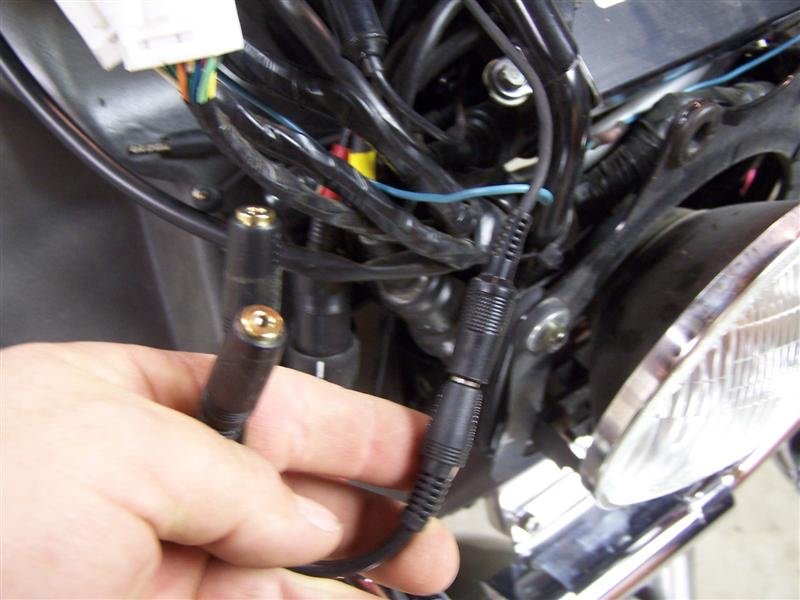
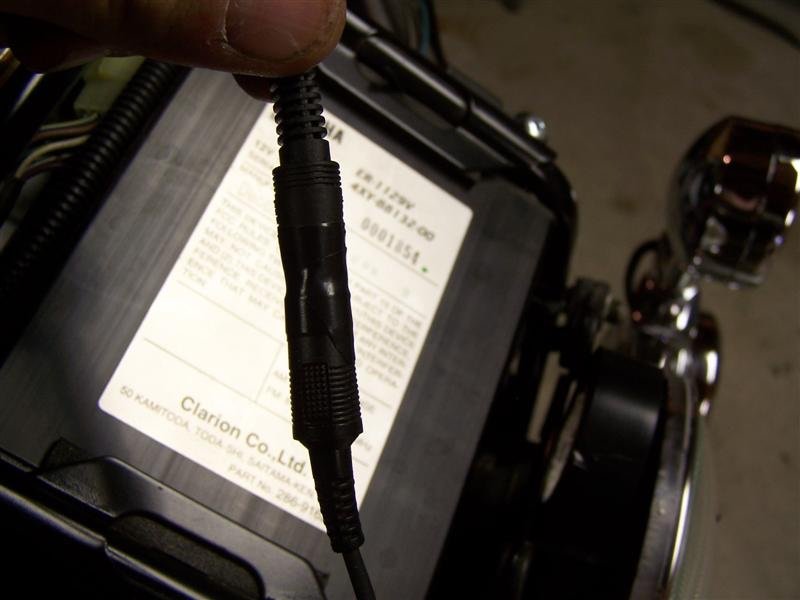
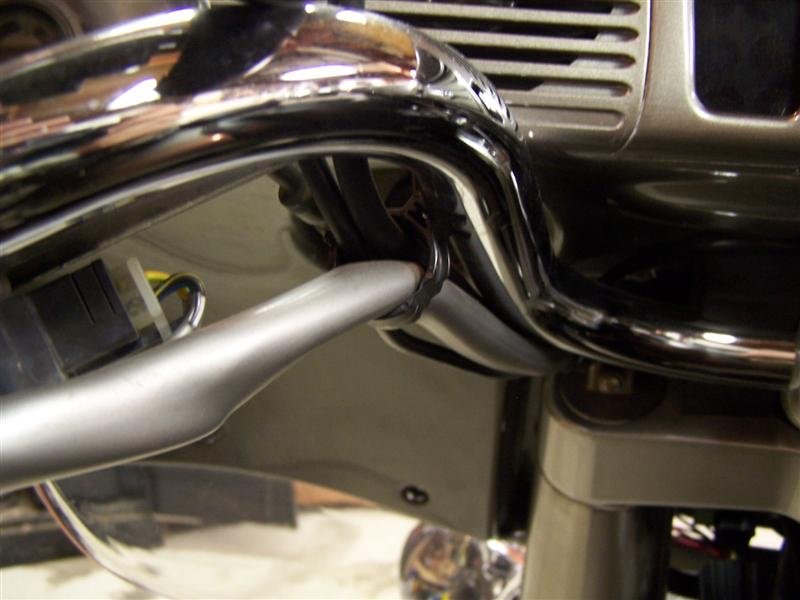
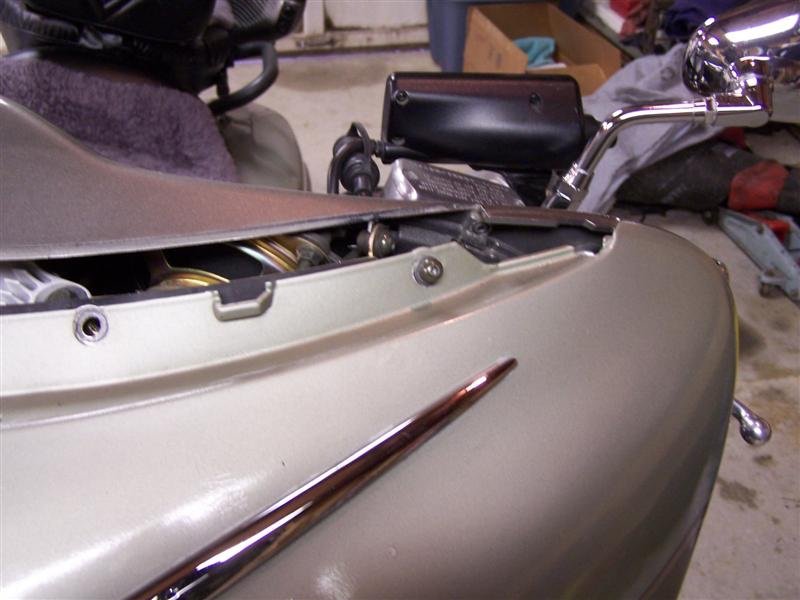
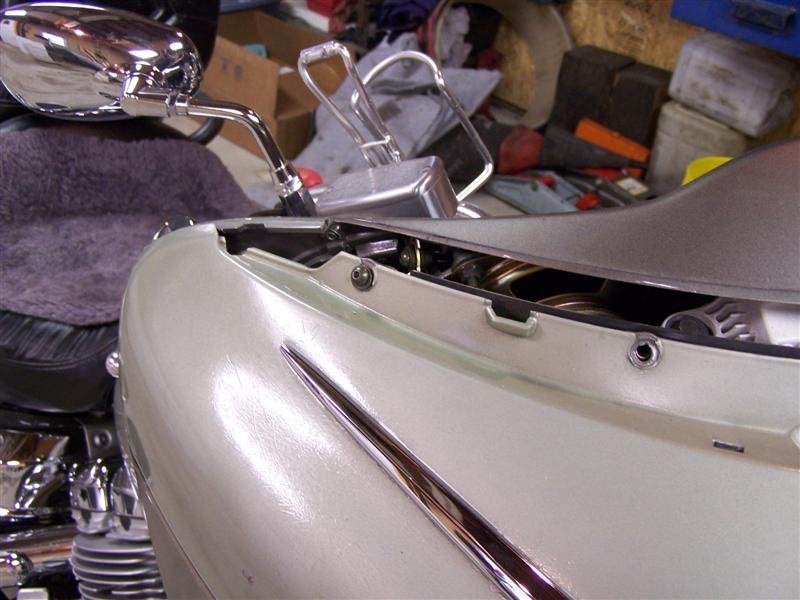
Well I have some time and decided that I will put up how to split the front fairing and install the audio cable to hook up MP3 players, Sat radio or GPS units. This is not a hard thing to do and it just takes a little time. Here is what you will need to accomplish this, all these cables can be purchased at you local Radio Shack for less that $20 2 Way splitter part # 42-2570 6 FT Audio Cable part # 42-2387A You can also use a 3 way splitter if you choose for more hookups Part # 42-2458 and if you want the ultimate audio cable then here is the gold series 6 FT cable Part # 42-2607 First thing to do is take off the chrome windshiled trim, it is held on by 2-3mm hex bolts (Pic) when you remove the bolts you need to get your fingernails under both outer edges of the chrome piece and lift strait up, working it slowly. You can rock it back & forth strait up and this will help it along. If yours has never been off it will go a little hard and your going to be puckered. Dont force it! work it a bit and it will come off. Next is to remove the additional 6 bolts that hold the fairing on from behind, there are 3 on each side and are 3mm also, You'll also notice that the 2 bolts that hold the chrome windshield trim on are longer than the others, they need to go back in those 2 top holes on reassembly The next bolt to remove is the 4mm below the headlight You will see 6-3mm bolts along the top of the fairing, these hold the windshield on and the top of the fairing. There is a trick here, remove the 1st bolt to the right of the center completely out. Then you will loosen the remaining 5 but dont take them completely out. You will see that the windshield has slots and that it slides over the other bolts. Once you have them loose and the one out you can lift the shield strait up and off the bike. Take out the remaining bolts and you can now remove the fairing. If you have driving lights that are not on an extention you will have to take the bracket loose to remove the front of the fairing. Now the bike will look like this You will now have to dig around inside the wires to free up the connectors for the Aux jack, here is the wire to which it is connected on the amplifier unit. This wire has the female end on it and is what you will plug the new splitter into. And here is the male plug that goes to the back of the cassette deck. You will plug this into 1 of the female ends of the splitter should you want to hook up the aux jack behind the cassette door. What you now need to do is take your splitter, which you can get from your local Radio Shack and install it onto the female end that is on the amp. I just wrapped it in electrical tape for seal out any moisture and debris. Now you can plug the male end from the casstette deck back into the splitter so it's still useable if you wish. Remember to wrap it in electrical tape so it is sealed and wont be pulled apart. You can now plug in your 6 ft Audio Cable that you will be running to whatever device your hooking up MP3 GPS or Sattilite radio. If you want to hook up 2 of these then just omit hooking the tape deck line back up and purchase 2-6 ft leads. You will then need to run your Audio Cable from inside the fairing to the handlebars or where ever you are hooking your components up at. I had mine run throught the cable loops that the bikes wiring and cables run through. There will be some extra length with these audio cables, just wind them up inside the fairing and put a zip tie on them to keep them neat and orderly...it makes getting around so much easier when you have to go back in there. Once you run your Audio Cables your ready to put the fairing back together, here is a little trick that will help you out. Put the outer 2 bolts in the upper fairing and start to thread them in before you slide the windshield back down into place. Many times the small brackets that hold the steel backing plate are broken and when you try to install the windshield it pushes the threaded guide holes out of position...dont ask how I know this. Install the windshield and then the right of center bolt, now the shield wont fall out. Replace all the additional bolts but be sure not to tighten any all the way up until all the bolts are threaded in....Tighten all the bolts Thats all there is to it! you now have additional hookups for the aux position. Mind you this will not work with the CD changer in the bike if you have one as it will use the auxillary on the bike. This works great for MP3 players, GPS systems and Sat radio.

-
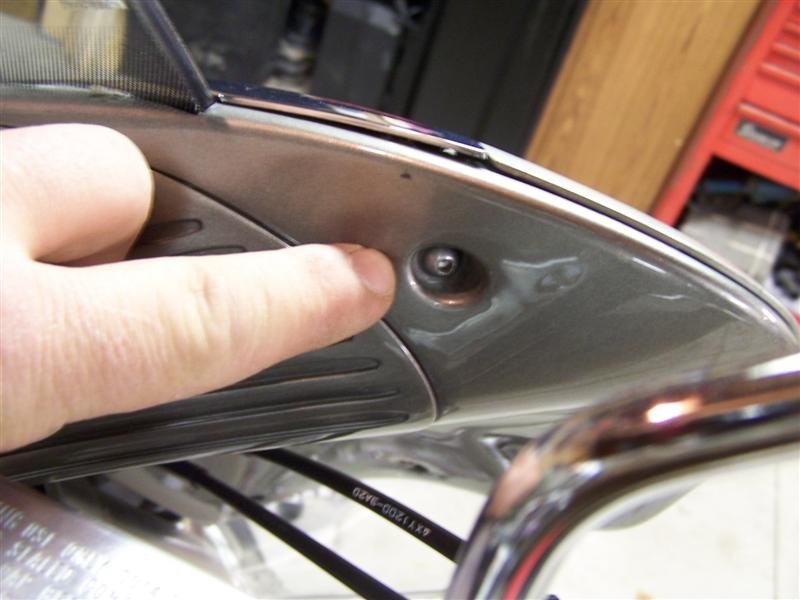
Submitted by Tony Dathan. Problem: One of the common complaints about the Yamaha passing light kit for the RSV is that it mounts so close to the fairing that removing the fairing becomes very difficult requiring one to either remove or loosen the passing light bracket. Installation: When the bracket arrives you will need 2 3/8" NC x 3/4" long bolts and lock washers. I got these at Home Depot for under two bucks. Undo your light bar. Use the 8mm bolts to fasten the bracket where the light bar was and then using the 3/8" bolts bolt the light bar to the bracket. Most of us that have the bracket can now split the fairing without touching the light bar or at least just loosening it a few turns. Might depend on the actual lights you have. Basically you undo the light bar, put the bracket where the bar was, then mount the light bar to the bracket! How to get one: You can contact me at dathan@shaw.ca The price at this time is $27.50 USD. That includes the postage as well! The following are some shots I've taken in the past! #5 shows the clearance between the back of the light and the fairing. This started as a way of my being able to clean between the light and the fairing. Taking the fairing off without touching the light bar was just a huge bonus!
-
Good day, I would like to know how easy is it to remove those chrome moldings on the front fairing on a RSMV 2005. The fairing need to be repainted and I would like to remove those chrome molding and reinstall it later. Thanks.