Search the Community
Showing results for tags 'brake'.
-
Are all MK II front calipers the same from 86-93? I finally got my front brakes hooked up to work together, but It still gives me the same amount of braking, virtually none, I am thinking the right one is bad, when I pump them up to bleed them I get good flow from the left when I bleed it, but when I bleed the right one after pumping them up again, just dribbles from the bleeder. If I let it sit for a while the brake lever has no pressure at all, have to pump them up to get any feel but the lever still goes to the handlebar. I am thinking the right caliper is leaking down, but I cant find any leaks anywhere. I have someone offering calipers from an 86 or 87 but I want to make sure they are the same before I get them. Any help here would be greatly appreciated.
-
Does anybody know what the brand of brake caliper is used on the Hannigan Trike off hand? (for a couple speed bleeders) Thanks, Jeff
-
As to replacement brake pads for a 2nd gen. ( 08 ) . I am looking for any comments as to aftermarket brake pads, which brand, is the best quality to buy, in terms of " stopping power " ie: What brand works the best !!! Irregardless of the cost, Is there an agreement here as to the highest quality brake pads ?? :detective:
-
Today I took the time to bleed and flush the clutch and the front brakes, all went well till I tried to bleed the left front caliper on the 93 trike. Pumped up the brake and broke open the bleeder, nothing came out.........so I loosened the brake line at the caliper and fluid came out. The brakes were delinked when it was triked, but evidently they didnt replace the proportioning valve for the front brakes so both would work off of the brake lever. I am in need of one so I can get more braking power to the front, 1 caliper dont work too good on a heavy trike. I guess I will have to check with Skydoc to see if he has one available.
-
This guy must have some sort of clutch and throttle modifications....not to mention front brake... http://autos.yahoo.com/blogs/motoramic/no-hand-man-motorcyclist-attempting-hands-free-525-145903268.html
-
The brake light is not working on my 98 royal star. The tail light works but no brakes light up in the front or rear levers. The light looks to be an led aftermarket and not stock bulb type. Any ideas on this?
-
How high do you fill the rear brake resevior?
-
Has anyone developed a parking brake for a 2nd gen. Now that I have a sidecar, I can't use my kickstand anymore.
-
Hello, does any one have an exploded view of how the parts go inside the rear brake proportional valve. My manual does not seem to show it. Thanks.
-
I got energetic today and changed the brake fluid. Being it's an '08 with 5k miles I doubted it had ever been done. Everything looked good inside the reserviors, just discoloration of the fluid. I'll let the experts decide if it looks normal or past due. One bottle contained new brake fluid (for comparison only) while the other is what came out of it. [ATTACH]70623[/ATTACH]
-

Front brake lever switch
tufftom4 posted a topic in Venture and Venture Royale Tech Talk ('83 - '93)
I can't seem to find anyone who carries the front brake lever switch anymore, does anyone know where I can find 1 for my 86 VR. Tom -
Just got off the phone with the OPP (Ontario Provincial Police) asking about the modulator's you can get for the rear brake lite. According to the Ontario Highway Traffic Act, you CAN NOT have any device that provides a flashing red light. It goes on to say tapping the brakes is OK...so MY common sense thinking on this is that the law applies to a STEADY flash....that could be interpreted as impersonating a police vehicle. But a light that flashes 3 times then goes solid is no different than tapping the brakes to flash the driver behind...which I often do on the bike anyway. Anyway...the Sgt. I spoke to said it sounds very much like it would be up the the officer's discretion. So if you P.O'd the leo for some reason, he could nail you for the flasher. The back of my bike is lit up pretty good for running lights...but the only brake light is the factory installed rear brake light mounted on the fender. In the daylight I think it get lost so I'm thinking I'll use the reflector LED mod FlyingFool did up for the brake light and put a modulator on it anyway....and take my chances. I'd rather take my chances with an uncooperative LEO objecting to it than with John Q Public who might not see my brake lights .
-
Anybody have a good REAR brake disk for a 2nd Gen ? Mine is toast.
-
I'm wondering what kind of brake pads I should get... I mean EBC is great, but incredibly pricy for a whole darn set. Found this: [ame=http://www.amazon.com/1986-1993-Yamaha-Venture-Royale-Kevlar/dp/B007RGQHIO/ref=sr_1_12?ie=UTF8&qid=1343848229&sr=8-12&keywords=Venture+Royale+Brake+Pads]Amazon.com: 1986-1993 Yamaha XVZ 13 D Venture Royale Kevlar Carbon Front & Rear Brake Pads: Automotive@@AMEPARAM@@http://ecx.images-amazon.com/images/I/51nJImUwFVL.@@AMEPARAM@@51nJImUwFVL[/ame] Don't know if they're good tho. Ebay also has that set too.
-
So I noticed my brake light was on when i started the bike this morning. No problem mess with the front brake lever and off it goes. Get home this evening and the light is stuck again and wont turn off (bike running). Shut off bike mess with lever light goes out. Work lever several times and seem to work fine (gonna clean this weekend anyway). Start the bike up and hit the brake light stuck again and wont go out until you cut the bike off. What in the world would cause that?
-
I had purchased one of the replacement turnsignal/brakelights for the reflector on the travel trunk on my 89 VR and never was happy with how much light the 4 194 bulbs put out for an additional brake light. I liked the idea of it up higher and more eye level with the cars behind me but just didnt do the job in my mind in getting their attention. So I have been on the lookout for more lighting for it for a while. I finally took the plunge and tried out some 12vdc strip LEDs in red. These are what is called a 5050 LED with 3 sources of light per LED housing and has 300 LEDs per 5 meter length. I ended up filling the rear of the housing with over a 100 leds and I must say it is now bright and noticeable. I purchased them off of Ebay for $26.00 shipping included from a China location. Here is the seller and he has lowered his price it appears. http://www.ebay.com/itm/Red-Waterproof-5050-300LED-5M-60LED-M-Light-Strip-12V-IP65-LED-LAMP-Car-Auto-/120894815654?pt=US_Car_Lighting&hash=item1c25e47da6 I feel that the light is just as bright if not brighter then the stock brake light and comes on quicker then the stock brake light also. I am thinking the next step is to try a modulator that has the lights at 33% power to work as a taillight and then flashes the LEDs for a bit and then goes solid. I really want to get their attention of those behind me. Here are some pictures of the setup. Let me know what you think. File 1 & 2 is how I set them in the housing. The LEDs are waterproof and have 3M sticky tape on the backside. They are able to be cut every 3 LED and have solder pads to attach wires to them. File 5 is the LEDs on but the red cover is not installed yet. File 6 is with the cover installed and the LEDs on and the overhead garage lights on. File 7 is with the cover installed and the LEDs on and the overhead garage lights off. Thanks Rick F.
-
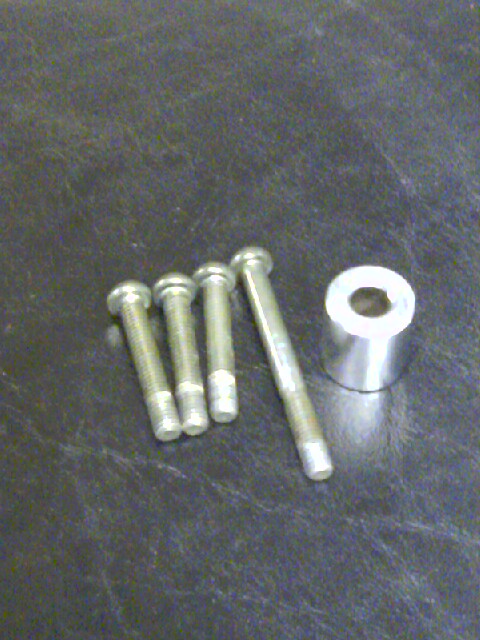
 Hi everyone! My major maintenence project on my 86' is coming along and today I got my R1 calipers. So now my question is which pads? I like the cleanliness of the cermics but is this going to halve the life of my $200+ new rear rotor? In the past I would by pads all willy nilly but since I'm starting with mostly new stuff (R1 calipers, delinked brakes, new rotors, SS lines and E3's) I would like to monitor the wear better and overall just start with the best. We don't ride fast but pull a very heavy trailer. Thanks everyone!
 -
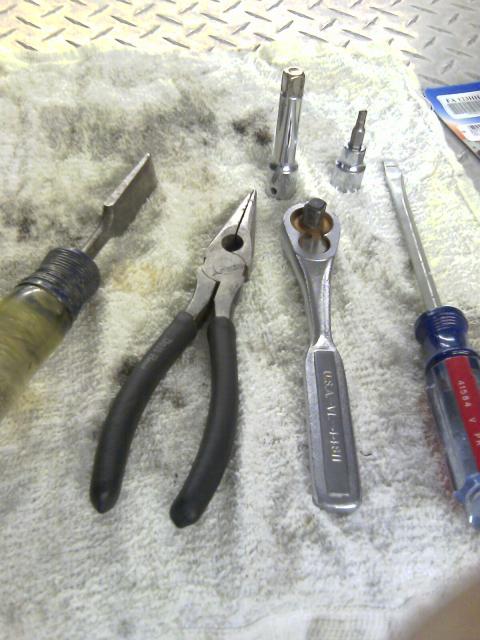
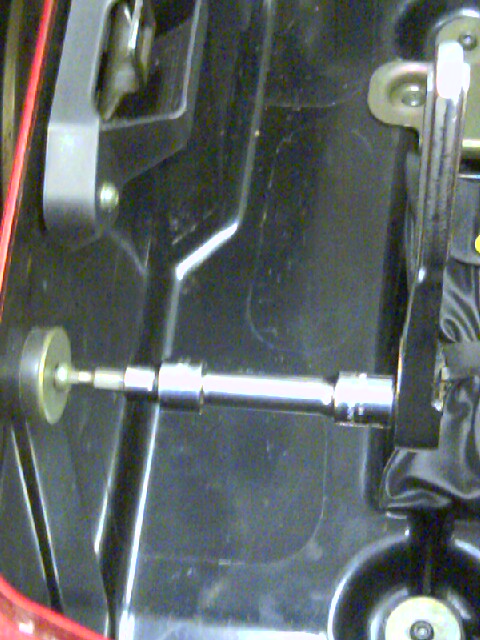
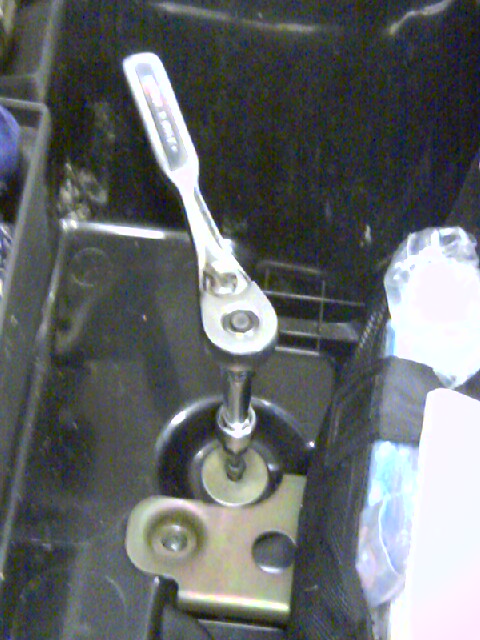
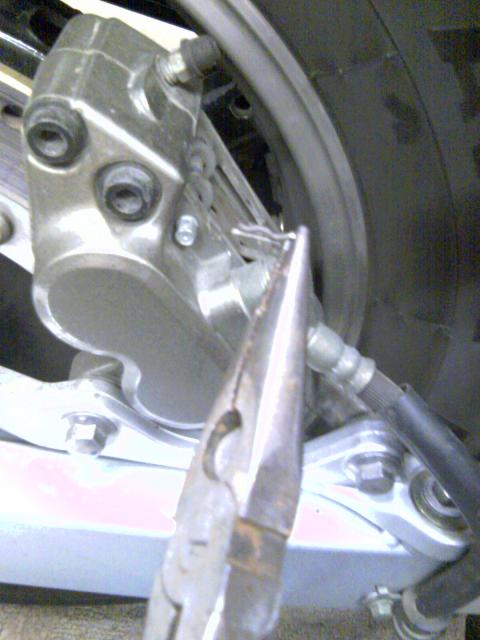
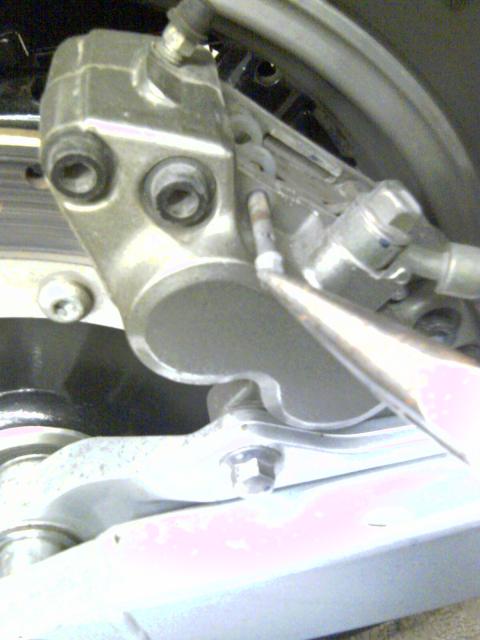
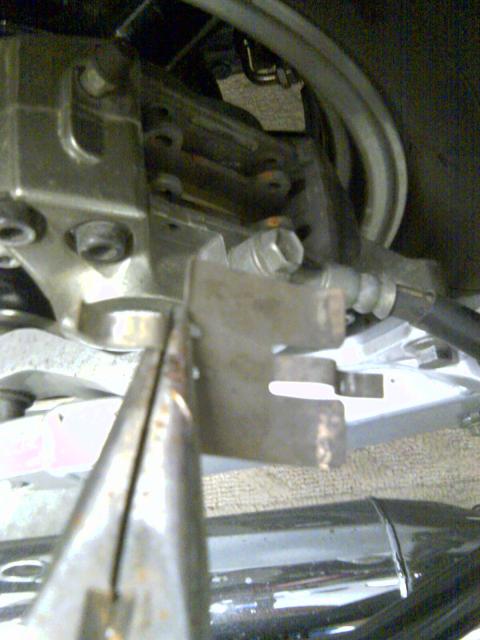
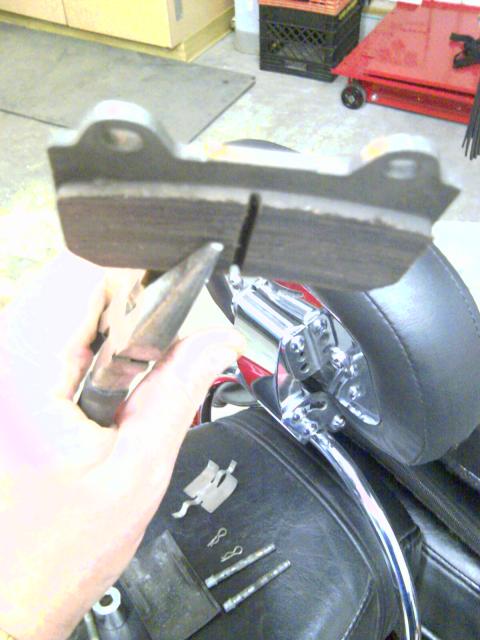
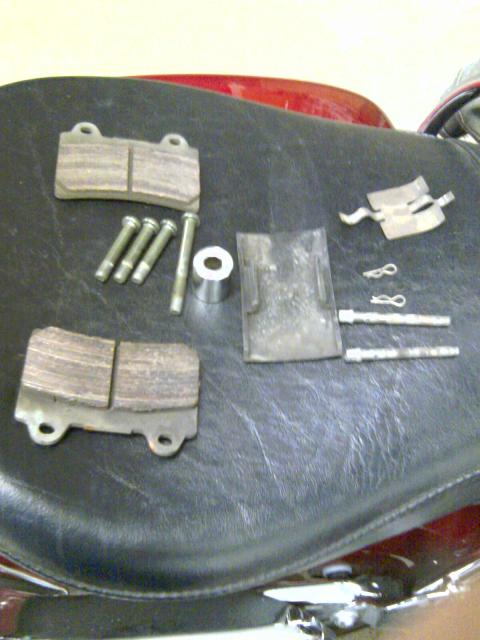
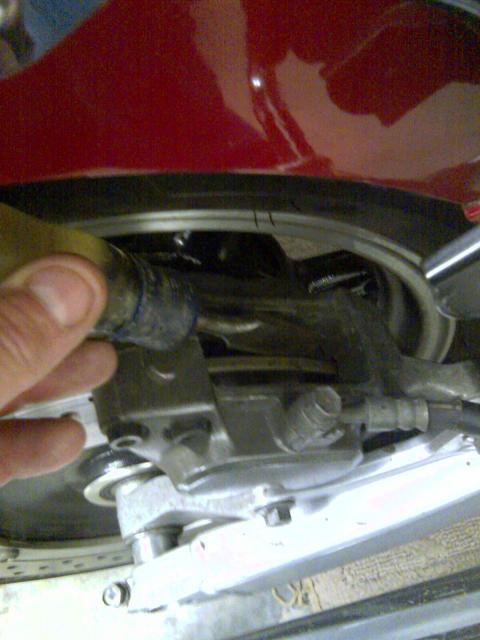
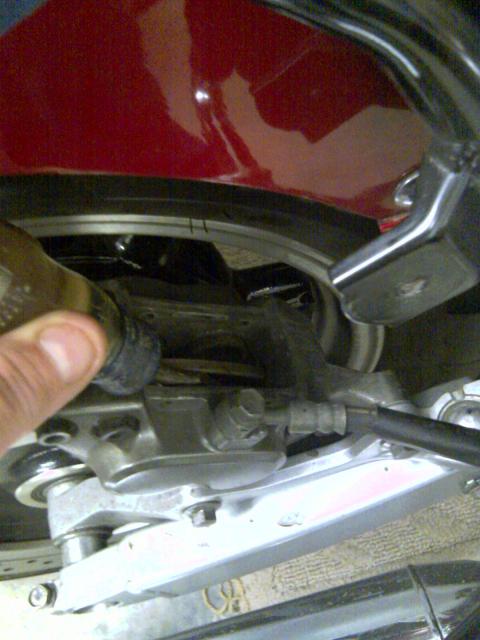
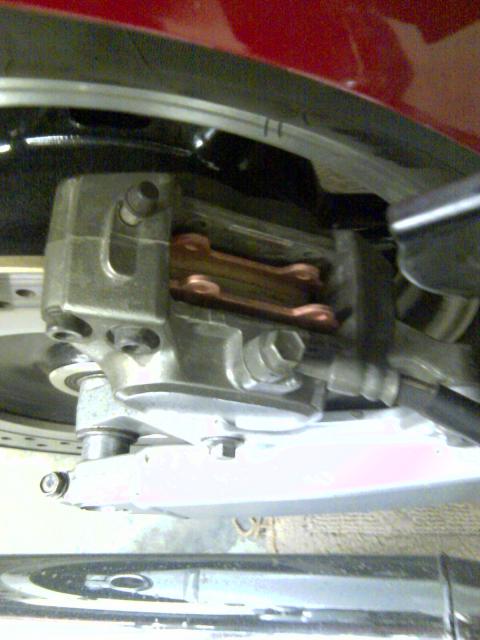
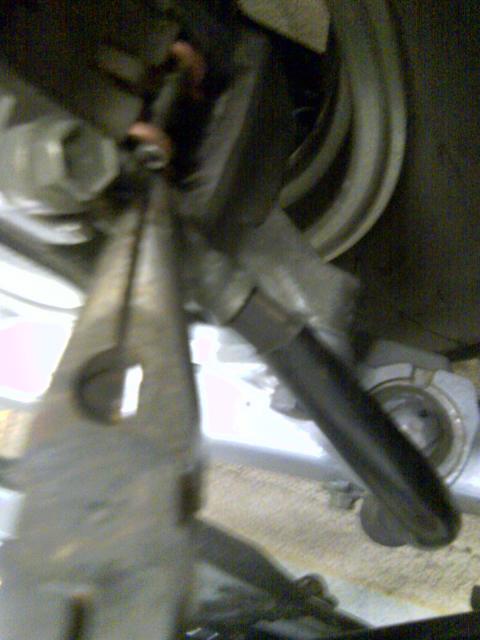
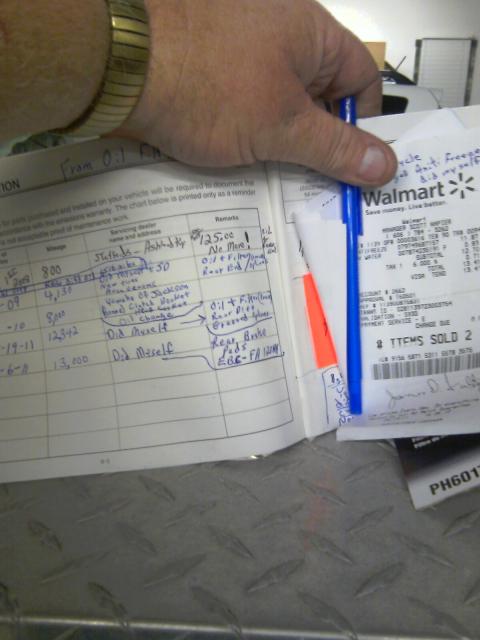
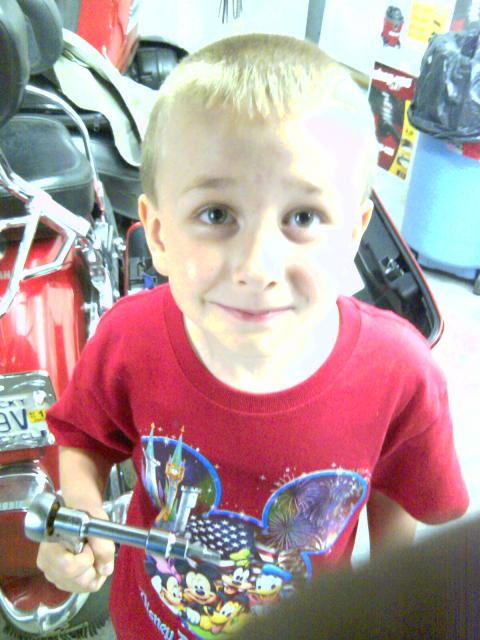
 First of all, if anyone has anything to add, please do. I am a shade tree mechanic. These things are nice to have to do this in hot weather; A garage, a fan, an air conditioner. I am blessed to have these, so I took the time to take some pictures as I did this. Hope it helps someone else. Time frame; 45 minutes to complete. Tools needed; A 4 mm allen head socket or allen wrench. A short 3" extension. A ratchet. A flat screw driver. A pair of needle nose pliers. A 3/4 " wide wood chisel or some tool of this nature to pry with. #1 . Remove the right side hard bag using the ratchet and extension and 4 mm allen head socket. There are 4 allen head bolts that hold this. There is one that is longer than the others and has a chrome spacer between the mount and hard bag. #2 . Remove the plastic cover from the top of the brake caliper with the flat screw driver. It just pops right off. #3 . Locate and remove the small clips that are through the pins in the caliper and brake pads. Rotate them around to face up and carefully pull them right out with the needle nose pliers. #4 . Next remove the two pins with the needle nose pliers, ( twist them as you pull them out). Remove one and then the other being careful of the flat spring type holder thingy. #5 . Remove the flat spring keeper thingy from atop the brake pads. Pay attention as to how it comes off and lay it aside that way. #6 . Using the needle nose pliers, remove the old pads and look closely at the inside (wheel side pad). If it is less than 1/8" replace pads. Some pads are wore more on the rear end of the pad (thinner).You can switch the inside pad to the out side and get 2000 to 3000 more miles out of them if you have 1/8 " left. My bike had 13,800 mile and where less than 1/8 " material left on inside pad, so new pads where installed. Outside pad compared to new> Inside pad compared to new> #7 . If you are replacing the pads, you will need to pry the brake piston back in to allow room for the new pads ( I used - EBC brand FA-123HH brake pads ). I used the 3/4" wood chisel to pry the pistons in because it has a short handle and was wide and easy to get into the area. Per SilverT; Clean the pins before you replace them, they may require a bit of "buffing up" with either emery paper or a buffing wheel on your drill. Clean the " thingy" before you replace it. Coat the pins with brake lubricant before you replace them. Coat the back side of the pads and the outer edges where they will rub against the caliper and other stationary metal parts with brake lubricant. Per RSTDdog; In addition to the lubricating tips (lightly) I am of the "clean the exposed part of the piston before pushing it back in" school of thought. Of course to do this properly you need to take the caliper loose which adds a few steps. Now is also a good time to change that brake fluid. Someone said that it is possible to clean the piston with a Q-tip and some break fluid before pushing back. Also it has been mentioned that a 42 thousand washer be placed between the frame and caliper to line the caliper up to equalize/a-line the inside pad wear. I have not researched this and I am only mentioning here for someone else to search. #8 . Using the needle nose pliers, put the new pads in place with the pin holes up. Being careful to put them in with the wear material toward the rotor. There is no difference in the two pads,they are the same. #9 . Replace one pin through the break pads and into the rotor. Now put the spring type holder thingy in under the one pin. Now the tricky part. Put the second pin through the break pads and through the spring type holder thingy and into the rotor, all at the same. Easy though... #1 0. Now replace the small clips into and through the small holes in the pins as before. I turned the small clips up and to the left and right. Make sure you get these in correctly (half way point). You would not want these coming out. #1 1. Now work the rear brakes and get the pads kinda seated into place. Will feel kinda spongy at first pump or two. I made sure my rear breaks worked and released by pushing bike forward and back a couple times. #1 2. Replace/snap plastic cover back into place. #1 3. Replace the hard bag with the four 4 mm allen head bolts. Remember the long one goes into the rear and side next to wheel and through the chrome spacer. Also make sure the rubber bushings and washers are on the hard bag (bottom and side). Most of the time they will stay in place if you are careful. #1 4. Make notes of your mileage and date in your owners manual and also keep your receipts to proof any warranty issues. Also for a reference/reminder as to when you need to replace again and what type/brand to use. Helpers are good and I had my little boys help. Fuzzy
-
OK the project got started yesterday. Yesterday I took off my floorboard and brake pedal and removed the old master cylinder. Today I did a little planning and thinking and fabricating. I decided to use the stock brake pushrod and I am fabricating a mounting plate for the master cylinder. I am tapping the side mounting holes on the new master cylinder so I can bolt it to the plate. The plate is going to be bolted to the brake pedal equalizer mount. I am slotting the holes so that the master can be adjusted up and down a little, and adjusted closer and further away from the brake pedal. I did a lot of hacking away on the piece that is the brake pedal mount so that the fabricated bracket will work out. I am trying to avoid drilling holes into the frame if at all possible. I have been taking pictures but probably not enough for a step by step illustration. I will make a template of the mounting plate once it is finished, I'm using 1/8 inch aluminum. My next obstacle is coming up with a nice SS brake line to go from the master back to the T block that will be SAE on the Master cylinder end and metric on the T block end. More to follow and pictures...
-
Hey didn't see this asked or ans. anywhere. Need a few opinions. Wife and I are in Asheville rode the Parkway here yesterday and my rear brake overheated. It's an 09 RSV and this has never happened to me before. We had planned to ride the Tail of the Dragon today and I was wanting to know what others thought. Would it be safe? Does them overheating once make it easier to do again? I think once they have colled they should be fine but I'm not 100% sure. Need thoughts
-
I have a question regarding the 1st Gen front brake. My Venture stops fine using bothe the front brake & the linked rear/front pedal but if I try to stop my Venture with JUST the front brake it struggles . I'm not saying stopping from 60 mph but say a 25 mph stop. is this normal? The reason I ask is my CB750 has only 1 front rotor & when I hit that front brake I can easily stop...even if I had no rear brake. My Venture's front pads look ok, as do the rotors. So is this just because of the weight of the Gen 1 that it needs both rotors or do I need new/better pads?
-
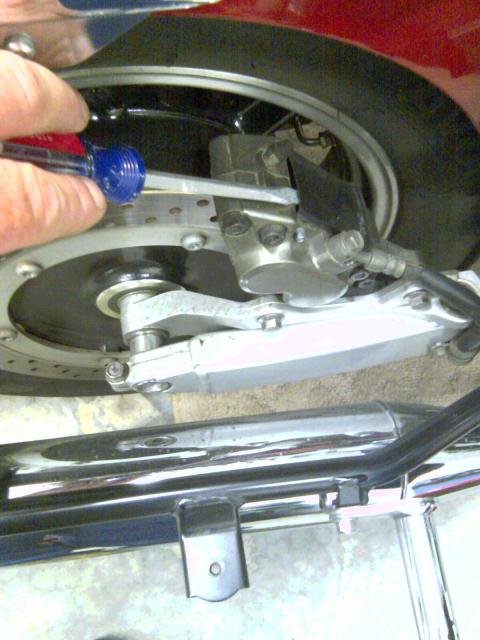
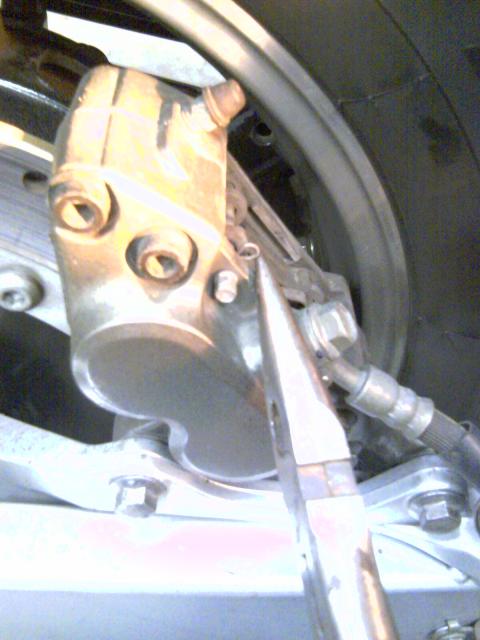
I was about to put some anti-squeak compound on the back of my front brake pads. I notice that the manual says 18 ft-bls of torque for the caliper retaining bolts. In the tech section there is a "service data" sheet that states 29 ft-lbs for the front brake caliper bolts. So... I'm assuming that the 29 ft-lbs is for the two bolts that attach the caliper "carrier" to the fork and the 18 ft-lbs is for the bolts holding the caliper to the "carrier". Can anyone verify that for me before I take things apart? Thanks. Andy
-
I've read some old posts about this subject but wonder if there is something newer I've missed. To use my brake pedal, I have to raise my foot up off the footboard which does not provide much control of the brake pressure being applied. This is because the pedal is too far back. I'd like to be able to keep my heel on the board and the only solution I see is to lengthen the pedal three or four inches. Anyone out there have a different solution?
-
Hello Everyone: I recently learned from a close friend that if your third brake light bulb burns out it will cause your cruise control to not function. He had it happen on his Chevy/GMC Colorado Pickup last week. I used the cruise yesterday morning on the way to my parents home about an hour away. It worked fine on the trip down, however it did not work on the way home. I remembered the tip and checked the brake lights on my 06 Dodge Ram 1500 and sure enough the 3rd brake light at the top rear cab was out. I purchased a new bulb and now the cruise works again. Not sure how many makes and models of vehicles this happens to, but I wanted to pass the info along.
-
I've been working on the 83 Venture for the last couple of months. My brother has been riding this and a lot of problems developed, and he brought it back for repairs. This bike has 140,000 miles on the clock. The stator was bad, so I changed that and now it charges fine. The clutch was slipping a little, so I installed one of Earl's kits and how it's great. The right half of the fairing had a lot of broken/cracked tabs as did a lot of other plastic, so I dug out the Plastex kit and went to work. New plugs made it run a lot better, and I also pulled out the TCI module and checked it for corroded diode leads....still looks perfect, and the diodes are fine electrically. I installed a new rear tire, and fought with the mess that the old formula Ride-ON left. I serviced the driveshaft and also changed the oil in the shaft drive unit. I'm sure I fixed several other things that are slipping my mind now, but it was ready for a test ride. Now, when Mark brought it to me, he told me that the low brake fluid indicator has been on for quite a while. He says he filled up the rear master and it had been empty and the fault went out. I bled the brakes, including the top line near the top steering bearing, and I've haven't been able to get what I call a good brake pedal. It has a lot of free play, although when it does finally apply the brakes, the pedal is firm....no more air in the line. I looked at the rear master cylinder, and I can see where the paint has bubbled off. It looks like that's where the brake fluid went, although nothing is leaking now (it might leak during winter storage). I suppose I should add that this bike has braided brake lines, and the anti dive has been disconnected, so the brake pedal was high and firm when Mark took the bike. I've got to decide how to take care of this. Another thing that became obvious....the shift lever has a lot of play in it. Yesterday when I watched my brother shift, I saw that he's not at all gentle, but pushes and lifts the lever aggressively. Anybody have any idea where to look for something in the shift linkage wearing out?? Then I"ve got to figure out what's not correct with the center stand. The small link that the spring attaches to keeps on bending. This bike isn't really an 83 anymore, because when the 83 frame broke where the center stand and rear shock attach, I installed all of the 83 pieces on an 84 frame. From the beggining, I 'assumed' that there was something different here and I just lived with the fact that the center stand didn't come all the way up when it was not being used. I looked in the Yammie parts fische, and 83 to 93 all use the same part numbers for the center stand, link and spring....no changes made when they redesigned the frame. My son and I inspected the center stand and link, and my son saw that the link was bent. We removed it and straightened it out, and then re-installed it. Then the center stand released all the way up against the frame like it was supposed to. That was until I put the bike back on the center stand and then the link bent again. I've got to determine what's bending it. I want to get this bike out of my garage again. Frank D.

.thumb.jpg.176b2ebbe9863175975d94710375c414.jpg)