Search the Community
Showing results for tags 'bolt'.
-
I am wanting to install the spin on oil filter adapter and have one question. On the original canister type the bolt has some type of pressure regulator in the bolt. Does these adapter plates have this valve or does the bike really need it? I would love to add this to my bike but was afraid of damage to the bike by eliminating this valve.
-
I purchased a new ignition switch to replace my old one. However - I cannot figure out how to remove the 2 bolts that hold the ignition switch on !!! The bolt heads are smooth with a flat top in the center - and they are threaded into a base witch is welded to the frame. Is there a special tool I need to remove these - or is this a drill the bolt out and replace them? I am hoping someone knows the secret to this? Thanks in advance.. Stuart
-
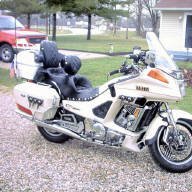
 As usual, the moneypit is giving me grief again. This time, I'm trying to change the seals in the front forks. Got the wheel, fender and all off. I'm down to where I'm trying to break loose the 10mm allen on the bottom of the forks. The bolt just spins. Muffinman said that a couple of the guys from WV have made a tool that they use to replace what yamaha calls their "t handle for tightening and loosening the front fork holding bolts." When I looked in the shop manual, this thing looks like a really long 3/8 drive extension. If so, I can probably put one together. The next question is what size socket goes on the end, and do I need to worry about the outside diameter fitting down inside the tubes? Waiting on a little feedback here as at the moment I'm at a standstill.
 -
Does anybody know if a 99 Venture starter will bolt in a first generation?? Frank
-
 Brought my bike home last night after having the new rear shock installed, a new rear Avon Venom X and the regular 28k mile service, which included Carb Sync and steering bolt tightening. I didn't realize how bad my bike has been handling. :crying:The shock must have been going bad for awhile. Also, recently I had noticed a little shake of the bars and slow speed handling degradation, so I asked them after the service if the steering head bolt was loose and it was by almost a half turn. I feel like I'm riding a new bike again. Haven't checked to see what air is in the shock yet or the tire pressure, but plan to do that tonight. But just how it is right now is a HUGE improvement. I just can't believe it is such a difference:confused24: I can't wait to get out and ride Friday Morning. Its amazing how fabulous these bikes are! when everything is up to par.
 -
Hey Folks, I need a little help on a 1999 RSV. I purchased it on Ebay from a dealer in FL and had it shipped to my son-in-laws in Wilton, CT. We're flying to CT next week to ride. Here's the glitch...when the bike was dleivered, Mark inadvertently left the ignition on accessory and ran the battery down. I told him he had to remove the seat in order to gain access to the battery to charge it. The bike has an aftermarket Saddleman Road Sofa seat. Below is what he emailed me whe he tried to get the seat off. " I have been unable to get the seat off of your bike to date. There is a bolt in the front of the seat with a nut which needs to come off but the bolt is spinning freely. The top of the bolt seems to be within the seat with no means of getting to it. I am also barely able to get to the nut so there is no way to secure the bolt while turning the nut. I will keep trying but I am beginning to lose hope. I worked on it for about two hours so far this morning." Now, can the battery be charged from the AuxiliaryDC Jack? If so, where do I tell him to look for it and how would he goa about using it to charge the battery? I haven't even seen the bike yet, so I'm just going from what I can find on the net. Thanks for any help. Jeff
-
If your driving light is loose I have a fix. Mine were loose and moving around alot. So I took them apart and found in the driving light there is a socket head bolt that has been drill out lengthwise. All you have to do is remove blinker light,be sure to take the bolt all the way out. Remove retaining ring on driving light and just let the light hang there for awhile. Unplug the red and the orange wires. Slowly pull the red and orange wires down just enough to get a 8mm allen wrench in. With a wrench hold the sided chrome part that you just pulled the blinker light off of and tighten with allen wrench good and tight. Push the red and orange wires back up into the driving light shell and replug them. Put light back in and the blinker light. You might won't to put some kink of thread lock on the allen bolt before you retighten it. Worked for me. Gene Weir
-
 OEM Bag Rails- Do the Lines Look Right to You? By Brad Norris “Boomer” OK, I couldn’t wait until I bought a set of OEM bag rails from a guy on bay. These were the Real McCoy and came in the OEM box. I made special time on a busy Saturday as soon as they arrived and mounted them up. Installation is quick and easy with the most time spent on removing the bags. After installation I admired them from all angles but wasn’t quite happy with the fit up. It appears to me that the bottom of the rails, when compared to the lines of the bag, just didn’t look right. The back end of the rails appears to be higher than in the front. Also, the back of the rails sat right under the turn signals- in fact, they touch each other. I quickly became suspicious of the Ebayer I bought these from but after looking at many pics on the forums I subscribe to, I saw the same trend in 95% of those I saw. Here is a side shot before with the camera leveling out on the rail. Muffler removed for clarity. http://www.venturerider.org/bagrails/pic1.jpg The rear distance from the bottom of the bag to the bottom of the rail is much different from the front measurement. Mine was out ¾”. To make the “gaps” closer to each other, either the back of the bags must be raised or the rails lowered in the rear. Since it is impractical to raise the bags, I decided to lower the rails. To do this, remove the bag and loosen the front mounting bolt on the rail. Here’s a back shot of the bike with the OEM mount up. Note that the rail rubs the signal. http://www.venturerider.org/bagrails/pic2.jpg I would suggest you do your own measurements to determine where to drill the new hole for the rear mount. Use a small “C” clamp on the rear mount when you think your measurement is close and then set the bag back on to see how it looks. It’s a bit tricky, but better to measure twice- and drill once. Important- Since the chrome rail you will drill into is “U” shaped, be mindful that you will have to put a metric nut behind it for the bolt. If you drill too close to the edge of the rail, you may not have enough room to thread the bolt in the new nut. The back of the rail has foam in it. Just make way for the new nut. I can’t remember the size of the nut but I bought it at Home Depot. When you have the final position, hold the back of the rail in place and use a spring loaded center punch to mark the new bolt location. http://www.venturerider.org/bagrails/pic3.jpg A spring loaded center punch makes this task a bit easier. If you don’t have one, GET ONE. Here’s a pic of mine: http://www.venturerider.org/bagrails/pic4.jpg Be sure to put some scrap metal behind the bracket before you push the drill through the fender and god forbid…the tire! Now, place the rear bolt that came with the rails through the support in the hole you just drilled and fasten with a nut (metric). Retighten the front bolt and install the bag. You should have something that resembles this: http://www.venturerider.org/bagrails/pic5.jpg When you’re done, you will notice the rails-to-bag lines look much better. http://www.venturerider.org/bagrails/pic6.jpg In the rear, the bag rails no longer rub the signals. Enjoy! http://www.venturerider.org/bagrails/pic7.jpg http://www.venturerider.org/bagrails/pic8.jpg
 -
heres the tool i came up with 23 inches long and the bolt head on the end is 15/16ths o.d. Lee
-
I installed The new JMCB-2003 CB this weekend. when purchasing the unit i ordered the yamaha mounting kit. the kit is for the star bikes. you remove the left mirror and bolt the mount in its place the the mount and cb mount to the rear of the bolt and the mirror bolt into a hole in the cb mount plate. well this doesnt work with the 1st gen as the clutch resovoir is a bit higher then the bolt on our bike that has no mirror in it. the bolt is used to hold the stereo control switch box. this also was an obstacle. wha i did was remove the switch from it mouning tab by the 2 small scres on the backside. I then turned the mount over so the switch was down rather then above the mounting bolt. tropuble wasa now due to the angle of the metal piece and the switch box when mounting the cb down tight over the stereo switch it pushed down on the switch and cause trouble with the switch operation. So i removed the stereo switch and drilled a new hole so it mounted about a 1/4" lower. installed the cb and all fit well now. I then removed the stock antenna and installed a Firefly cb antenna with fold down mount from http://www.walcottcb.com/ I wanted to keep the single antenna so i added a splitter in the cable so the antenna works for bolth cb and stereo. I suppose the splitter take away from the cb power but im just looking for communication for group riding. not long distance talking. with the stereo input tapped into the stereo speakers the music from my stereo and Ipod with fm modulator is heard in my headset along with the cb. they also have a way to connect cell phone and gps if you like. in the first photo you can see a hole in the front of the cb on the chrome mount the is the hole they say to use to mount it but i used the hole in the back that for the mirror instead because othe the resevoir being higher on the 1st gen. you can also see the new lower stereo controls position.