PGunn
-
Posts
327 -
Joined
-
Last visited
Content Type
Profiles
Forums
Gallery
Events
Store
Everything posted by PGunn
-
Please ignore the "R4" edit I did that is one of the side effects from the concussion I received from the accident. I have had issues with it but it is getting better, I'm driving my wife nuts sometimes saying one thing than later changing what I said only to realize I am wrong and yes it does suck. Yamaha YZF ‘R1’ 98-03 298 5 0 132 8.5 150 6 MD2074LD MD2074RD MD2074CR Yamaha YZF R1 (5VY) 04-06 320 4.5 0 132.2 8.5 150 5 MD2094LD MD2094RD MD2094CR Yamaha YZF-R1 07-14 6-piston, radial-mount front brake calipers with 310mm rotors http://www.cheapcycleparts.com/page/yamaha-r1-parts-specs) Yamaha R6 05-06 310 4.5 0 132.2 8.5 150 5 MD2095LD MD2095RD MD2095CR So from what I can find searching is from 98-03 (4 pot) rotor size is 298 mm, From 04-06 rotor size is 320 mm and from 07-14 rotor size is 310 mm and the R6 rotor size is 310 also.

-
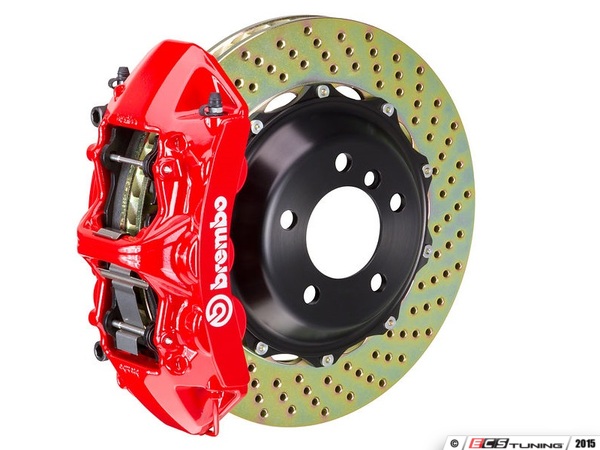
Front rotor diameter on a R1 is 310 mm which is a difference of 12 mm or 6 mm per side or about .23 of an inch. The end slots of the caliper sits about 1/8 th of an inch off the OD of the rotor with the pads sitting below the OD of the rotor. Now on a car your diminitions are correct below is the sizes of a car caliper which is at least twice or real close to twice the size. I do understand your concern but as I said I put at least 1500 miles with no issues and pad ware was just as it should have been no stepping on the outside edge of the pads
-
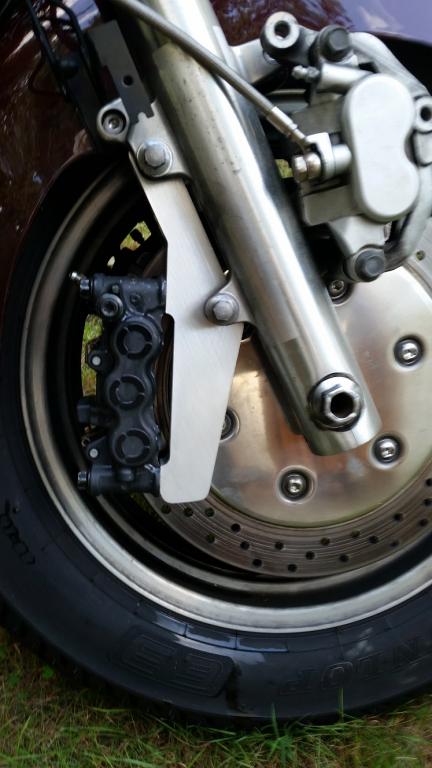
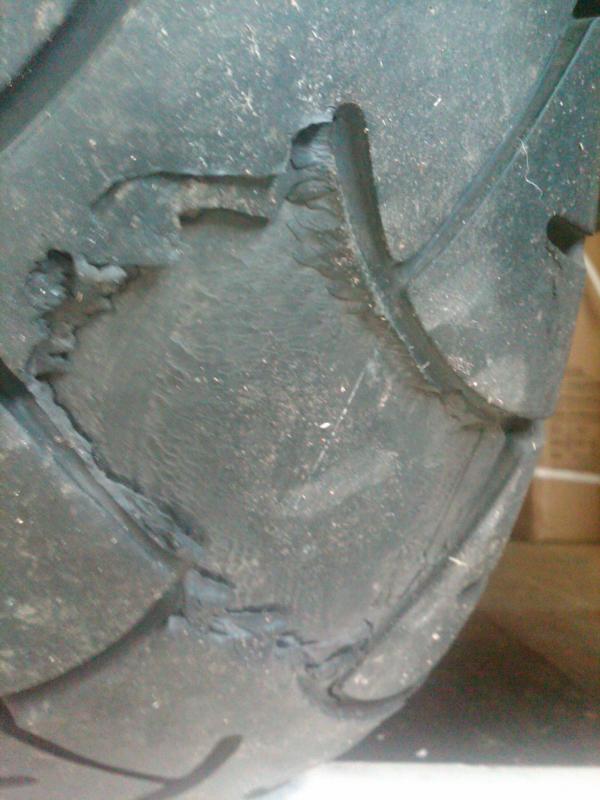
The pads make full contact it was one of the things I was most concerned about, it looks like the angle I took it at is causing the question it isn't a real straight on picture like the one you posted. The accident was completely my fault had nothing to do with the brakes or anything else, driver error only. I had the bike leaned over so far the RK muffler was lifted the back tire up which was when things really went bad.... With the difference between the 2 R1 calipers the 6 pot has 2 pads per side (4 in total) one covers 2 of the pots and the second the 3 pot giving more surface contact on the pads and rotor. and yes these thing make the OEM calipers on the Venture look under size.... This is from when I was testing fit....
-
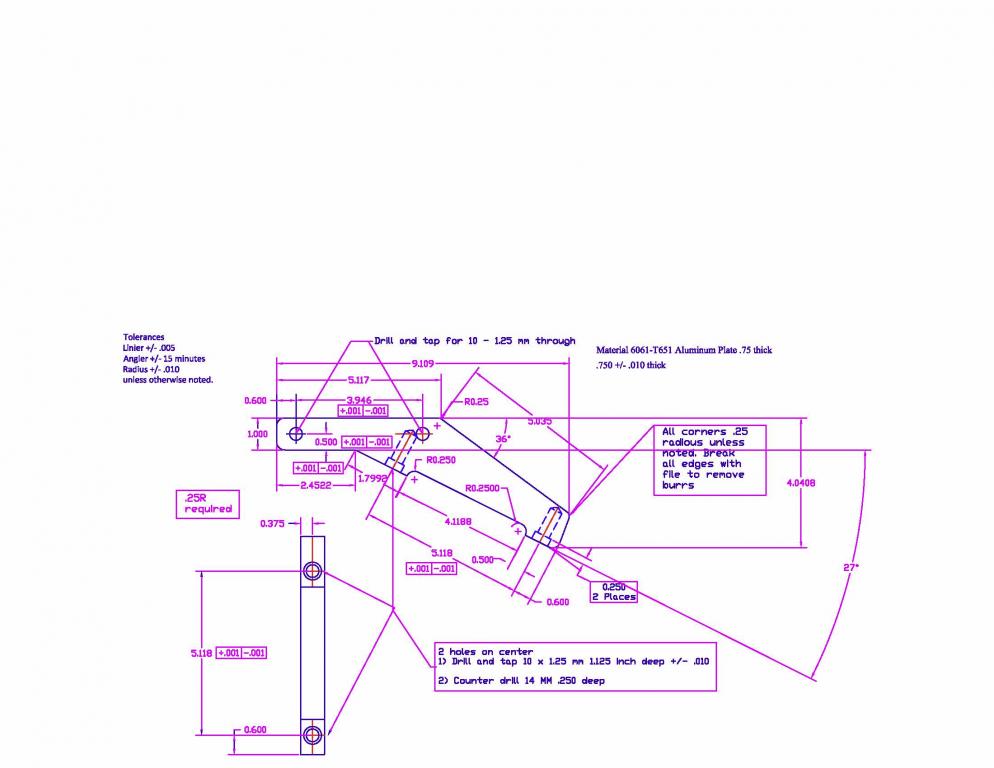
No kit but let me explain why, Last December I was out for a ride on my Venture and due to my fault, took my eyes off the road for about 5 seconds and got caught in a progressively tightening curve lost control and totaled the bike, got 2,000 for it. Well long story short I broke my right foot, right ankle, right collar bone, right scapula in 7 places, and my neck at the C2 vertebrate. So my riding is done for good because of my neck and according to everyone in the medical field I'm lucky to be walking with no after effects. I did have these done at a CNC shop in Canada and I'll be happy to give you the guys info he also told me with a bigger order he could get the water jet cut saving on a lot of the machining. He charged me 120.00 for one set. I also did a lot of checking the legal aspects of a kit and the liability alone would drive the cost way up so that is why I posted the print. I figured the group here could get together and get a volume discount saving some money. Also if you buy a used set of calipers I highly recommend that you rebuild them before installing them. The R1 lines are too short to reach.
-
They are made out of 3/4 inch thick Aluminum plate all corners inside and out call for a 1/4 inch radius. I had to buy 18" lines and banjos for both sides. I couldn't find a set with attached banjos with the correct geometry between the ends without putting a twist in them. The stock mounting bolts are retained also for the tube mount and for the caliper mount (bolts are from the R1).
-
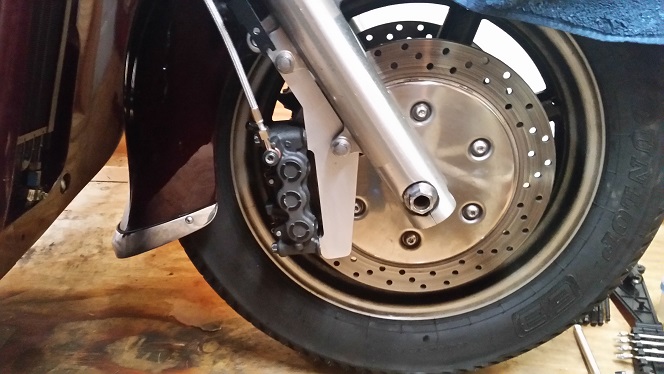
Here is a shot of them mounted on my bike. I put about 1500 miles on them to test and not a single problem. These are plain nothing fancy but I'm sure they can be machined a little more to make them better looking. The mounts are the same for both sides, there is no left or right.
-
Here is the adapter I came up with to mount the R1 6 pot calipers to the Gen 2 Venture and the RSTD. The bolt spacing is 130 mm which will also allow the Brembo caliper to also be mounted as long as they are for the R1 and have a bolt spacing of 130 mm.
-

R1/R6 caliper question
PGunn replied to dingy's topic in Venture and Venture Royale Tech Talk ('83 - '93)
Here is the adapter I came up with for the Gen 2 using 6 pot Yamaha R1
-
Those I believe are 5 mm screws as a temp fix try Home Depot they carry metric screws. Once you have the right one look on EBay for stainless ones to replace the Home Depot ones which will rust in time. You can coat the steel ones with light grease to hold off the rust over the short term
-
Ok thanks....
-
A quick question on this do I have to drain the oil before pulling the stator side cover? I just changed it and by just I mean last weekend. The problem at hand is the bike starter drive is jammed or appears so. The bike was running fine no issues after changing the oil, let it run for a good 1/2 before shutting it down. The starter was turning and all of a sudden a grinding noise from the starter turning and a "Ding" like a steel on steel ding and than everything locked up in all time wise it took about 5 to 10 seconds to come to a halt. I have looked around on the web and it looks (hopefully) like the starter clutch or one of it's screws is the issue and I'm hoping the screw has the gears jammed.
-
I bought a backup camera that is wireless to my cell and no the image is correct and not reversed
-
No problem and it should have been pointed out that 1) read all the way through before you respond also if I remember right there are 2 versions of the first gen out there so the title could be misleading also.....
-
My fault for not reading the whole thing and for going by the title of the post.....
-
Having a similar issue in the past I would pull the ignition switch clean the contacts with a pencil eraser and reassemble. Test to see if that fixed the issue if so I would do the relay install to take the load off the ignition switch and apply it to the 30 amp relay. Another quick check is pull the 2 wire connection to the ignition switch and wire a switch across the 2 contacts coming from the bike not the 2 going to the switch turn on the ignition switch than the jumper switch if all works well it is the ignition switch that needs to be cleaned.
-
I have a wifi backup camera that allows you to turn off mirroring (so the picture is correct not backwards) and have it synced to my Samsung S5 it allows recording. It is mounted under the headlight and works good enough for what I want.
-
My last Metzler now E3's only......
-
Cheap, easy, fix for clutch lever switch
PGunn replied to frankd's topic in Venture and Venture Royale Tech Talk ('83 - '93)
I have an 06 that the cruise keeps turning off when I hit bumps in the road I'll have to check and see if it has a return spring and if not look into seeing if it needs one. Thanks for the info. -
I use crimp and heat shrink only but I use the marine heat shrink and a crimping tool that punches a square into the lug squeezing it down tight and have not had one come loose yet. The heat shrink has an heat activated epoxy in it seals around the wire and everything else. Now I did find a problem with the marine heat shrink, when you doing splicing (wire end to wire end) it works great and never had an issue but when it comes to the lugs here is where your better off using non-marine type. I did some work on mine (installed the relay on the ignition switch) and what happened was when I heated it up to shrink it the epoxy did flow out and filled the nooks and crannies. Well that caused the connection to lose some of its contact which caused it to heat up (lessened contact surface will result in resistance to go up causing heat) releasing and softening the epoxy to flow more and it just got worse. Now this whole issue took a year+ to happen but it resulted in the bike not being able to be turned off and I had to disconnect the battery. So in the process of fixing the mess I created by trying to keep things dry I ended up losing 2 - 3 inches of wire to remove the burned insulation on the wire. When I spliced in the replacement wires I covered the spade connectors with the non-epoxy heat shrink then covered them with the epoxy type to seal it up. Now with liquid tape I have used it to rubberise steel parts that would have rusted otherwise and to keep the covering from chip away over time. One example was the oil pressure sending unit I installed I covered it in liquid tape (3 coats) and it is still nice and black and no rust.
-
Tom first I want to say I'm sorry (in more ways than one) I didn't get back to the meet. When I got back to my Daughters house I went to shut the bike off and the motor would but all the lights stayed on like the key was not turned off. Well I dug into it and found that I over did the solenoid install for the key switch. When I put it all together I used marine heat shrink tubing great stuff but.... When I heated up the heat shrink all the epoxy was forced into all the nooks and crannies in and around the spade connections. Problem was it cut the contact area way down and the resistance went up as the current draw went up also causing it to heat up making the problem worse. Long story short I had to splice wires to replace burned up wires, as usual it was worse as I dug into it. Well got it fixed late Friday afternoon. I thought I could make it Saturday but my grandson had a football game and couldn't pass that up. Looks like I'll be buying a used wiring harness to "fix" the wiring correctly but for now it got me back home to Boston and should hold for a while. So here is to next year and this time once I get there my butt isn't moving.
-
Only if it doesn't rain.....
-
Anyone coming in from out of town and would like to group up and meet somewhere Wednesday or Thursday I'm in. I know where the place is my brother lives right around the corner from Pioneer and I'll be staying on route 104 about 1/2 way between Rochester and Niagara Falls an hour away from Pioneer so leading those who may need help finding the place won't be an issue.
-
Funny story... A few years ago when my Granddaughter was 4 my Grandson, Granddaughter and I walked down to their pond to feed the fish some bread. Well one thing lead to another and she goes in and that 2 seconds that seems to last 5 minutes waiting for her to popup passes I jump in cell phone and all come to find out 2 ft from the shore it's 10 ft deep. Well I help her out shes crying more scared than anything and we head back to inform Mom that she fell in. So on the walk back to the house a snake comes slithering by and I reached down to pick it up. Well while holding it my Granddaughter, who likes snakes, starts petting it on the head and the snake pulls back and I tell her not to do that he may bite you. Hey what does Papa know it's a small snake and they don't bite..... Well after the 3rd or so attempt the snake strikes her on the finger and it's mouth just slides off no harm to her. Well the look on her face was priceless going from me to the snake to me to the snake and she says "Papa we can let the snake go now".
-
In places I never new it could grow.....
-
I would but my plans are drive in Saturday the 16th stay the week and go the RS meeting in Sardinia NY.