Leaderboard


Popular Content
Showing content with the highest reputation on 05/27/2022 in all areas
-
Basiclly it looks like you have the pairs synced up ok You just need to sync the left pair with the right pair. Sequence is not as important as it seems, to simplify, there are three screws involved 1 on the left and 2 on the right and they sit between the carbs set in and slightly below the diaphragm covers. They control the external linkage that connects the carbs together. So starting on the left adjust that screw until both carbs on the left are in sync, at this point ignore the right pair. Next move to the right side you will now see the 2 were on the left there is only 1. adjust the front screw until the the two carbs on the right side are in sync with each other, ignoring the left pair (by your video this is were you are at now ). Finally using the back screw on the right side adjust until the left pair is in sync with the right pair. You may have to repeat the sequence more than once but stick to the sequence you will eventually get there if the carbs are in proper condition. P/S during the process try to maintain idle speed between 900 to 1000 rpm. The adjusting screw for this is a small knob between the the left carbs. Once you have them set burp the throttle a couple times than recheck.1 point
-
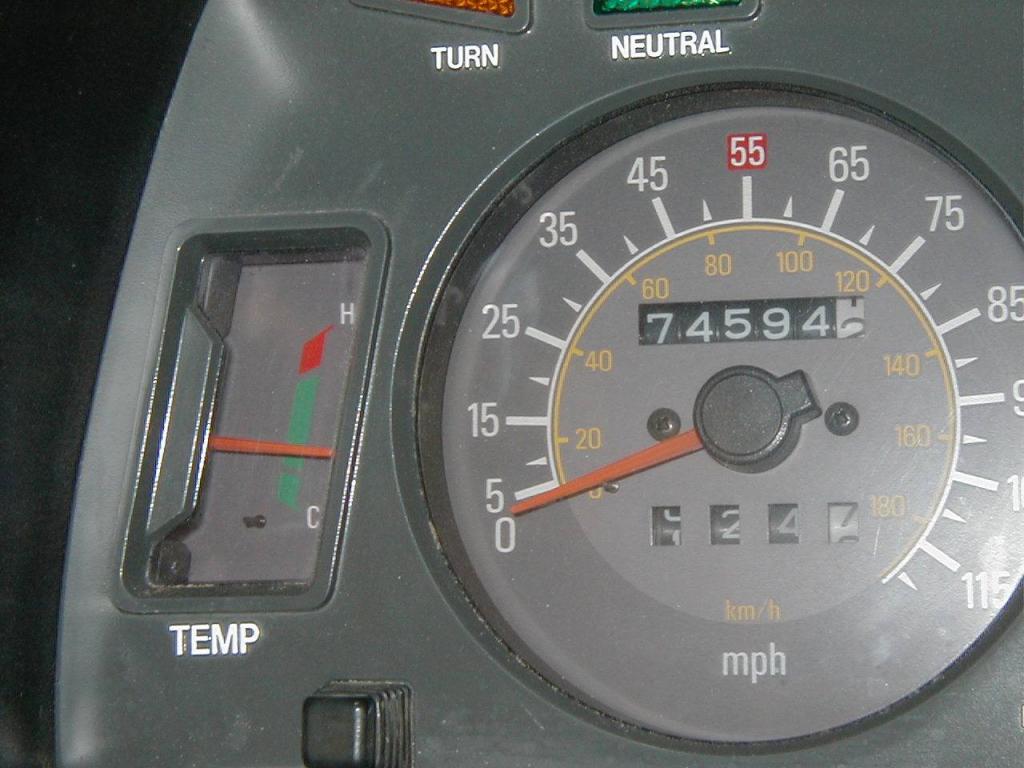
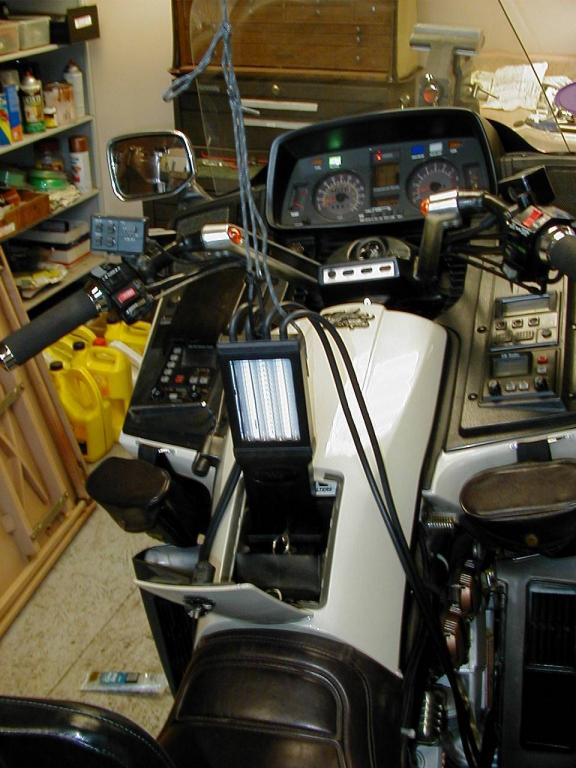
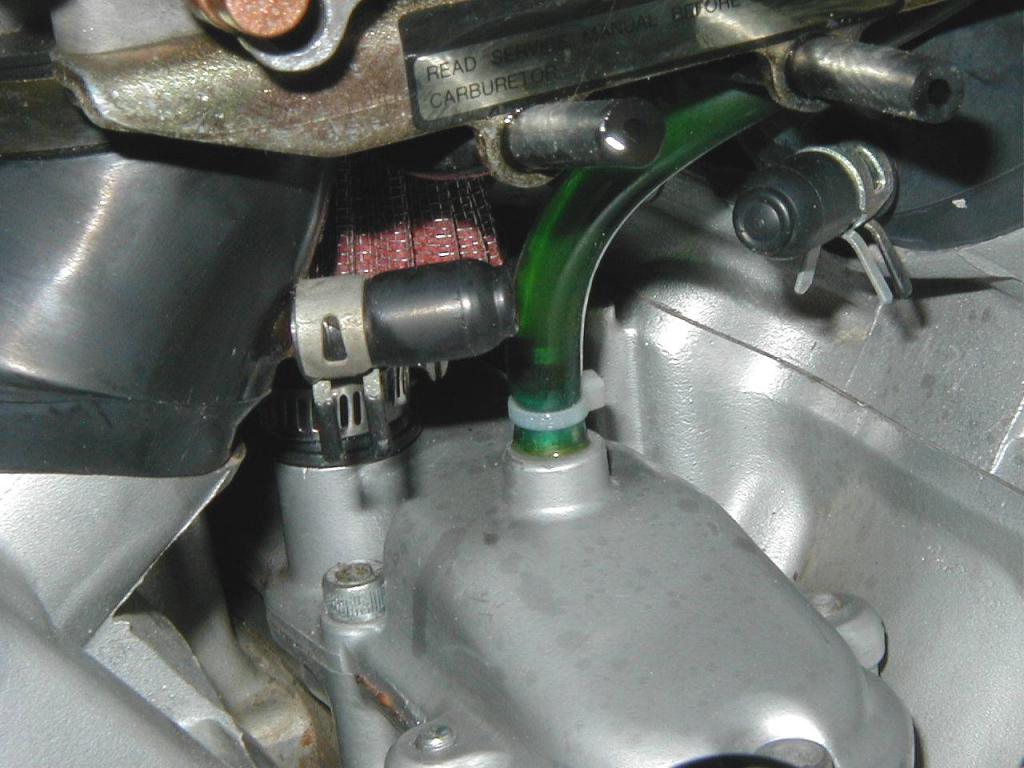
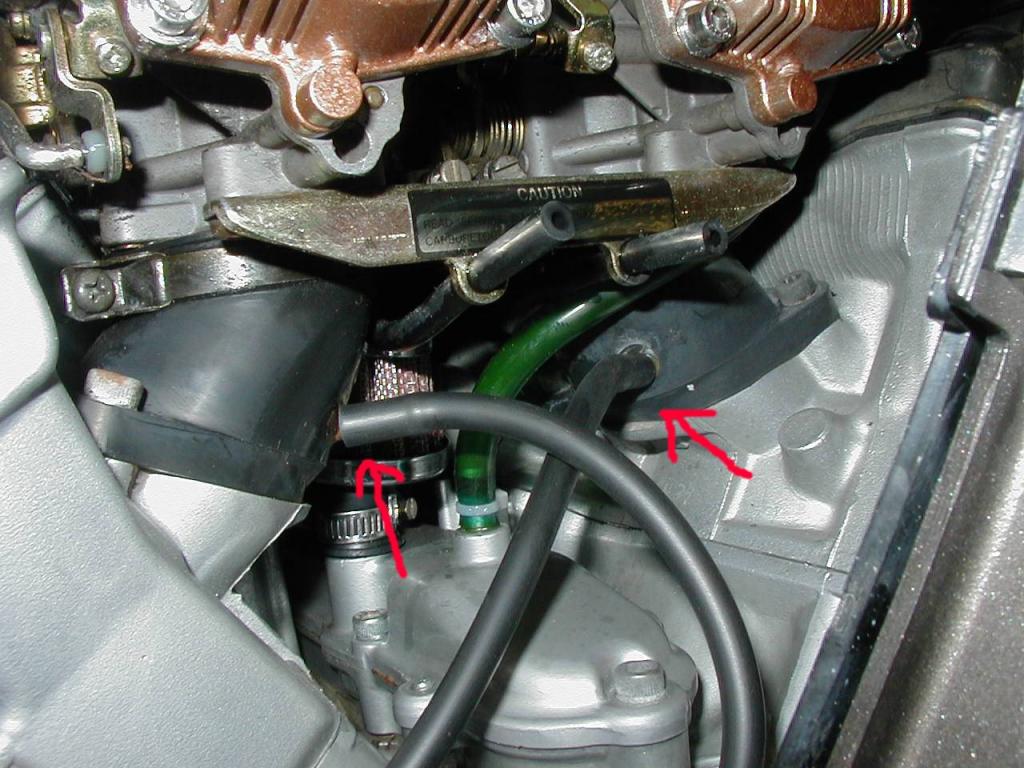
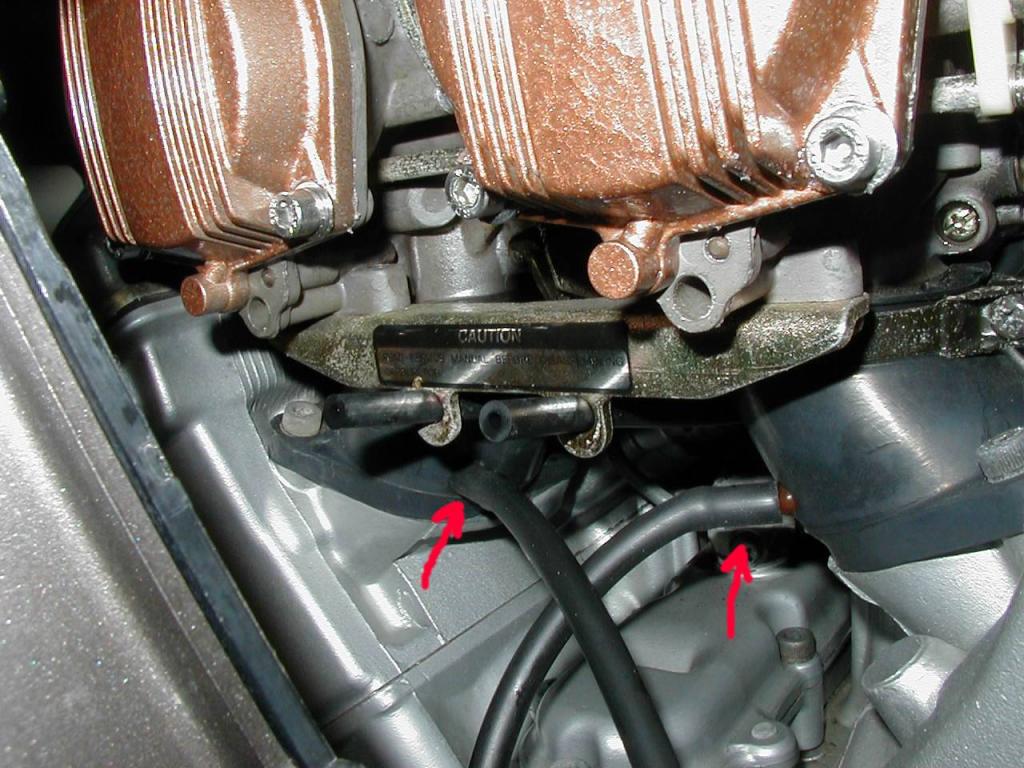
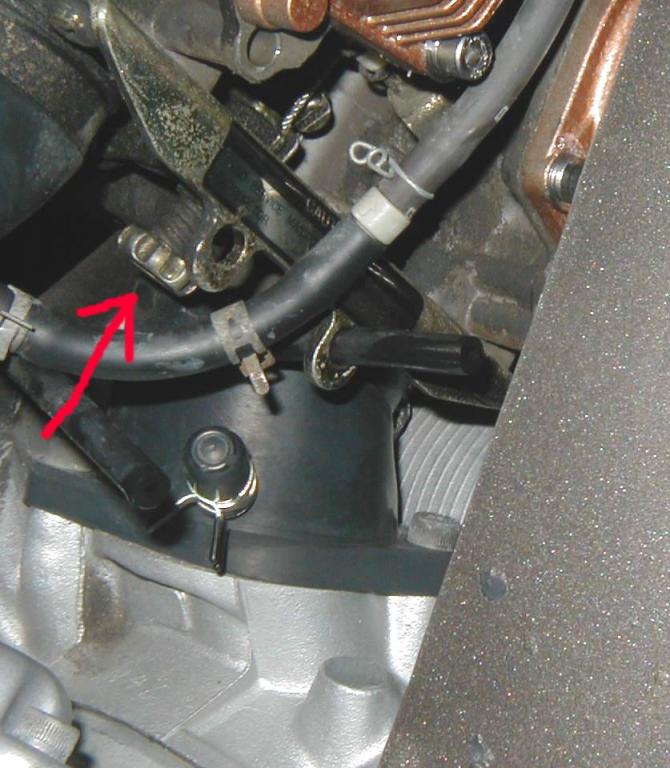
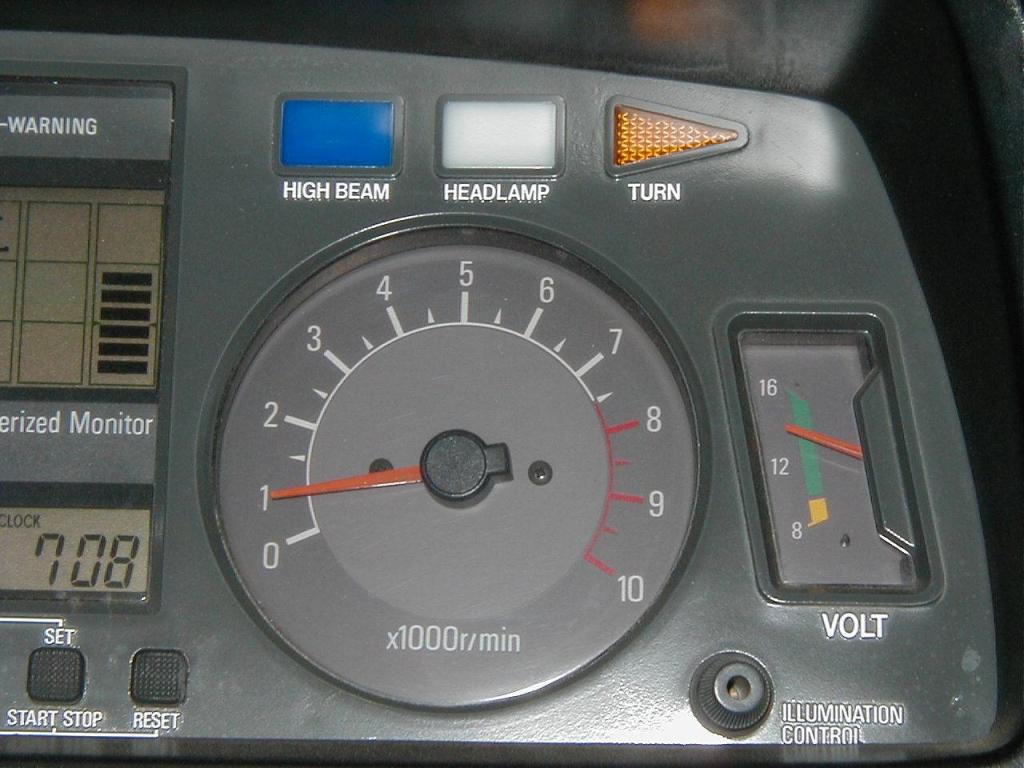
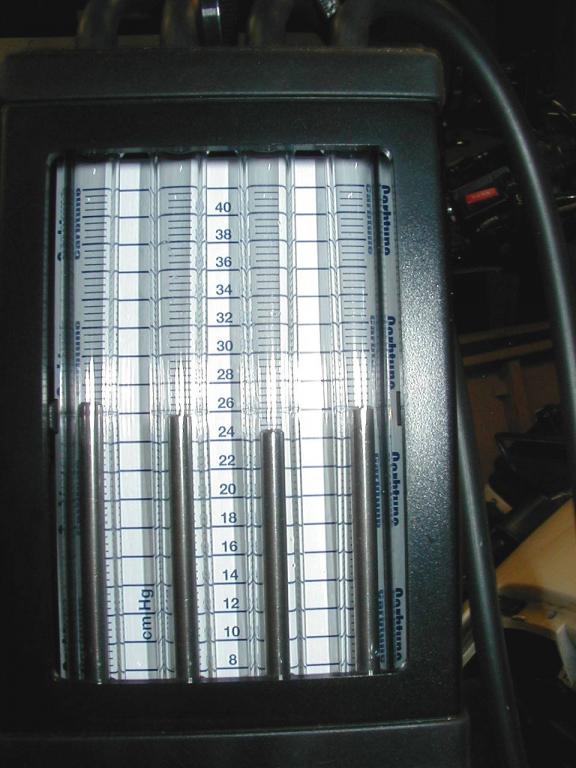
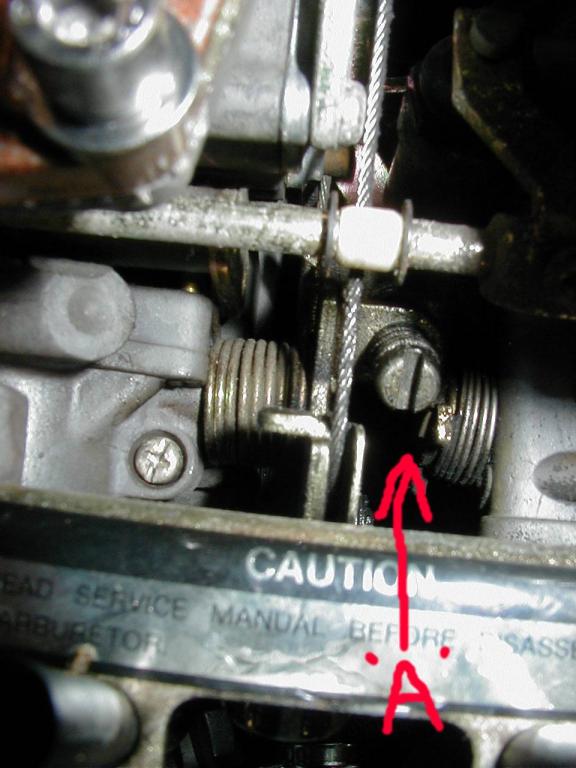
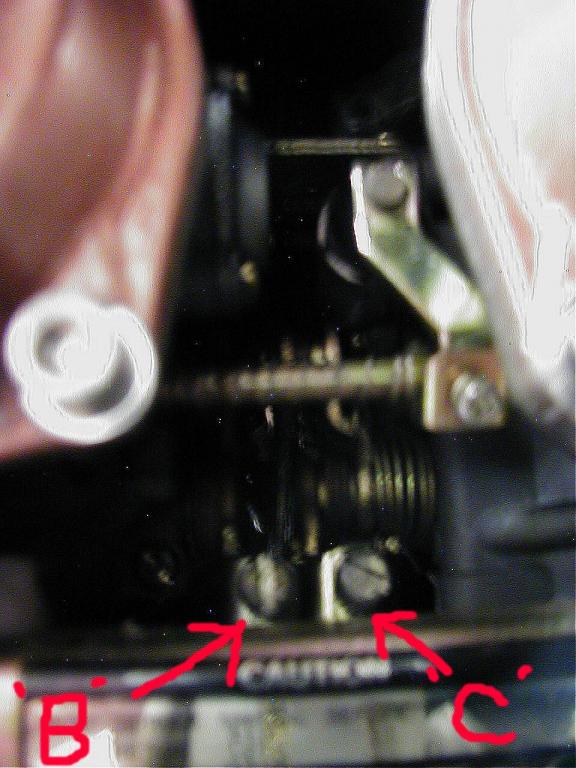
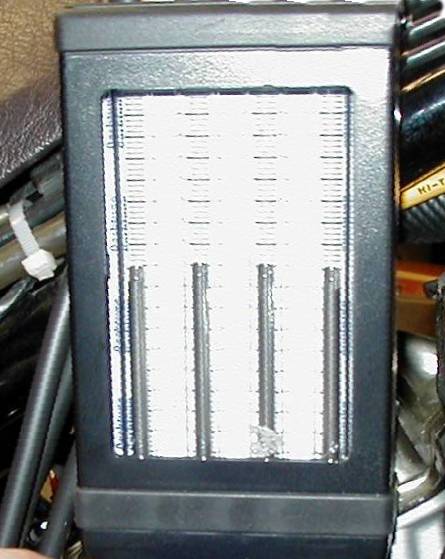
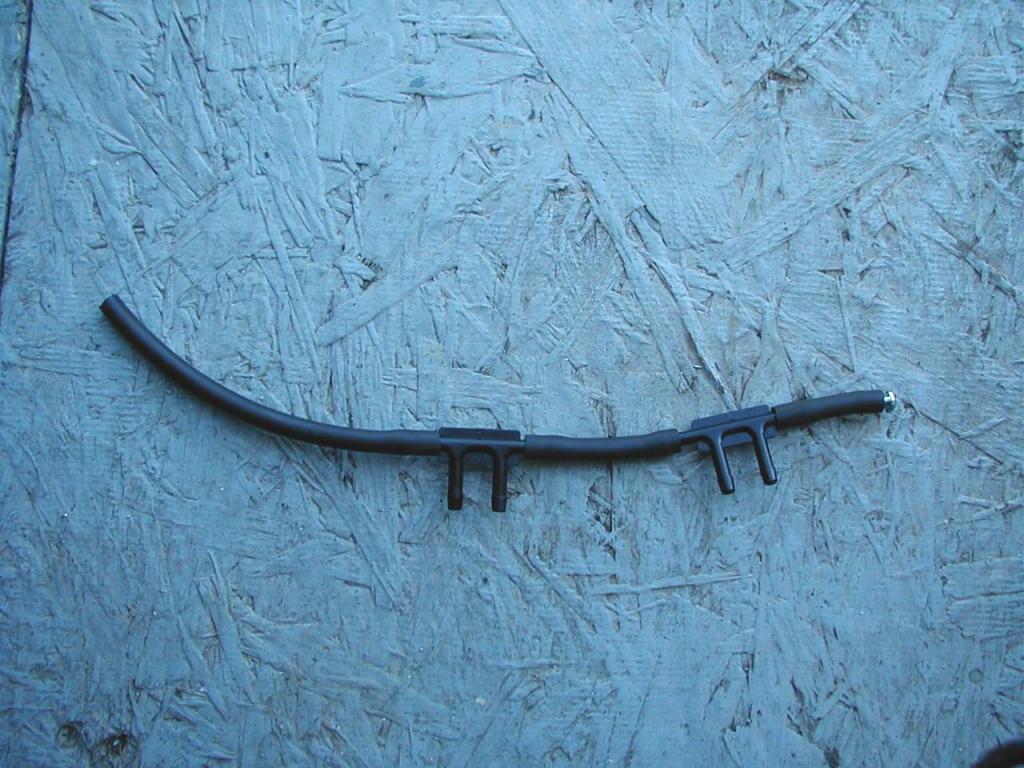
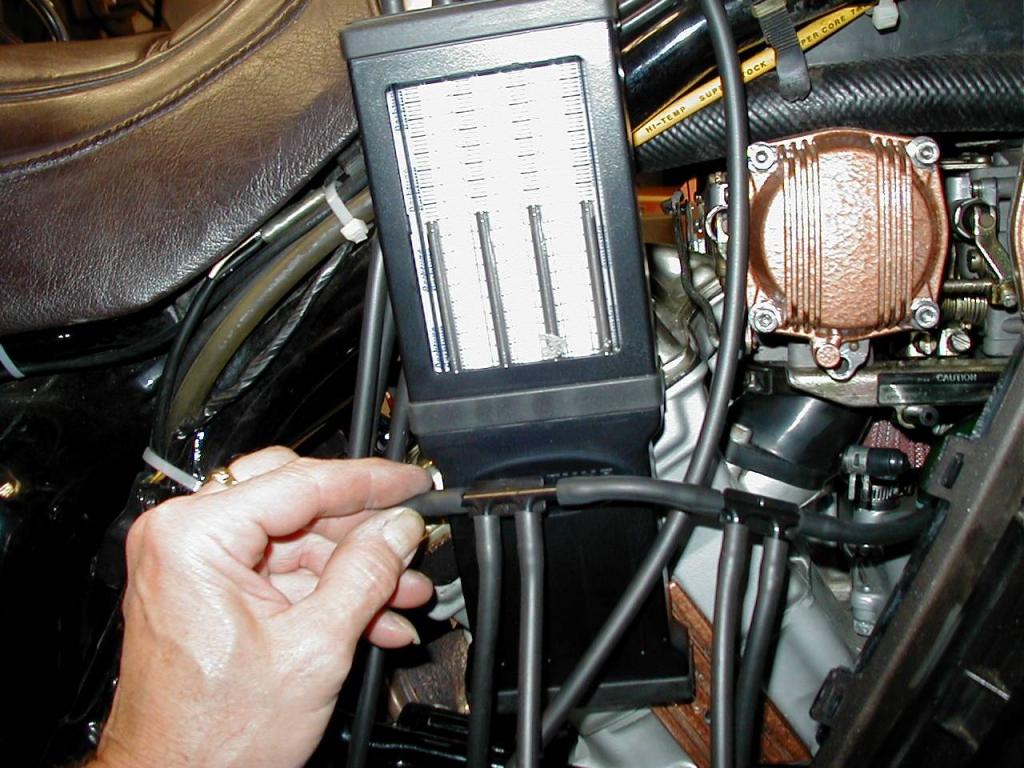
There have been so many people asking about Syncing. the Carbs on their First Gens. that I thought I would take a few pics of the way I do it so that other members would have a general Idea how to go about it. (Disclaimer: My way is not the "do all, be all", just the way I do it. Take what you need and leave the rest.) I start by removing the screw in the false tank cover and unhooking the front of the cover, It does not need to come off. I then remove both side covers. I then remove both of the Radiator side panels to expose the 2 screws that will allow the lower fairing legs to be pulled away from the Carb. Bodies. (NOTE: if your lower fairing legs are in bad shape, you may want to remove the lower cowling which will expose the screws that will allow you to completely remove the lower fairing legs, Mine are still pretty flexible so I don't take them completely off. (Do what you feel "warm and fuzzy" about.) With the plastic off, I start the bike and let it run up to "operating temperature". Pic #1 shows the temp. gage about 1/3 the way up. Depending how "hot blooded" you bike is, this may take a minute or two. While the bike is warming up. Pic #2 shows how I suspend my Carbtune from the ceiling in my shop with a long shoe string and center it right above the gas cap. This allows the Carbtune to remain vertical and also allows me to work both sides of the bike with out moving the Carbtune . At this time, I shut the bike off. Pic #3 shows the location of the Vacuum ports on the right side of the bike, I remove them and plug in the Carbtune on that side. Pic #4 shows the lines installed on the right side. I then move to the left side of the bike, Pic #5 shows the one Vacuum port Cap and the "Boost Sensor" Vacuum line that is connected to Cylinder #2. (NOTE: These pics were taken of an 1987 VR MKII, I don't know if the MKI is the same because I don't own one!) I remove the Vacuum port cap from the #1 cylinder and the Boost Sensor line from the #2 cylinder and Pic #6 shows the two lines from the Carbtune connected. I am now ready to restart the bike. Pic #7 shows how I position a fan at the front of the bike to keep the engine temp. from going too high. I like to take my time when I'm adjusting the Carbs. on a bike and this gives me the extra time. With the bike running and at temp. Pic #8 shows the location of the Idle adjustment screw. (NOTE: I moved the #2 cylinder Carb. Bowl Drain Tube out of the way for the pic. This screw is hard to find unless you are squatting down... and use a flashlight!) Pic #9 shows the Tachometer at 1000 RPMS (By the book 950-1050 RPMS) Pic #10 shows the Carbs. are in fact out of adjustment. I have the left two channels of the Carbtune connected to the left side of the bike, (cylinders #1 and #2.) and the right two channels of the Carbtune connected to the right side of the bike, (Cylinders #3 and #4). Starting on the left side of the bike Pic #11 shows the location of Carb. Sync. screw "A". (NOTE: This is another screw that is hard to see at first, and it is at a downward angle so it will be hard to get a screwdriver on it properly, be patient!) The object here is to rotate "Screw A" until you get the left two channels balanced. Make an adjustment, then "Blip" the throttle and let the bike return to Idle. If needed, adjust again. With the left bank of Carbs. adjusted, I move to the right side of the bike for the rest of the adjustments. Pic #12 shows the location of the "B" and "C" screws. Screw "B" is used to adjust the right two channels of the Carbtune, and Screw "C" is used to adjust the left bank of two Carbs. (Cylinders #1 and #2) to the right bank of Carbs. (Cylinders #3 and #4) Using screw "B" I adjust the right two channels, "blip" the throttle and readjust if necessary. Then I use screw "C" to adjust the left bank to the right, "Blip" the throttle and readjust. Pic #13 shows all four Carbs. on the Carbtune adjusted pretty darn close. Basically, you are done at this point. I wanted to add a few personal suggestions that I use to "enhance" the Carb. Sync. experience to make the bike run even better for me. After I am done with the Carb. Sync. at Idle, I Rev the bike to the 1800 to 2000 RPM range and hold it there, if all four of the Carbs. aren't holding the same vacuum at 2000 RPMS I make slight adjustments (split the difference) between Idle and 2000 RPMS. The reason I do this is because when I am stopped, and start to take off, I increase the RPMS of the bike into the 1800 to 2000 RPMS range as I am slipping the clutch to engagement. I don't want one or more Cylinders "cutting out" or "cutting on" as I am trying to look cool pulling away from a light, especially with Jean on the back! The next issue I would like to address is the "Reliability" of the Carbtune Manometer. Here is a list of Items I purchased to build a simple "Manometer Tester" Manifold. Pic #14 shows the "Manifold". and Pic #15 shows how I test my Carbtune BEFORE I use it. I got these Items from NAPA Auto Supply: Part# 2-616 (2 needed) Vacuum Connector $1.49 each $2.98 Part# H-459 (1 foot needed) 5/32 Vacuum Tubing $.99 1 qty. 1/4-20 screw Free from toolbox 6% Tax (Pa.) $.24 -------- $4.21 Total I hooked all 4 Carbtune lines to the manifold and hooked the Manifold line to one of the carbs. on my 87'VR. My Carbtune checked out OK. If you have any questions, PLEASE feel free to ask. Earl
 1 point
 -
Follow the sequence to the letter. First of I think is the rear left, it doesn't have a sync screw and is only adjusted to set the idle and that would be the 'hidden' thumb screw between the 2 carbs and is your base carb.. Set that to 900rpm, then the other carb on the left side needs to pull the same vac. It seems you have that about right. Always keep the idle at 900 or you will change the vac draw as you go, and that is done by adjusting the idle screw only on the left side. Now comes the fun part on the right side, which screw does what. Look closely at the linkage, one carb is linked to the left side, the other has a link going to the other one on the right side. First sync the right side together, keeping the idle at 900, then adjust so that the right side 2 come together with the left side, always going back to adjust to 900rpm.0 points