Leaderboard


Popular Content
Showing content with the highest reputation on 08/08/2021 in all areas
-
I never heard anything from Cowpuc. I know he was no longer riding but he still seemed to have a lot to contribute. I hope he will eventually be back. Patch did send me an email. To be honest, it was very cryptic and I wasn't sure exactly what he was trying to say. I responded and told him that and he said that he was having some issues and had a problem putting into writing what he was trying to say. He also had a lot to offer but he basically said his goodbyes.4 points
-
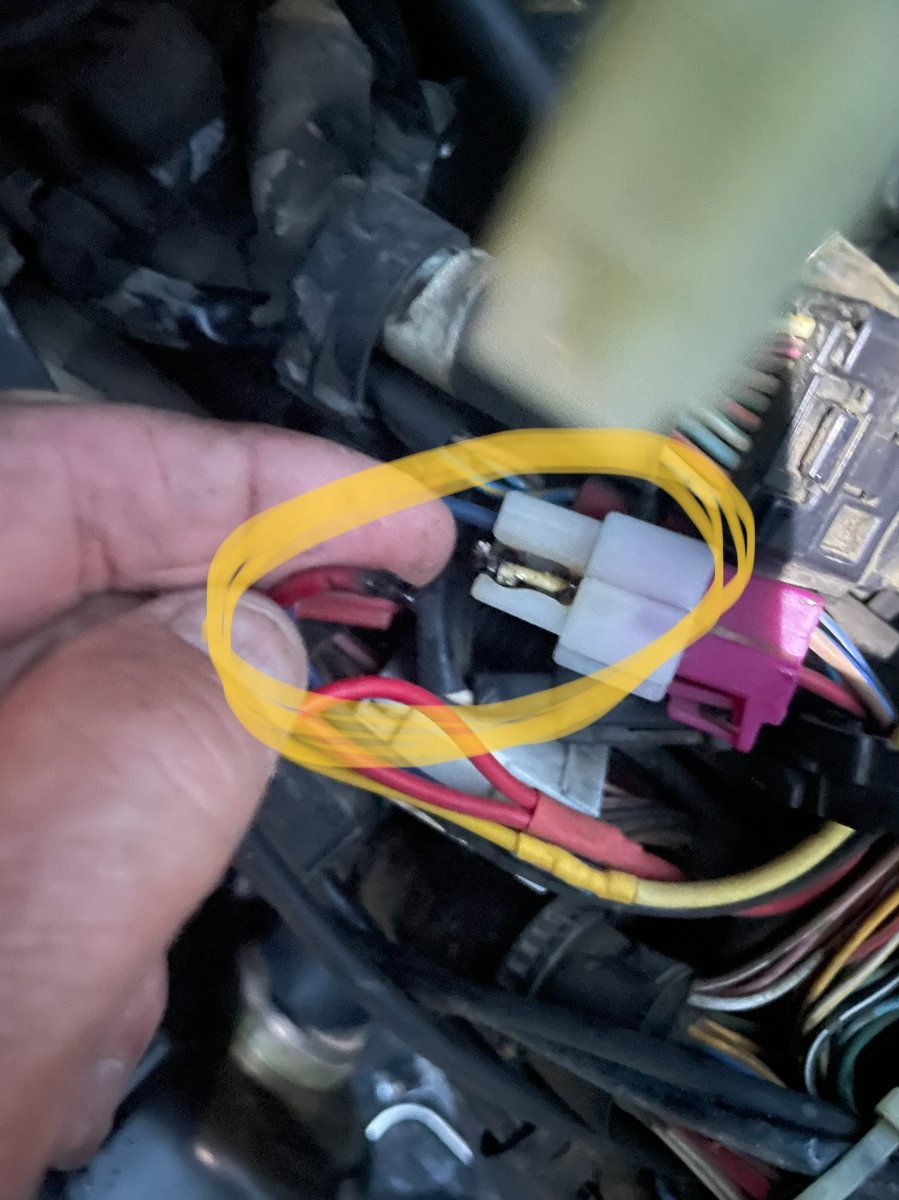
To start with, thanks for @djh3 for the ignition relay I bought back in 2014. It definitely saved my ignition switch but gave its life in the process. I was in Yellowstone this week in a thunderstorm downpour, pulled over to the shoulder on a narrow road section and my 2006 RSV just shut off like the key was turned off. Literally getting buckets poured on me and in an unsafe place. I, of course, channeled my inner @cowpuc for guidance. My buddy waved traffic about two feet away from my butt as I checked the Ignition fuse and battery connections. After that I just knew that something was amiss with the wiring to the ignition switch. I was in a very unsafe place to be pulling the tank off and totally getting drenched at the same time. Had to call for a tow out of the part to West Yellowstone - $520 - and using my Somewear satellite hotspot ( no cell service of course) I was able to ask my daughter to find me the ONLY motel room left in the whole town. As soon as I was unloaded off the tow trailer as the motel I pushed the bike under a bit of covering and took the tank off. We don't always get so lucky to see such an obvious solution yelling out - ITS ME ITS ME ! but that is what I saw see photo. That red wire burned up and came off the connector. Had the ignition power been running though the ignition switch directly - as stock- this would not have had such a happy ending and quick repair. I stopped to have dinner since I could relax. After dinner I had to cut off and cut out the DJH3 ignition relay wiring, Plugged the now open blade females ( had to cut them out of the ink connector ) back into the stock connector and I was ALIVE again. So thank you to the ignition relay and thank you to djh3! Now I need to contact djh3 to buy another ignition relay and an extra male connector. I suggest that everyone with the relay check the relay wires every time you have the tank off. VentureFar
 2 points
 -
I have up loaded the Yamaha factory instruction for the 86-93 rotor covers so if you get some off of Ebay you can make sure you have all the parts and how it all goes together. Hope this helps Rick F. 86-93 Rotor Cover installation instructions.pdf2 points
-
Would have to see a flow diagram but I am thinking what may occur, is the Anti-dive would block fluid flow and so when the fork attempts to compress there would be increased pressure on the fluid in the forks causing it to be forced against the seal. If the Anti-dive is faulty and creating more fluid flow blockage or back pressure than the design intent, I am thinking the seal may leak. This could be compounded by A softer inferior after market seal which may even be more unable to with stand this added pressure. However I am just making a somewhat educated guess here and could be way out in left field but I once hit a pothole hard enough to pop the top seal on one of my forks.2 points
-
I doubt it can get much wetter than it was at Asheville last year. We still had a great time. Ron, do you have camp set up yet?1 point
-
Thats unfortunate to hear it was only 3 weeks ago or so that we had been PM'ing back and forth. he was going to be coming east in a couple weeks and wanted to hook up with Marcarl and myself for a visit on his way through. and then all of a sudden nothing. I hope all is OK with him.1 point
-
Hey Joe, Welcome to the forum! now let's get to it! I posted this several years ago for another forum member that had a problem similar to yours Joe, I hope this works for you. Cleaning First Gen. Carbs. On The Bike I use this cleaning method to unstick a float needle that is causing the gas tank to drain when the bike is parked, or for a Carb. That is passing raw gas out of the overflow tube when the bike is running. This on bike cleaning DOES NOT address the issue of a Carb. Set needing a complete rebuild, (off the bike) and does not address the issue of AIR PASSAGES being blocked, and causing poor performance. These two issues require the Carbs. be removed from the bike. With the bike on the center stand, and the engine off, I select the first Carb. I want to clean. You will be looking for the Black Plastic Carb. Drain Tube, and the screw that opens that drain. (Phillips Head Screw) You will need a small coffee can, or a coke can with the top cut off, (NO plastic containers) to catch the gas that will come out when you open the drain screw. Allow all of the gas to drain from the Carb. and have a look in the can for “floaters”. (Solid particles) With a new can of Carb. Cleaner, insert the red straw in the end of the drain tube. I wrap the junction of the red straw, and the drain tube with a small piece of shop towel to slow the blow by. Press the button on the top of the can of Carb. Cleaner, and count to 3. Remove the red straw and let the cleaner fluid run into the coffee can. Move to the next Carb. and repeat. When you do Carb. #4, start over again, and do them again. I use up one can of Carb. Cleaner on the four Carbs. When the can of Carb. Cleaner is gone, retighten all four drain tube screws, (CAUTION DO NOT OVERTIGHTEN THE DRAIN SCREWS) Turn on the ignition switch, (do not start bike) listen for the fuel pump to fill the Carb. Bowles and stop pumping, check the drain tubes and the overflow tubes (down in front of rear tire) for fuel leakage, move the can with the Carb. Cleaner/Gas mixture away from the bike, (or better yet, roll the bike out of the garage) and start the bike. (It may take a few short bursts on the starter motor, and you may need to choke it as well) Go for a ride and “blow the cobwebs out” (my personal FAV part) if this doesn’t solve your problem, then a “Carbs. Off Rebuild” may be in order. On a side note, I run 3 ounces of Seafoam in every tank of gas I put in my 87’and 89’VR because of the negative effects of the Ethanol in the fuel these days. Because of my shop here in South Central PA. I buy OEM parts direct from Yamaha, and share my discount with the VR.ORG members. It would be my pleasure to help you with any project you have in mind for your First Gen. VR. Earl (skydoc_17)1 point
-
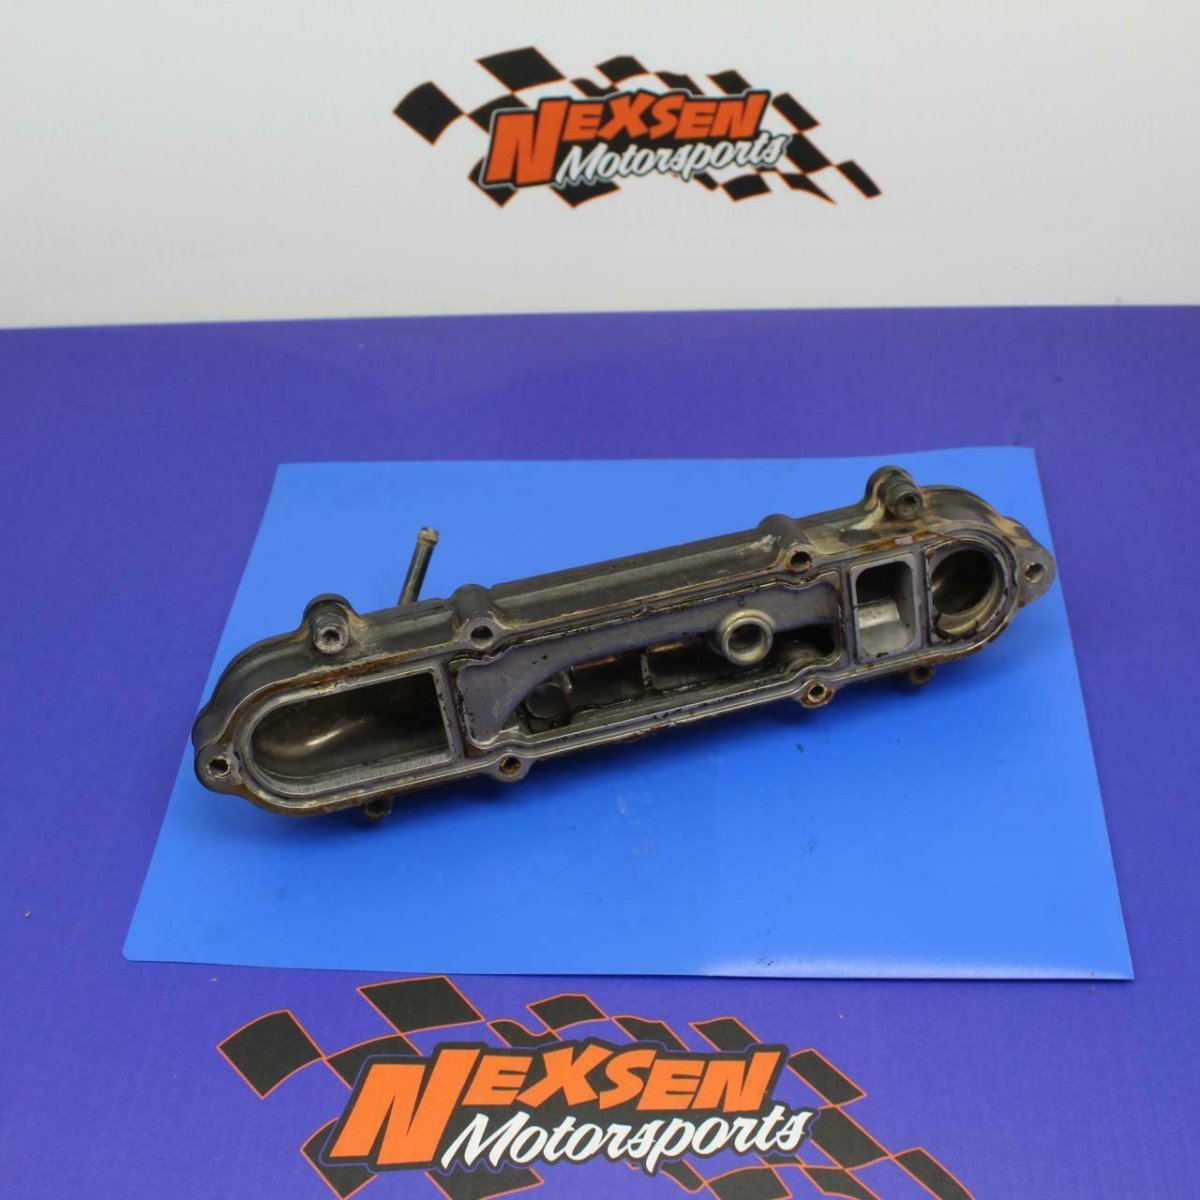
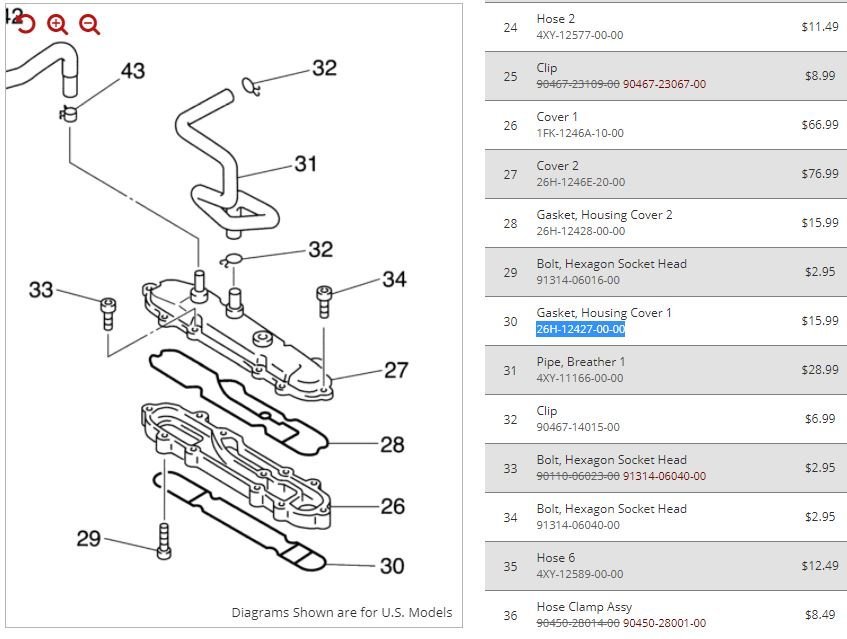
I am struggling with the same issue on a 2008 RSV with 24K miles. It overheated in the Tucson heat about a month ago. I found the radiator fan switch to be defective. When I opened the radiator cap I was surprised to find a light, brown oily sludge in the system. Upon researching the this issue there are several possibilities: (1) Water pump oil seal; (2) The mysterious "Twinkie." or (3) Engine head gasket. I understand that the engine is robust and the head gasket is not the usual culprit. I focused on (1). I removed the water pump and found a questionable oil seal. I purchased the parts from PartZilla for $84. I then rebuilt the pump and thoroughly flushed the system with a radiator cleaner. I went through several flushes until the drained coolant was clear. I then put in new coolant and figured it was fixed. As an additional safety I added a toggle switch in parallel with a new thermal fan switch so I could manually turn on the radiator fan. Last weekend I took a ride to Phoenix with my son. The ambient temperature was a toasty 106F. The bike did not overheat, but when refueling my son said he saw a small puddle of brown goo under my bike. The radiator reservoir under the seat again had the brown oily sludge in it. Now I am focused on (2): The mysterious "Twinkie" is a manifold located under the carburetor assembly and above the V of the cylinders. It is apparently a heat exchanger between the oil and coolant and also functions as a crankcase ventilation system. There are two gaskets. One is under the unit and mates to the engine. The other is in-between the top and bottom cover of the unit. Failure of this gasket can cause oil to get into the coolant. Also a cracked cover(s) could also cause the same. Refer to attached photos and documents for part numbers. Since my 900-pound Japanese girlfriend (RSV) is much cheaper than a psychiatrist I decided to order a used Twinkie from Ebay and the two gaskets from PartZilla. I figure if my Twinkie is defective I can swap parts and minimize downtime. I will let you know what happens. Twinkie.txt
1 point
-
I ran the MT 66 and did a review for ultimate motorcycling on them. The were very low price but I only got 8000 miles on them and interestingly both front and rear went at the same time. Normally my front gets double the rear. Here it is https://ultimatemotorcycling.com/2018/06/18/pirelli-mt-66-route-tire-review-an-oldie-but-goodie/ VentureFar...1 point
-
Whoa! That's freaking awesome!!!!1 point
-
I noticed that too. I'm still relatively new here & new to working on motorcycles. Those two guys motivated, encouraged, prodded and taught me as I was dealing with an excessive heat issue on my bike when I first bought it. I was getting depressed that I couldn't enjoy getting out and riding my new toy and they, along with others helped me get through it. The knowledge they possess and their patience with a dork like me was priceless. Whatever new chapter in life they are on to and the people who are a part of that chapter are blessed to have them. I will always be grateful to them for not only helping me, but the legacy of historical postings they've left behind here, which I often encounter when looking for various bits of info. Godspeed to you Cowpuc and Patch! Godspeed, my brothers!1 point
-
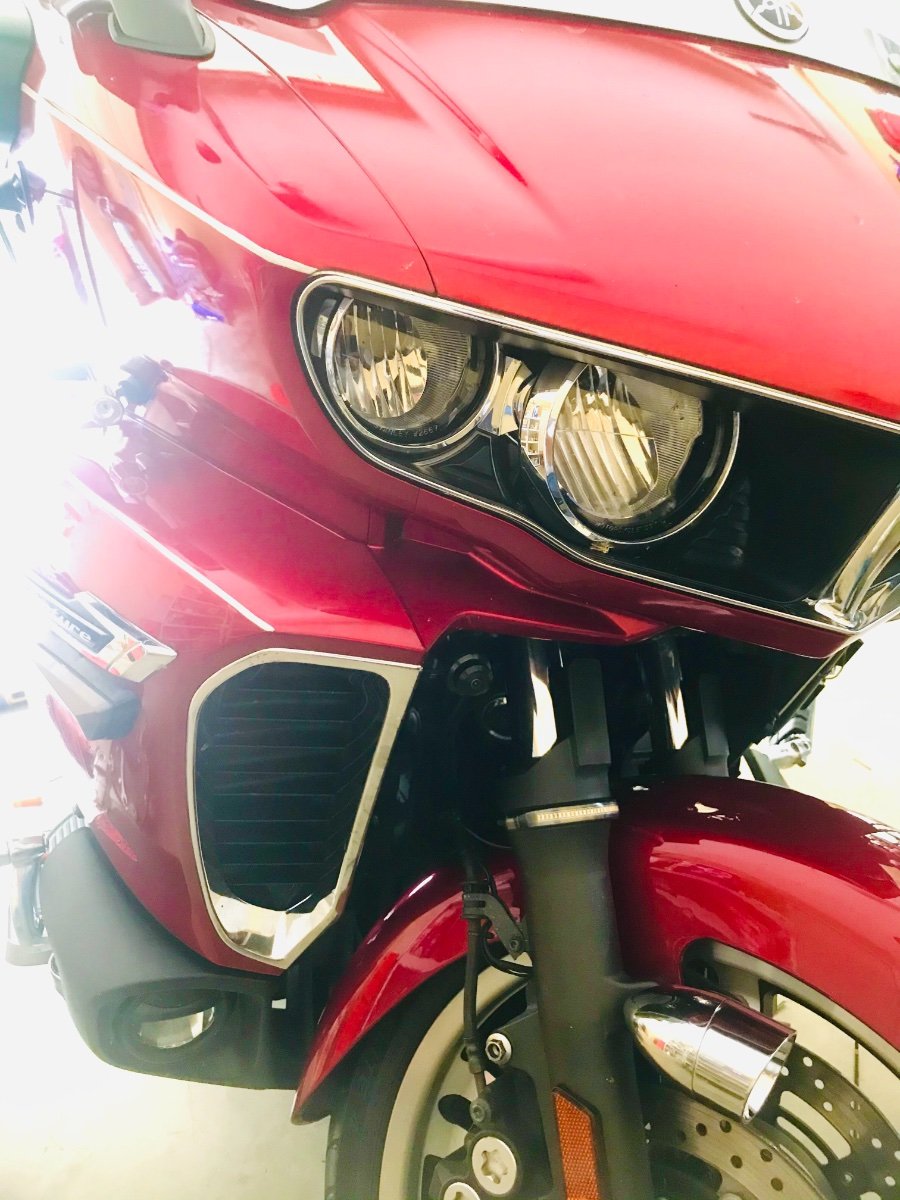
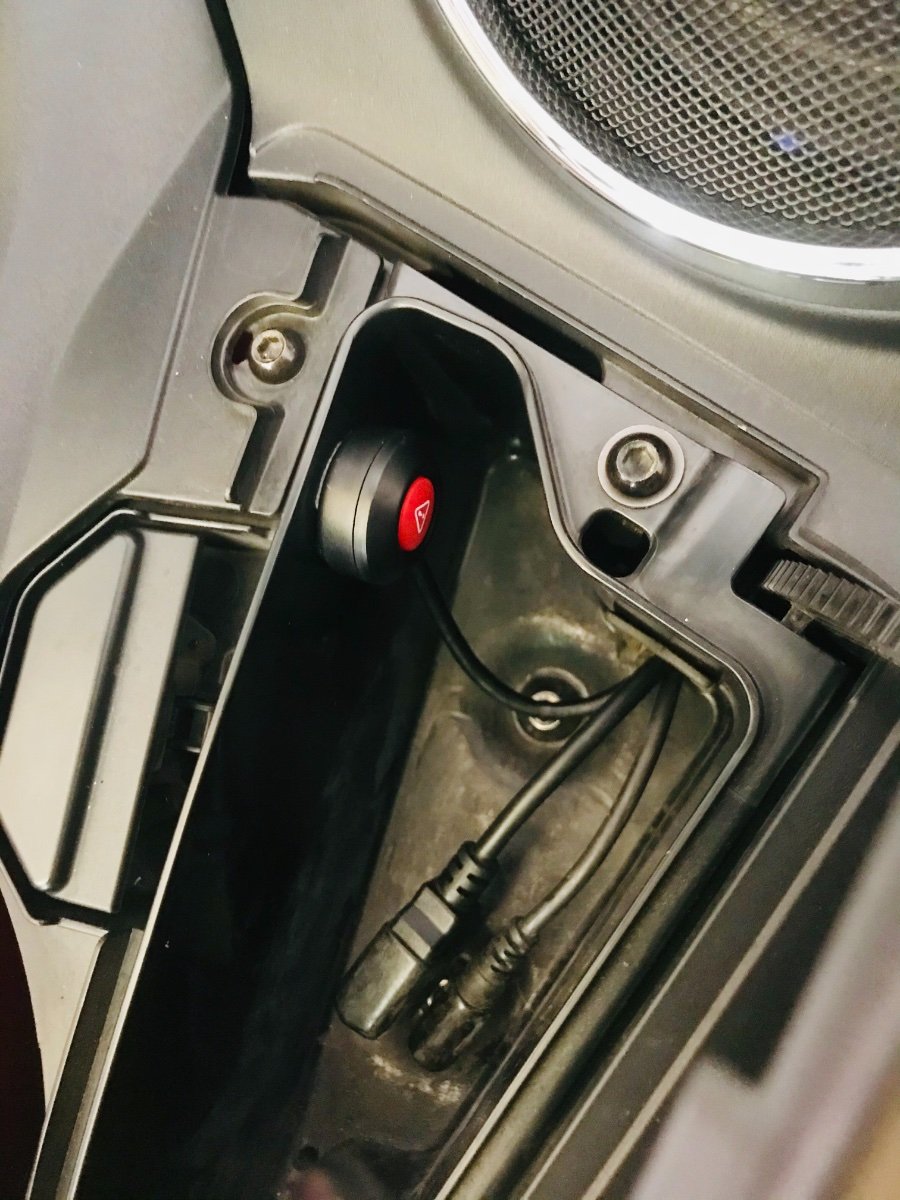
Well, finishing up putting in a dual camera system with night IR capabilities and wi-if for live streaming rides. The button for still shots was not waterproof so I put it in the right cubbie.
1 point
-
After my last comment, I am almost afraid to answer! But here goes. When you dampen the flow of oil in the fork, it increases the pressure in the area above the Anti-Dive Unit to the bottom of the fork seal. This increase in pressure will migrate out of the fork seal in any area that has been compromised in the form of a leak. Earl1 point
-
Is that the Dutch phrase that is used to describe a "Cheapskate" Marcarl! "A penny saved is a penny earned"! (Cheapskate!) "Penny wise and pound foolish"! (Cheapskate!) We sorta' cut to the chase down here in the lower 48. I love ya', brother! Earl1 point
-
Hey Marcarl, I have to admit, I have rarely seen you post about something that has you scratching your head over it, so this will be an honor to add my two cents to the mix! With that being said, The guide bushings that keep the upper fork tubes in the center of the lower fork tubes will wear out just like the fork seals. In fact, if the guide bushings are excessively worn, they will cause a perfectly good set of fork seals to start leaking! Because of the "Rake" of the front fork tubes, (angle of the tubes in relation to the center line of the motorcycle frame) the guide bushing inside diameter will become "egg shaped" over time. When this condition increases to the point where the lip of the fork seal no longer contacts the upper fork tubes, leakage will result. There are usually two guide bushings in each lower fork tube, try replacing those. Earl1 point
-
Never apologize in the search for answers. Situations like yours as well as camaraderie is the reasons this site exists and those of us that are able to help are only happy to do so. As far as your fuel consumption goes two of the more common causes are stuck enrichment valves (often referred to as the choke. A common sign of this but not always the case, is that you never need to choke your bike to start it even on very cool mornings. You can try observing them for movement as you move the choke lever as they are mounted on the outside of the carbs and manipulated by levers too which the choke cable runs. Another issue is the float levels set to high which sadly is not an easy thing to check on a 1st gen and is easier done with the carbs removed and on the bench. If your valve set is so far out that you are loosing compression this could cause an incomplete or inefficient burn resulting in low power and higher fuel consumption. Also when draining the Rad there is a hex valve near the oil filter housing. marked drain. make sure it is set in the on position when draining or filling the cooling system and turn to the off position for normal operation.1 point
-
MK1 or MK2? The MK1 makes short work of removing the rear tire compared to the MK2. I wouldn't say either is dificult but there is a good bit of prep work to get to actually removing the wheel. Follow the service manual and you will have no problems. There are some short cuts that work, but I would advise going by the book the first time around. One good short cut, if you pay close attention and do it safely, allows you to remove both wheels from the centerstand with no lift. Set up on the center stand, then use a ratchet strap from the center stand to the front frame to secure the center stand in the forward position. use a small bottle jack under the front cross member to lift the front end and remove the front wheel by the book. Let the bottle jack down, pull the front end down and secure it with a tied down strap. Remove rear wheel by the book. It's critical to do this on a solid, flat surface free of debris. Do not attempt this method on grass or a gravel driveway.1 point
-
I put the Shinko's on the other day and the difference is amazing! I also added a bit/10# of air to the shock. It rides/corners like a MC again.1 point

.thumb.jpg.2205483fddeda4af671a7b2c5b4f4ab4.jpg)

.jpg.5d9e9b3ab7f621d4c0e3106cd3f55794.jpg)
.jpg.5c041783d931fcc2b16389744b3c391d.jpg)
.jpg.2c5dfc7fde609ac08ee383108d9367dd.jpg)