![]()
BARNETT CLUTCH INSTALLATION
STEVE (hdhtr) DUBOIS ~ PICS by JACK (justjack) CHALAIS
Steve Dubois decided that his clutch was in need of some TLC before leaving on the first west coast annual Venture West ride in, and after ordering the proper parts from Buckeye Performance in Ohio he set aside a Saturday morning to take care of business.
Step one is removing the clutch basket cover. Note: this was done without removing the clutch pedal and linkage. Also note that with the bike on it's side stand there is little, or no loss, of oil.

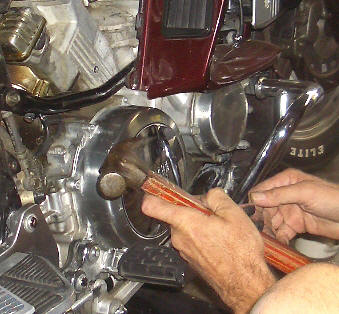
After removing the allen head screws the cover still needed a bit of persuading to give it up. CAUTION! A rubber hammer is recommended, but since he didn't have one, a steel hammer was employed along with a very thick towel to soften the blows. |
|
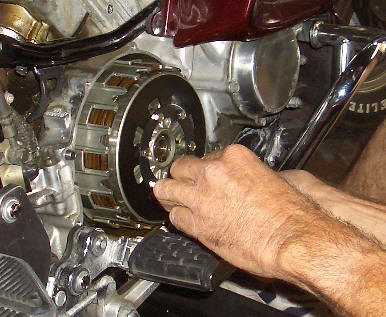
With the cover removed the next step is removing the diaphragm and pressure plate. These items won't be used any longer and can be discarded.....or stored if you don't like to toss things. What ever makes you feel comfortable. I reused the 6 plate bolts. |
|
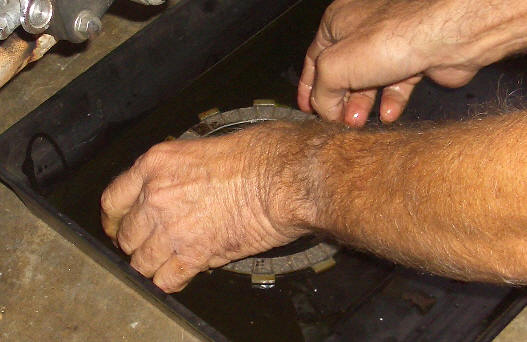
Next remove the old friction plates and discs. Note: there is a set of 1 plate and 1 disc held at the very bottom of the clutch basket by a thin retaining wire. The wire is held in place by a couple of bent ends that are pushed through a hole in the basket. The wire needs to be removed and the last two pieces taken out. No shortcuts. Do it!! |
|

Here's an empty basket if there ever was one..... Cleaned up and ready for a new clutch. |
|

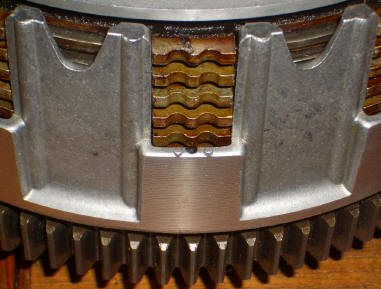
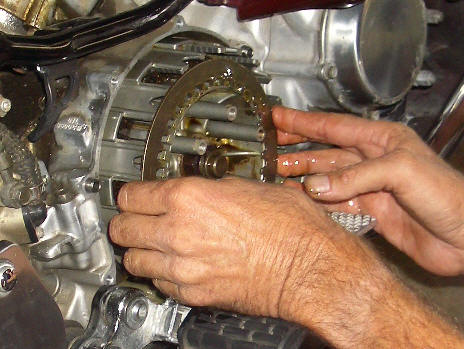
When inserting the discs make sure that you have the tang with the double notches aligned with the two 'dots' on the clutch basket. Important... Also check the edges of the uprights for any burrs or imperfections that might hinder disc travel. If any are found remove them with a fine file. Be careful not to get filings into the basket area. |
|
Place
one disc and then (the odd) friction plate (#YA26H-16321-01-00) and
one re-used spacer into the base of the basket. Make sure they are oil
soaked before aligning them. (take note that there are no notches on
the first disc) Now comes probably the hardest part of the entire clutch
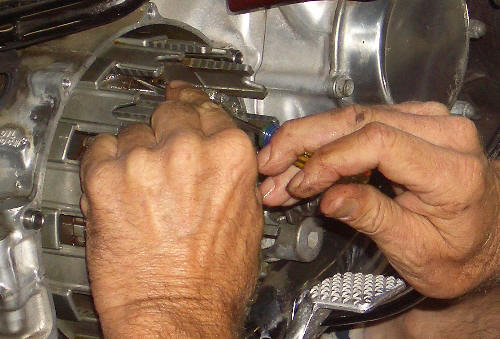
job. Placing that thin new wire into the notches of the basket uprights and
securing it by pushing the bent ends into the hole. It can be done, just be
patient. Most clutch kits come with a new wire to replace the old. A long
thin screwdriver also facilitates the job. |
|
You can never have enough oil on the new discs and plates. Don't be bashful. |
|
When inserting the discs and plates, double check to make sure that the notches are lined up with the two dots on the lip of the basket. |
|
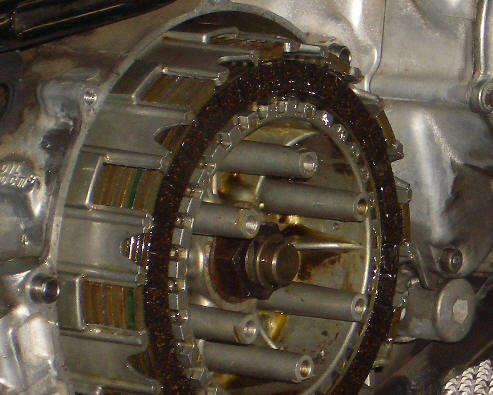
Here's what a full basket of new discs looks like. |
|
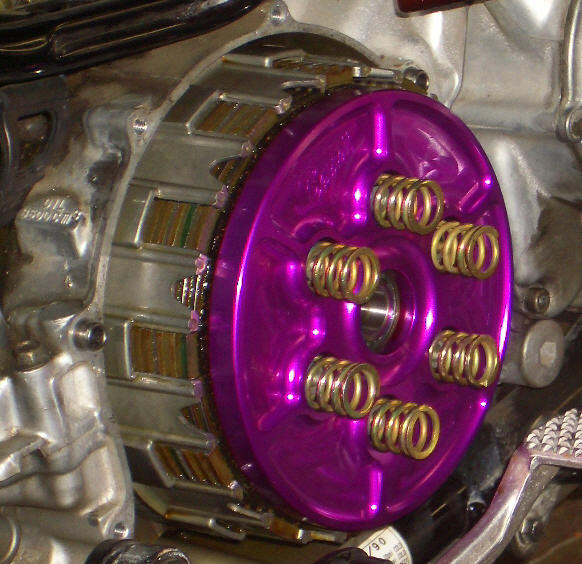
Now the pretty part. Place the Barnett Clutch pressure plate on the basket. The instructions with the Barnett show the "Barnett" label up, tried it that way first but couldn't get rid of the gap or get the bolts in. So rotated it until it fit right. The book refers to lining up the holes. We could never find any, so we just rotated the plate until it seated without any gap between the plate and the top disc. |
|
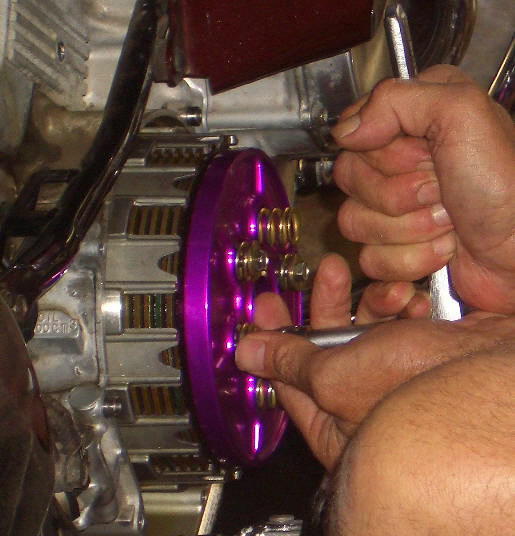
This is how NOT to put on the pressure plate. Notice the gap referred to above that is inbetween the plate and the top disc. Also, compressing the new Barnett clutch springs will also be a chore. Once again, rotate the plate until it fits right. |
|
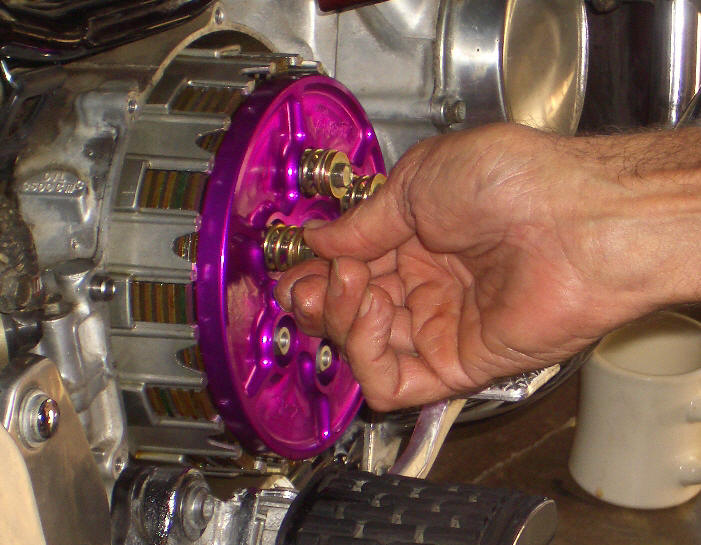
This is how it should be done. Note the plate sitting lower into the basket and the ease of the spring compression. |
|
The last stop in a 2 hour job. Putting the new gasket on the basket housing and securing the cover. Whew!! |
|
 |