DougS Posted April 12, 2018 Share #1 Posted April 12, 2018 I have a Pitbull motorcycle lift and today I tried to lift the SVTC for the first time. It slid under there just fine but even with the lift moved to the back as far as possible the front wanted to come up first. Does anyone know of a trick to lift this thing or maybe some sort of adapter that is available that would let me move the lifting point further back? Thanks for any ideas on this! Link to comment Share on other sites More sharing options...
YamahaParExcellence Posted April 13, 2018 Share #2 Posted April 13, 2018 I have a Pitbull motorcycle lift and today I tried to lift the SVTC for the first time. It slid under there just fine but even with the lift moved to the back as far as possible the front wanted to come up first. Does anyone know of a trick to lift this thing or maybe some sort of adapter that is available that would let me move the lifting point further back? Thanks for any ideas on this! Doug, can you reduce the fulcrum effect and move the two support slats closer together, and is your back support just under the drive pulley if seen from the right rear side? Also, even if the front wants to come up first, does the rear end follow, with the rear wheel leaving the ground? Link to comment Share on other sites More sharing options...
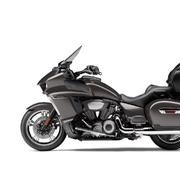
DougS Posted April 13, 2018 Author Share #3 Posted April 13, 2018 The slats on my lift are not adjustable. I aligned the rear slat right under the frame weld (see picture.) In this position the bike was stable side to side but it teetered front to back. Pushing down on the front of the bike with maybe five pounds of pressure would tip the front down and onto the front slat of the lift and then the rear of the bike would come up. This is what I did to raise the rear wheel off the ground about an inch so I could spin it to clean it... Link to comment Share on other sites More sharing options...
YamahaParExcellence Posted April 13, 2018 Share #4 Posted April 13, 2018 (edited) http://www.venturerider.org/forum/attachment.php?attachmentid=112219 The slats on my lift are not adjustable. I aligned the rear slat right under the frame weld (see picture.) In this position the bike was stable side to side but it teetered front to back. Pushing down on the front of the bike with maybe five pounds of pressure would tip the front down and onto the front slat of the lift and then the rear of the bike would come up. This is what I did to raise the rear wheel off the ground about an inch so I could spin it to clean it... Hi Doug, Ok...then I have a suggestion, to off-set the obviously longer length of the bike aft, or the forward favoring engine cradle. Obvious to me, by your lift experience, that the tour trunk and bags are creating a significant 'fulcrum' effect on vertical center-of-gravity. No problem though...with my try-it-out, suggestion; Buy some 1/4 inch thick out-door grade (it's a better glue) plywood, and measuring the width of the rear slat, cut off a number of pieces of plywood, cut to the length of the rear Pit Bull lift support/slat (this is what I will do, when I get my SVTC home and try to lift it and if I get the same front-wheel-light observance) Then using your cut 1/4 thick plywood slats (as shims), start placing one or two on the back Pit Bull slat..and then bring the slat to meet the frame. Start a 2 inch or 3 inch lift sequence. Watch the front end. If it comes off the floor two/three inches, and there is no true rocking back and forth front to back, back to front on the bike...I'd lower the Pit Bull, and put one more 1/4 inch 'shim' on the back slat..and then raise the bike two inches off the floor once more. Grab the handlebars and press down or up..to see how much force it takes to give a comfortable 're-weighting' of the front end of the bike. If you need another plywood shim...and have the room...use another, until you are satisfied, Doug. That's what I am going to do, if I find the same situation as you. When you arrive at how many slats are needed to create the over-all 'thickness' of your new rear slat shim, drill three holes across it, and countersink three screws to hold then all together, then place a top layer of any kind of rubber to cushion between the lower frame member, and the top of your new plywood shim. On the BOTTOM of the shim, I'd glue a piece of black medium grain, sanding paper (the black stuff for metal/brass, etc) grain side down. That will 'catch' the top of the Pit Bull slat face and give better 'grab' purchase. Because the back will lift higher than the front Pit Bull slat...you will need to use, and make a hard rubber material buffer pad that will take up the airspace created by the pitch forward angle of the bike frame as it rests upon the front slat. Just use some non scratching hard rubber, with the right thickness to take up the air space at the back edge of the front slat. That in a nutshell, are my suggestions, Try that, and let me know if that was the solution. Cheers, Joe Edited April 13, 2018 by YamahaParExcellence Link to comment Share on other sites More sharing options...
ChiefGunner Posted April 18, 2018 Share #5 Posted April 18, 2018 I have a Pitbull motorcycle lift and today I tried to lift the SVTC for the first time. It slid under there just fine but even with the lift moved to the back as far as possible the front wanted to come up first. Does anyone know of a trick to lift this thing or maybe some sort of adapter that is available that would let me move the lifting point further back? Thanks for any ideas on this! I have a bike lift 1500lbs that I got from Harbor Freight. What I noticed is that you have to place the rear part of the lift literally right where the frame tubing bends at the rear. Lift SLOWLY & have a FULL TANK of gas. It’s puts more weight forward. Even after I get it up, install a security strap up from from the front cross brace under the bike to the lift to help secure it. Hope that helps. Link to comment Share on other sites More sharing options...
DougS Posted April 18, 2018 Author Share #6 Posted April 18, 2018 I have a bike lift 1500lbs that I got from Harbor Freight. What I noticed is that you have to place the rear part of the lift literally right where the frame tubing bends at the rear. Lift SLOWLY & have a FULL TANK of gas. It’s puts more weight forward. Even after I get it up, install a security strap up from from the front cross brace under the bike to the lift to help secure it. Hope that helps. Interesting, I’ll have to look into trying it like this. I didn’t have much luck with shims. Thanks for the insight! Link to comment Share on other sites More sharing options...
YamahaParExcellence Posted April 18, 2018 Share #7 Posted April 18, 2018 I have a bike lift 1500lbs that I got from Harbor Freight. What I noticed is that you have to place the rear part of the lift literally right where the frame tubing bends at the rear. Lift SLOWLY & have a FULL TANK of gas. It’s puts more weight forward. Even after I get it up, install a security strap up from from the front cross brace under the bike to the lift to help secure it. Hope that helps. Chief, did you get the same one I got, the 1500 lb cast aluminum one? or the steel bar frame one? Wondering... Link to comment Share on other sites More sharing options...
YamahaParExcellence Posted April 18, 2018 Share #8 Posted April 18, 2018 I have a bike lift 1500lbs that I got from Harbor Freight. What I noticed is that you have to place the rear part of the lift literally right where the frame tubing bends at the rear. Lift SLOWLY & have a FULL TANK of gas. It’s puts more weight forward. Even after I get it up, install a security strap up from from the front cross brace under the bike to the lift to help secure it. Hope that helps. Thanks for the full tank of gas tip. Makes perfect sense! Link to comment Share on other sites More sharing options...
ChiefGunner Posted April 18, 2018 Share #9 Posted April 18, 2018 Chief, did you get the same one I got, the 1500 lb cast aluminum one? or the steel bar frame one? Wondering... Mine doesn’t seem to be aluminum. It’s pretty stout with roller wheels & a T-Bat handle. The two bars that actually lift the bike are rubber coated. I found that if I put that rear frame bend in the center of the rear lift bar, it puts it just at a balance point. It does lean more. Back than forward but doesn’t fall off. I don’t like not having any front down force until I install the strap. I think I’m going to try hooking on one of those short black rubber straps used for cargo to the lift. Then as I lift the bike it will stretch the bands and keep front downpull on it without me having to crawl under it and tighten a strap. I’ll let you know how that goes. Link to comment Share on other sites More sharing options...
YamahaParExcellence Posted April 18, 2018 Share #10 Posted April 18, 2018 Mine doesn’t seem to be aluminum. It’s pretty stout with roller wheels & a T-Bat handle. The two bars that actually lift the bike are rubber coated. I found that if I put that rear frame bend in the center of the rear lift bar, it puts it just at a balance point. It does lean more. Back than forward but doesn’t fall off. I don’t like not having any front down force until I install the strap. I think I’m going to try hooking on one of those short black rubber straps used for cargo to the lift. Then as I lift the bike it will stretch the bands and keep front downpull on it without me having to crawl under it and tighten a strap. I’ll let you know how that goes. Yes, by stating that it has a T handle..that is the welded steel frame version. They had another one (I posted about it in the Watering Hole forum..and that you can get it until April 30 of this month with a Super Saver 20% coupon for $143.99. It's all aviation grade aluminum with a massive single hydraulic lift, much like the motorcycle full lift tables. I have a link and all that in the post, if you are curious. Another user with a PitBull first stated that the bike has an aft center of gravity. I suggested shims, but he said that didn't work out too well for him. Being that I don't have an SVTC yet to lift...will try it with the new lift I bought (Harbor Freight) and will post a review. The main reason that I got it wasn't to lift the bike clean off the ground so much, as to be able to make it go vertical, for proper oil change dip stick reading at the oil tank. Stuff like that. Of course now that I can lift both tires off the ground (this is my first lift ever...) I can see saving some money, by changing my own tires, now easy to do with both wheels off the ground. Up here, if your bring the entire bike in for a change, it is around $50.00 for a re and re/balance on the front, and $65.00, for a re and re/balance on the rear. That pretty much would let you pay for two or three tire irons, and easy to make a two-by-four frame for a brass rod that could have your tire placed on it to let the tire settle to the low spot for balancing. I might just try and have a go for one time and see how long it takes, what the hassle at home is...and compare all that to just riding to the dealership..and wham/bam, your new tires on on in 45 minutes. Out the door... I have that option, anyway with owning the lift. Choices are good. Link to comment Share on other sites More sharing options...
ChiefGunner Posted April 18, 2018 Share #11 Posted April 18, 2018 Yes, by stating that it has a T handle..that is the welded steel frame version. They had another one (I posted about it in the Watering Hole forum..and that you can get it until April 30 of this month with a Super Saver 20% coupon for $143.99. It's all aviation grade aluminum with a massive single hydraulic lift, much like the motorcycle full lift tables. I have a link and all that in the post, if you are curious. Another user with a PitBull first stated that the bike has an aft center of gravity. I suggested shims, but he said that didn't work out too well for him. Being that I don't have an SVTC yet to lift...will try it with the new lift I bought (Harbor Freight) and will post a review. The main reason that I got it wasn't to lift the bike clean off the ground so much, as to be able to make it go vertical, for proper oil change dip stick reading at the oil tank. Stuff like that. Of course now that I can lift both tires off the ground (this is my first lift ever...) I can see saving some money, by changing my own tires, now easy to do with both wheels off the ground. Up here, if your bring the entire bike in for a change, it is around $50.00 for a re and re/balance on the front, and $65.00, for a re and re/balance on the rear. That pretty much would let you pay for two or three tire irons, and easy to make a two-by-four frame for a brass rod that could have your tire placed on it to let the tire settle to the low spot for balancing. I might just try and have a go for one time and see how long it takes, what the hassle at home is...and compare all that to just riding to the dealership..and wham/bam, your new tires on on in 45 minutes. Out the door... I have that option, anyway with owning the lift. Choices are good. I got mine from Harbor Freight on sale for $69! I love it. Just as you said, it was perfect to hold the bike upright when filling and checking oil after the change. Makes getting underside & rear tire during cleaning very easy! Link to comment Share on other sites More sharing options...
American Posted May 1, 2018 Share #12 Posted May 1, 2018 I have a Pitbull motorcycle lift and today I tried to lift the SVTC for the first time. It slid under there just fine but even with the lift moved to the back as far as possible the front wanted to come up first. Does anyone know of a trick to lift this thing or maybe some sort of adapter that is available that would let me move the lifting point further back? Thanks for any ideas on this! I just bought a 2018 Star Venture Transcontinental, I also own a J&S Jack that I have used with my Victory Cross Country Tour when I had that bike then I used it with my Harley Davidson Ultra Limited Low and now I have the Star Venture. Like you I found that the rear tire does not want to come off the ground and you are just raising the front tire, like you I also repositioned the jack as far back on the steel tube frame as I could and tried again, this time while still tail heavy the rear tire did come off the floor and like you the bike was stable side to side but was not as stable front to rear as you could rock the bike. While we own different manufactures jacks I did email J&S and asked them if they were going to make an adaptor for their jack like they have for other bikes. I am thinking what is needed is the rear lift bar needs to contact the rear of the frame before the front lift bar on the jack, these bikes may need to be tied down to the jacks regardless because of the tail heavy bias of them. When I hear back from J&S I will post what they have to say. Link to comment Share on other sites More sharing options...
ChiefGunner Posted May 1, 2018 Share #13 Posted May 1, 2018 I just bought a 2018 Star Venture Transcontinental, I also own a J&S Jack that I have used with my Victory Cross Country Tour when I had that bike then I used it with my Harley Davidson Ultra Limited Low and now I have the Star Venture. Like you I found that the rear tire does not want to come off the ground and you are just raising the front tire, like you I also repositioned the jack as far back on the steel tube frame as I could and tried again, this time while still tail heavy the rear tire did come off the floor and like you the bike was stable side to side but was not as stable front to rear as you could rock the bike. While we own different manufactures jacks I did email J&S and asked them if they were going to make an adaptor for their jack like they have for other bikes. I am thinking what is needed is the rear lift bar needs to contact the rear of the frame before the front lift bar on the jack, these bikes may need to be tied down to the jacks regardless because of the tail heavy bias of them. When I hear back from J&S I will post what they have to say. My lift is from Harbor Freight but designed the same as yours. What I came up with to help stabilize the bike is this: First: Have a full tank of gas, that helps with the front weight. Secondly: I hooked on TWO of those black rubber ties downs from the front cross support down to the lift. As the lift goes up, the straps tighten. It’s more stable, but I still attach a ratchet strap for extra security once I get it up. Link to comment Share on other sites More sharing options...
ChiefGunner Posted May 1, 2018 Share #14 Posted May 1, 2018 I just bought a 2018 Star Venture Transcontinental, I also own a J&S Jack that I have used with my Victory Cross Country Tour when I had that bike then I used it with my Harley Davidson Ultra Limited Low and now I have the Star Venture. Like you I found that the rear tire does not want to come off the ground and you are just raising the front tire, like you I also repositioned the jack as far back on the steel tube frame as I could and tried again, this time while still tail heavy the rear tire did come off the floor and like you the bike was stable side to side but was not as stable front to rear as you could rock the bike. While we own different manufactures jacks I did email J&S and asked them if they were going to make an adaptor for their jack like they have for other bikes. I am thinking what is needed is the rear lift bar needs to contact the rear of the frame before the front lift bar on the jack, these bikes may need to be tied down to the jacks regardless because of the tail heavy bias of them. When I hear back from J&S I will post what they have to say. My lift is from Harbor Freight but designed the same as yours. What I came up with to help stabilize the front is this: First: Have a full tank of gas, that helps with the front weight. Secondly: I hooked on TWO of those black rubber tie downs from the front cross support down to the lift. As the lift goes up, the straps tighten. It’s more stable, but I still attach a ratchet strap for extra security once I get it up. Link to comment Share on other sites More sharing options...
American Posted May 1, 2018 Share #15 Posted May 1, 2018 I think a solution may be at the rear of the steel Fram rails, there are two holes in the frame rails where it starts to curve upwards, one hole on each side, if a block could be made that had a pin that would slide into the hole on each side with a flat bottom to extend the frame rearward another 2 inches I think that would make the bike lift more level. I think that would move the jack far enough rearwards to safely lift the bike. The photo rotated on the upload but you get the idea. Link to comment Share on other sites More sharing options...
DougS Posted May 1, 2018 Author Share #16 Posted May 1, 2018 I just bought a 2018 Star Venture Transcontinental, I also own a J&S Jack that I have used with my Victory Cross Country Tour when I had that bike then I used it with my Harley Davidson Ultra Limited Low and now I have the Star Venture. Like you I found that the rear tire does not want to come off the ground and you are just raising the front tire, like you I also repositioned the jack as far back on the steel tube frame as I could and tried again, this time while still tail heavy the rear tire did come off the floor and like you the bike was stable side to side but was not as stable front to rear as you could rock the bike. While we own different manufactures jacks I did email J&S and asked them if they were going to make an adaptor for their jack like they have for other bikes. I am thinking what is needed is the rear lift bar needs to contact the rear of the frame before the front lift bar on the jack, these bikes may need to be tied down to the jacks regardless because of the tail heavy bias of them. When I hear back from J&S I will post what they have to say. I look forward to hearing what they have to say! Link to comment Share on other sites More sharing options...
American Posted May 1, 2018 Share #17 Posted May 1, 2018 I just measured the frame from the holes at the rear and there is at least 3 1/2 inches available before you reach the cross over pipe for the exhaust. I wish I had a machine shop to make up two adaptors with a pin to follow the curve of the frame with a flat bottom and secure them via two pins in the holes in the frame, that extra 3 to 3 1/2 inches would make a huge difference in the center point of the bike when lifting it. Link to comment Share on other sites More sharing options...
YamahaParExcellence Posted May 1, 2018 Share #18 Posted May 1, 2018 I got mine from Harbor Freight on sale for $69! I love it. Just as you said, it was perfect to hold the bike upright when filling and checking oil after the change. Makes getting underside & rear tire during cleaning very easy! Right..and soon, I'll be able to see that in play, lol! That was though, the main impetus, for I have never owned a bike without a centre stand. How do any of the Harley Tribe, properly take a dip stick oil reading when the bike is on the left slant? Or to put the tank or wet sump to the proper level? I dunno...I guess every one that doesn't have a factory centre stand, ends up buying a lift?!? Link to comment Share on other sites More sharing options...
YamahaParExcellence Posted May 1, 2018 Share #19 Posted May 1, 2018 I just measured the frame from the holes at the rear and there is at least 3 1/2 inches available before you reach the cross over pipe for the exhaust. I wish I had a machine shop to make up two adaptors with a pin to follow the curve of the frame with a flat bottom and secure them via two pins in the holes in the frame, that extra 3 to 3 1/2 inches would make a huge difference in the center point of the bike when lifting it. You might be able to produce your custom 'adaptors' yourself,...all you need is a hard set up foam, that custom saddle manufacturers use...for the custom base seat. Try and find something similar, and then create two mold bodies with 1x1's...then put a 1/4 inch bottom to the mold forms. Fill up the mold blocks with any kind of hard-set up foam that you can order/buy in your area...and then place them on top of your aft/rear lift rail, and with somebody holding the SVTC vertical...SLOWLY lift up those blocks to wherever you want the custom forms to lift the bike frame at. Then once you see the foam move half way up the thickness of the frame, stop and let the foam set up. Then...merely lower the lift, and the two custom lift blocks will still be held in place on the lower frame. Just tap them off...and now you have absolutely custom lift supports, just like you can get orthopedic shoe inserts. They won't scratch the frame, and will support it much better than merely lifting the frame by the flat face of the lift. Think of putting shoe inserts on your lift rails. Just an idea... BTW, that would only be needed for the back lift rail, as we see the fulcrum of the SVTC is aft of dead center length of the bike. Link to comment Share on other sites More sharing options...
Sylvester Posted May 1, 2018 Share #20 Posted May 1, 2018 This all sounds like the beginning of the 2nd gen Venture. All sorts of using hockey pucks, 2X4s, shims and Voodoo to lift them. Carbonone came up with solid engineering to handle this problem and I use his products often in my shop. Link to comment Share on other sites More sharing options...
YamahaParExcellence Posted May 1, 2018 Share #21 Posted May 1, 2018 This all sounds like the beginning of the 2nd gen Venture. All sorts of using hockey pucks, 2X4s, shims and Voodoo to lift them. Carbonone came up with solid engineering to handle this problem and I use his products often in my shop. I'm all ears...can you post any links, or more descriptions? Thanks. Link to comment Share on other sites More sharing options...
American Posted May 1, 2018 Share #22 Posted May 1, 2018 Right..and soon, I'll be able to see that in play, lol! That was though, the main impetus, for I have never owned a bike without a centre stand. How do any of the Harley Tribe, properly take a dip stick oil reading when the bike is on the left slant? Or to put the tank or wet sump to the proper level? I dunno...I guess every one that doesn't have a factory centre stand, ends up buying a lift?!? I owned a 2016 Harley Ultra Limited Low and the Harley can be checked on the side stand, the dip stick is designed to be checked on the side stand or standing upright. Good move on Harleys part. Link to comment Share on other sites More sharing options...
YamahaParExcellence Posted May 1, 2018 Share #23 Posted May 1, 2018 I owned a 2016 Harley Ultra Limited Low and the Harley can be checked on the side stand, the dip stick is designed to be checked on the side stand or standing upright. Good move on Harleys part. Yeah, that is a good move! I wonder if the SVTC's dipstick also has that ability...that would be great. I need to ask my dealer that question...can you take a reading with the bike on the side stand angle? Thanks. I was wondering about this! So, I assume there were two marks...one marked for side stand, and the other for standing upright? I'd imagine that the lower hash mark, would be the side stand lean angle, or would that be the higher? Link to comment Share on other sites More sharing options...
Zelthian Posted May 1, 2018 Share #24 Posted May 1, 2018 I wonder if the SVTC's dipstick also has that ability...that would be great. I need to ask my dealer that question...can you take a reading with the bike on the side stand angle? Nope. According to page 9-13 of the manual, the bike has to be held upright on a level surface (the sidestand will give a false reading). Link to comment Share on other sites More sharing options...
American Posted May 1, 2018 Share #25 Posted May 1, 2018 J&S Jacks emailed me and asked me to send them some photos of the underside of the Star Venture so they can see what they can come up with. If they make an adaptor for the frame itself it should be able to be used with the jacks some of you have that are not J&S Jacks. I will post what J&S Jacks says when they reply back. I sent them 14 photos so hopefully they will come up with a solution that is first rate. Link to comment Share on other sites More sharing options...

Recommended Posts
Create an account or sign in to comment
You need to be a member in order to leave a comment
Create an account
Sign up for a new account in our community. It's easy!
Register a new accountSign in
Already have an account? Sign in here.
Sign In Now